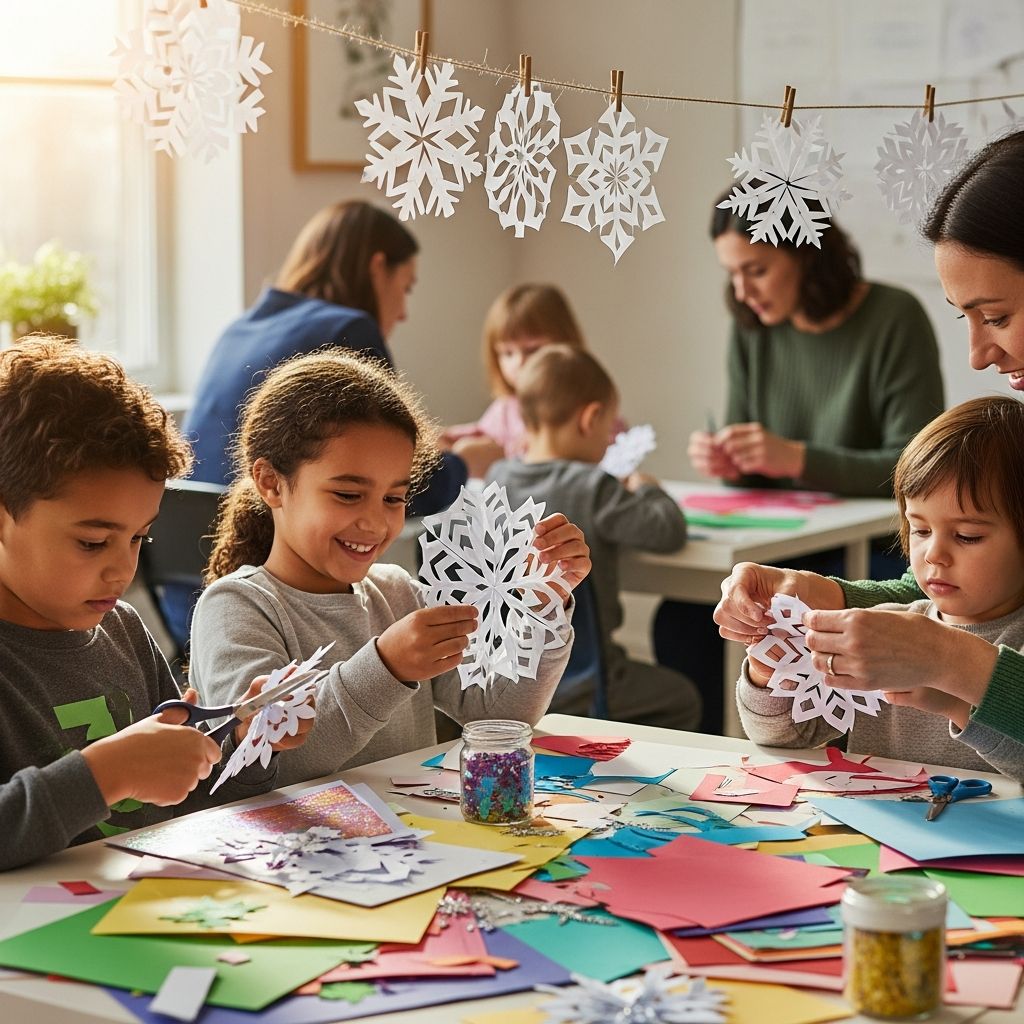
Paper snowflakes are more than just winter decorations; they can also become symbols of comfort, remembrance, and community when created with intention and shared with others.
Why Snowflake Crafts Can Comfort Kids
Children often process big feelings with their hands before they find the words to explain what is going on in their hearts. A simple craft like cutting snowflakes offers a calm, repetitive motion that helps ease anxiety and invites conversation in a gentle way.
Transforming basic snowflakes into character-inspired designs or themed decorations also gives kids a sense of control and creativity during times when the world can feel confusing or scary. The final pieces can serve as visible reminders of love, hope, and shared care.
Project Overview: Character-Inspired Tribute Snowflakes
This project takes the classic folded paper snowflake and adds playful, character-inspired shapes to the design. Think of bold eyebrows, round eyes, or fun beaks and hair tufts integrated into the cut-outs, so that each snowflake becomes both a wintry shape and a friendly face.
You can make these snowflakes purely for fun, hang them in your home or classroom, or turn the activity into a quiet tribute or community kindness project. The goal is to create something joyful that also respects children’s emotional needs.
- Recommended ages: 6 and up with scissors; younger kids can decorate pre-cut snowflakes.
- Time required: 20–40 minutes per batch of snowflakes, depending on detail.
- Best settings: classrooms, scout groups, family craft nights, community centers.
Materials and Preparation
You do not need fancy art supplies for this project. Most of the items are likely already in your home, classroom, or office. Having everything set out ahead of time helps kids stay focused and relaxed during the activity.
| Item | Purpose | Tips |
|---|---|---|
| White printer paper or lightweight colored paper | Base for folded snowflakes | Use thinner paper for younger kids to make cutting easier. |
| Child-safe scissors | Cutting out designs | Provide smaller scissors with rounded tips for elementary students. |
| Pencils and erasers | Sketching character faces and shapes | Draw lightly so guidelines can be adjusted or erased. |
| Markers or colored pencils | Adding color and personality | Choose bold colors for facial features and accents. |
| String or ribbon | Hanging snowflakes | Lightweight yarn or embroidery thread also works well. |
| Hole punch (optional) | Creating a clean hanging hole | Useful if you plan to hang many snowflakes together. |
Before you begin, cover your work surface with scrap paper or a tablecloth and create a small “discard bowl” for paper snippets. This makes cleanup faster and reinforces the idea that everyone is working together to care for the space.
Step-by-Step: Folding and Cutting the Base Snowflake
Creating a symmetrical snowflake starts with a careful fold. Once children understand this basic structure, they can adapt it for countless variations. The instructions below assume you are working with a rectangular sheet of standard printer paper.
- Start with a square. Fold one corner of the paper diagonally across to the opposite edge, forming a triangle. Trim off the extra strip so you have a square when unfolded.
- Fold into a triangle. Keep the square folded into a triangle with the long side as the base and the point opposite the base facing up.
- Divide into thirds. Imagine the triangle as a pizza and fold one side over so that it covers about one-third of the triangle. Fold the other side over the top, also aiming for roughly one-third. Perfection is not required; the goal is a narrow wedge.
- Trim the top. Cut straight across the top of the wedge to create an even edge. This cut determines the outer edge shape of your snowflake.
- Draw cutting guidelines. On one wide side of the wedge, lightly sketch shapes that will become your cut-outs, avoiding the entire spine where all the folds meet so your snowflake holds together.
Once kids are comfortable with these steps, they can experiment with smaller or larger wedges, deeper cuts, and different outer edge shapes such as waves or points.
Adding Character-Inspired Faces and Details
The twist that makes this project special is turning parts of the snowflake into expressive faces or playful character silhouettes. This can be done simply, without complex drawing skills, by focusing on a few recognizable features.
- Eyes: Draw or cut out simple circles or angled ovals along the sides of the wedge. When unfolded, these can become repeating eye shapes around the snowflake.
- Eyebrows or hair tufts: Add small triangles or curves above the eyes to suggest personality—curved lines for gentle faces, sharp angles for more intense expressions.
- Beaks or noses: Position small triangle cut-outs near the center of the wedge. When opened, they create a ring of beaks or noses that can be colored later.
- Cheeks or blush spots: Leave circular spaces uncut around the eyes so they can be colored in pink or red afterwards as soft cheeks.
Encourage kids to imagine that each repeating shape on the snowflake is a character looking out into the room. They might represent friends, community helpers, or even fictional heroes offering support and protection.
Unfolding the Snowflake: A Moment to Pause
There is always a bit of magic when the folded wedge opens out for the first time. Make a small ritual of this moment by asking everyone to open their snowflakes slowly and notice the repeating shapes and faces they created.
This is also an opportunity to invite quiet reflection. You might ask children to think of someone they love, a person they want to encourage, or a community that needs kindness, and then silently dedicate their snowflake to that intention.
Coloring, Decorating, and Personalizing
After unfolding, the snowflakes are ready for color and detail. This is where each child’s imagination can really shine. While the cut edges provide structure, the markers and pencils give life to the characters implied by the cut-outs.
- Outline eye shapes and fill them in with bright colors or gentle pastels.
- Add simple beaks, mouths, or speech bubbles with kind words such as “hope,” “courage,” or “friend.”
- Color alternating sections of the snowflake in a repeating palette (for example, blue, teal, and silver) for a cohesive look when many are displayed together.
- Write a tiny message or initials on the back of each snowflake to show who made it and where it came from, especially if you plan to send them to another location.
Glitter glue, stickers, and metallic pens can add sparkle, but they are optional. The heart of this project is the time spent together and the meaning behind each snowflake, not the complexity of the decoration.
Displaying Snowflakes as a Symbol of Care
Once finished, the snowflakes can be turned into a powerful visual statement of unity. A wall or hallway filled with unique designs reminds viewers that many different people came together with a shared purpose.
Consider these display ideas for homes, schools, and community spaces:
- Snowflake curtain: String several snowflakes along lengths of ribbon and hang them in front of windows or doorways as a gentle shimmering divider.
- Ceiling mobiles: Attach snowflakes to embroidery hoops or lightweight branches to create rotating mobiles that move softly with the air.
- Gratitude wall: Pin snowflakes to a bulletin board, leaving space beneath each one for a short gratitude note or kind thought.
- Community gallery: Ask a local library, place of worship, or community center if they would like to host a temporary display highlighting kids’ artwork and messages of compassion.
Turning the Craft into a Kindness Project
This snowflake activity can stand alone as an afternoon craft, but it also lends itself beautifully to larger acts of kindness. When organized with a group, it becomes a tangible way to show support for people far beyond your immediate circle.
Here are a few ways to expand the project:
- Send a bundle of snowflakes, along with a simple letter, to a school, hospital, or community that has recently experienced hardship.
- Host a neighborhood “snowflake-making party” and then decorate a shared public space with permission.
- Combine the craft with a service activity, such as collecting books or comfort items, and include a snowflake with handwritten well-wishes in each donation.
When working on tribute or support projects, stay sensitive to the wishes of the receiving community. Check whether they welcome mailed artwork and follow any guidelines they provide.
Safety, Sensitivity, and Age-Appropriate Conversation
Because this craft can be used as a quiet response to difficult events, adults need to guide the emotional tone and keep discussions appropriate for children’s ages. The focus should be on kindness, connection, and hope rather than details of any tragedy.
- For young children, talk about helping others feel loved or supported without describing specific events.
- For older kids, allow them to ask questions, but emphasize what people are doing to help and how creative expression can be part of healing.
- Offer breaks and alternate activities for kids who feel overwhelmed or uninterested; participation should always be voluntary.
On the practical side, supervise scissor use closely, especially in group settings, and remind kids to keep materials away from faces and eyes.
Variations for Different Skill Levels
One of the strengths of this snowflake project is its flexibility. You can adapt it for preschoolers, teens, or even adults by changing the complexity of folds and the style of decoration.
| Age/Group | Suggested Adaptation | Focus |
|---|---|---|
| Preschool (with help) | Adults pre-fold and pre-cut basic snowflakes; children add color, stickers, and simple shapes. | Exploring color, basic shapes, and sharing. |
| Elementary | Kids do the folding and simple cuts themselves; adults model one or two character faces. | Practicing fine motor skills and expressing feelings. |
| Middle school | Introduce more complex designs and layered colors; invite students to design their own characters. | Symbolism, personal style, and community themes. |
| Teens and adults | Experiment with intricate patterns, multi-layer snowflakes, and mixed-media embellishments. | Mindfulness, reflection, and collaborative art pieces. |
Encourage everyone to celebrate their current skill level instead of comparing results. The variety of designs reinforces the message that every contribution matters.
Frequently Asked Questions (FAQs)
How long will these snowflakes last?
Snowflakes made from standard printer paper can last through an entire season if they are kept dry and handled gently. If you want to reuse them year after year, consider storing them flat between sheets of tissue paper in a sturdy folder or cardboard envelope.
Can this project be done in a very large group?
Yes. For large classes or community events, prepare some steps in advance, such as cutting the paper into squares or pre-folding wedges for beginners. Set up stations for folding, cutting, decorating, and hanging so that participants can move smoothly through the process without crowding.
What if a child becomes upset while we work?
Craft time can sometimes bring big feelings to the surface, especially if the project connects to a difficult topic. Offer the child a quieter activity, like coloring a simple heart or star, and reassure them that it is okay to step away or talk privately. The goal is to support them, not to finish a perfect snowflake.
Can we adapt the theme to something other than faces?
Absolutely. Instead of character faces, you might design snowflakes with tiny hearts, stars, or symbolic shapes tucked into the cuts. You could even choose a theme that reflects your group’s interests, such as musical notes, books, or sports equipment, and let kids decide how best to include those motifs.
Is it okay to share photos of the snowflakes online?
Sharing photos can inspire others to create their own kindness projects, but always follow your school or organization’s privacy guidelines. Focus images on the artwork itself rather than clearly identifiable faces, and avoid including personal information in any captions.
Encouraging Ongoing Acts of Creative Kindness
When kids see their snowflakes hanging together—whether in a hallway, a living room, or a community building—they learn that small efforts can combine into something beautiful and meaningful. That lesson can carry forward into other projects and everyday choices.
After you finish this activity, invite children to brainstorm the next simple act of creative kindness they might try: perhaps handmade bookmarks for a library, friendship cards for a local shelter, or painted rocks with encouraging words for a neighborhood path. Each new idea builds on the sense of agency and empathy nurtured by these handmade tribute snowflakes.