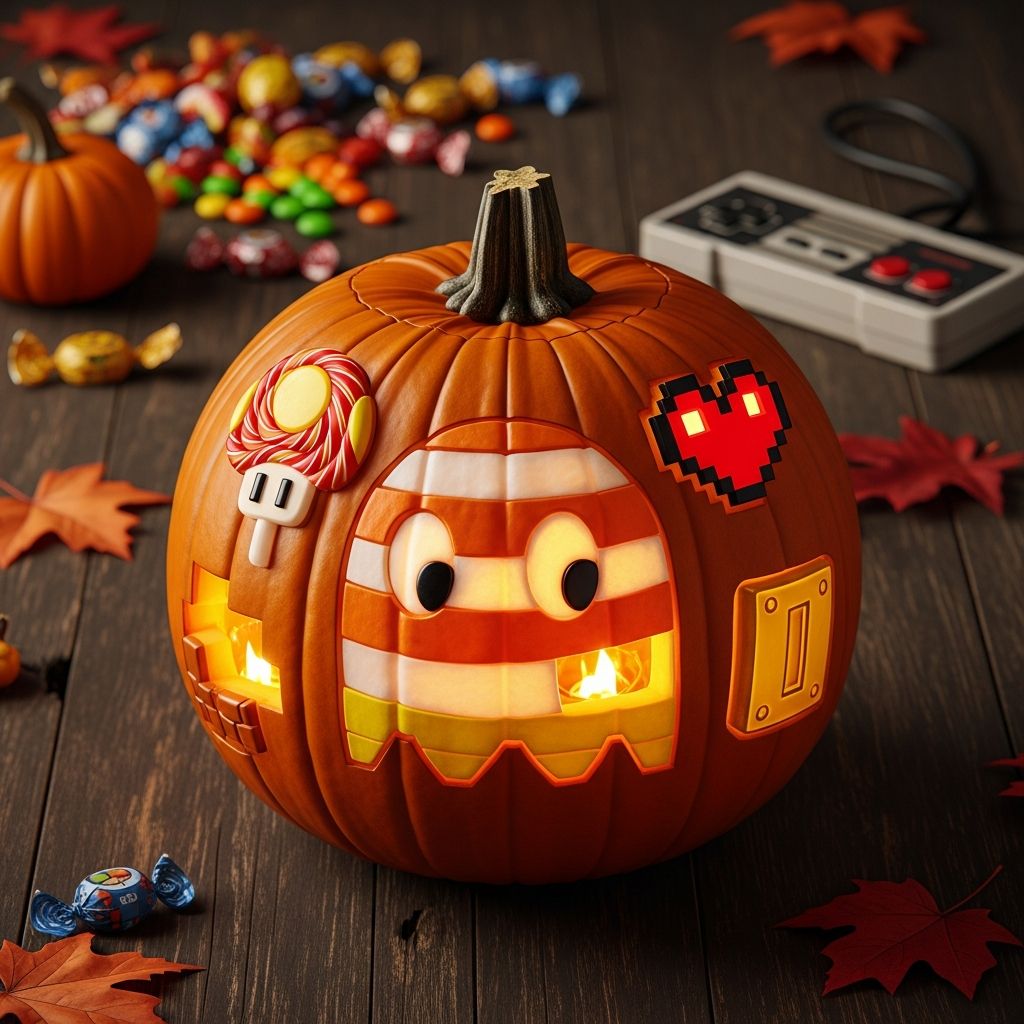
If you love casual mobile games and colorful candy graphics, a candy-inspired jack-o’-lantern is the perfect way to bring that playful energy to your Halloween porch. Instead of the usual triangle eyes and jagged grin, you can carve bold shapes, glowing candies, and whimsical game-style icons that look like they popped off the screen and onto your pumpkin.
This guide walks you through choosing the right pumpkin, planning game-inspired candy designs, carving with layered techniques, and adding finishing touches that make your jack-o’-lantern a Halloween highlight. Everything here is designed to be approachable for beginners but flexible enough for more advanced carvers.
Why Go Candy- and Game-Inspired?
Combining candy imagery with game-style graphics gives your pumpkin instant personality. Think bright shapes, simple icons, and recognizable patterns that are easy to read from the sidewalk but still feel creative and fresh.
- It’s kid-friendly and non-scary, making it ideal for family neighborhoods and school-friendly events.
- The simple shapes used in casual games—hearts, stars, drops, and striped pieces—translate beautifully into pumpkin carving outlines.
Choosing the Right Pumpkin
The pumpkin you start with makes a big difference in how clean and readable your final design looks. Look for a pumpkin that gives you a large, smooth area for your game and candy shapes.
- Shape: Round or slightly oval pumpkins provide a wide “canvas” for grouped candy icons or a central character face.
- Surface: Avoid deep ridges and soft spots so your candy shapes don’t distort or crumble as you carve.
- Stability: A flat bottom keeps your pumpkin steady while you carve and when it’s on display, important if you’re adding multiple small details.
Tools and Supplies You’ll Need
You don’t need professional sculpting gear to make a candy-inspired jack-o’-lantern, but a few basic tools will make the process much easier and safer.
- A long, sturdy knife or serrated pumpkin saw for cutting the lid or bottom opening.
- A large spoon or pumpkin scoop for removing seeds and thinning the walls.
- Small carving tools or craft knives for tracing and cutting candy icons and game shapes.
- A fine marker or washable pen for sketching your design onto the pumpkin.
- Optional: small clay tools or loop tools for shallow carving and shading effects.
Planning Your Candy-Themed Design
Before any cutting starts, treat your pumpkin like a blank level in a puzzle game: you’re about to arrange candies, power-ups, and special items into a fun, balanced layout. The more time you spend planning, the cleaner your finished jack-o’-lantern will look.
Pick a Style: Simple Icons or Full Scene
Decide whether you want a single bold image or a collage of smaller game-style candies. Both can look amazing, but they suit different carving skill levels and time limits.
- Simple icon style: One large candy piece, a power-up, or a game tile with a face. Great for beginners and kids.
- Collage style: Several candies arranged in a grid or swirling pattern, similar to a game board or cascading match-three level.
- Character face with candy accents: A central smiling or surprised face with candy pieces as eyes, cheeks, or crown decorations.
Candy Shapes That Work Well on Pumpkins
Not every candy shape is easy to carve, especially when you’re working on a curved surface. Focus on simple, high-contrast silhouettes that read clearly when lit from inside.
- Rounded candies: circles, ovals, jellybean shapes, and gumdrops are forgiving if your cuts aren’t perfect.
- Striped or wrapped candies: you can carve the outer shape deeply and then use shallow cuts for stripes or wrapper folds.
- Special pieces: stars, hearts, and sparkling “power candies” can act as focal points on your pumpkin.
Design Ideas Inspired by Puzzle Games
To capture the feeling of a popular candy puzzle game without copying any one design, think in terms of color-coded pieces, simple geometric outlines, and playful expressions.
Idea 1: Candy Grid Jack-O’-Lantern
This design imitates a game board made of candies, arranged in neat rows and columns. It’s perfect if you like symmetry and want something eye-catching from across the street.
- Divide the front of the pumpkin into a loose grid using light pen marks.
- In each “square,” draw a different candy shape: a circle, a striped bar, a heart, a droplet, or a wrapped piece.
- Carve some shapes fully through the pumpkin and others only partially, so you create a glowing pattern with different brightness levels.
Idea 2: Big Power Candy Centerpiece
For a bold, minimalist look, focus on one oversized “power candy” shape in the center of your pumpkin, surrounded by small sparkles or dots.
- Draw a single large shape, such as a starburst candy or a rounded square with soft corners.
- Carve the outer shape completely, then use shallow surface carving inside to hint at stripes or sprinkles.
- Scatter tiny circles or plus-sign shapes around the main candy to suggest motion and power-up energy.
Idea 3: Candy Crown Character
This design combines a cartoon face with a crown made of candies, echoing the fun of advancing to new levels in a game.
- Draw a friendly face: wide eyes, a big grin, and maybe game-style eyebrows for expression.
- Above the face, sketch a row of candies that form a crown: hearts, stars, jellybeans, and wrapped sweets.
- Fully carve the eyes and mouth for bright glow, then shallow-carve the candies so they appear outlined in light.
Step-by-Step: From Pumpkin to Candy Masterpiece
Once you have a design in mind, the process follows a simple sequence. Treat it like moving through levels: each step unlocks the next.
Step 1: Cut and Clean
Decide whether to cut an opening in the top or the bottom of your pumpkin. A bottom opening helps the pumpkin sit flatter and can make lighting easier if you’re using a flameless candle or light puck.
- Cut at a slight inward angle so the lid or base rests securely and doesn’t fall through.
- Scoop out seeds and stringy pulp, then scrape the inner walls until they are evenly thinned, especially behind the area you plan to carve.
Step 2: Sketch Your Game-Inspired Layout
Use a marker or pen to draw your candy and game shapes on the pumpkin. This is your chance to adjust spacing, size, and balance before committing to cuts.
- Keep major shapes at least a finger-width apart to prevent the pumpkin from breaking between cuts.
- Start with the largest shapes, like a central power candy or character face, then add smaller accent candies around them.
Step 3: Carve the Main Openings
Begin by cutting the shapes that go completely through the pumpkin wall. These create your brightest light areas and define the main structure of the design.
- Use slow, gentle sawing motions rather than forcing the blade to turn sharply.
- Remove small pieces carefully, pushing them inward if needed, to avoid cracking the pumpkin skin.
Step 4: Add Shallow Carving and Candy Details
To mimic the layers and shading seen in digital candy graphics, use shallow carving for stripes, sprinkles, and facial expressions.
- Lightly scrape away only the orange skin of the pumpkin for subtle glowing lines when lit.
- Use different depths of carving to suggest stripes on wrapped candies, shine marks on gumdrops, or energy rings around power pieces.
Using Light to Enhance the Candy Effect
Great lighting can transform a good design into something magical. Because candy-themed pumpkins rely on layered effects and soft edges, your light choice matters.
- LED candles or light discs: Safer than open flames and often brighter, making shallow-carved details more visible.
- Colored lights: Place small colored LEDs inside to echo the feel of vibrant game graphics—bluish light for cool candies, warm light for classic Halloween glow.
- Reflective base: Set your light on a small piece of foil or a mirrored surface inside the pumpkin to push more light upward into your carved areas.
Candy and Game-Themed Display Ideas
Your pumpkin doesn’t have to sit alone on the front step. Build a mini “level” around it to deepen the game-inspired theme.
- Arrange small bowls of wrapped candy nearby, but keep them far enough away that they don’t block the glow.
- Use colored paper or fabric under the pumpkin to represent a game board, with printed or drawn candy icons scattered around.
- Create a lineup of pumpkins, each dedicated to a different type of candy piece: one for round sweets, one for striped pieces, one for star-shaped power-ups.
Quick Reference: Candy Carving Techniques
The table below summarizes some useful techniques for building up that candy-puzzle-game look on your jack-o’-lantern.
| Effect You Want | How to Carve It | Best Used For |
|---|---|---|
| Bright, bold candy shapes | Cut fully through the pumpkin wall along the outer outline of the candy. | Main candies, eyes on character faces, large power pieces |
| Soft glow and shading | Scrape away just the outer skin, leaving the inner pumpkin flesh intact. | Stripes, sprinkles, wrapper folds, shine marks |
| Outlined icons | Carve a thin channel following the drawn line without piercing the wall. | Game borders, grid lines, motion swirls around candies |
| High-contrast “power-up” glow | Combine a fully cut central shape with shallow-carved rings or rays around it. | Special candies, level-complete symbols, magical bursts |
Tips for Carving Safely With Kids
A candy and game-themed jack-o’-lantern is a natural project for children, but the actual cutting should always be supervised and adjusted for age.
- Let kids draw the candy shapes, choose the layout, and sort out which candies go where, while adults handle sharp tools.
- Provide blunt-tipped carving tools or plastic saws for older children, and reserve knives for adults only.
- Offer stickers, markers, and paint so younger kids can add candy patterns without needing to carve at all.
Decorating Beyond Carving
You can push the candy theme even further with simple decorations that don’t involve more cutting. These extras help suggest bold colors and playful patterns even when the pumpkin isn’t lit.
- Use non-toxic paint to color in candies on the pumpkin surface, especially if you want blue, pink, or bright green that pumpkins can’t naturally provide.
- Add glitter glue to shallow-carved stripes or dots for a sparkling “sugar coating” effect.
- Attach lightweight decorations, like paper stars or foam hearts, around the pumpkin using removable tape or toothpicks.
Frequently Asked Questions
How thick should the pumpkin wall be for detailed candy designs?
For delicate candy outlines and shallow-carved stripes, aim for pumpkin walls that are moderately thinned. Too thick, and light won’t shine through your details; too thin, and you risk pieces breaking away. A wall that still feels firm when pressed with your fingers but allows light to pass through your scraped areas works best.
Can I create the look of bright game colors using only carving?
Carving alone can’t reproduce the neon colors of digital games, but layered carving creates a light gradient that suggests depth and shine. Fully cut shapes will glow strongly, while shallow-carved areas will appear softer and slightly darker, mimicking the highlights and shadows you see on candies in puzzle games.
What’s the best way to transfer a complex candy pattern onto a pumpkin?
If drawing freehand feels intimidating, sketch your design on paper first. Then tape the paper to the pumpkin and poke small holes along the lines with a pin or fine tool. When you remove the paper, use the dotted outline as a guide for carving your candy shapes and game icons.
How can I keep a detailed candy jack-o’-lantern from collapsing?
Leave solid support columns of pumpkin between major cutouts and avoid connecting multiple large openings with very thin bridges. Focus intricate work on one section of the pumpkin rather than all the way around, and consider mixing fully cut candies with shallow-carved ones to reduce structural stress.
What lighting works best for shallow candy details and game-style shading?
Bright, battery-operated LED candles or small puck lights are ideal because they produce steady, intense light without heat. Position the light so it sits under your most detailed area, and experiment with distance: moving the light closer or farther away from the carved wall changes how strongly the candy shapes glow.
Bring Your Favorite Game to the Front Porch
With thoughtful planning and a little patience, a candy and game-inspired jack-o’-lantern can become the playful centerpiece of your Halloween decorations. Bold silhouettes, layered carving, and strategic lighting all work together to echo the satisfying look of matching candies on a digital screen, while still feeling completely unique to your home.
Whether you go for a simple candy grid, a dramatic power-up emblem, or a crowned character full of personality, your pumpkin will say that Halloween at your house is all about color, creativity, and just a hint of sweet-toothed mischief.