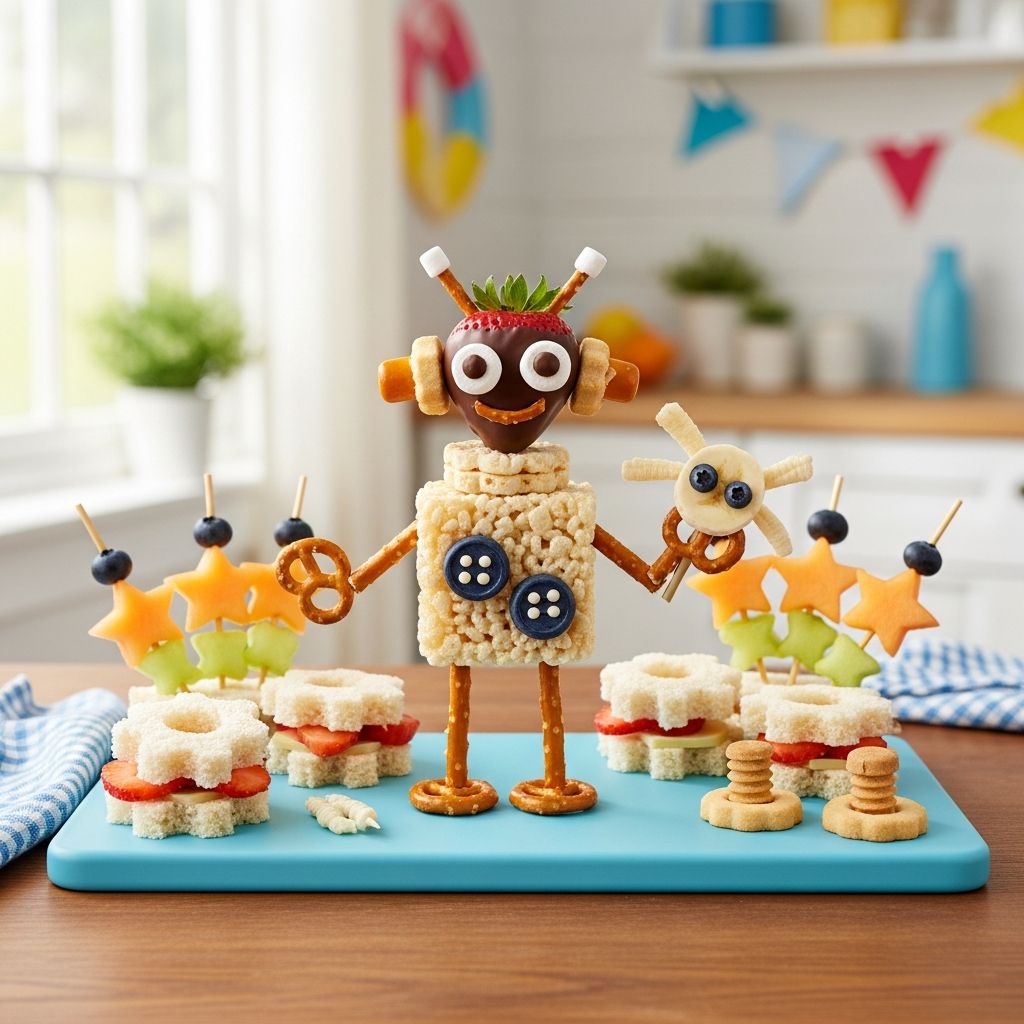
Snack time does not have to mean another plain bowl of crackers. With a little imagination and a few simple ingredients, you can turn everyday foods into adorable edible robots that kids design, assemble, and gobble up. These playful robot snacks are part craft project, part mini STEM activity, and completely kid-approved.
This guide walks you through planning, ingredients, setup, variations, and tips so you can create a fun, low-stress robot snack station at home, in the classroom, or at your next party.
Why Robot Snacks Are Worth the Effort
Robot snacks are more than cute photos on social media; they give kids a chance to explore creativity, fine motor skills, and basic design thinking while they eat. Instead of passively receiving a snack, children become little engineers, planning and assembling their own edible inventions.
- Encourage creativity: Kids choose colors, shapes, and layouts, turning simple ingredients into unique characters.
- Support fine motor skills: Pinching, stacking, and arranging small food items helps strengthen tiny hands and fingers.
- Make healthy foods fun: Vegetables, fruits, whole grains, and proteins become more appealing when they are part of a robot’s “circuits” and “control panels.”
- Invite open-ended play: There is no right or wrong way to build a robot, which reduces pressure and boosts confidence.
Planning Your Robot Snack Session
A little planning makes the experience smoother for everyone. Think about when and where you will set up, how many kids you are feeding, and how involved you want the activity to be.
Decide the Setting and Time
- After-school snack: Use robot snacks as a creative wind-down activity after a long day.
- Weekend project: Turn it into a Saturday or Sunday family mini “food lab.”
- Party activity: Set up a build-your-own-robot station at a birthday, STEM-themed, or space-themed party.
- Classroom or group setting: Pre-portion ingredients and keep designs simple so kids can assemble quickly and safely.
Set Goals Before You Shop
- Decide whether you want mostly healthy options, mostly treats, or a balanced mix.
- Plan for dietary needs such as nut-free, gluten-free, or dairy-free variations.
- Choose whether robots will be eaten immediately or packed as take-home treats.
- Think about cleanup: fewer messy dips and spreads make for easier post-snack tidying.
Choosing Ingredients: Shapes and Textures
Robot snacks look impressive, but they rely on very simple shapes. Focus first on the geometry of your ingredients rather than specific brands. Once you understand the basic categories below, you can substitute with whatever you have on hand.
Shape Categories for Robot Building
| Shape Type | Examples | Best Use |
|---|---|---|
| Rectangles & Squares | Crackers, sandwich pieces, cereal bars, cheese slices, granola bars | Robot heads, bodies, torsos |
| Sticks | Carrot sticks, celery sticks, pretzel rods, cheese sticks, breadsticks | Arms, legs, antennae |
| Circles & Ovals | Cucumber slices, grape tomatoes, olives, banana rounds, cheese coins | Eyes, buttons, wheels, joints |
| Tiny Details | Raisins, mini chocolate chips, peas, corn kernels, sunflower seeds | Bolts, dials, indicator lights |
| Spreads & Adhesives | Hummus, cream cheese, yogurt, nut or seed butters | Sticking small pieces onto larger parts |
Sample Ingredient List
Mix and match from these ideas depending on preferences and allergies:
- Bases (heads and bodies): whole-grain crackers, mini pita rounds, sandwich squares, rice cakes, small waffles.
- Arms and legs: snap peas, thin carrot sticks, celery sticks, pretzel sticks, thin breadsticks, sliced cheese strips.
- Faces and control panels: sliced grapes, blueberries, sliced olives, cheese coins, cherry tomato halves, cucumber slices.
- Decorative bits: dried cranberries, raisins, pumpkin seeds, sunflower kernels, mini cereal pieces.
- Edible “glue”: hummus, cream cheese, plain yogurt, guacamole, sunbutter, mashed avocado.
Basic Robot Snack Blueprint
Use this simple structure as a jumping-off point. Once kids understand the basics, they will quickly invent wild and wonderful variations.
- Choose a body: Place one rectangular cracker, sandwich square, or cereal bar in the center of a plate.
- Add a head: Stack a smaller cracker, half rice cake, or fruit slice above the body.
- Attach arms and legs: Use stick-shaped ingredients coming out from the body for limbs.
- Decorate the face: Add round slices or small bits for eyes, nose, and mouth.
- Build the “control panel”: Arrange tiny ingredients in patterns on the torso area.
- Add extras: Antennae, gears, wheels, and buttons can all be built from any leftover shapes.
Step-by-Step: Setting Up a Robot Snack Station
Instead of building every robot yourself, invite kids into the process. A self-serve robot station gives them autonomy and turns snack time into an activity.
1. Prep Ingredients in Advance
- Wash and dry all fruits and vegetables thoroughly.
- Cut ingredients into consistent sizes so pieces stack easily.
- Pre-slice sandwiches or toast into rectangles and squares.
- Place each ingredient type in its own bowl or tray section for easy visibility.
2. Arrange the Building Zones
Think of the snack station like a mini assembly line:
- Zone A – Foundations: Plates, napkins, and the larger base pieces (crackers, sandwich squares, rice cakes).
- Zone B – Limbs and heads: Stick-shaped ingredients and mid-sized pieces for heads.
- Zone C – Details: Small bowls of “buttons,” “eyes,” and “circuits.”
- Zone D – Adhesives and tools: Small cups of spreads with kid-safe knives or spoons.
3. Explain the “Robot Rules”
Before kids start, give a very short, simple explanation:
- Show them a quick sample robot or a sketch for inspiration.
- Emphasize that robots can look any way they want—no two need to match.
- Remind kids to keep fingers clean and to only touch pieces they plan to use.
- Set a rough “building time” after which everyone can sit and eat together.
Theme Ideas and Variations
Once you have the basic idea down, you can customize robot snacks to fit almost any theme or dietary need. Use the ideas below to tailor the activity.
Healthy Everyday Robots
For a more nutritious focus, lean heavily on fruits, vegetables, and whole grains. Use spreads like hummus, guacamole, or Greek yogurt instead of sugary dips.
- Whole-grain crackers or mini pitas for bodies.
- Cucumber slices, bell pepper rings, and carrot coins for faces and joints.
- Snap peas and celery sticks for arms and legs.
- Blueberries, grapes, or cherry tomatoes as colorful robot “lights.”
Party-Time Robots
For birthdays or celebrations, mix fun treats with healthier items so kids get the excitement without an all-sugar overload.
- Use cereal bars or small brownies as robot torsos.
- Add mini marshmallows, small cookies, or colorful cereal as robot details.
- Incorporate a few candy pieces as “power buttons” or “energy cells.”
- Offer fruit kabobs shaped like robot arms for a playful, slightly more indulgent snack.
Allergy-Friendly Robots
Robot snacks can be adapted for a wide range of allergies and sensitivities. Always check labels and communicate with caregivers ahead of time.
- Nut-free: Replace nut butters with sunbutter, seed butter, hummus, or cream cheese.
- Gluten-free: Use gluten-free crackers, rice cakes, or sliced baked potatoes as bodies.
- Dairy-free: Swap cheese and yogurt with dairy-free cheese, mashed avocado, or bean spreads.
- Egg-free: Avoid mayonnaise-based spreads and egg-containing baked goods; focus on fruits, vegetables, and safe packaged items.
Educational Angles: Sneaky STEM and Learning
Robot snacks naturally lend themselves to simple STEM concepts and early learning. You can quietly weave in a few ideas without making the activity feel like a lesson.
Introduce Basic Design Thinking
- Ask kids to plan their robots before they build: “What will your robot do? What parts does it need?”
- Encourage problem-solving when things topple or won’t stick: “How could we make this head more stable?”
- Invite iteration: children can build one prototype robot, eat it, and then try a new design.
Explore Shapes, Counting, and Patterns
- Have kids count how many circles, squares, or sticks they used in each robot.
- Challenge them to create patterns on the robot’s chest with alternating colors or shapes.
- Talk about symmetry: “Does your robot look the same on both sides, or is it asymmetrical?”
Keeping It Low-Stress for Grown-Ups
Robot snacks do not need to look like a magazine photo. Kids care far more about getting to build and eat their own creations than about the details of your knife skills. A relaxed approach keeps the experience fun for everyone.
Smart Shortcuts
- Use pre-cut veggies or fruit trays from the store when time is short.
- Choose only 4–6 ingredient types instead of a huge spread; fewer choices can actually make building easier for younger children.
- Skip intricate designs and focus on simple shapes that stack easily.
- Serve the snack over a tray or disposable table covering for fast cleanup.
Managing Mess and Cleanup
- Offer aprons or old T-shirts if you are using spreads that can drip.
- Place a small trash bowl on the table for stems, peels, or unused bits.
- Keep wet wipes or damp cloths nearby for quick hand and surface wiping.
- Encourage kids to help clear plates and bowls as part of the activity.
Fun Twists on Classic Robot Snacks
Once you have done standard robot snacks a few times, keep kids interested by adding small twists. These ideas can freshen up the activity without requiring a completely new setup.
- Story-building robots: After creating their robots, kids tell a short story about what their robot’s job is or what planet it comes from.
- Speed-build challenge: Set a gentle timer and see who can build a robot in three minutes, then give everyone time to refine their creations.
- Color-coded robots: Ask kids to design a robot mostly in one color—green robots, red robots, or rainbow robots.
- Team robots: Pair kids so one designs the top half and the other designs the bottom half of a shared robot.
Sample Robot Snack Menu
Use this as a ready-made plan for your next robot snack afternoon. Adjust portions to match the age and appetite of your group.
| Component | Ingredient Options | Notes |
|---|---|---|
| Robot Body | Whole-grain crackers, mini pitas, cereal bars | Choose 1–2 options to keep things simple. |
| Head Pieces | Rice cake halves, cucumber rounds, sliced apples | Pre-cut into child-sized portions. |
| Arms & Legs | Carrot sticks, pretzel rods, string cheese strips | Offer at least one veggie and one non-veggie choice. |
| Eyes & Buttons | Blueberries, sliced grapes, olive rings, raisins | Serve in small bowls with spoons for scooping. |
| Edible Glue | Hummus, cream cheese, yogurt | Provide small spreading knives or spoons. |
Frequently Asked Questions (FAQs)
How far in advance can I prep robot snacks?
You can wash and cut most fruits and vegetables a few hours ahead and store them in the refrigerator in airtight containers. Wait to slice ingredients that brown easily, such as apples or bananas, until just before serving, or toss them lightly with lemon juice to slow discoloration. Crackers and other crunchy items should be kept sealed until setup time so they stay crisp.
What age group is best for robot snacks?
Robot snacks work well for preschoolers through early elementary age, but older kids and even teens often enjoy the creative challenge. For toddlers, focus on larger, softer pieces and avoid very small or hard items that could pose a choking risk. Tailor ingredient size, complexity of designs, and tools (no sharp knives) to the age and skill level of your group.
How do I keep it from becoming a sugar overload?
Start by choosing mostly whole foods—fruits, vegetables, whole grains, and proteins—and treat sweets as occasional accents instead of the main building blocks. Offer a variety of naturally colorful produce so robots look exciting without relying on candy, and pre-decide how many treat-style ingredients will be available. When the healthy options are fun and easy to use, kids are surprisingly willing to build (and eat) nutritious robots.
Can robot snacks be packed in lunch boxes?
While the full interactive station works best at home or parties, you can pack simple deconstructed robot kits in lunch containers. Place bases, limbs, and details in separate compartments, add a small container of spread, and let your child assemble their robot at school. Choose sturdy ingredients that hold up well in transit, and skip very juicy or delicate items that might leak or squash.
What if my child only wants to play and not eat?
It is common for some children to focus on building and storytelling more than eating at first. Allow some time for play, then gently encourage them to taste at least a few pieces of their creation before clearing the table. Over time, many kids become more comfortable eating the foods they have handled and arranged themselves, especially if you keep the mood light and pressure-free.
Make Snack Time an Invitation to Create
Robot snacks transform everyday foods into tiny works of edible art and give kids ownership over what ends up on their plates. With simple ingredients, a bit of prep, and a relaxed attitude, you can turn an ordinary snack into a memorable moment filled with imagination, laughter, and maybe even a little bit of sneaky learning. The next time someone asks for a snack, invite them to build a robot—and watch snack time become the highlight of the day.