Flat-pack furniture turns a box of boards and hardware into a functioning home, but the assembly process can feel like a puzzle with too many pieces. The good news: a handful of smart tools and techniques can cut your build time dramatically, reduce mistakes, and protect your new furniture from damage.
This guide explains which tools genuinely help with IKEA-style furniture, how to set up your workspace, and the strategies professionals use to breeze through complex wardrobes, beds, and bookcases.
Why Bother With Extra Tools If IKEA Includes Some?
IKEA typically includes the minimum tool needed to complete an assembly, usually an Allen (hex) key and sometimes a small wrench or simple plastic tool. However, instructions may also specify that additional tools such as a screwdriver, drill, or hammer are required. Relying only on the supplied pieces often means more time, sore hands, and a higher chance of overtightening or stripping screws.
Using higher-quality tools can:
- Speed up repetitive tasks like turning dozens of cam bolts.
- Provide better grip and torque, reducing hand fatigue.
- Help keep screws straight and holes undamaged.
- Prevent overdriving fasteners into particleboard, which is more prone to splitting and blowouts than solid wood.
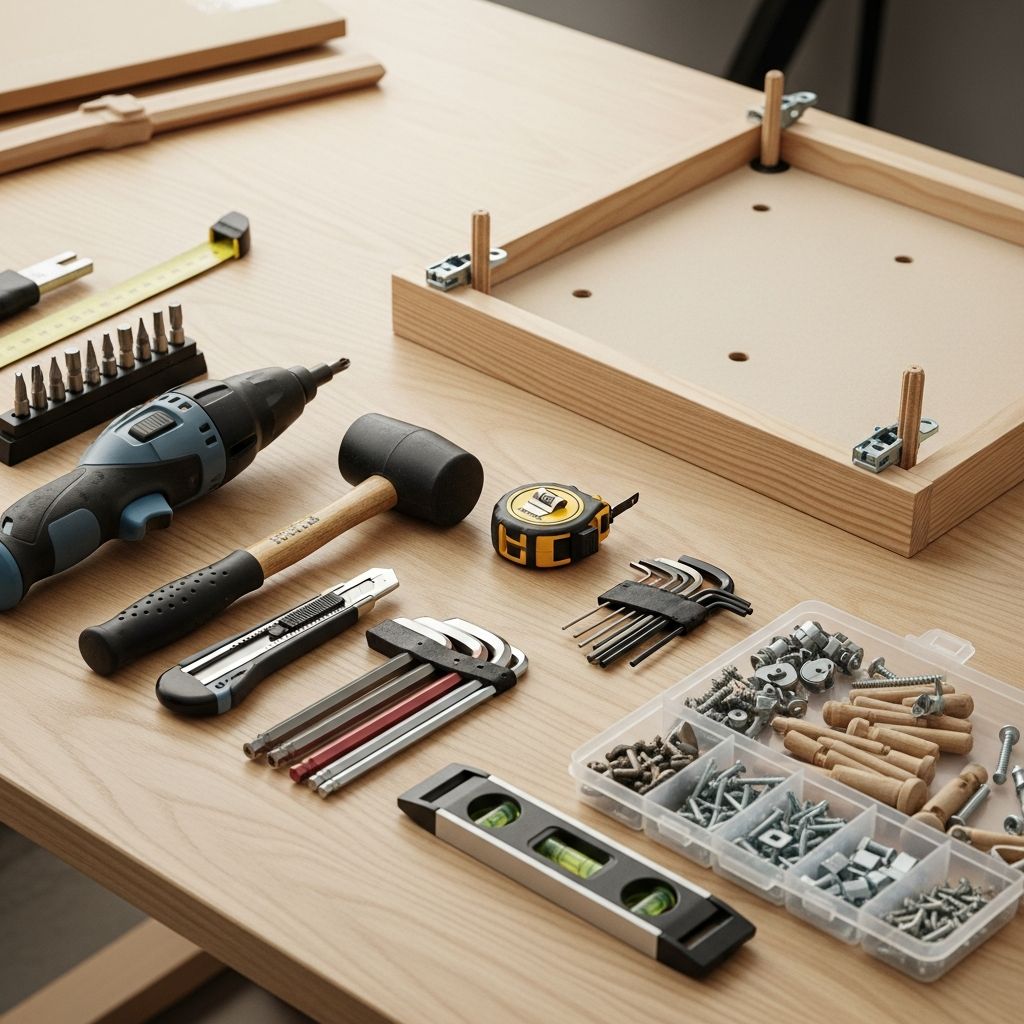
Core Tool Kit for Faster IKEA Furniture Builds
You do not need a full workshop. A compact, well-chosen kit covers almost every IKEA item you will encounter.
1. Quality Screwdriver (Manual or Powered)
A good screwdriver handles most of the work in flat-pack furniture. Many pros recommend using your own tools rather than the basic ones provided with the box.
- Manual multi-bit screwdriver: Ideal if you prefer control over speed. Look for a comfortable handle and bits for Phillips, Pozidriv, Torx, and flathead.
- Electric screwdriver or drill-driver: Best for large projects with many screws. Choose a low-torque setting to avoid overtightening, which can strip screw holes in composite boards.
Pro tip: Start all screws by hand to ensure they are straight, then finish with the power tool on a low setting to avoid damage.
2. Hex (Allen) Bits for Drill or Screwdriver
Most IKEA furniture uses hex fasteners. While an L-shaped key is included, hex bits that fit your screwdriver or drill save substantial time, especially on beds, tables, and wardrobes with many bolts.
- Get a metric hex bit set to match the common sizes IKEA uses.
- Use a magnetic bit holder so small hardware does not fall out in tight spaces.
- Keep the original Allen key as a backup for final fine adjustments or areas with awkward access.
3. Rubber or Plastic Mallet
A regular steel hammer can easily dent or chip particleboard and veneers. A rubber mallet gives you the force you need to tap pieces together without leaving marks.
- Use it to seat dowels fully into pre-drilled holes.
- Tap shelves, back panels, and frame joints into perfect alignment.
- Avoid excessive force—gentle, repeated taps are safer than a single heavy blow.
4. Pliers and Small Hand Tools
Fine control tools make it easier to deal with tiny hardware and corrections.
- Needle-nose pliers for holding small nails, pulling misaligned dowels, or adjusting metal fittings.
- Standard pliers for tightening or straightening brackets and cams.
- Utility knife for opening boxes and trimming packaging, used carefully away from surfaces to avoid cuts.
5. Measuring & Alignment Tools
Even with pre-drilled holes, alignment problems can occur. Simple measuring tools help keep everything square and safe.
- Measuring tape to confirm wall space and clearances.
- Carpenter’s level for checking shelves and wall-mounted units; improper leveling can affect stability and door alignment.
- Pencil and masking tape for light marks and labels that will not damage surfaces.
Optional Tools That Make Big Projects Easier
If you regularly assemble flat-pack furniture or are tackling a large wardrobe system, these extra tools can save even more time and effort.
| Tool | What It Helps With | When It’s Worth Having |
|---|---|---|
| Cordless drill/driver | Drives many screws quickly; can pre-drill into walls for anchors. | Large shelving systems, wardrobes, kitchen rails. |
| Right-angle attachment | Lets bits reach fasteners in tight or awkward spots. | Inside cabinets and narrow compartments. |
| Magnetic parts tray | Keeps small screws and cams in one place. | Any build with multiple hardware bags. |
| Knee pads or floor cushion | Protects knees during floor-level assembly. | Long sessions, large units assembled on the floor. |
| Clamp set | Holds panels together while you fasten them. | Working solo on tall or heavy furniture. |
Preparing Your Space Before You Open the Box
Preparation is one of the biggest time-savers. Professional assemblers emphasize organizing parts and clearing space before turning the first screw.
Clear and Protect Your Work Area
- Move furniture to create enough floor space to lay out all panels.
- Use flattened cardboard from the box as a protective mat to prevent scratches on both the floor and the new furniture.
- Ensure good lighting so you can see small icons, arrows, and alignment marks clearly.
Sort and Verify Parts
- Open all hardware bags into shallow containers or trays.
- Match each type of screw and fastener to the parts list in the instruction booklet.
- If a piece appears missing or damaged, contact customer service before assembling further—building with wrong or incomplete parts can compromise safety and stability.
Read the Instructions Once Before Starting
IKEA’s visual instructions are meant to be followed in order. Skipping ahead often causes partial disassembly later. A quick read-through helps you:
- Identify stages that require two people for lifting or flipping.
- Spot early steps that affect later alignment, such as back panels or rails.
- Stage the correct hardware near you for each major step.
Step-by-Step Strategies for Quicker, Cleaner Assembly
Beyond tools, technique plays a major role in how smooth your IKEA project feels. These strategies come from common best practices used by experienced assemblers.
1. Follow the Sequence, But Group Similar Steps
Stay in the order shown, but when instructions repeat the same action (for example, attaching eight identical brackets), do all of them in one batch.
- Lay out identical panels together.
- Attach all hardware of the same type before moving to the next type.
- This reduces tool changes and mental context switching.
2. Use the “Loose First, Tight Last” Rule
When joining panels, insert all connectors loosely before fully tightening any of them. This technique allows small adjustments so parts can align and reduces stress on fasteners.
- Start every screw or cam bolt by hand.
- Check that holes and edges line up.
- Then tighten gradually in a cross pattern where possible, similar to how mechanical fasteners are often tightened to avoid stress concentration.
3. Protect Particleboard and Veneer Surfaces
Most IKEA furniture uses particleboard or fiberboard with veneer or laminate finishes. These materials are economical but more fragile at edges and fastener points than solid wood.
- Avoid overtightening; stop when resistance increases rather than forcing a screw deeper.
- Never use a metal hammer directly on edges; always use a rubber mallet or a wooden block between the tool and the furniture surface.
- Do not pry stubborn joints with a screwdriver tip, as this can cause chipping; instead, loosen fasteners or gently tap joints free.
4. Install Back Panels Carefully
Thin back panels may appear purely cosmetic, but they add significant rigidity to bookcases and wardrobes when nailed or screwed correctly. Research on furniture stability shows that back panels help brace structures against racking (sideways movement), which is important in preventing tip-overs.
- Square the frame first using a level or by measuring diagonals (they should be equal).
- Nail or screw the back panel starting in one corner and working your way diagonally, checking for squareness as you go.
- Uneven or misaligned backs can cause doors to hang poorly and shelves to sit unevenly.
Safety and Stability: Do Not Skip These Steps
Beyond aesthetics and speed, safety matters. Freestanding storage furniture like dressers and bookcases can tip if not secured properly. The U.S. Consumer Product Safety Commission has documented injuries and fatalities from furniture tip-over incidents, particularly affecting children.
Use Included Wall Anchors and Brackets
- Many tall IKEA pieces come with safety straps or brackets designed to anchor furniture to the wall.
- Always install these into suitable wall studs or use appropriate wall anchors for your wall type, following the manufacturer’s guidance.
- Use a drill and correct bit to pre-drill for wall anchors when required.
Place Heavy Items Low
- Store heavier objects in lower drawers and shelves to lower the center of gravity.
- Avoid climbing or allowing children to climb on open drawers or shelves.
- Regularly check that fasteners remain tight, especially in high-use items like dressers and beds.
Common Mistakes and How to Avoid Them
Many assembly frustrations come from a few predictable errors. Avoiding them can drastically improve your experience.
- Mixing up similar parts: Some panels look almost identical but differ in hole placement. Double-check orientation against the instructions before fastening.
- Skipping labeling: For large projects, label parts with small pieces of masking tape. This makes it much easier to find the correct piece at each step.
- Ignoring damaged edges: If particleboard edges chip during unpacking, gently remove loose material. For structural damage, request a replacement part.
- Working alone on tall units: Large wardrobes and tall bookcases are much safer and faster to build with a second person for lifting and steadying.
When to Consider Professional Help
While many people enjoy the challenge of DIY assembly, complex systems can justify hiring a professional.
- Large wardrobes, loft beds, or wall-mounted storage that requires precise anchoring.
- Kitchen systems or built-ins where measurement errors are costly.
- Situations where you lack tools, time, or physical ability for safe lifting.
Professional assemblers often rely on the same categories of tools described above—quality drivers, hex bits, mallets, and measuring tools—but their main advantage is experience and efficiency.
Frequently Asked Questions (FAQs)
Do I really need tools beyond what IKEA includes?
For very simple items, the supplied Allen key may be enough. However, projects with many screws or large panels are significantly easier with a good screwdriver, hex bits, and a rubber mallet, which improve speed and reduce strain.
Is a power drill safe to use on IKEA furniture?
Yes, if used carefully. Set the torque low, start screws by hand, and stop tightening as soon as resistance increases to avoid stripping the particleboard or damaging hardware.
How can I keep from losing small parts during assembly?
Empty hardware bags into shallow trays or magnetic bowls, and keep them near your instructions. Group similar screws together and only open new bags when the instructions call for them.
Why is attaching furniture to the wall so important?
Tall or heavily loaded furniture can tip forward if drawers are opened or climbed on. Anchoring units to the wall with brackets or straps greatly reduces tip-over risk and is strongly recommended by safety authorities.
Can I disassemble and reassemble IKEA furniture multiple times?
It is possible, but joint strength can decrease each time, especially in particleboard where screw holes may loosen. If you plan to move items frequently, take extra care when unscrewing, and consider reinforcing worn holes with appropriate repair methods.
References
- Protect children from furniture and TV tip-overs — U.S. Consumer Product Safety Commission. 2022-02-09. https://www.cpsc.gov/Safety-Education/Safety-Education-Centers/Tipover-Information-Center
- Are all the tools required for assembly included with your furniture? — IKEA Customer Service. 2023-06-01. https://www.ikea.com/us/en/customer-service/knowledge/articles/514ff041-1ddd-4059-9fd4-0350805fee67.html
- Expert Tips for IKEA Furniture Assembly — Taskrabbit Blog. 2023-04-15. https://www.taskrabbit.com/blog/expert-tips-for-ikea-furniture-assembly/
- Tools and accessories — IKEA. 2024-01-10. https://www.ikea.com/us/en/cat/tools-hardware-16292/