Why Handmade Valentine Gifts Matter
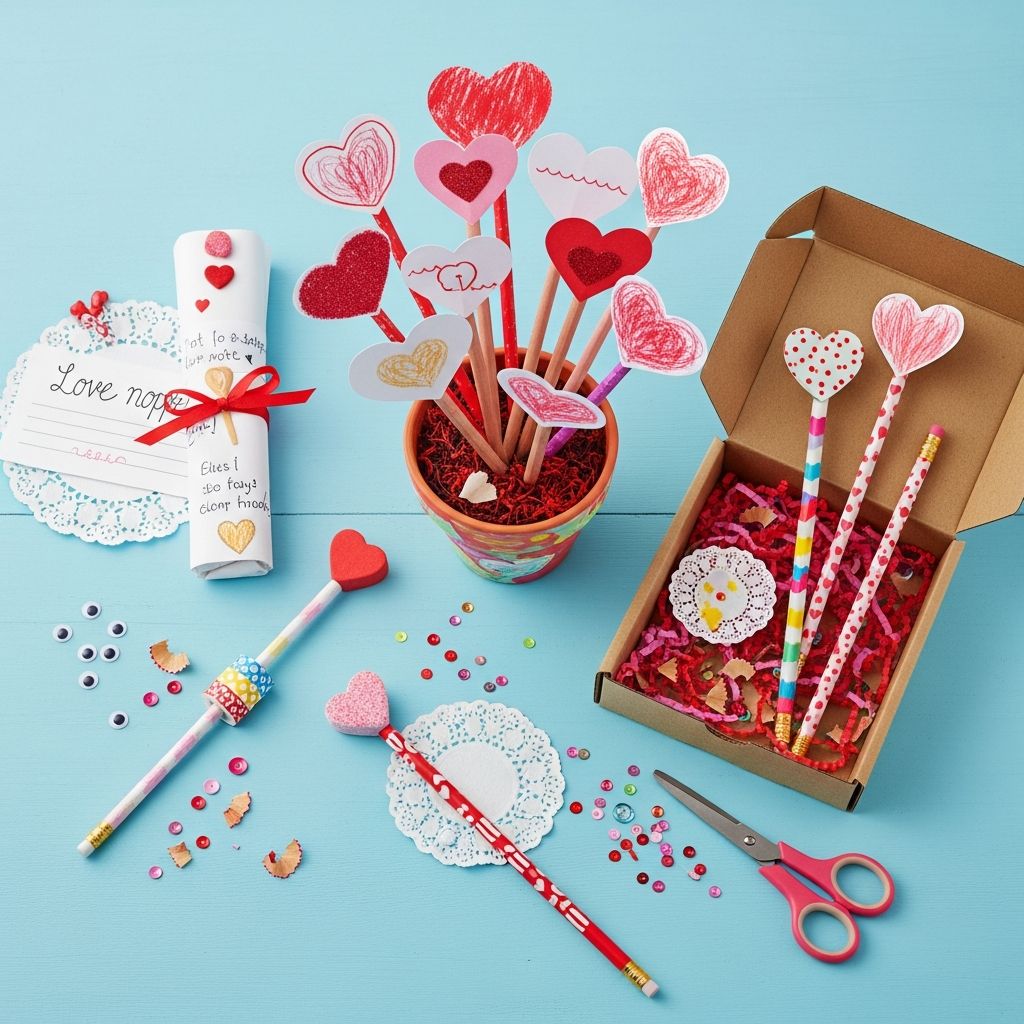
Valentine’s Day is more than just candy and cards—it’s a chance for children to express kindness, creativity, and thoughtfulness. While store-bought treats are convenient, handmade gifts carry a special warmth that kids and adults alike remember. Crafting personalized items like pencil toppers gives children a sense of pride and ownership in their creations, while also teaching them about sharing, effort, and the joy of giving.
When kids make something with their own hands, they’re not just following instructions—they’re learning fine motor skills, color coordination, pattern recognition, and problem-solving. A simple pencil topper becomes a tiny masterpiece that can be shared with classmates, teachers, or family members, turning a classroom writing tool into a symbol of friendship and affection.
Choosing the Right Theme: Love Bugs and Friendly Creatures
One of the most engaging themes for Valentine’s Day crafts is the idea of ‘love bugs’ or friendly little creatures that spread kindness. These aren’t scary insects; they’re cheerful, heart-shaped characters with big eyes, wiggly antennae, and smiles that make them instantly lovable.
Love bugs work especially well as pencil toppers because they can sit right at the top of a pencil, giving it a playful personality. Their segmented bodies can be made from stacked hearts or ovals, and their faces can be customized with different expressions, colors, and accessories. This theme is flexible enough for toddlers to participate with help, while older children can add more detail and complexity.
Supplies You’ll Need for Pencil Toppers
The beauty of this craft is that it uses common, inexpensive materials that most households already have or can easily find at a craft store. Here’s a basic list of what you’ll want to gather before starting:
- Colored cardstock or construction paper (red, pink, purple, white, and other Valentine colors)
- Scissors (child-safe for younger kids, regular for older ones)
- Glue sticks or white craft glue
- Googly eyes in various sizes
- Pipe cleaners (chenille stems) in pink, red, white, or metallic shades
- Pencils (regular or colored pencils work well)
- Markers, crayons, or colored pencils for drawing details
- Optional: heart stickers, glitter, foam shapes, or small pom-poms for extra decoration
Having a variety of colors and textures on hand encourages creativity and allows each child to make a unique design. For a classroom or group setting, it’s helpful to pre-cut some shapes (like hearts or circles) so kids can focus on assembling and decorating rather than cutting.
Step-by-Step Guide to Making Love Bug Pencil Toppers
Creating a love bug pencil topper is a simple, repeatable process that can be adapted for different age groups. Here’s how to guide children through the project:
1. Design the Bug’s Body
Start by deciding how many segments the bug will have. A basic love bug can have three parts: head, middle, and tail. Cut out three hearts or ovals from colored paper, each slightly smaller than the last. For a more realistic inchworm look, use elongated ovals instead of perfect circles.
Arrange the pieces in a line on the table to see how they’ll stack. This is a great opportunity to talk about sequencing and patterns—older kids can alternate colors or sizes to create a striped effect.
2. Assemble the Segmented Body
Once the pieces are arranged, glue them together in a straight line, slightly overlapping each segment so they look connected. Let the glue dry completely before moving on. If the paper is thin, you can reinforce the back with a small strip of tape or extra paper to keep the shape sturdy.
For a more durable version, especially if the toppers will be handled a lot, consider using cardstock or laminating the finished bug after it’s assembled.
3. Attach the Bug to the Pencil
To turn the bug into a pencil topper, glue the bottom segment (the tail) around the eraser end of the pencil. Make sure the glue is applied evenly and that the bug sits straight. If the paper is too loose, you can add a small dab of glue inside the last segment to help it grip the pencil.
For a no-glue option, cut a small slit in the bottom of the tail and slide it onto the pencil like a ring. This works best with thicker paper and allows the topper to be removed and reused.
4. Add the Face and Personality
This is where the fun really begins. Use googly eyes to give the bug a wide-eyed, friendly expression. Glue them onto the head segment, then use markers to draw a mouth, cheeks, or even blush marks. Older kids can experiment with different emotions—happy, surprised, sleepy, or silly.
Encourage children to name their bugs and imagine their personalities. Is it a shy bug? A brave explorer? A teacher’s helper? Giving the bug a story makes the craft more meaningful and memorable.
5. Create Antennae and Other Details
Cut a pipe cleaner in half and twist one end of each piece into a small loop or spiral to form antennae. Glue or tape the straight ends to the top of the bug’s head. The antennae can be straight, curly, or bent into fun shapes.
Additional details like legs (small pipe cleaner pieces), wings (cut from paper or foam), or tiny hearts around the body can make each bug unique. For a Valentine’s twist, add small heart stickers or draw tiny hearts on the bug’s body.
Adapting the Craft for Different Ages
One of the strengths of this project is its flexibility. With small adjustments, it can be suitable for toddlers, preschoolers, and elementary school children.
Toddlers (Ages 2–4)
- Use pre-cut shapes so they can focus on gluing and decorating.
- Provide large googly eyes and thick markers for easier handling.
- Keep the design simple: one head, one body, and antennae.
- Let them choose colors and stickers rather than drawing details.
Preschoolers (Ages 4–6)
- Introduce simple cutting with safety scissors.
- Encourage them to create a three-part body and glue it in order.
- Let them draw faces and experiment with expressions.
- Use pipe cleaners for antennae and maybe a few legs.
Elementary Kids (Ages 7–10)
- Challenge them to design more complex bugs with patterns, stripes, or gradients.
- Allow them to write a short message or name on the bug.
- Introduce more advanced techniques like folding, curling, or layering paper.
- Encourage them to make a set of matching or themed bugs for classmates.
Turning Pencil Toppers into Meaningful Gifts
These love bug pencil toppers aren’t just fun to make—they’re perfect for sharing. Here are a few ways to turn them into thoughtful Valentine’s gifts:
Classroom Valentine Exchanges
Instead of traditional cards, children can make a set of pencil toppers to hand out to classmates. Each bug can be personalized with the recipient’s name or a short message like “You’re a great friend!” or “Have a bug-tastic Valentine’s Day!”
Pair each topper with a small pencil or crayon for a complete little gift. This approach reduces paper waste and gives classmates something useful and fun to use at school.
Teacher Appreciation Gifts
Teachers often receive a flood of candy and cards, so a handmade pencil topper can stand out as a unique and practical gift. Kids can make a special bug for their teacher, perhaps with a heart-shaped body and a message like “You’re the best teacher ever!”
For a classroom party, each child can make one topper for the teacher, and the teacher can display them on a bulletin board or use them as part of a Valentine’s Day decoration.
Family and Friends
These toppers also make sweet gifts for siblings, grandparents, or other family members. A child can make a bug for each family member, perhaps matching the colors to their favorite things. For example, a blue bug for a sibling who loves the ocean, or a purple bug for a grandparent who loves flowers.
Pairing the topper with a small notebook or coloring book creates a mini gift set that feels both personal and useful.
Learning Benefits of This Craft
Beyond the fun and creativity, this activity supports several important developmental areas:
Fine Motor Skills
Cutting, gluing, drawing, and manipulating small items like googly eyes and pipe cleaners all help strengthen the small muscles in the hands and fingers. These skills are essential for writing, using utensils, and other daily tasks.
Language and Social Skills
As children describe their bugs, name them, and decide who to give them to, they’re practicing vocabulary, storytelling, and social awareness. Talking about kindness, friendship, and sharing during the craft reinforces positive values.
Math and Spatial Concepts
Arranging segments in order, comparing sizes, and creating patterns introduce basic math concepts in a playful way. Children also develop spatial awareness as they position eyes, antennae, and other features on the bug’s body.
Emotional Expression
Art provides a safe outlet for children to express their feelings. A happy bug might reflect a child’s excitement, while a sleepy bug could mirror how they’re feeling that day. Encouraging children to talk about their creations helps them connect their emotions with their actions.
Storage and Display Ideas
Once the pencil toppers are made, there are several ways to store and display them:
- Keep them on pencils in a pencil cup or desk organizer for daily use.
- Hang them on a string or ribbon to create a Valentine’s Day garland.
- Display them on a bulletin board with a theme like “Our Love Bug Friends” or “Kindness Crew.”
- Store extras in a small box or envelope labeled “Valentine Gifts” for future use.
For keepsakes, consider taking a photo of each child with their bug and including it in a holiday scrapbook or memory journal.
FAQs About Valentine Pencil Toppers
What kind of paper works best for these toppers?
Cardstock or heavy construction paper holds its shape better and lasts longer. Regular printer paper can be used, but it may bend or tear more easily, especially if the bug is handled a lot.
Can these be made without glue?
Yes! You can cut a small slit in the bottom of the bug’s tail and slide it onto the pencil like a ring. For extra hold, use a tiny piece of tape on the inside of the tail. This method is great for reusable toppers or for kids who are sensitive to glue.
How can I make this craft more eco-friendly?
Use recycled paper, old greeting cards, or scrapbooking leftovers for the bug bodies. Choose non-toxic, washable glue and markers, and avoid excessive glitter or plastic embellishments. You can also reuse the toppers year after year by storing them carefully.
Are these safe for young children?
With supervision, yes. Use child-safe scissors, non-toxic glue, and avoid small parts that could be choking hazards for very young children. For toddlers, pre-cut the shapes and use larger googly eyes and pipe cleaners.
Can older kids make more advanced versions?
Absolutely. Older children can experiment with 3D designs, layering, or even creating a whole family of bugs with different personalities. They can also write short stories or poems to go with their bugs, turning the craft into a mini writing project.
What if we don’t have pipe cleaners?
You can substitute with yarn, embroidery floss, or even thin strips of paper twisted into antennae. For legs, try small pieces of chenille stems, pipe cleaner scraps, or even folded paper tabs.
Final Thoughts: A Craft That Grows with Your Child
Valentine’s Day pencil toppers are more than just a seasonal activity—they’re a versatile, educational, and heartwarming project that can be revisited year after year. As children grow, the same basic idea can evolve from simple glued shapes to detailed, imaginative creatures with stories and personalities.
By focusing on creativity, kindness, and sharing, this craft helps children connect with the true spirit of Valentine’s Day. Whether they’re making one bug for a best friend or a whole set for a classroom party, the joy of giving something handmade is a lesson that lasts far beyond the holiday itself.
References
- Developmental Benefits of Arts and Crafts for Children — American Academy of Pediatrics. 2023-05-15. https://www.aap.org/en/patient-care/healthy-active-living-for-families/arts-and-crafts/
- Early Childhood Fine Motor Skill Development — Centers for Disease Control and Prevention (CDC). 2023-08-10. https://www.cdc.gov/ncbddd/actearly/milestones/index.html
- Supporting Social-Emotional Learning Through Creative Activities — National Association for the Education of Young Children (NAEYC). 2022-11-03. https://www.naeyc.org/resources/pubs/yc/mar2022/supporting-social-emotional-learning