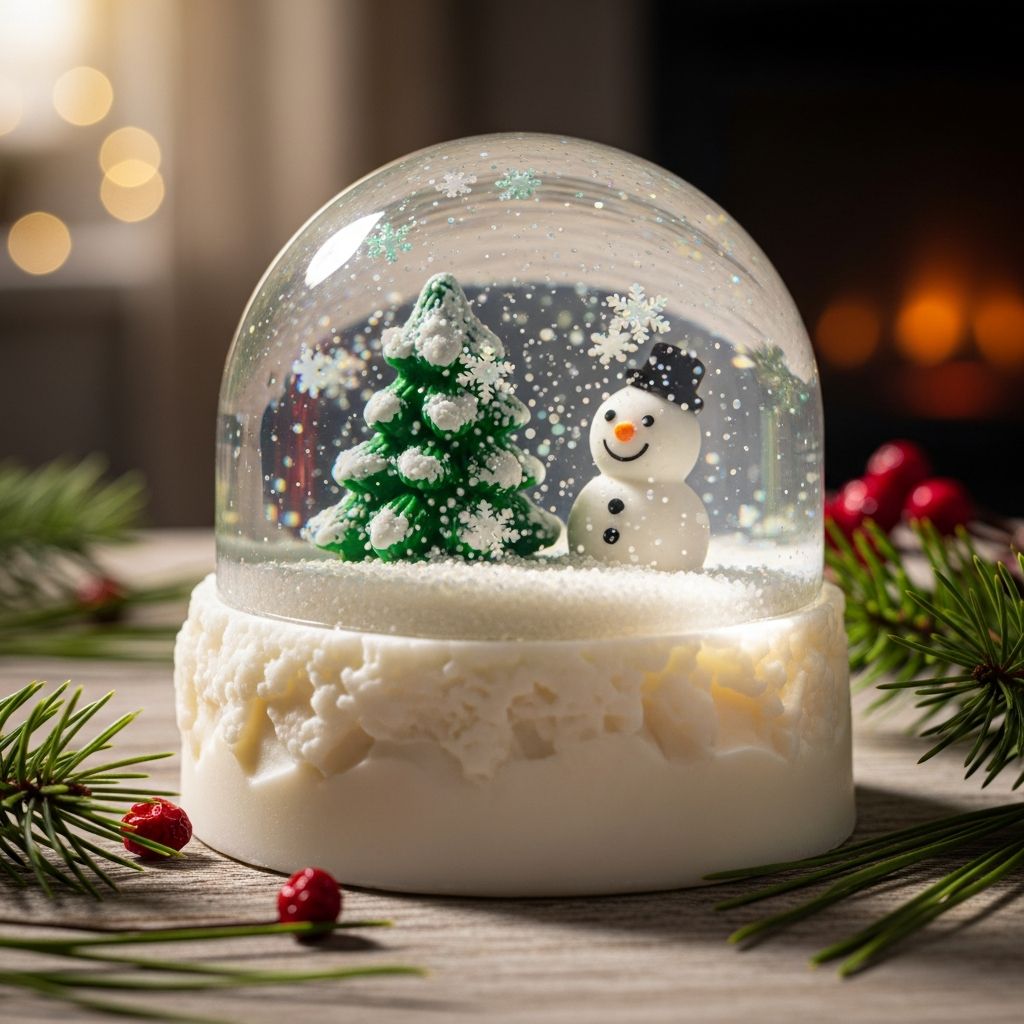
Transform ordinary soap into tiny winter wonderlands with snow globe soaps that are as practical as they are adorable. These miniature scenes, captured inside clear bars of soap, make charming gifts, festive decorations, and fun projects to share with kids and friends.
Why Snow Globe Soap Is a Perfect DIY Project
Snow globe soap combines the charm of a seasonal decoration with the usefulness of an everyday item. Unlike traditional snow globes that sit on a shelf, these live at the sink and encourage frequent handwashing.
- Great for holiday stocking stuffers and teacher gifts.
- Beginner-friendly craft with simple tools and easy-to-find supplies.
- Customizable for different seasons, themes, or occasions.
Because the project uses melt-and-pour soap base, there is no need for complex soap chemistry, making this an approachable activity for crafters of all ages under adult supervision.
Planning Your Snow Globe Soap Design
Before melting anything, start by deciding what story each soap will tell. Think of each bar as a tiny diorama: a scene frozen in time and captured inside crystal-clear soap.
- Choose a theme: winter forest, cozy village, polar animals, or festive holiday characters.
- Decide on a color palette: icy blues and silvers, classic red and green, or neutral white and gold.
- Think about scent: peppermint for winter, vanilla for a bakery feel, or pine for a woodland theme.
A simple sketch on paper can help you plan where each miniature figure will sit and how much “snow” you want to see at the base of your scene.
Essential Supplies and Tools
You can adapt this project to what you have on hand, but the following list will give you a strong starting point. Aim for skin-safe, soap-specific materials whenever possible.
Core Soap Ingredients
- Clear melt-and-pour soap base (glycerin-based for transparency).
- Optional white melt-and-pour soap base for snowy accents.
- Skin-safe liquid soap colorant (blue, silver, or other desired colors).
- Skin-safe fragrance or essential oil (peppermint, vanilla, pine, etc.).
- Cosmetic-grade glitter or mica for sparkle (optional but festive).
Molds and Miniatures
- Small silicone molds or ice cube trays with individual cavities.
- Miniature plastic or resin figurines that are waterproof and non-metallic.
- Small decorative items that can safely be embedded, such as tiny plastic trees or snowflakes.
Tools and Safety Items
- Microwave-safe pouring jug or heatproof glass measuring cup.
- Sharp knife or soap cutter for chopping the soap base.
- Spoon, chopstick, or small spatula for stirring.
- Grater or peeler to create soap “snow” from white soap.
- Rubbing alcohol in a spray bottle to reduce bubbles and help layers adhere.
- Heat-resistant gloves or oven mitts for handling hot containers.
Safety First: Crafting With Kids
While melt-and-pour soap is easier and safer than traditional cold-process soap, it still involves hot liquid, making supervision essential. Treat the melting step like working with hot cocoa or soup.
- Assign adults to manage the microwave and pouring of hot soap.
- Give children age-appropriate tasks such as placing figurines, sprinkling snow, or choosing colors and scents.
- Use a stable, clutter-free workspace and keep handles turned inward away from counter edges.
With clear rules and a bit of planning, the project becomes both safe and confidence-building for young helpers.
Step-by-Step Guide to Making Snow Globe Soap
The process can be broken down into three main phases: preparing the figurines and molds, pouring the clear layer, and adding the snow base and final seal.
Step 1: Prepare Molds and Miniatures
- Wash and dry all molds to remove dust or residue that might cloud the soap.
- Check that every miniature fits comfortably inside a mold cavity with a bit of space around and above it.
- Decide whether your figures will be upright or intentionally tilted, such as a sled racing down a slope.
If your figurines are very light and tend to float, you may prefer to attach them to a tiny disk of white soap or a small dab of hardened clear soap before embedding.
Step 2: Melt the Clear Soap Base
- Chop the clear melt-and-pour base into small cubes to ensure even melting.
- Place the cubes in your microwave-safe jug, filling it with only as much as you need for one or two layers at a time.
- Heat in short bursts, stirring between intervals, until completely melted but not boiling.
Overheating can create excess bubbles and may affect the clarity of the finished soap, so take your time and use gentle heating.
Step 3: Add Color, Scent, and Sparkle
- Add a very small amount of soap-safe colorant, stirring well after each drop.
- Blend in fragrance oil according to the manufacturer’s usage guidelines.
- Sprinkle in cosmetic glitter or mica if you want a shimmering snowfall effect.
A barely tinted blue or silver-tinged base can create the illusion of crisp winter air without obscuring the scene inside.
Step 4: Pour the First Layer
- Pour a shallow layer of clear soap into each mold cavity, leaving enough room for the figurine and snow base later.
- Lightly spritz the surface with rubbing alcohol to reduce bubbles.
- Allow this layer to cool just long enough to form a soft skin; it should be thickened but still tacky.
This semi-set layer acts as a cushion that helps hold figurines in place instead of letting them sink all the way to the bottom.
Step 5: Position the Miniature Scene
- Gently press each figurine into the semi-firm soap, arranging it so the front faces outward.
- Use a toothpick or skewer to nudge figures into place without scratching the mold.
- Ensure that any pieces intended to stand remain upright and fully surrounded by soap.
Remember that when you eventually unmold the bar, the side currently touching the mold will become the front window of your snow globe scene.
Step 6: Add the Snowy Base
There are several ways to create a snow effect, but one of the easiest is turning white soap base into tiny shavings.
- Use a grater or peeler to create delicate curls or flakes of white soap.
- Sprinkle the shavings around the feet of each figurine, forming small drifts or a full snowy ground.
- Avoid packing the snow too tightly so that the final clear layer can flow between pieces and hold them together.
Soap shavings give a soft, textured appearance that looks like real snowbanks once they are encapsulated in clear soap.
Step 7: Seal With a Final Clear Layer
- Re-melt a small amount of clear soap base if needed, then let it cool slightly so it is warm but not scorching hot.
- Spritz the snow surface with rubbing alcohol to help the layers connect.
- Slowly pour the clear soap over the snow, filling each cavity and sealing the scene.
Pouring slowly and close to the surface reduces air bubbles and prevents the snow from shifting too much.
Step 8: Cool, Unmold, and Inspect
- Allow the soaps to cool at room temperature or place them briefly in the refrigerator (not the freezer) until fully firm.
- Gently press from the back of each mold cavity to release the soaps without warping them.
- Inspect each bar, trimming any stray edges with a clean knife for a polished finish.
Once cured and dry on the surface, the soaps are ready for packaging or immediate use at the sink.
Creative Variations and Theme Ideas
One of the best parts of snow globe soap is how easily it can be adapted to different seasons or personalities. You can craft a whole collection tailored to your recipients.
- Classic winter: Reindeer, snowmen, evergreen trees, and snowflakes in pale blue soap with silver shimmer.
- Arctic animals: Polar bears, penguins, and seals set against an icy blue background.
- Storybook scenes: Tiny castles, fairy-tale figures, or whimsical creatures in pastel colors.
- Non-winter themes: Beach scenes with sand-colored soap shavings or floral gardens embedded in pastel bars.
By changing colors, scents, and figurines, the same basic technique works for birthdays, baby showers, or party favors year-round.
Suggested Combinations for Inspiration
| Theme | Color Palette | Scent Idea | Mini Figurines |
|---|---|---|---|
| Cozy Cabin Winter | Deep blue, white, silver | Fir needle or cedar | Tiny cabin, pine tree, stacked logs |
| North Pole Friends | Ice blue, bright red, white | Peppermint or spearmint | Penguins, polar bears, candy canes |
| Frosty Fairytale | Pale lavender, soft blue, pearl | Vanilla sugar | Mini carriage, tiny crown, starry accents |
| Snowy Village | Warm white, gold, navy | Cinnamon or baked goods blend | Little houses, lampposts, trees |
Packing and Presenting Your Snow Globe Soaps
Thoughtful packaging turns a handmade soap into a keepsake that feels special before it is even used. Clear wrapping showcases the scene and protects the surface from nicks and dust.
- Wrap each bar tightly in plastic wrap or shrink wrap to preserve scent and clarity.
- Slip wrapped soaps into small boxes or cellophane bags tied with ribbon or twine.
- Add a tag noting the scent, ingredients, and a short message like “Handmade just for you.”
Grouping several soaps into a set—such as a trio of coordinating scenes—creates a ready-made gift that looks polished and professional.
Common Issues and Simple Fixes
Even well-planned soaps can develop small imperfections. Most can be corrected or minimized with quick adjustments.
- Cloudy soap: Often caused by overheating; next time, melt in shorter intervals and avoid boiling.
- Floating figurines: Allow the first layer to thicken more before placing miniatures, or anchor them in a dab of semi-set soap.
- Layers separating: Always spritz surfaces with rubbing alcohol before pouring a new layer so they fuse properly.
- Excess bubbles: Pour slowly, stir gently, and spritz the surface with alcohol right after pouring.
Slight variations between bars are part of the handmade charm and often go unnoticed by gift recipients.
Storage and Shelf Life Tips
Like other melt-and-pour soaps, snow globe bars benefit from a bit of care in storage to keep them looking their best. Proper wrapping also helps maintain fragrance.
- Keep finished soaps in a cool, dry place away from direct sunlight to prevent fading.
- Wrap each bar individually to minimize glycerin “sweating” in humid environments.
- Use within 12–18 months for the brightest color and strongest scent.
Even if the fragrance softens over time, the visual impact of the embedded scene will still delight anyone who unwraps it.
Eco-Friendly and Skin-Friendly Considerations
For a more eco-conscious project, pay attention to both the soap base and the miniatures you embed. The goal is to create something that feels gentle on the skin and mindful of long-term use.
- Choose detergent-free, skin-friendly melt-and-pour bases that list ingredients clearly.
- Select miniatures that are durable and reusable once the soap has worn down.
- Avoid harsh colorants or glitter not labeled as cosmetic-grade.
If you are making soaps for recipients with sensitive skin, lightly scented or unscented versions with minimal color are a considerate choice.
Frequently Asked Questions (FAQs)
Can the toys inside the soap be used afterward?
Yes, as long as you start with sturdy, waterproof miniatures, they will eventually emerge as the soap wears down. Once freed, they can be rinsed and used as small toys, desk decorations, or holiday ornaments.
Is melt-and-pour soap safe for beginners?
Melt-and-pour soap is widely considered beginner-friendly because it removes the need to work with lye while still allowing for creativity in colors, scents, and designs. Following the melting and safety instructions on the package will help ensure a smooth experience.
Can I make these without a microwave?
Yes, the soap base can be melted using a double boiler on the stovetop, where the soap sits in a heatproof container over gently simmering water. This method can provide more control over temperature, but still requires careful supervision.
What if I don’t have cosmetic glitter?
Glitter is purely decorative, so it can be omitted without affecting the structure of the soap. If you still want shimmer, a small amount of pearly mica powder can create a gentle, luminous effect in the clear base.
How do I prevent fingerprints and smudges on the finished bars?
Make sure soaps are completely cool and firm before handling, and wrap them promptly to protect the surface. Wearing clean, dry gloves while packaging can keep the crystal-clear look intact for gifting or display.
Bringing It All Together
Snow globe soap turns simple supplies into tiny scenes that spark imagination every time someone washes their hands. With thoughtful planning, a gentle melting process, and creative finishing touches, you can craft a whole set of soaps that look like miniature worlds captured in ice.
Whether you give them as gifts, sell them at a craft fair, or line them up along your own bathroom sink, these handmade creations add a sense of wonder to an everyday routine. Once you master the basic technique, the only limit is how many stories you want to tell in soap form.