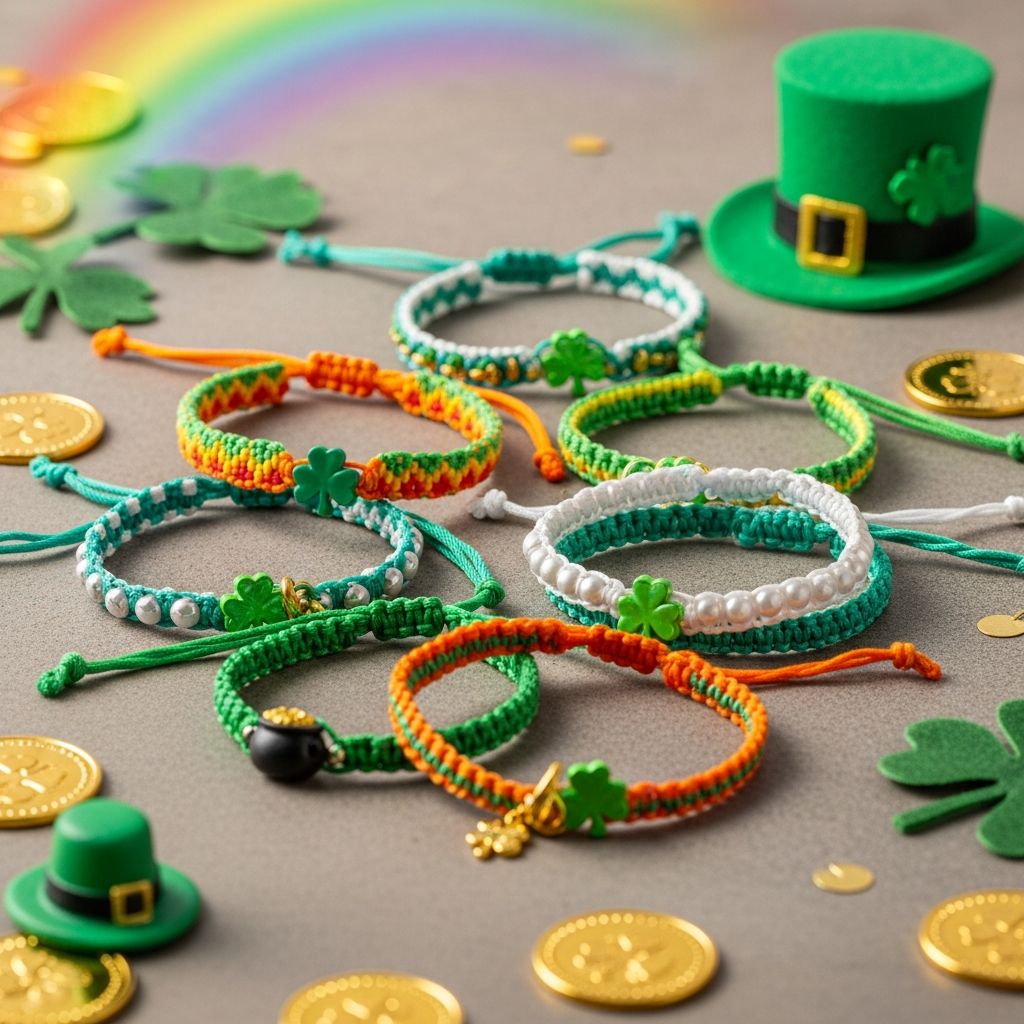
St. Patrick’s Day is the perfect excuse to add a little extra color, kindness, and creativity to your day. Rainbow friendship bracelets combine the bright charm of a holiday rainbow with a simple craft that kids can proudly make and share with friends, classmates, or family members.
Why Rainbow Friendship Bracelets Are Perfect for St. Patrick’s Day
Rainbows and St. Patrick’s Day go hand in hand. In many traditions, a rainbow represents hope, good luck, and the promise of better things ahead, which fits beautifully with the spirit of friendship bracelets. When children exchange handmade bracelets, they are not just trading a decoration; they are practicing generosity and thoughtfulness in a tangible way.
This simple project works well at home, in classrooms, at community events, or as a low-stress party activity. With just a few inexpensive supplies, you can set up a bracelet station that keeps different ages busy, encourages fine motor skills, and sends every guest home with something cheerful on their wrist.
Gathering Your Supplies
Before anyone starts crafting, it helps to organize a small set of basic materials. You can keep things simple with just yarn or string, or you can add beads and charms for an extra touch of sparkle. Most of these supplies are easy to find in craft stores, discount shops, or even around the house.
Core Materials
- Rainbow colors of yarn, embroidery floss, or thin cord (red, orange, yellow, green, blue, purple)
- Scissors with blunt tips for kid safety
- Tape, safety pins, or a clipboard to hold the bracelet while tying
- Ruler or measuring tape
Optional Add-Ons
- Letter beads to spell names or phrases like “LUCK” or “FRIEND”
- Small gold or shamrock charms for a St. Patrick’s Day twist
- Elastic cord if you prefer stretchy bracelets instead of tied closures
- Clear glue or fabric glue to secure knots
| Age Group | Approximate Wrist Size | Suggested Strand Length |
|---|---|---|
| Early elementary (5–7) | 12–14 cm | 40–45 cm |
| Upper elementary (8–10) | 14–16 cm | 45–50 cm |
| Tweens & teens | 16–18 cm | 50–55 cm |
| Adults | 17–19 cm | 55–60 cm |
These measurements are guidelines, not strict rules. It is always better to cut strands slightly longer than you think you need, especially if children are still learning how tightly to tie their knots.
Step-by-Step: Simple Rainbow Braid Bracelet
This first method uses basic braiding, making it ideal for younger crafters or anyone who is new to friendship bracelets. The result is a soft, wearable rainbow that can be tied on the wrist or ankle.
Step 1: Measure and Cut
Measure around the crafter’s wrist, then add at least 15–20 cm to allow space for knotting and tying the bracelet later. Cut one strand of each rainbow color to this length, keeping them as even as possible. If you are working with a group, cutting several sets in advance can save time and reduce traffic around the scissors.
Step 2: Secure the Starting Point
Line up all of the strands and tie a single knot near one end, leaving a short tail for tying. Tape this knotted end to a table, clip it to a clipboard, or use a safety pin to attach it to a small cushion or your pant leg. Keeping the starting point secure makes it much easier for kids to control the strands while they work.
Step 3: Braid the Rainbow
Divide the strands into three roughly equal bundles. You can mix the colors in each bundle or place them in traditional rainbow order; there is no wrong choice. Show children how to cross the right bundle over the middle, then the left bundle over the new middle, repeating this simple pattern until the braid reaches the desired length.
Step 4: Finish with a Knot
Once the braided section is long enough to wrap around the wrist, tie another firm knot at the end of the braid. Trim the extra tails if they are too long, but keep enough length to tie the bracelet on comfortably. For extra durability, you can place a tiny drop of clear glue on the ending knot and let it dry before wearing.
Twisted Rainbow Bracelet for Fast Crafting
When you need a project that comes together quickly—perhaps for a classroom, scout troop, or party—the twisted method is a great alternative. It avoids detailed knot patterns and still gives a bold rainbow effect.
How to Make the Twist
- Cut two or three strands in each rainbow color, all the same length.
- Gather them together and tie a firm knot at one end, leaving a short tail.
- Separate the bundle into two equal groups of strands.
- Twist each group tightly in the same direction until they begin to coil naturally.
- Hold each twisted group firmly, then wrap them around each other in the opposite direction and knot the ends together.
This creates a rope-like bracelet that looks more complex than it actually is. Kids often enjoy watching how the strands curl and transform from loose threads into a strong cord.
Adding Beads, Letters, and Lucky Charms
For older kids or crafters who want more detail, beads and small charms bring extra personality to each bracelet. They also provide an opportunity to talk about the symbolism behind colors and shapes associated with St. Patrick’s Day.
Bead and Charm Ideas
- Gold beads: Represent the legendary “pot of gold” at the end of the rainbow.
- Green beads: Echo shamrocks, springtime, and the traditional color of the holiday.
- Letter beads: Spell names, initials, or short words like “LUCK,” “JOY,” or “BFF.”
- Shamrock charms: A small charm at the center can turn a simple bracelet into an instant holiday accessory.
To add beads to a non-stretchy bracelet, slide them onto the strands before you finish the main braid or twist. With elastic cord, string the beads in your chosen pattern first, then knot the ends together securely and hide the knot inside a larger bead if possible.
Keeping Craft Time Safe and Stress-Free
Any craft session with children runs more smoothly with a bit of planning. Rainbow friendship bracelets are low-risk, but there are still a few simple precautions that make the experience safer and more enjoyable for everyone involved.
Safety and Setup Tips
- Pre-cut strands for very young children to prevent accidents with scissors.
- Use age-appropriate scissors and supervise closely whenever cutting is involved.
- Keep beads, charms, and small items out of reach of toddlers who might put them in their mouths.
- Choose a flat, well-lit workspace where bracelets can stay anchored without being jostled.
- Provide a few finished samples so visual learners understand what they are working toward.
Having zipper bags or small containers labeled with each child’s name can also help prevent bracelets from getting mixed up during group activities or classroom projects.
Creative Ways to Share and Wear the Bracelets
The fun does not end when the last knot is tied. Because friendship bracelets are meant to be shared, you can build simple traditions around giving, receiving, and wearing them on or around St. Patrick’s Day. This turns a quick craft into a memorable ritual that kids look forward to each year.
Sharing Ideas
- Classroom exchange: Each student makes one bracelet to give away, encouraging kindness and inclusion.
- Family tokens: Parents and siblings exchange bracelets as a reminder to look for “little bits of luck” in everyday life.
- Good-deed bracelets: Children earn bracelets by completing acts of kindness or helpful chores during the week.
- Party favors: Send guests home from a St. Patrick’s Day celebration with a handmade bracelet instead of candy-only treat bags.
Encouraging children to explain the meaning behind the colors or charms on their bracelet can also build confidence and help them practice speaking about their creative choices.
Frequently Asked Questions
How long does one bracelet take to make?
A basic braided bracelet usually takes 10–20 minutes, depending on the child’s age and experience with tying knots. More detailed designs with beads or special patterns may take a bit longer, but many kids enjoy the extra time spent customizing their creations.
What if the bracelet ends up too short?
If a bracelet is slightly short, you can tie an extra short piece of yarn to each end to create an extension and hide the join inside a bead or under a knot. For future projects, remind kids to measure loosely around the wrist and add extra length for tying so they have more flexibility.
Can this project work for mixed age groups?
Yes, this craft adapts easily across ages. Younger children can focus on simple twists or thick braids with larger beads, while older kids experiment with thinner threads, detailed patterns, and meaningful messages spelled out in letter beads.
How do we store leftover materials?
Wrap extra yarn or cord around cardboard pieces or empty paper tubes to prevent tangles, then place beads and charms in small labeled containers or resealable bags. Keeping a dedicated “bracelet kit” box makes it easy to bring this activity out again for future holidays, birthday parties, or rainy afternoons.
Are these bracelets just for wrists?
Not at all. You can tie the finished pieces onto backpacks, water bottle handles, key rings, or even use them as colorful bookmarks. Anywhere a small touch of rainbow color and a reminder of friendship is welcome, a bracelet can find a new life as a charm or decoration.
Bringing Color, Luck, and Friendship Together
Rainbow friendship bracelets blend the playful magic of St. Patrick’s Day with the lasting value of handmade gifts. Children practice focus, patience, and creativity while making something they can share with others, and adults get an accessible, budget-friendly activity that fills the day with conversation and color.
Whether you choose the simplest braided design or a more elaborate beaded version, the real treasure is not just at the end of the rainbow—it is in the time spent making, laughing, and connecting together.