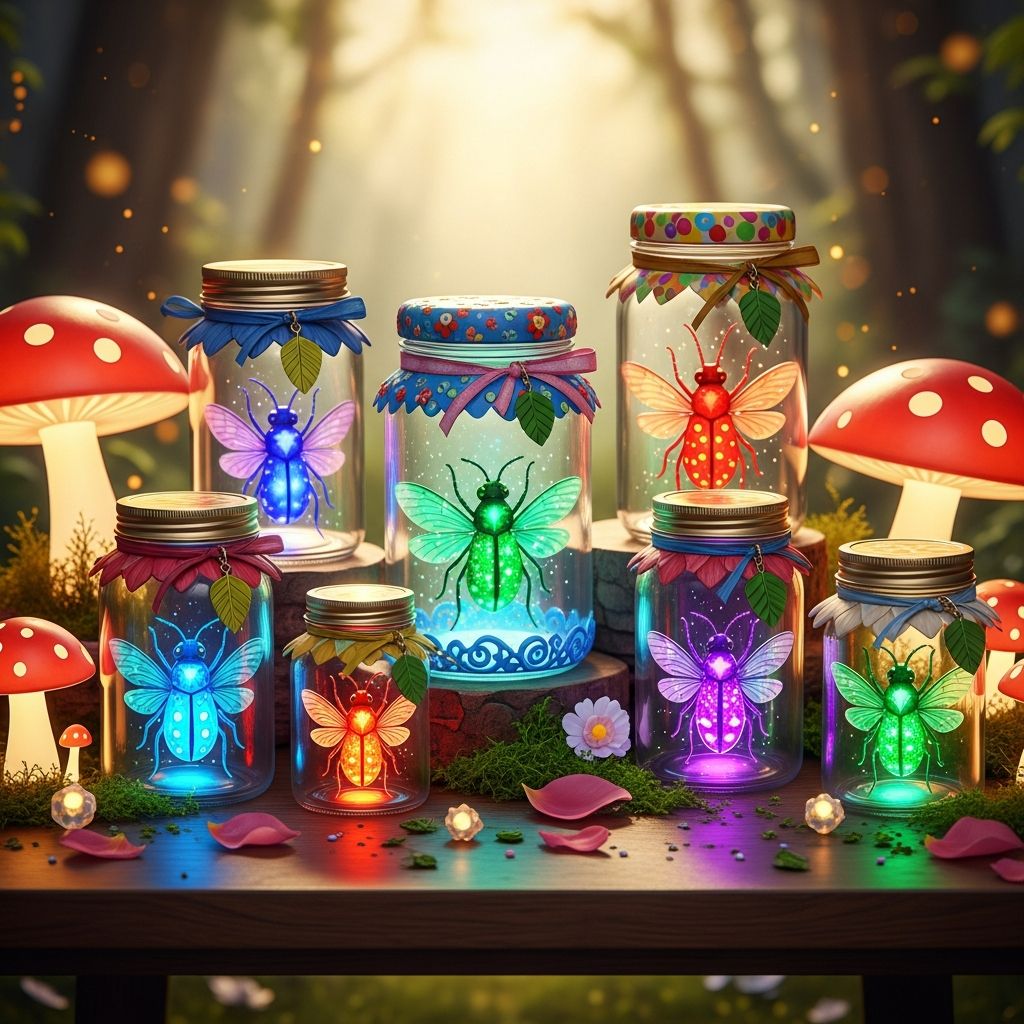
If the children in your life are fascinated by fireflies, beetles, and butterflies but you would rather not host live insects in your home, a pretend bug jar is the perfect solution. This craft transforms ordinary jars into tiny glowing worlds filled with make-believe critters, giving kids all the wonder of nature with none of the wiggly surprises.
Why Pretend Bug Jars Are Wonderful for Kids
Pretend bug jars invite children to explore science, storytelling, and art all at once. Instead of focusing on capturing real insects, kids design imaginary habitats, invent species, and think about what bugs need to live comfortably.
This simple project can be adapted for toddlers, preschoolers, and older kids, making it a flexible activity for home, classrooms, nature clubs, and birthday parties.
- Encourages curiosity about nature without disturbing real ecosystems.
- Builds fine motor skills through cutting, gluing, and arranging materials.
- Opens the door to age-appropriate discussions about habitats, life cycles, and conservation.
- Creates long-lasting, decorative keepsakes kids will proudly display.
Suggested Materials for Your Bug Worlds
You do not need fancy supplies to create magical bug jars. Most of the materials can be found in your recycling bin, craft drawer, or backyard. Feel free to swap items based on what you already have at home.
Basic Craft Supplies
- Clear jars with lids (plastic or glass, cleaned and dried)
- Craft glue or a hot glue gun (with adult supervision)
- Child-safe scissors
- Colored paper, cardstock, or foam sheets
- Permanent markers or paint pens
- Washable markers or crayons
- Googly eyes, sequins, or small gems for decoration
Nature and Texture Elements
- Small twigs, bark pieces, or tiny branches
- Clean pebbles or gravel
- Silk leaves or faux plants
- Craft moss or shredded green paper
- Glitter or metallic confetti for a magical effect
Optional Special Effects
- Glow-in-the-dark paint or glow sticks (for firefly-style jars)
- Fine wire LED fairy lights (battery-operated, cool to the touch)
- Clear tape or sticky dots
- Printed or hand-drawn bug shapes on light cardstock
Encourage children to help gather safe items from the yard, emphasizing that anything living (like real insects, snails, or plants with roots) stays outside where it belongs.
Planning Your Jar: Choosing a Theme
Before opening the glue, invite kids to dream up what kind of tiny world they want to build. A clear theme makes it easier for them to choose colors, textures, and bug designs.
| Theme | Bug Types | Colors & Materials | Story Starters |
|---|---|---|---|
| Glow-in-the-Dark Firefly Jar | Fireflies, tiny glowing beetles | Glow paint, dark blue paper, glitter stars | “What do your fireflies light up at night?” |
| Butterfly Garden | Butterflies, moths, ladybugs | Flower cutouts, pastel colors, faux grass | “Which flowers do your butterflies like most?” |
| Underground Bug Tunnel | Ants, beetles, worms | Brown paper, small rocks, paper tunnels | “Where do your tunnel bugs store their food?” |
| Fairy Forest Critters | Imaginary sparkle bugs, winged creatures | Sequins, moss, tiny paper mushrooms | “What magic can your forest bugs do?” |
Let children combine themes or invent their own. There is no wrong way to design a pretend habitat as long as it is safe and sparks joy.
Step-by-Step Guide: Building the Bug Jar
The process can be broken into simple, repeatable steps that even young crafters can follow with help. Older kids can handle more of the cutting and layout planning, while younger children can focus on decorating and placing pieces.
1. Prepare and Inspect the Jar
- Wash and dry the jar and lid thoroughly to remove labels, glue, and moisture.
- Check for sharp edges, especially if you are using a repurposed glass jar. If anything feels rough, cover it with tape or choose a different container.
- Decide whether the jar will be opened often (for rearranging) or sealed permanently once finished.
2. Create the Habitat Base
- Add a thin layer of pebbles or gravel to the bottom for texture.
- Layer moss, shredded paper, or faux grass on top to mimic ground cover.
- Press in a small twig or two to suggest branches for bugs to climb.
- Glue down any pieces that shift too easily, especially if the jar will be moved frequently.
3. Design and Assemble the Bugs
This is where imagination takes center stage. Bugs can be drawn, cut out, or constructed from small collage elements.
- Cut simple bug shapes (ovals, circles, tear-drops) from colored paper or foam.
- Use markers to add stripes, spots, and wing patterns.
- Glue on tiny paper antennae or legs, or draw them directly on the jar surface with permanent markers.
- Add googly eyes or drawn eyes for expression and personality.
Attach the finished bugs in different ways for added dimension:
- Glue them lightly to twigs so they look like they are perched or crawling.
- Hang them from the lid using clear thread or thin fishing line so they “float” in mid-air.
- Tape flat paper bugs to the outside of the jar for a stained-glass effect when light shines through.
4. Add Magical Lighting (Optional)
- Brush glow-in-the-dark paint onto select bug bodies, wings, or spots and allow to dry.
- If using fairy lights, tuck the light strand among the habitat pieces and tape the battery pack to the outside or top of the jar for easy access.
- Test the glow in a dark room and adjust placement if needed.
5. Finish with Decorative Details
- Write your child’s name and the jar’s title (for example, “Lena’s Night Fireflies”) on a small label.
- Wrap ribbon, twine, or yarn around the jar neck and tie a bow.
- Add star stickers, leaf cutouts, or tiny paper mushrooms to complete the scene.
Once finished, let the jar sit for a few minutes so all glued elements can fully dry before kids start playing with or displaying it.
STEM Learning Opportunities Hidden in the Craft
Beyond being a charming art project, pretend bug jars can anchor simple science conversations. The key is to ask open-ended questions while kids build and play.
Nature and Habitat Questions
- “Where would your bugs find food in this jar?”
- “Do your bugs live in the soil, on the plants, or in the air?”
- “What kind of weather do your bugs like best?”
- “If your bug had a predator, where would it hide?”
Simple Science Extensions
- Compare day versus night bugs by making one bright daytime jar and one dark, glowing nighttime jar.
- Sort bug designs by number of legs, wing style, or body color and talk about classification.
- Create a simple bug “field guide” where kids name and describe each invented species in a small notebook.
These add-ons keep the activity playful while gently building vocabulary and critical thinking skills related to biology and observation.
Age Adaptations and Group Ideas
The same basic idea can serve a wide range of ages and group settings, from solo home projects to full classroom stations. Adjust the complexity of the designs and tools to match your audience.
For Toddlers and Preschoolers
- Pre-cut simple bug shapes and let children decorate with stickers and crayons.
- Skip glass and use lightweight plastic jars or clear plastic cups.
- Focus on placing big, easy-to-grab items like chunky pom-poms and fat paper leaves.
For Elementary-Age Kids
- Allow kids to design and cut their own bugs using reference pictures for inspiration.
- Introduce the idea of food chains and camouflage during the build process.
- Invite them to write a short story or comic about life inside their jar.
For Groups, Clubs, and Parties
- Set up a central “bug body” station, a “habitat” station, and a “lights and extras” station.
- Give each child a name tag label for their jar to avoid mix-ups.
- Create a display shelf or table where finished bug jars can stay for everyone to admire.
Safety and Eco-Friendly Tips
Because this project often involves jars and small decorations, a few simple guidelines will keep everyone safe and respectful of the natural world.
- Supervise closely when using glass, hot glue, or small parts that could be choking hazards.
- Choose battery-powered LED lights labeled as low-heat and avoid open flames or traditional candles.
- Use recycled jars and scrap paper when possible to reduce waste.
- Explain that real bugs should stay in their natural homes and not be sealed in jars.
By emphasizing care and responsibility, children learn that creativity and kindness toward living creatures can go hand in hand.
Fun Ways to Use Finished Bug Jars
Once the crafting is over, the jars can play many roles in your home or classroom. Rather than becoming dusty decorations, they can be woven into daily routines and imaginative play.
- Nightlight companions: Glow-in-the-dark or LED-lit jars can gently illuminate a bedroom shelf.
- Story prompts: Invite children to pick a jar and tell “a day in the life” of one bug.
- Seasonal décor: Create jars themed for spring, summer, and fall to rotate throughout the year.
- Learning corners: Place jars in a science or reading nook to inspire quiet exploration.
The more kids use their jars in everyday play, the more meaningful the craft becomes.
Frequently Asked Questions
1. Do we have to use real jars?
No. Clear plastic containers, sturdy cups, or even recycled food tubs work well, especially for younger children. The important part is that kids can see into the “habitat” and interact with their pretend bugs.
2. How long does the craft usually take?
For simple designs, plan about 30–45 minutes, including setup and cleanup. More detailed, themed jars with glow effects or hanging elements may take an hour or longer, which can be split across two shorter sessions.
3. Can this project be done in a classroom?
Yes. The activity works well as a small-group center or whole-class project. Preparing pre-cut bug shapes and habitat materials ahead of time will help the session run smoothly and keep the focus on creativity.
4. What if my child is afraid of real bugs?
Pretend bugs are a gentle way to build comfort. Children can design friendly, colorful creatures that look nothing like the insects they see outdoors, slowly easing some of their worries while still teaching respect for living things.
5. How can we store the jars?
Display finished jars on a stable shelf or windowsill out of direct, harsh sunlight to prevent colors from fading. If the jar uses lights, keep the power switch accessible so kids can turn it on and off independently.
6. Is this craft messy?
It can be, depending on how much glitter and loose material you introduce. Using trays or baking sheets under each workspace will help contain spills, and choosing washable markers and glue sticks can simplify cleanup.
Encouraging Ongoing Creativity
Pretend bug jars are rarely a one-time project. Once kids experience the fun of creating a tiny world in a container, they often want to explore new themes, colors, and stories.
- Invite children to make a “series” of jars, each dedicated to a different ecosystem.
- Rotate accessories so bugs migrate from one jar habitat to another in pretend “seasons.”
- Pair the craft with visits to parks or gardens where kids can observe real insects respectfully.
With each new jar, kids deepen their understanding of nature, strengthen creative skills, and build a collection of whimsical keepsakes that reflect their unique imaginations.