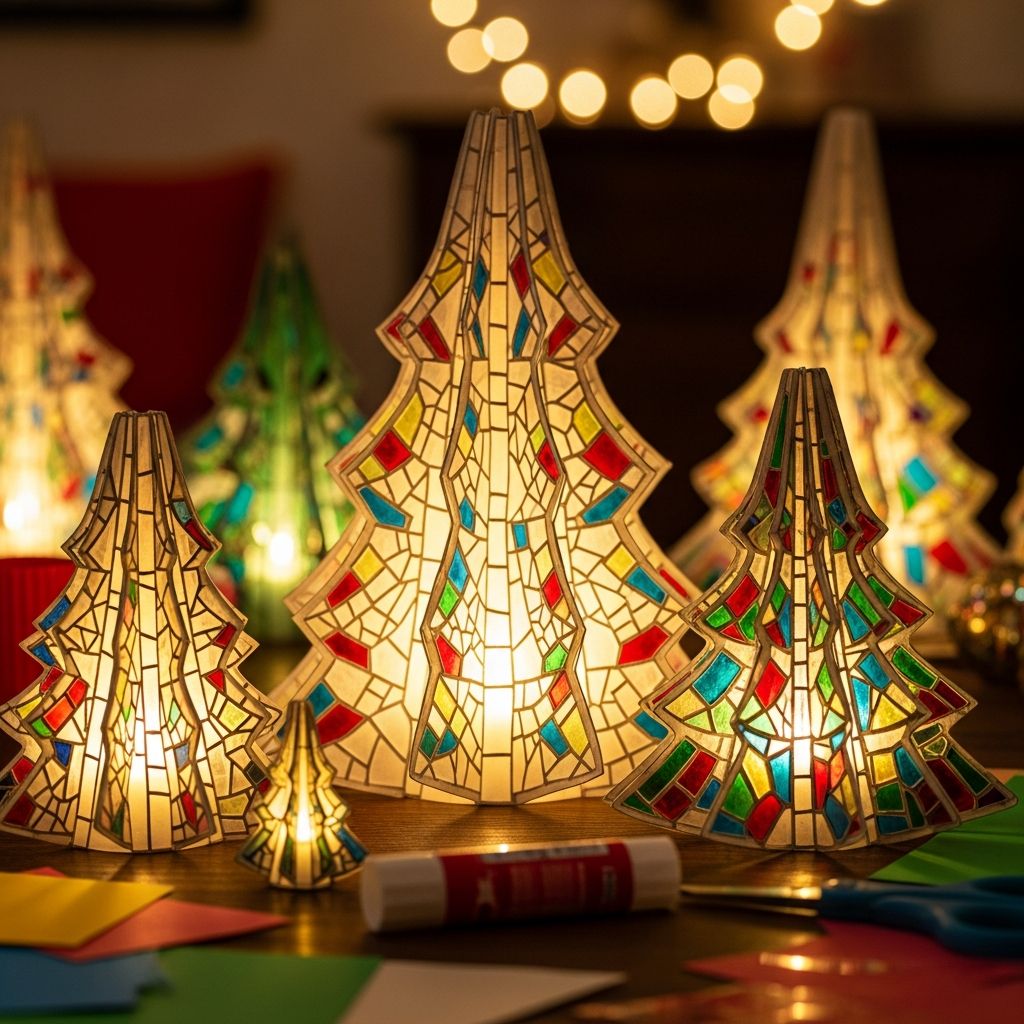
Paper “Stained Glass” Christmas trees are a simple, colorful craft that turns ordinary windows into glowing holiday scenes using only paper, tissue, and glue. They are perfect for families, classrooms, and anyone who wants an inexpensive, low-mess way to decorate for Christmas.
This guide walks through everything you need to know: materials, step-by-step instructions, design ideas, display options, and answers to common questions. The project is highly adaptable for different ages and skill levels, from preschoolers to crafty teens and adults.
Why Make Paper Stained Glass Christmas Trees?
Paper stained glass crafts mimic the look of real stained glass using thin, translucent materials that glow beautifully when placed in front of a light source. For Christmas trees, this effect is especially magical in sunny windows or by twinkling string lights.
- Uses inexpensive supplies that many households already have on hand.
- Provides a kid-friendly way to practice cutting, gluing, and color planning.
- Creates flat decorations that store easily for use year after year.
Recommended Materials and Tools
You can adapt this craft to whatever you have available, but the following list will give the cleanest and brightest results. Choose sturdy paper for the tree frame and translucent materials for the colorful “glass” sections.
Core Supplies
- Dark construction paper or cardstock (green, black, or dark brown for the frame)
- Colored tissue paper in assorted shades (greens, reds, yellows, blues, purples)
- Clear contact paper, laminating film, or thin baking parchment (optional but helpful)
- Child-safe scissors (or craft knife for adults)
- Glue stick or thin white craft glue
- Pencil, ruler, and eraser
- Hole punch and string, yarn, or ribbon (for hanging smaller trees)
- Transparent tape or removable adhesive putty (for window display)
Optional Embellishments
- Metallic paper or foil for stars and ornaments
- Glitter glue for extra sparkle
- Stickers, sequins, or adhesive gems
- White gel pen or paint marker for snowy details
Basic Concept: How the “Stained Glass” Effect Works
The craft is built around a paper frame shaped like a Christmas tree, with sections cut out to create open spaces. These openings are then backed with colorful tissue paper or other translucent materials, which light can shine through.
When the finished tree is taped to a window or placed in front of a bright lamp, the thin tissue paper glows, and the dark paper frame outlines the tree, creating a stained glass look without any glass or special paints.
Step-by-Step Instructions: Classic Window Tree
This version is designed to hang flat in a window like a suncatcher. Adjust the steps as needed depending on the age of the crafter and the tools you are comfortable using.
Step 1: Draw and Cut the Tree Frame
- Fold a sheet of dark construction paper in half vertically if you want a perfectly symmetrical tree.
- Draw half of a simple triangular Christmas tree along the fold, including a trunk if desired.
- Cut along the outline and open the paper to reveal the full tree shape.
- Draw interior shapes inside the tree: triangles, strips like garlands, circles for ornaments, or irregular “glass” panels.
- Carefully cut out the interior shapes, leaving a strong border around each opening so the frame stays sturdy.
Step 2: Prepare the Colored Inserts
- Cut tissue paper into small pieces: squares, rectangles, or random shapes work well.
- Plan your color scheme: traditional red and green, snowy pastels, or bold rainbow panels.
- Keep pieces slightly larger than the cut openings so they overlap the edges and glue securely.
Step 3: Attach the Tissue Paper
- Flip the tree frame over so you are working on the back.
- Apply a glue stick or a thin line of white glue around one opening.
- Press a piece of tissue paper over the opening, smoothing gently to avoid tearing.
- Repeat for all openings, mixing colors or creating patterns as you go.
- Trim any excess tissue that sticks out beyond the frame if you want a tidy edge.
Step 4: Seal and Strengthen (Optional)
- Place a sheet of clear contact paper or laminating film over the back of the tree.
- Smooth from the center outward to remove air bubbles.
- Trim carefully around the outer tree shape, leaving a thin border of clear film if you want extra durability.
Step 5: Display Your Tree
- Use transparent tape or removable putty to attach the tree to a sunny window.
- Experiment with different locations: front door sidelights, sliding glass doors, or a child’s bedroom window.
- Arrange multiple trees together at different heights to create a glowing forest effect.
Design Variations to Try
Once you understand the basic technique, it is easy to change the shape, size, and level of detail. Use these ideas as a starting point and customize them for your space and crafters.
Mini Ornament Trees
- Use small pieces of cardstock to create palm-sized tree frames.
- Punch a hole in the top and add ribbon to hang them on a Christmas tree or garland.
- Write names or short messages on the back for personalized keepsakes.
Layered Forest Scene
- Cut several trees in different sizes and shades of paper.
- Overlap them slightly on a large sheet of clear plastic or contact paper.
- Fill each tree with tissue paper, then hang the finished forest as a single large window panel.
Night Sky Background
- Mount one or more stained glass trees onto a larger sheet of blue tissue or translucent paper.
- Add yellow or white tissue stars, a crescent moon, or snowflakes around the trees.
- Display in a window where the entire panel can glow at once.
Skill Levels and Age Adaptations
One of the strengths of this craft is that it can be simplified or made more intricate depending on who is participating. Adjust cutting, gluing, and design complexity to keep the experience enjoyable and safe.
| Age Group | Adult Preparation | Child Tasks |
|---|---|---|
| Preschool (3–4) | Pre-cut tree frames and large openings; prepare tissue pieces. | Choose colors, place tissue on glue, gently press and smooth. |
| Early Elementary (5–7) | Lightly sketch tree outlines; assist with tricky cuts. | Cut simpler shapes, glue tissue, plan color patterns. |
| Older Kids & Tweens (8–12) | Provide tools and safety guidance. | Design their own tree shapes, detailed openings, and color layouts. |
| Teens & Adults | Optional: share pattern ideas or templates. | Create complex patterns, layered scenes, and coordinated decor sets. |
Holiday Learning Opportunities
Beyond the pretty results, these paper stained glass Christmas trees offer built-in learning moments for children. This makes them a popular choice for classrooms and homeschool activities during December.
- Fine motor practice: Cutting, gluing, and placing small pieces help build hand strength and coordination.
- Color exploration: Kids can see how overlapping tissue creates new shades when the sun shines through.
- Pattern and symmetry: Designing balanced trees introduces basic design principles in a hands-on way.
Display Ideas Around the Home
These flat, lightweight trees can brighten almost any spot where light can reach. Think beyond the main living room window and use them to spread holiday cheer all over the house.
- Line several trees along a kitchen window to create a cheerful backdrop for holiday baking.
- Attach a row of mini trees to a string to make a glowing paper garland.
- Place a tree in front of a battery-powered candle (never a real flame) for a gentle evening glow on a shelf.
- Use them as backdrops for holiday photo corners or classroom bulletin boards.
Safety and Mess-Management Tips
While this craft is generally low risk, especially with glue sticks and safety scissors, a few basic precautions will keep the experience safe and stress-free for everyone involved.
- Cover the work surface with newspaper or a reusable craft mat to catch glue and stray tissue.
- Use rounded-tip scissors for young children and supervise any use of craft knives by adults.
- Keep glitter, sequins, and very small embellishments away from toddlers who may put them in their mouths.
- Allow glued pieces to dry fully before taping them to windows to avoid slipping or tearing.
Eco-Friendly and Budget-Friendly Options
This craft is naturally thrifty, but it can be made even more sustainable by reusing household materials. You do not need to buy specialty supplies to enjoy a stained glass effect.
- Cut tissue paper from old gift bags and packaging instead of purchasing new sheets.
- Repurpose cardboard from cereal boxes for sturdier frames, painting the surface a dark color first.
- Use leftover clear plastic packaging in place of laminating film, making sure edges are smooth and safe.
- Collect offcuts of paper from other crafts and work them into your tree designs.
Common Mistakes and Easy Fixes
Even simple crafts can come with small challenges, especially when working with thin tissue and enthusiastic young helpers. The following troubleshooting tips will help keep your project on track.
- Tissue paper tears: Use a glue stick instead of liquid glue, and press gently from the center outward. If a tear appears, simply layer another piece of tissue over the top.
- Frame loses shape: Make sure the borders between openings stay thick enough, and avoid cutting too many thin lines through one area.
- Tree will not stick to the window: Wipe the glass first, then use fresh transparent tape or removable adhesive tabs at multiple points around the edge.
- Colors look dull: Choose brighter tissue shades and avoid stacking too many layers in one spot, which can block the light.
Frequently Asked Questions
How long do paper stained glass Christmas trees last?
With gentle handling and storage in a dry, flat container, these decorations can last for several holiday seasons. Tissue paper is delicate, so avoid crushing or folding the finished trees when you pack them away.
Can I do this craft without tissue paper?
Yes. You can use colored cellophane, thin wrapping paper, or even crayon-colored baking parchment for a similar translucent effect. Test any alternative material in a window to see how much light passes through before committing to a full project.
What if I do not have dark paper for the frame?
Lighter paper can still work, but the stained glass effect will be less dramatic. One option is to lightly paint or color the frame edges with dark marker or paint before adding the tissue, so the shapes stand out better against the light.
Are these projects suitable for large groups?
This craft adapts well to classrooms, scout troops, or community events. Prepare tree frames and pre-cut tissue pieces ahead of time, set up shared color stations, and display the finished trees together on big windows to create a collaborative winter mural.
Can I add lights directly behind the trees?
For safety, only use cool, low-heat light sources such as LED string lights placed behind or near the decorations. Avoid placing paper too close to hot bulbs or open flames, and never attach the trees to actual lighting fixtures that may heat up.
Bringing It All Together
Paper stained glass Christmas trees combine creativity, color, and holiday spirit in a project that almost anyone can enjoy. With simple supplies and a bit of imagination, you can fill your windows with glowing forests that make long winter days feel brighter and more festive.
Whether you craft a single tree with a young child or cover an entire wall of windows with a layered scene, the process is as meaningful as the finished decoration. Turn on some music, gather your supplies, and let each tree tell its own small story of the season.