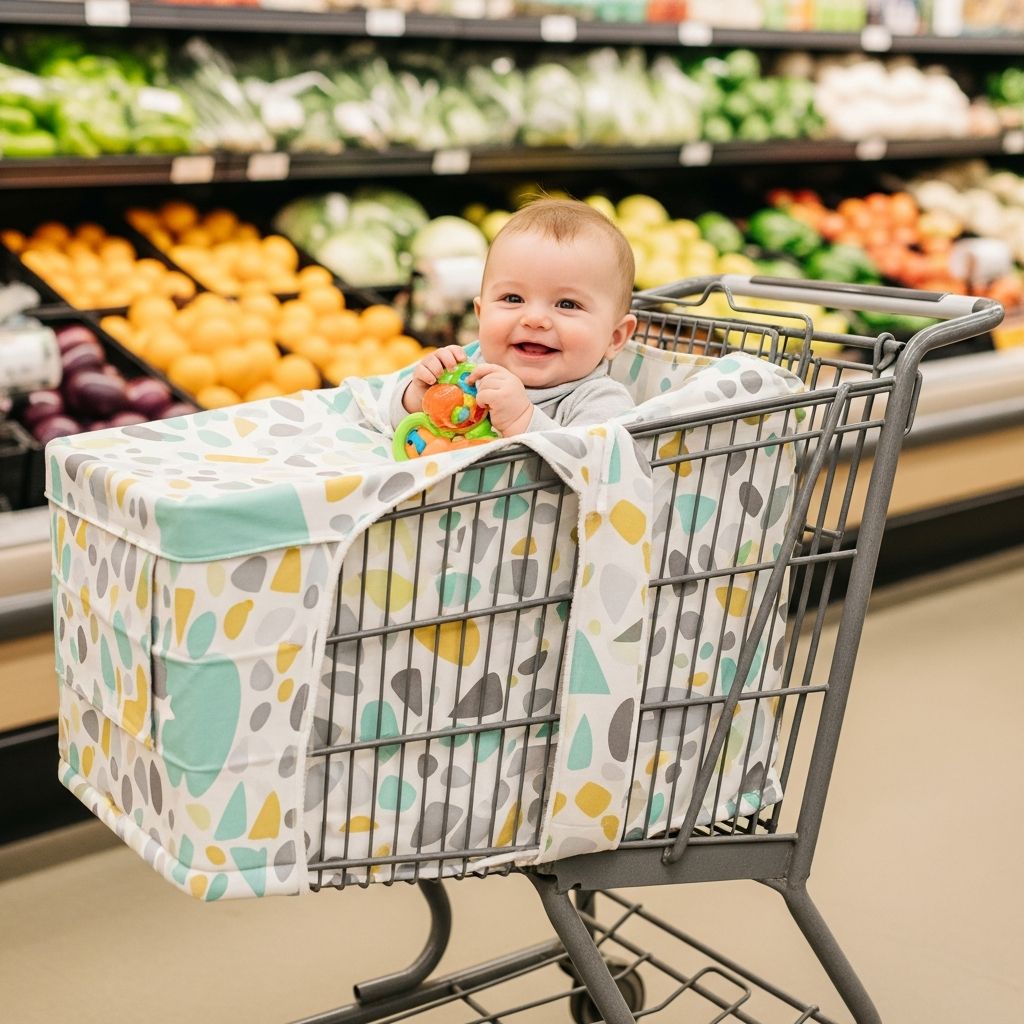
Outings with little ones often mean juggling groceries, snacks, and a wiggly baby while trying to keep them away from sticky, germy cart handles and rough plastic edges. A no-sew shopping cart cover offers a soft barrier between your child and the cart, providing comfort, warmth, and a bit more peace of mind—without requiring any stitching skills.
Why Make Your Own Cart Cover?
Store-bought cart covers can be pricey, bulky, or not quite the style or size you want. A homemade cover lets you control the fabric, fit, and features while staying on a budget. With a no-sew design, this project becomes approachable even for parents who have never used a sewing machine.
- Save money compared to many commercial cart covers.
- Customize colors and patterns to fit your taste.
- Wash and reuse easily after messy outings.
- Complete the project with only basic cutting tools.
Choosing the Right Fabric and Tools
The heart of this project is the fabric. Fleece is a popular choice because it is soft, warm, and does not fray when cut, which makes it perfect for no-sew projects. However, you can also use other stable, non-fraying fabrics if they are thick enough to provide a cushion and withstand frequent washing.
Suggested Materials
- One large piece of fleece or similar non-fraying fabric (approximately cart-sized, see below).
- Sharp fabric scissors or a rotary cutter and cutting mat.
- Measuring tape or a long ruler.
- Chalk or washable fabric marker for marking lines.
- Optional: fabric glue or fusible tape for extra reinforcement.
- Optional: ribbon or fabric strips for toy loops and fasteners.
Approximate Fabric Size Guide
Most standard grocery carts have a child seat area that fits within a medium rectangular piece of fabric. Exact carts vary, but you can use this guide as a starting point and adjust after measuring your local cart.
| Cart Area | Typical Width (side to side) | Typical Depth/Height |
|---|---|---|
| Seat base | 40–50 cm | 25–35 cm (front to back) |
| Seat back | 40–50 cm | 20–30 cm (upward) |
| Side flaps | 15–25 cm each side | Match seat depth |
For a universal fit, many parents choose a piece roughly the size of a small throw blanket. A rectangle somewhere in the range of about 115–140 cm by 115–140 cm typically offers enough coverage to line the seat, back, and sides with some extra overhang. Always measure your common carts first and adjust your fabric size accordingly.
Planning the Layout Before You Cut
Before cutting into the fabric, it helps to visualize where each part of the cart will contact the cover. Imagine your fabric as a map of the child seat: the center will be the seat base, while the top, bottom, and sides fold over the cart to create a soft envelope.
- Spread the fabric flat on a clean floor or large table.
- Mark the central area that will become the seat base.
- Identify where your child’s legs will pass through.
- Decide how much fabric should drape over the back and sides.
Taking a few minutes to plan prevents awkward leg openings or uneven coverage later. Using a tape measure and a bit of chalk, lightly sketch your layout on the wrong side of the fabric so any marks remain hidden once in use.
Step-by-Step: Creating Leg Openings
The most important structural detail is the leg openings. These must be large enough for your child’s legs to pass through comfortably, but not so large that there are big gaps around the thighs. The simplest approach is to cut two squares or rectangles in the seat area, spaced a few centimeters apart.
Marking the Leg Openings
- Fold the fabric in half widthwise to find the center line.
- Measure outward from the center line to place each leg opening symmetrically.
- Use chalk to trace two equal shapes (squares or circles) for the leg holes.
- Leave enough space between them to form a comfortable barrier between the legs.
As a general rule, many toddlers are comfortable with leg openings similar in size to a small dessert plate for circular holes, or roughly the width of their thigh plus some room for movement if you prefer square openings. Always err slightly smaller and enlarge if needed—once fabric is removed, it cannot be replaced.
Cutting the Openings Cleanly
- Use the sharpest part of your scissors and begin with a small starter cut.
- Cut slowly along your chalk lines, turning the fabric rather than the scissors.
- After cutting, test the openings by gently stretching them with your hands.
- If they seem too tight, trim a little more evenly all the way around.
Fleece will generally lay flat after cutting and will not unravel, making it well-suited to these raw leg openings. For extra neatness, you can add decorative fabric tape or no-sew binding products around the edges, but this is optional rather than essential.
Shaping the Sides and Back
Once your leg openings are in place, the rest of the project focuses on how the fabric drapes over the cart. The goal is to have enough coverage over the back, sides, and front bar so that the child primarily touches fabric, not bare metal or plastic.
Defining the Seat Base
- Place the center of the fabric (with leg openings) over a cart or a mock-up shape at home, such as a sturdy box.
- Allow the fabric to naturally fold where the seat changes from base to back and sides.
- Use pins or clips temporarily to mark those fold lines.
These folds indicate where the fabric needs to turn upward or downward when in use. Mark the fold lines lightly so that, when you remove the fabric from the cart, you can see where to trim excess bulk if desired.
Adjusting Length and Overhang
Too much fabric bulk can make the cover uncomfortable or difficult to install quickly. Trim down extreme excess while still leaving generous coverage. A bit of overhang is helpful because it allows you to tuck the fabric around native cart bars for added stability.
- Shorten overly long side flaps to avoid dragging on the floor.
- Trim the back panel to just cover the full height of the seat back plus a few extra centimeters.
- Keep the front edge long enough to fold over the cart handle or front bar.
Optional No-Sew Fringes and Ties
One advantage of fleece is the ability to create ties and decorative fringes simply by cutting parallel strips along the fabric edges. These strips can be knotted together to form a decorative border or used as functional ties to help secure the cover to the cart.
Creating a Knotted Fringe Border
- Decide how deep you want the fringe; many people choose around 5–8 cm.
- Mark a border line that distance from the edge all the way around.
- Cut evenly spaced strips from the edge up to the border line.
- Tie each strip in a simple knot to add weight and a finished appearance.
This border is decorative and can make the cover feel cozier, but it is not essential. If you prefer a more minimal look or want to save time, you can skip the knots entirely and leave the edges plain after trimming them neatly.
Making Functional Ties and Loops
- Cut a few longer strips of fleece or ribbon to use as ties.
- Attach them near the corners or along the sides of the cover using tight double knots or no-sew adhesives.
- Use these ties to secure the cover to cart bars or to create toy loops where rattles and teethers can be clipped.
Simple ties can help prevent the cover from sliding when your child shifts around and can also stop toys from hitting the floor. Just ensure that any ties are short enough and positioned so they do not become entanglement hazards.
Converting the Cover for Restaurant High Chairs
One of the most convenient aspects of this project is its versatility. With the right size and layout, the same cover can work both in shopping carts and in many restaurant high chairs. The leg openings remain useful, while the extra fabric drapes over hard wooden slats or plastic seats, adding comfort and warmth.
- Place the center of the fabric over the high chair seat.
- Feed the leg straps of the restaurant chair through the same openings, if safe and compatible.
- Tuck or tie extra fabric around the back and sides to keep everything stable.
Since high chairs come in many shapes, you might need to experiment the first few times to see exactly how your cover fits best. Over time, you will develop a quick routine for setting it up as soon as you arrive at a restaurant.
Practical Safety and Hygiene Tips
While a cart cover adds a soft and more hygienic surface, it is not a safety device or a replacement for cart straps and common sense. Always use the store’s safety belt, your own strap system if compatible, or a separate harness approved for this purpose. Never rely solely on the fabric to hold your child upright.
- Keep openings snug but not restrictive around your child’s legs.
- Ensure that no loose fabric droops near wheels or moving parts of the cart.
- Do not attach heavy toys or objects that could swing into your child’s face.
- Wash the cover frequently, especially after illness or messy spills.
For cleaning, most fleece covers can be machine washed on a gentle or regular cycle and dried on low or medium heat. Avoid fabric treatments that may irritate sensitive baby skin, and check after washing that no holes or tears have developed around the leg openings or ties.
Time-Saving Tips for Busy Parents
Parents often hesitate to start DIY projects because of time constraints. Fortunately, this no-sew cart cover can be made in a fairly short session once you have the materials ready. Breaking the process into steps makes it even more manageable.
- Day 1: Purchase fabric and tools, and wash the fabric.
- Day 2: Measure, plan your layout, and mark leg openings and edges.
- Day 3: Cut leg openings, trim sides, and add any fringe or ties.
Even if you choose to complete everything in a single afternoon, planning and washing the fabric early helps the project go smoothly. Using pre-printed grid mats or straight-edge rulers also speeds up measuring and cutting.
Simple Installation Routine at the Store
Once your cover is complete, it helps to have a consistent setup routine so you are not fumbling with fabric while your child grows impatient. Folding and storing the cover in a specific way can make installations faster and less stressful.
- Keep the cover folded with the leg openings on top so you can find them instantly.
- Lay the cover across the child seat area with the leg holes approximately where the existing cart openings are.
- Feed your child’s legs through and settle them onto the seat.
- Secure the cart belt over the cover, keeping it snug at the waist.
- Tuck extra fabric around the sides and over the front handle.
After a few trips, the process will become routine and may take only a minute or two from cart selection to buckling your child in.
Storage and Travel Ideas
A bulky cover that is hard to store is more likely to be left at home. Think about how you typically shop and travel so you can fold and store the cover in a convenient way. A simple roll-up method works for many families.
- Fold the cover in thirds lengthwise, with the soft side in.
- Roll from the back panel toward the front so the leg openings end up covered.
- Use a ribbon or built-in fleece tie to secure the roll.
- Keep the rolled cover in your car trunk, stroller basket, or diaper bag.
Consider making a small matching pouch from leftover fabric (using the same no-sew techniques) so that the cover stays clean in your bag and is easy to grab on the way into the store.
Frequently Asked Questions (FAQs)
Do I really not need any sewing at all?
For basic versions, you can complete the entire project with just cutting, tying, and optionally using no-sew fabric adhesives. Choosing a fabric that does not fray is the key to avoiding hems and stitched edges. If you later want to add details like pockets or decorative trims, you can always sew them on, but they are not required for a functional cart cover.
How do I make sure it fits different carts?
Carts can vary significantly in size between supermarkets, big-box stores, and warehouse clubs. To maximize compatibility, start with a rather generous piece of fabric and design the cover with flexible drape rather than a tight, tailored fit. Ties and tucks will help adapt the same cover to a variety of cart shapes while still keeping your child’s immediate area well covered.
Is fleece too warm for summer?
Fleece is warm and cozy, which is wonderful in cooler climates or in heavily air-conditioned stores. In very hot weather, you may prefer a lighter, breathable fabric that also resists fraying. Consider making two covers—one with fleece for cooler days and another with a lighter material for warmer months—so your child stays comfortable year-round.
Can I turn this into a gift?
Yes, a personalized cart cover can make a thoughtful baby shower or first birthday gift. Choose fabrics that match the family’s style, add a small name tag or monogram with fabric paint, and include a simple instruction card for care and use. The fact that the cover is handmade and practical adds a personal touch that many parents appreciate.
What if I do not have much crafting experience?
This project is well suited for beginners because it relies on simple straight cuts and basic measuring. The most important skills are patience and careful measuring rather than technical expertise. If you can follow a ruler and handle scissors safely, you are ready to make a functional and attractive shopping cart cover.
Final Thoughts
A no-sew shopping cart cover is a small project that can make a big difference in everyday errands with your baby or toddler. By investing a bit of time up front, you gain a washable, reusable barrier that makes carts and restaurant high chairs more comfortable and less intimidating to use. With customizable fabrics, optional decorative touches, and a flexible, forgiving design, this project is both practical and rewarding for new and experienced parents alike.