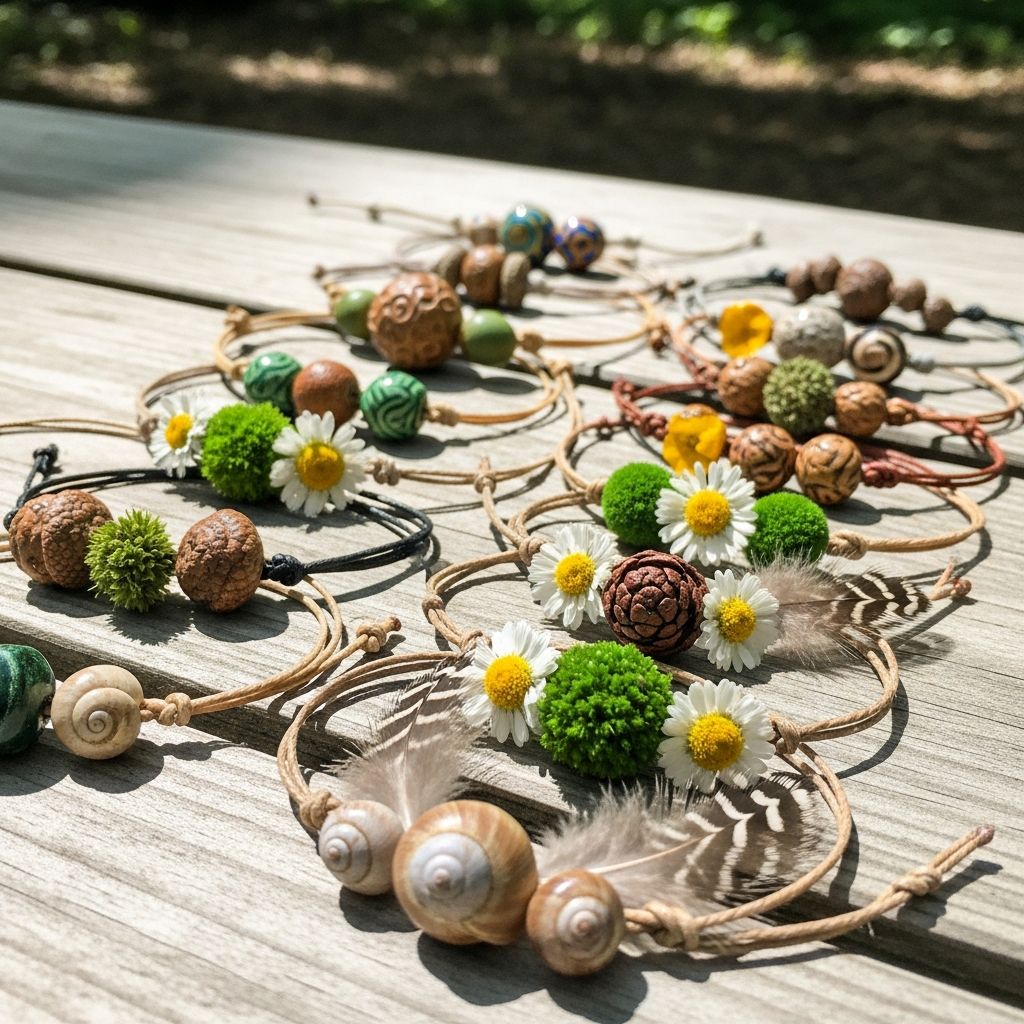
Nature walk treasure bracelets are simple, low-cost, and endlessly creative accessories that children can make while exploring the outdoors. This activity invites kids to collect small natural treasures and turn them into a bracelet they can proudly wear, all during a relaxed stroll in a park, garden, or neighborhood green space.
Why Nature Bracelets Make the Perfect Outdoor Project
A nature bracelet project blends art, outdoor play, and science learning into one easy activity that works in almost any season. Children stay motivated to walk farther and look more closely at their surroundings when they know they are “hunting” for special items to add to their wearable gallery.
Because the materials are light and inexpensive, this project is ideal for families, teachers, and caregivers who want an engaging activity that does not require a lot of preparation or cleanup. It is also highly adaptable for different ages, group sizes, and environments—from city sidewalks lined with tiny weeds to forest trails rich with leaves and seedpods.
Supplies You Will Need
Most of the basic supplies for nature walk bracelets are items you may already have at home. The rest comes straight from the environment, making the activity budget-friendly and spontaneous.
- Base material for the bracelet: Duct tape, masking tape, or clear packing tape works well because of its sticky surface and flexibility.
- Optional backing: Strips of lightweight cardstock or colored paper for extra sturdiness or to save the bracelet later.
- Safe scissors: Child-safe scissors for trimming tape or cardstock, used by an adult or responsible older child.
- Small container or bag: A paper bag, small basket, or reusable container for found treasures that are too large or heavy for the bracelet.
- Writing tools: Pencils or markers if you plan to label or record the items collected.
Optional extras such as ribbon, yarn, or stickers can be added after the walk to secure the bracelet or decorate the backing. These details are not required but can make the finished piece feel more special to children.
Planning a Child-Friendly Nature Walk
Thoughtful planning helps ensure that a nature walk bracelet outing feels fun rather than rushed or stressful. Choose a location that matches the age and stamina of the children participating, such as a backyard, a nearby park, a schoolyard, or a short trail.
- Check the weather: Mild temperatures and dry conditions make it easier for tape to stay sticky and for kids to move comfortably.
- Set expectations: Explain that only small, loose items on the ground or already shedding from plants should be collected, and living creatures should remain undisturbed.
- Define boundaries: Point out where kids can and cannot go so you can keep an eye on everyone while they explore at their own pace.
Planning also includes thinking about time. For younger children, 20 to 30 minutes of active exploring is usually enough, while older kids may enjoy a longer walk with more chances to compare and trade finds.
Safety, Respect, and Environmental Care
A nature walk bracelet is more enjoyable when safety and environmental respect are built into the project. Before heading out, remind children not to eat any berries, seeds, or plants they find, and to avoid touching unfamiliar plants that might cause skin irritation.
- Encourage kids to pick up only small amounts of each item, leaving plenty of leaves, flowers, and other resources for wildlife.
- Teach a simple rule: if you are not sure whether it is safe or allowed to take something, look at it closely, take a photo, or draw it later instead of collecting it.
- Choose soft, lightweight objects like petals, grass blades, feathers, and small leaves rather than heavy sticks or large stones that may fall off the bracelet.
Adults can quietly scan the area ahead of the group, steering children away from hazards such as thorny plants, deep water, or areas labeled as protected habitat where picking is not permitted.
Step-by-Step Guide to Making a Nature Walk Bracelet
The process of making a nature walk bracelet is straightforward, and children can participate in almost every step. Adjust the level of adult involvement based on the age and skill level of each child.
1. Prepare the Bracelet Base
Start indoors or near your starting point by cutting a length of tape or tape-backed cardstock slightly larger than the child’s wrist. If using tape alone, keep the sticky side facing out when you wrap it, then secure the ends together so it fits comfortably but is not tight.
- Allow enough space so the bracelet can later slide off the wrist without cutting the tape.
- For very young children, an adult can hold one end of the tape while placing it around the wrist to prevent it from sticking to itself too soon.
2. Begin the Walk and Start Collecting
Once bracelets are in place, encourage children to move slowly and look closely at plants, rocks, and the ground. Whenever they find a small, safe item that they like, they can press it directly onto the sticky surface of the bracelet.
- Help children gently press petals and leaves flat so they adhere better to the tape.
- Remind kids to leave room on the bracelet for additional treasures they may find later on the walk.
- If an item is too heavy or large, place it in the collecting bag to examine later instead of forcing it onto the bracelet.
3. Fill in the Bracelet Design
As the bracelet starts to fill up, some children like to create patterns, such as alternating colors or arranging items from smallest to largest. Others simply enjoy adding pieces randomly, which also creates a charming and unique design.
- Ask open-ended questions like “Which color appears most on your bracelet?” or “How does this leaf feel compared to that one?” to encourage observation.
- If the sticky surface becomes too full, you can gently overlap items, creating layers of texture and color.
4. Finish and Gently Remove the Bracelet
When the walk is complete or the bracelet is full, slip it off the child’s wrist. If it is too snug to slide off, an adult can cut through the tape at one point and later attach it to paper or retape the ends together.
- Optionally place a second strip of tape over the back of the bracelet to seal in delicate items and make the piece more durable.
- If you plan to save the bracelet as a keepsake, press it firmly onto a strip of cardstock so it lies flat and is easier to store or display.
Types of Natural Treasures to Look For
Part of the joy of a nature bracelet is that it will look different every time you make one. The specific items available depend on the season, climate, and location of your walk, giving children a reason to repeat the activity throughout the year.
- Colorful petals from fallen flowers or blossoms that are already coming apart.
- Small leaves in a variety of shapes, especially those with interesting edges or veins.
- Thin blades of grass or clover that can bend without breaking.
- Tiny feathers, delicate seedpods, or bits of soft moss found on the ground.
- Miniature twigs, bark flakes, or empty nutshells that are lightweight enough to stay in place.
Children often enjoy comparing what they find with siblings or friends, noticing differences in color, size, and texture. These casual comparisons naturally introduce vocabulary related to nature, such as “smooth,” “rough,” “pointed,” or “speckled.”
Learning Benefits Hidden in a Simple Craft
While nature walk bracelets feel like play, they support several important areas of development. The process encourages children to observe details, practice fine motor skills, and engage in sensory exploration, all in a relaxed outdoor setting.
| Skill Area | How the Bracelet Activity Helps |
|---|---|
| Observation and curiosity | Children slow down and notice small patterns, colors, and textures they might otherwise ignore. |
| Fine motor control | Peeling petals, picking up tiny leaves, and pressing them onto tape strengthens small muscles in hands and fingers. |
| Language development | Describing items (soft, prickly, smooth, bright) introduces new vocabulary and encourages conversation. |
| Scientific thinking | Sorting, grouping, and comparing items offers an early introduction to classification and basic scientific observation. |
| Creativity and self-expression | Every bracelet becomes a unique piece of art that reflects the choices and style of the maker. |
These benefits make nature bracelets well suited for classrooms, scouting groups, and homeschool activities, not just weekend family outings. Adults can easily adjust the complexity of discussion and follow-up tasks to match the age group.
Ideas for Extending the Activity After the Walk
Once the bracelets are complete, there are many ways to extend the learning and fun. These follow-up activities help children reflect on their experience and deepen their connection to local plants and seasonal changes.
- Nature journals: Have children sketch their bracelets and label the items they remember, such as “yellow flower petal” or “oak leaf.”
- Color sorting games: Ask kids to count how many pieces on their bracelet are green, brown, red, or yellow, then compare results with others.
- Seasonal comparison: Make bracelets in different seasons and save them on cards to compare changes in available colors and materials.
- Storytelling prompts: Invite children to invent a short story about a character who wears a magic nature bracelet that gives special powers linked to each object.
These simple additions transform a single craft into an integrated learning experience that can include art, writing, math, and science.
Variations to Keep the Craft Fresh
Once your family or class has tried basic nature bracelets, it can be fun to experiment with small variations. These changes keep the activity feeling new and give children fresh reasons to explore familiar paths or gardens.
- Theme bracelets: Choose a focus such as “all shades of green,” “things that feel rough,” or “items from the ground only.”
- Team designs: Pair children up so they build one bracelet together, taking turns choosing objects to add.
- Arm bands or crowns: Use longer strips of tape to create wider bands or simple crowns decorated entirely with natural materials.
- Color challenges: Give each child a color to “collect” and see how many variations of that color they can find in nature.
- Photo bracelets: If collecting is not allowed in a certain area, take close-up photos of potential bracelet items and later print or draw them to create a “paper version” of the bracelet indoors.
Changing the rules slightly motivates kids to pay attention in new ways and builds excitement for return visits to the same outdoor spaces.
Tips for Group Leaders, Teachers, and Caregivers
Nature bracelet walks work well with small or large groups when a few organizational details are considered in advance. With multiple children, structure helps keep everyone engaged and safe while still leaving room for exploration.
- Prepare bracelet bases before leaving the classroom or meeting point to avoid delays once you are outdoors.
- Divide kids into small groups, each supervised by an adult or older helper, especially in busy parks or on trails.
- Set a clear time limit, such as “We will collect for 20 minutes and then meet back at the big tree.”
- Have a simple cleanup plan for discarding leftover tape scraps ethically and safely at the end of the activity.
Group leaders can also integrate the project into larger themes such as plant life cycles, habitats, seasons, or local ecology, using the bracelets as a tangible reminder of what children observed.
Frequently Asked Questions About Nature Walk Bracelets
How long does a nature bracelet last?
The bracelet is most vibrant on the day it is made, since petals and leaves tend to wilt or dry out. If you attach the bracelet to cardstock and store it flat in a dry place, it may keep its basic shape and color for several weeks, though it will gradually become more brittle and faded.
Can this activity be done in winter?
Yes. In colder months, the items on the bracelet will be different, but children can still collect small evergreen needles, seedpods, bits of bark, or dried grasses. Snowy areas may require shorter walks and warmer clothing, but the core concept remains the same.
What if local rules say we cannot pick plants?
In protected parks or nature reserves, focus only on loose items already on the ground and keep collection to a minimum. Alternatively, treat the activity as a “looking bracelet” by having children point to objects they would add and then sketch or photograph them instead of picking them.
Is it suitable for toddlers?
Very young children can enjoy wearing a bracelet and pointing out objects, but close adult supervision is essential to prevent them from putting items in their mouths or pulling at the tape. For toddlers, shorten the walk, use larger objects that are easier to handle, and focus on sensory experiences rather than filling the bracelet completely.
How can I make the bracelet more durable?
To strengthen the bracelet, press a second piece of tape over the first so the natural items are sealed between two layers. You can then punch small holes at the ends and tie them with ribbon or yarn, or mount the sealed strip onto a piece of cardstock for long-term display.
Nature walk treasure bracelets are an approachable way to weave creativity and curiosity into everyday time outside. With minimal supplies and flexible steps, this project can become a beloved family ritual or a recurring classroom activity that changes with every season and every new place you explore.