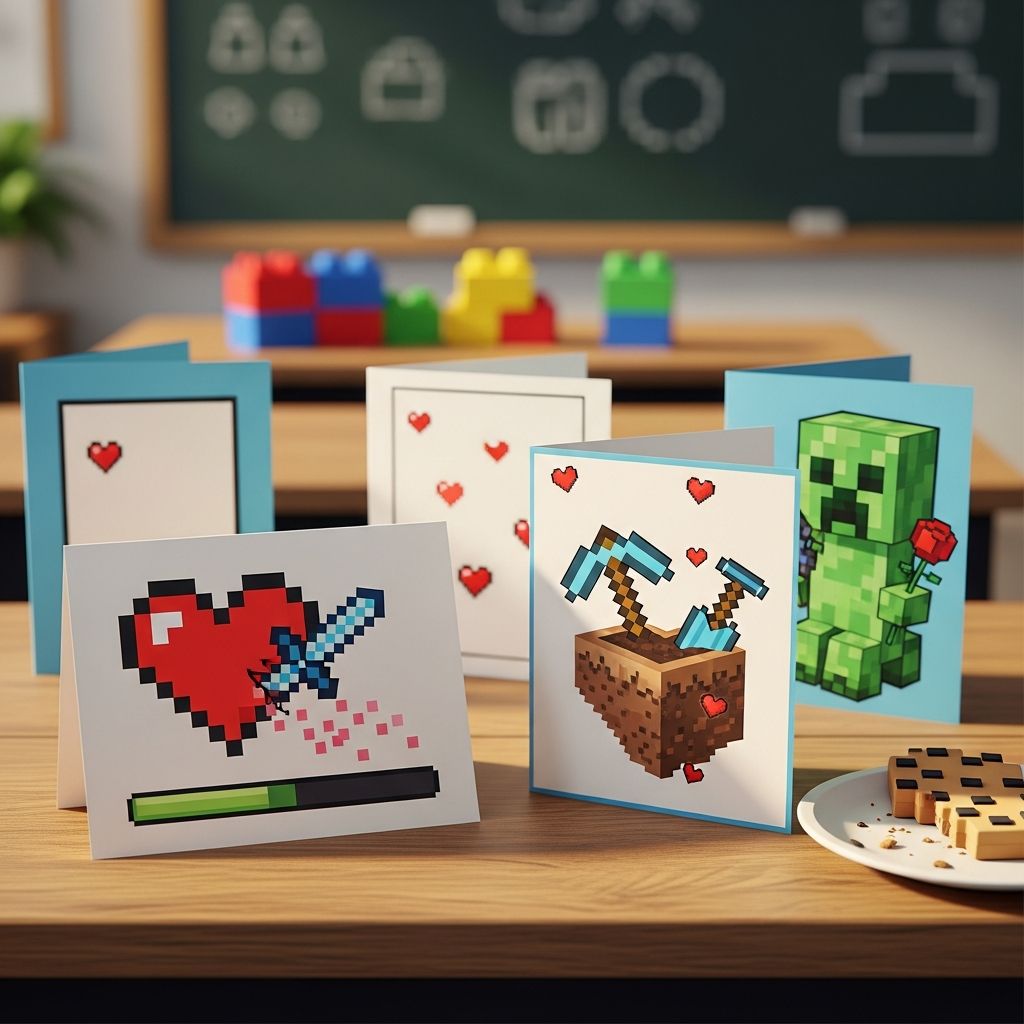
Valentine’s Day in elementary school has evolved far beyond store-bought cards, and game-themed designs are now at the top of many kids’ wish lists. Minecraft-inspired Valentines let children share their love of the game while also handing out something fun, colorful, and candy-friendly to their classmates.
Why Kids Love Game-Inspired Valentines
Minecraft-style Valentines tap into the pixelated world that many kids already know, making the exchange feel more personal and exciting than generic hearts and roses. The blocky art style is also forgiving and simple, which makes these projects approachable even for beginners.
Parents appreciate that Minecraft-inspired designs can be adapted for candy-free options as well as sweet treats, so the cards can work for allergy-aware classrooms and different school policies. The end result is a balance of playful design and practical planning.
Planning Your Classroom Valentine Project
Before cutting the first piece of paper, it helps to think through the scale of your project, any school rules about candy, and how much time your family actually has. A little planning at the start prevents a late-night crafting marathon on February 13.
Ask the teacher how many students are in the class, whether candy is allowed, and if cards need to arrive in a bag or box. With those details, you can choose a project that fits your schedule and your child’s enthusiasm level.
Key Decisions to Make
- Theme focus: Creepers, hearts, tools, or a mix of Minecraft-inspired icons.
- Candy vs. no candy: Decide early so you can design space for attaching treats or small toys.
- Printed vs. hand-drawn: Younger kids may enjoy coloring while older kids may prefer clean, printed graphics.
- Time commitment: Reserve more detailed designs for smaller classes and quicker templates for bigger ones.
Basic Supplies You Will Need
Most Minecraft-inspired Valentines start with simple craft staples you may already have at home. Using square and rectangular shapes keeps the look blocky and on-theme without needing advanced drawing skills.
Choose colors that echo grassy landscapes, stone blocks, and bright hearts, then mix in black accents for bold pixel outlines. This palette instantly signals a Minecraft feel even without using any copyrighted images.
| Item | Suggested Colors | How It Helps |
|---|---|---|
| Cardstock or construction paper | Green, brown, gray, red, white, black | Forms sturdy card bases and pixel-style layers. |
| Adhesives | Clear glue, glue sticks, or double-sided tape | Secures layers, candy, and labels without mess. |
| Cutting tools | Scissors or a paper trimmer | Helps create neat squares and rectangles quickly. |
| Markers or gel pens | Black, silver, metallic colors | Adds borders, pixel outlines, and kid signatures. |
| Optional extras | Mini candies, washi tape, foam dots | Elevates the cards with dimension and treats. |
If you own a home printer, you can design basic pixel grids, print them on white cardstock, and let your child color them in. This hybrid approach keeps the layout uniform while giving kids creative control over final colors and faces.
Designing Pixel-Style Valentine Cards
Instead of copying any specific Minecraft character, think in terms of pixel blocks, bold squares, and simple faces. Hearts, cubes, and pickaxe-inspired shapes can all be built from small squares arranged in a grid.
Start with a square or rectangle as the main card base, then layer smaller squares in a checkerboard pattern to echo the blocky, digital aesthetic. Monochrome variations, such as multiple shades of green or red, make the cards look more textured and game-like.
Simple Pixel Layout Ideas
- A green card base with darker green and black squares clustered into a face-like pattern.
- A gray stone-style card with a red and white pixel heart centered in the middle.
- A long, narrow card arranged like a vertical stack of blocks with a heart at the top.
- A two-tone card split horizontally, resembling grassy ground on top of dirt.
For a cohesive classroom set, choose one layout and vary only the colors or small details. This makes mass production much easier while still allowing your child to personalize each card with different shades or doodles.
Incorporating Candy and Small Treats
Adding candy or tiny toys turns a simple card into a mini gift, but it is important to do this in a way that does not crush the paper or fall off in backpacks. Lightweight treats with flat packaging usually attach best and travel well.
If the school has strict guidelines, consider non-food options such as stickers, erasers, or temporary tattoos and design the card with a little slot or pocket to hold them. This keeps the card useful even after the Valentine’s party ends.
Attachment Ideas
- Use two small strips of washi tape to secure flat candy wrappers across the front of the card.
- Create a small paper band and glue only the ends, forming a loop to slide a lollipop through.
- Stick foam glue dots on the back of mini toys so they pop off easily without tearing the card.
- Cut tiny slits in the card and weave in pencils or glow sticks as candy-free alternatives.
Step-by-Step: Easy Pixel Heart Card
This simple project works well for a large classroom because each card follows the same basic pattern. Children can help cut squares, place colors, and sign their names, turning the process into an afternoon craft session rather than a rushed chore.
The directions below describe one basic version, but you can easily adapt colors, card sizes, and the placement of treats to match your child’s preferences.
- Create the base: Cut a piece of cardstock to roughly the size of a standard index card, then fold it in half if you want a top-opening card.
- Mark a light grid: With a pencil, lightly sketch a grid of equal squares on the front. Four squares across and four squares down is usually enough for a simple heart shape.
- Cut pixel squares: From red and pink paper, cut tiny squares that match the grid size. Cut extra so kids can experiment with patterns.
- Arrange the heart: Lay the colored squares in a heart shape on top of the penciled grid before gluing, adjusting until you like the look.
- Glue in place: Stick down each square, leaving a narrow gap between them to keep the pixel effect visible.
- Add outlines: Use a black marker to draw a thin border around the heart or the entire card for a digital, screen-like frame.
- Attach treats: Tape a small candy or pencil along the bottom edge, leaving room for the child to sign their name.
- Personalize: Inside the card, your child can write a short note or simply add a blocky doodle and their name.
Time-Saving Tips for Busy Parents
Turning out 20 or more cards can be intimidating, but small adjustments streamline the process without sacrificing charm. Batch tasks wherever possible so you are not switching tools and supplies too often.
Keep the design consistent for all classmates and let your child add personality through color choices and signatures. This approach prevents one elaborate card from becoming the standard for the rest.
- Pre-cut card bases and pixel squares a day or two before crafting with your child.
- Use a paper trimmer for straight cuts so squares align neatly without much effort.
- Design a single layout and repeat it, changing only colors or candy types.
- Set a clear stopping time so the project stays fun rather than turning into a late-night scramble.
Keeping Cards Safe and Classroom-Friendly
Durability matters when cards are transported in backpacks, dropped on desks, and shuffled through by excited kids. Using thicker paper and secure adhesives helps the cards arrive intact and presentable.
For younger children who may be rougher with their Valentines, avoid delicate elements such as loose glitter, dangling charms, or tiny parts that can detach easily. Sturdy, flat designs tend to survive the party best.
Practical Classroom Considerations
- Skip loose glitter and confetti that can spill across desks and floors.
- Keep any 3D elements low-profile so cards stack easily for transport.
- Clearly label each card with “From” and optionally “To” for smooth distribution.
- Place finished cards in a large zip bag or small box labeled with your child’s name.
Fun Ways to Display Minecraft-Inspired Valentines
Beyond handing out cards at desks, you can turn the exchange into a mini event by using themed bags or boxes for collecting Valentines. Simple cardboard boxes decorated with block-like patterns instantly match the pixel look.
Your child can help design a personal Valentine holder using the same color palette as their cards, which makes the entire project feel cohesive and intentional. After the holiday, these boxes can double as storage for small toys or craft supplies.
- Cover a shoe box in green paper, then add darker squares for a pixel-style pattern.
- Use brown paper to mimic stacked blocks and add a large red pixel heart on one side.
- Cut a rectangular slot on top sized for standard cards before decorating.
- Add your child’s name in a simple, block-style font on the front of the box.
Printable and Hybrid Ideas (Without Copying Official Art)
If drawing by hand is not your family’s favorite activity, you can design simple, original pixel patterns in any basic graphics program and print them on cardstock. Focus on generic squares, hearts, and abstract block arrangements rather than direct replicas of specific game assets.
A hybrid method works well for many families: print a repeating pixel background, then let kids glue on extra paper squares, candy, or name tags. This preserves the charm of handmade cards while minimizing the most tedious steps.
Frequently Asked Questions
How do I avoid copyright issues with game-inspired Valentines?
Stick to generic pixel shapes, hearts, and blocky patterns instead of copying official characters, logos, or artwork. Use the overall aesthetic as inspiration, but keep the designs and wording completely your own.
What if my child’s school does not allow candy?
You can still use the same card designs and attach pencils, mini erasers, stickers, or temporary tattoos in place of sweets. Just adapt the layout so there is a space or loop to hold the non-food item.
How many cards should we make?
Ask the teacher for an updated class list and always create a few extra cards in case of new students or last-minute changes. Having spares on hand prevents awkward situations where someone is left out.
Can younger kids really help with these projects?
Yes, younger children can press glue sticks, place pre-cut squares, and sign their names with guidance. Give them the simpler tasks while an adult or older sibling handles cutting and layout.
How far in advance should we start?
Beginning a week or two before the classroom party keeps the project relaxed and fun. Working in short sessions over several days helps kids stay engaged without getting overwhelmed.
Making Valentine Crafting a Memory, Not a Chore
Minecraft-inspired Valentines offer a playful way for kids to bring a favorite game into real life while sharing kind messages and little treats with classmates. The pixel style is wonderfully forgiving, which encourages creativity instead of perfectionism.
By planning ahead, using simple supplies, and choosing a repeatable design, you can turn what might have been a last-minute scramble into a cozy, shared craft activity. The cards will be a hit at school—and the time spent making them together may become your family’s favorite Valentine tradition.