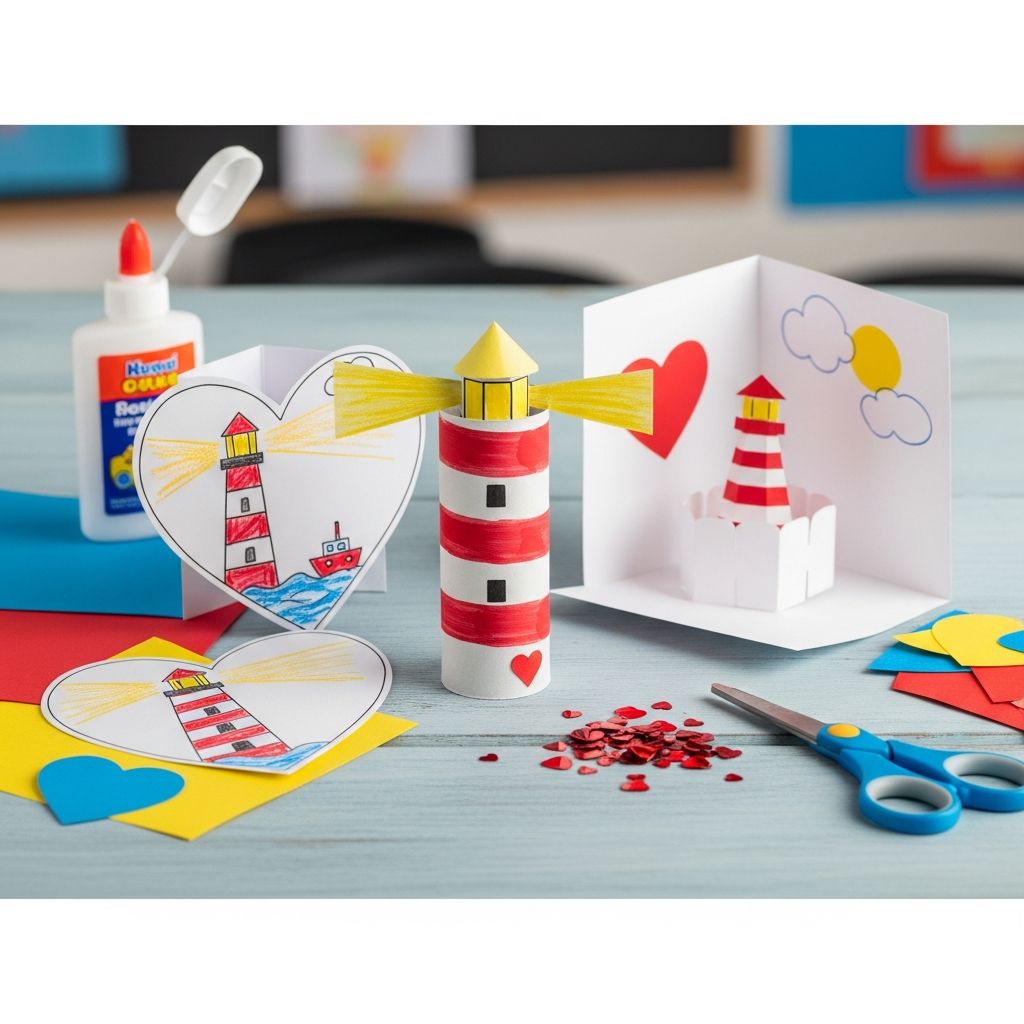
Classroom Valentines do not have to be store-bought cards with the same cartoon characters everyone has seen for years. A lighthouse-themed Valentine project gives kids the chance to create something three-dimensional, whimsical, and memorable that quite literally “shines” on friends and classmates. This guide walks through everything needed to plan, build, and share lighthouse Valentines, from materials and steps to classroom management and fun variations.
Why Choose a Lighthouse Valentine?
Lighthouses are powerful symbols of guidance, hope, and friendship, which makes them an especially charming theme for Valentine’s Day. Instead of focusing only on hearts and candy, this project lets kids talk about shining kindness, looking out for friends, and being a bright spot in someone’s day.
For adults, a lighthouse Valentine is appealing because it is customizable; it works with candy or small trinkets, can be scaled for one child or an entire class, and can be adapted for different age groups with minimal changes.
Planning Your Lighthouse Valentine Project
A little planning before the glue and paper come out will save frustration later. Decide whether the project is for home use (a child making a set for classmates) or for a classroom activity where every student will make one or two lighthouses. Clarify these basics before you shop:
- How many Valentines are needed (class size plus extras)?
- Will candy be included, or only paper and small non-food treats?
- How much time is available for the craft session (one class period, a party station, or multiple days)?
- What adult help is available for cutting, gluing, and cleanup?
Core Supplies and Optional Extras
Most lighthouse Valentines can be made from simple craft and household materials. Adjust colors and shapes as needed, but the following list offers a reliable starting point.
Basic Materials
- Sturdy cardstock or construction paper in red, white, blue, and any accent colors
- Small round or cone-shaped candy (or another lightweight treat or trinket for the “light” at the top)
- Clear tape, double-sided tape, or a glue stick
- Child-safe scissors
- Washable markers, crayons, or colored pencils
- Ruler for measuring strips and borders
Fun Extras
- Gold or silver foil paper for the lantern room and trim
- Glitter glue to add sparkle around windows or waves
- Small adhesive gems or sequins to represent shining light
- Tiny heart stickers for simple decoration that kids of all ages can manage
- Mini LED tea lights (battery-operated) for an extra-special glowing version
Designing the Lighthouse Shape
A lighthouse Valentine can be as simple or as detailed as you like. For young children, a straight cylinder or a stack of paper rectangles is easiest. Older kids can experiment with tapered towers, stripes, and tiny windows. Introduce the idea by showing a few pictures of real lighthouses so kids notice details like the balcony, lantern room, and stripes.
To keep things manageable, consider choosing one base design for the whole group and letting children customize colors and decorations on top of that shared template.
Step-by-Step: Simple Standing Lighthouse Valentine
This version stands upright on a desk and can hold a small treat at the top. The steps are written in a way that a teacher or parent can read aloud and model, while kids follow along.
Step 1: Create the Tower
- Cut a rectangle of cardstock roughly the width of a small cup and tall enough to make a tower (for most classroom purposes, 10–12 cm tall works well).
- Decorate the rectangle before rolling it; horizontal stripes, windows, and doors are easier to draw on a flat surface.
- Roll the rectangle into a cylinder and secure the overlapping edge with tape or glue, pressing from the inside to keep it neat.
Step 2: Add the Lantern Room
- Cut a narrow strip of contrasting paper to form a band around the top of the tower; this can represent railings or the base of the lantern room.
- Wrap this strip around the top of the cylinder and fasten it.
- If using candy or a non-edible trinket as the “light,” attach it carefully on top with tape or a small dot of glue, leaving the wrapper intact.
Step 3: Build the Base and Waves
- Cut a circle or square of cardstock slightly larger than the bottom of the tower to serve as a base.
- Glue or tape the tower onto the base so it can stand independently.
- Use blue paper scraps or markers to draw waves, rocks, or a shoreline around the base for extra detail.
Step 4: Add the Message
- On a small heart-shaped or rectangle tag, write a short Valentine message and the recipient’s name.
- Punch a hole in the tag and tie it around the lighthouse with a piece of string or ribbon, or tape the tag directly to the base.
- Encourage kids to personalize messages while keeping them kind and classroom-friendly.
Alternative Version: Flat Lighthouse Card
If three-dimensional projects are not practical for your space, a flat lighthouse card is a great alternative. It fits easily into backpacks and can be tucked into standard classroom Valentine boxes. This version also uses less paper and storage space before the big exchange day.
- Cut a tall rectangle for the tower and a smaller rectangle for the lantern room.
- Glue the smaller rectangle on top of the tall one, then add a triangle roof.
- Attach the lighthouse to a larger card base to leave room for a written message and the child’s name.
- Draw beams of light spreading from the lantern room, adding hearts or stars at the ends of the beams.
Classroom vs. At-Home Crafting
The same project looks different in a classroom than it does at a kitchen table. At home, a child can work slowly, try multiple designs, and add more fragile embellishments. In the classroom, the focus is on efficiency, safety, and shared supplies.
| Setting | Best Features to Emphasize | Helpful Adjustments |
|---|---|---|
| Classroom | Simple shapes, pre-cut pieces, minimal drying time | Limit glitter, offer ready-made tags, create stations for each step |
| Home (single child) | Detailed decoration, trial and error, custom messages | Experiment with lights, heavier cardstock, and added textures |
| Small group or party | Social interaction, shared ideas, creative variation | Prepare templates, assign a drying area, label projects by name early |
Tips for Working With Different Age Groups
Match the project to the fine motor skills and attention span of the children involved. Here are age-based suggestions to keep everyone engaged and successful.
- Preschool: Offer pre-rolled towers or thick paper tubes; let them decorate with stickers and large markers rather than intricate cutting.
- Early elementary: Allow students to cut rectangular towers and simple roofs on their own; emphasize pattern-making with stripes and windows.
- Older elementary and up: Challenge kids to design different lighthouse styles, add dimensional details, or research a real lighthouse to model their design on.
Safe and Inclusive Treat Ideas
Food allergies and classroom policies vary, so it is wise to check guidelines before choosing treats. The lighthouse concept works well with or without candy, which makes it easy to adjust as needed.
- Use wrapped chocolates or small hard candies only where permitted by the school.
- Swap sweets for mini erasers, stickers, or small pencils placed at the top of the lighthouse or taped to the base.
- If food is not allowed at all, consider writing a positive “light-themed” affirmation in the lantern room instead of adding a physical treat.
Organizing a Lighthouse Valentine Station
For classroom parties or large groups, a station-based approach reduces chaos and waiting time. Set up separate spots for decorating towers, assembling bases, attaching treats, and writing names. Have a tray or box at each station with only the supplies needed so kids do not have to carry everything around.
Color-coding can help: for example, keep all cutting tasks at a “blue” table, all gluing at a “red” table, and all writing at a “green” table. When it is time to rotate, call colors instead of steps so kids remember where they are headed next.
Encouraging Creativity and Personal Messages
A lighthouse Valentine is more meaningful when it reflects a child’s personality. Encourage kids to choose their own color combinations, add special symbols, or draw scenes around the lighthouse, such as starry skies or friendly sea creatures. The goal is variety, not matching perfection.
For written messages, offer a few sample sentence starters on the board, but let children finish the phrases themselves. This helps them feel ownership of what they are giving their classmates while staying age-appropriate and kind.
Displaying and Delivering the Valentines
Once the lighthouses are complete, the way they are displayed can become part of the celebration. A teacher might create a paper ocean on a windowsill and line the lighthouses along it, or a parent might place them around a centerpiece on the dining table for a family Valentine dinner.
For classroom exchanges, consider assigning each child a section of the room or a labeled bag, then have students walk their lighthouses around, “shining” kindness as they deliver. This makes distribution feel like a small procession rather than a rushed handoff.
Cleaning Up Without Losing Pieces
Crafts with multiple small parts can easily turn into a clean-up headache. To avoid missing lighthouses or scattered treats, collect completed projects on a single labeled table or shelf as soon as each child finishes. Provide paper plates or cardboard squares with names written ahead of time to keep structures from sticking together.
When using glitter, sequins, or tiny gems, place a tray beneath the work area so stray bits are caught and can be poured back into a container or disposed of cleanly. Assign a few helpers to wipe tables and check the floor for stray candy or embellishments before everyone leaves.
Frequently Asked Questions
How long does a lighthouse Valentine take to make?
Most children can complete a simple standing lighthouse in 20–30 minutes if the pieces are prepared ahead of time. Allow extra time for decorating, writing messages, and moving between stations if working in a classroom setting.
Can this project work without any candy?
Absolutely. The lighthouse design stands on its own as a decorative Valentine, and the “light” can be represented with drawings, stickers, foil paper, or a small non-food trinket instead of candy.
What if my class has a wide range of skill levels?
Prepare two versions: one with pre-cut, pre-rolled pieces for students who need more support, and a more open-ended design challenge for children who are ready to cut, measure, and decorate independently. Mixing both options in the same room works well as long as expectations are clearly explained.
How should finished lighthouses be transported home?
Because the project is three-dimensional, the safest method is to place each lighthouse on a flat piece of cardboard or in a shallow box. If backpacks are the only option, encourage students to hold their Valentine in their hands until they meet a caregiver who can carry it for the rest of the journey.
Can older kids adapt this into a more advanced project?
Yes. Older students might research real lighthouses and recreate their colors and shapes, add paper engineering elements like opening doors, or wire in a small, safe LED and battery to make the lantern really glow. The same basic idea becomes a gentle introduction to design and simple engineering concepts.
With thoughtful planning and a little imagination, lighthouse Valentines can turn an ordinary classroom exchange into a memorable, hands-on celebration of kindness and creativity. Whether made at home with one child or in a bustling classroom full of students, each tiny lighthouse becomes a reminder that even small gestures of friendship can brighten someone’s day.