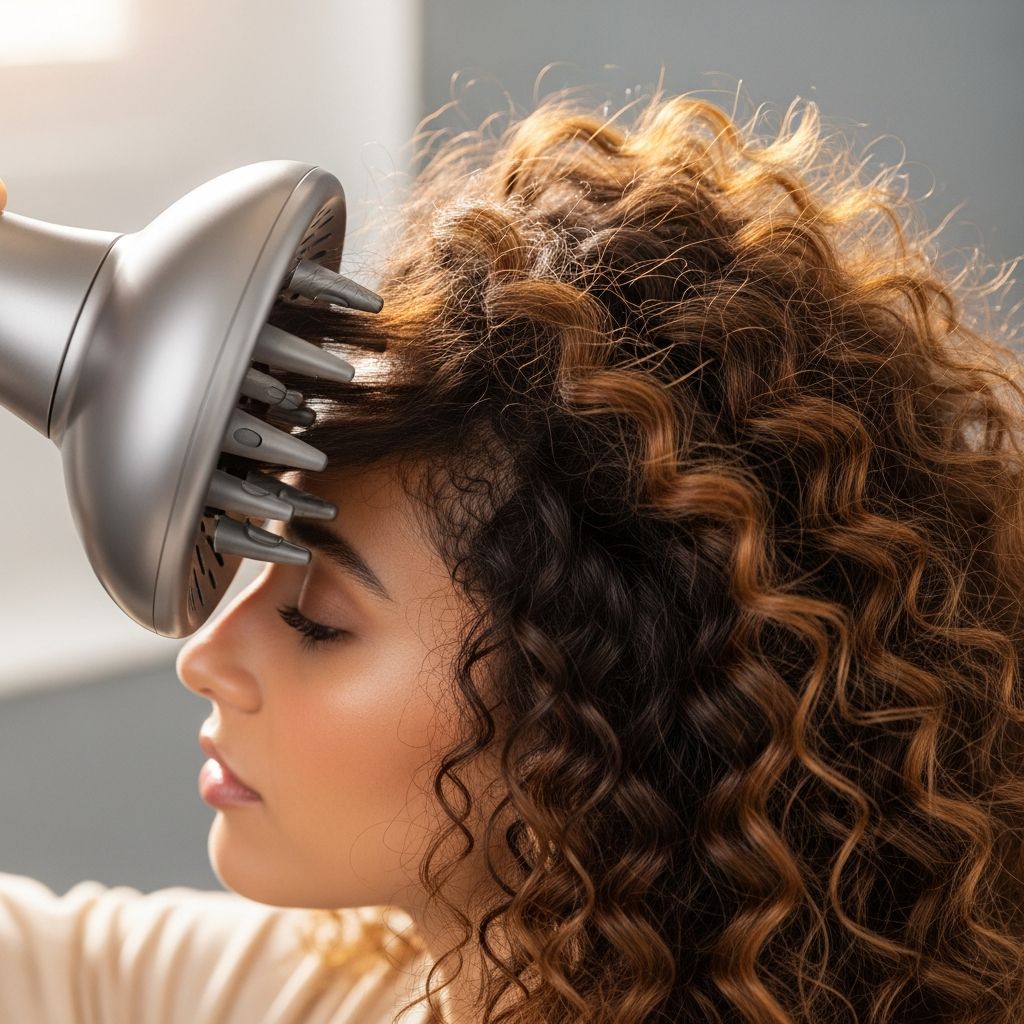
A hair diffuser can transform the way your hair dries and looks, turning chaotic frizz into defined curls, softer waves, and fuller volume without excessive heat. Used correctly, it supports your hair’s natural pattern instead of fighting against it.
What a Hair Diffuser Actually Does
A diffuser is a blow-dryer attachment that spreads air over a wider area, softening the airflow so strands are dried more gently. Instead of a harsh blast that disrupts your natural pattern, you get controlled, cushioned heat that helps curls and waves form in clusters rather than blowing apart.
Because the air is dispersed, diffusing tends to reduce motion at the hair’s surface, which is where frizz usually begins. The result is better definition, more volume at the roots, and less risk of hot spots or heat damage when compared to direct, concentrated airflow.
Who Benefits Most from Diffusing
Diffusers are best known as a must-have tool for curly hair, but they can support a wide range of textures. If you have any natural bend or movement—even if it looks like a subtle wave—diffusing can help you enhance that texture with more control.
- Curly and coily hair: Encourages curl clumping, reduces shrinkage shock, and helps curls dry faster without turning into a halo of frizz.
- Wavy hair: Adds shape and lift so waves become more defined and less limp or stringy.
- Straight or nearly straight hair: Can add root volume and a soft, subtle texture without needing a round brush.
Key Benefits of Using a Diffuser
When used properly, a diffuser is not just about faster drying; it is about styling and hair health. Below is a quick overview of how diffusing compares to air drying or traditional blow-drying.
| Method | Drying Time | Frizz Level | Curl/Wave Definition | Volume |
|---|---|---|---|---|
| Air Drying | Slow | Moderate (varies with climate) | Natural but unpredictable | Soft, often flat at roots |
| Regular Blow-Drying (no diffuser) | Fast | High risk of frizz | Can stretch out curls/waves | Volume depends on brush technique |
| Diffusing | Moderate | Lower frizz with correct technique | Enhanced curls/waves | Boosted root lift and fullness |
Essential Prep Before You Diffuse
The way you treat your hair before turning on the dryer will make or break your results. Think of diffusing as the final step that locks in the work you already did in the shower and during your product routine.
Step 1: Cleanse and Condition Strategically
Hydrated hair responds better to heat and holds its pattern more easily. Use a gentle cleanser that does not leave the hair feeling stripped, followed by a conditioner that provides slip for detangling. Rinse thoroughly so leftover residue does not weigh down your texture.
If your hair is very dry or fragile, consider using a leave-in conditioner on the mids and ends for extra moisture and protection before you bring any heat into the picture.
Step 2: Detangle the Right Way
Detangle only while the hair is coated in conditioner or immediately after using a leave-in product. Use your fingers or a wide-tooth comb, working from the ends upward to avoid breakage and stretching your curl pattern too aggressively.
Once your hair is detangled and product is applied, avoid brushing again before or during diffusing. Excessive combing after this stage tends to separate curl clumps and invites frizz.
Step 3: Remove Excess Water Gently
Soaking-wet hair takes longer to dry and can dilute your styling products. After your shower, gently squeeze out excess water using a microfiber towel or a soft cotton T-shirt.
- Avoid rough rubbing or twisting, which disturbs the cuticle and causes frizz.
- Use a squeezing or blotting motion, moving in the direction of your natural curl or wave.
Choosing the Right Styling Products
The products you apply before diffusing determine how long your style lasts and how it feels. The goal is to support your natural pattern without creating stiffness or buildup.
Core Product Categories
- Heat protectant: Essential whenever you use a blow-dryer, even at lower temperatures. Look for lightweight sprays or creams that can be layered under other stylers.
- Leave-in conditioner: Adds moisture, slip, and softness, especially helpful for coarse, dry, or color-treated hair.
- Curl cream or wave lotion: Offers definition and light hold for looser textures or those who dislike a “crunchy” feel.
- Mousse or gel: Provides stronger hold and frizz control, ideal for tighter curls, humid climates, or styles that need to last multiple days.
Matching Products to Hair Type
Thicker, coarser hair usually tolerates richer creams and oils, whereas fine hair often needs feather-light formulas to prevent collapse at the roots. If your hair feels flat or greasy after diffusing, use less product or switch to lighter textures such as foams or sprays.
On the other hand, if your hair still feels dry or frizzy, layer a leave-in conditioner under your styler, or choose formulas with humectants and nourishing oils to help seal in moisture.
Core Diffusing Techniques: Three Main Styles
There is no single “correct” way to diffuse. Different techniques change your results in terms of volume, stretch, and curl formation. Experiment with these approaches to discover what complements your texture and goals.
1. Cup-and-Lift Diffusing for Maximum Bounce
This method supports the hair from below, encouraging springy curls and waves with strong root lift. It works especially well on curly, coily, or wavy textures that crave volume.
- Apply your heat protectant and stylers to damp hair and form your curls or waves with scrunching or finger-coiling if desired.
- Attach the diffuser and set your dryer to low or medium heat and low airflow.
- Flip your head forward or to one side. Place a section of hair into the diffuser bowl, starting from the ends.
- Gently raise the diffuser toward your scalp, allowing the hair to pile into the bowl without pressing or twisting.
- Hold the dryer in place for several seconds at a time before moving on to the next section. Avoid moving the dryer while the air is running; keep it steady.
- Repeat around the head until hair is mostly dry, then finish with a brief blast of cool air to help set the style.
2. Hover Diffusing for Minimal Disturbance
Hover diffusing is ideal for hair that frizzes easily or for curl patterns that break apart with too much handling. Instead of placing your hair directly into the bowl, you hold the diffuser a short distance away.
- Apply your usual stylers and gently arrange your hair into its preferred pattern (for example, encouraging curls to clump or arranging waves to fall in the same direction).
- With your dryer on low airflow, hold the diffuser a few centimeters from your hair, focusing on one area at a time.
- Allow the gentle airflow to dry the surface before moving slightly to the next area, keeping movements slow and controlled.
- Flip your head to different angles—forward, sideways, and upright—to reach the roots from multiple directions without roughing them up.
3. Stretch Diffusing for Controlled Length
Some curls shrink significantly as they dry, making the hair look much shorter than it is. Stretch diffusing can help you retain more visible length while still enjoying defined curls or elongated waves.
- Apply a heat protectant and firm-hold styler to damp hair, then gently separate it into sections.
- Hold a section near the ends and lightly pull downward to create gentle tension.
- Place the diffuser near the roots and mid-lengths, directing air along the shaft while maintaining that slight stretch.
- Release the section once it feels mostly dry, then repeat on the next section. Avoid over-stretching, which can leave the hair looking limp rather than intentionally elongated.
Heat and Airflow Settings: Finding the Sweet Spot
The settings on your dryer matter as much as the technique. Using the highest heat and power may seem efficient, but it often leads to frizz and unnecessary stress on your hair.
- Heat: Low to medium is usually sufficient for most hair types, especially if you are diffusing for more than a few minutes.
- Airflow: Low airflow keeps your curl clumps intact and reduces flyaways. Higher airflow might be used briefly at the beginning if you are in a hurry, then reduced as hair begins to set.
- Cool shot: Use the cool button at the end of your session on each section to help lock in shape and add shine.
Adjusting Your Approach by Hair Type
Small changes in technique can dramatically change your outcomes. Tailor your diffusing routine according to your natural texture and goals.
Curly and Coily Hair
- Start with well-hydrated hair and layer a leave-in, then a curl cream or gel with firm hold.
- Use the cup-and-lift method to support curl clumps from below while keeping airflow gentle.
- Avoid touching the hair between sections; wait until it is fully dry before scrunching out any crunch.
Wavy Hair
- Choose lighter products like foam, mousse, or a soft-hold gel to preserve movement.
- Alternate between hover diffusing and brief cup-and-lift movements to define waves without overwhelming them.
- Stop diffusing when hair is about 80–90% dry to maintain a soft, lived-in texture.
Straight or Slightly Wavy Hair
- Focus on root volume by placing the diffuser close to the scalp while you tip your head upside down or to the side.
- Use lightweight volumizing sprays or mousses to avoid weighing hair down.
- Avoid heavy creams or oils before diffusing; save them for sparing use on the ends after drying if needed.
Common Mistakes to Avoid
Even with the right tools and products, a few small missteps can sabotage your results. Watch out for these frequent diffusing errors.
- Using maximum heat and speed: This blasts curls apart, causes tangling, and leads to poofiness rather than definition.
- Constantly touching your hair while it dries: Hands introduce friction and oil, encouraging frizz and breaking up curl clumps.
- Stopping product application too soon: Skipping heat protectant or using too little hold can make hair look puffy once fully dry.
- Over-drying: Taking hair from damp to bone-dry with heat can reduce shine and make strands feel rough.
Finishing Touches and Next-Day Styling
How you treat your hair after diffusing affects shine, softness, and how long your style lasts. Finishing steps do not have to be complicated, but they should be intentional.
- Once hair is fully dry, lightly scrunch with clean, dry hands or a few drops of serum to soften any cast created by gel or mousse.
- Avoid brushing or combing dry curls and waves. If you need to separate pieces, use your fingers and work gently.
- To preserve your results overnight, loosely gather hair on top of your head in a soft scrunchie (“pineapple”) or sleep on a satin pillowcase to reduce friction.
Frequently Asked Questions About Hair Diffusers
1. Do I really need a diffuser, or can I just air-dry?
Air-drying works for many people, but it can leave the hair flat at the roots, unevenly dry, or frizzy—especially in humid or very dry climates. A diffuser gives you more control over shape, volume, and timing, while still treating your hair gently when used on lower settings.
2. Can I use a diffuser on short hair?
Yes, diffusers work on short cuts as well as long hair. For shorter styles, focus on root direction and volume; use the diffuser close to the scalp and move in small sections to encourage lift and texture without blowing hair out of place.
3. How long should I spend diffusing?
The exact time depends on your hair density, length, and your dryer’s power. Many people diffuse until hair is about 80–90% dry and then allow the last bit of moisture to air-dry, which helps maintain softness and shine while minimizing frizz.
4. What if I don’t own a diffuser attachment?
While nothing fully replaces a proper diffuser, you can mimic some effects by using the lowest airflow on your dryer and keeping it at a distance while gently scrunching your hair with your hands. For best, most consistent results over time, however, investing in a universal diffuser attachment is recommended.
5. Why does my hair still look frizzy after diffusing?
Persistent frizz usually comes from one or more factors: too much heat or airflow, insufficient hold from your styling products, touching the hair while it is drying, or starting with very dry, under-conditioned hair. Adjust one variable at a time so you can identify what makes the biggest improvement.
Putting It All Together
Using a hair diffuser well is less about complicated tricks and more about respecting your hair’s natural pattern. With thoughtful prep, the right product choices, gentle heat settings, and a technique tailored to your texture, you can consistently achieve defined curls, enhanced waves, and healthier-looking hair.
Experiment with different methods and minor adjustments in routine until you find the combination that gives you the balance of volume, shine, and definition you want. Over time, diffusing becomes a quick, reliable part of your routine rather than a guessing game.