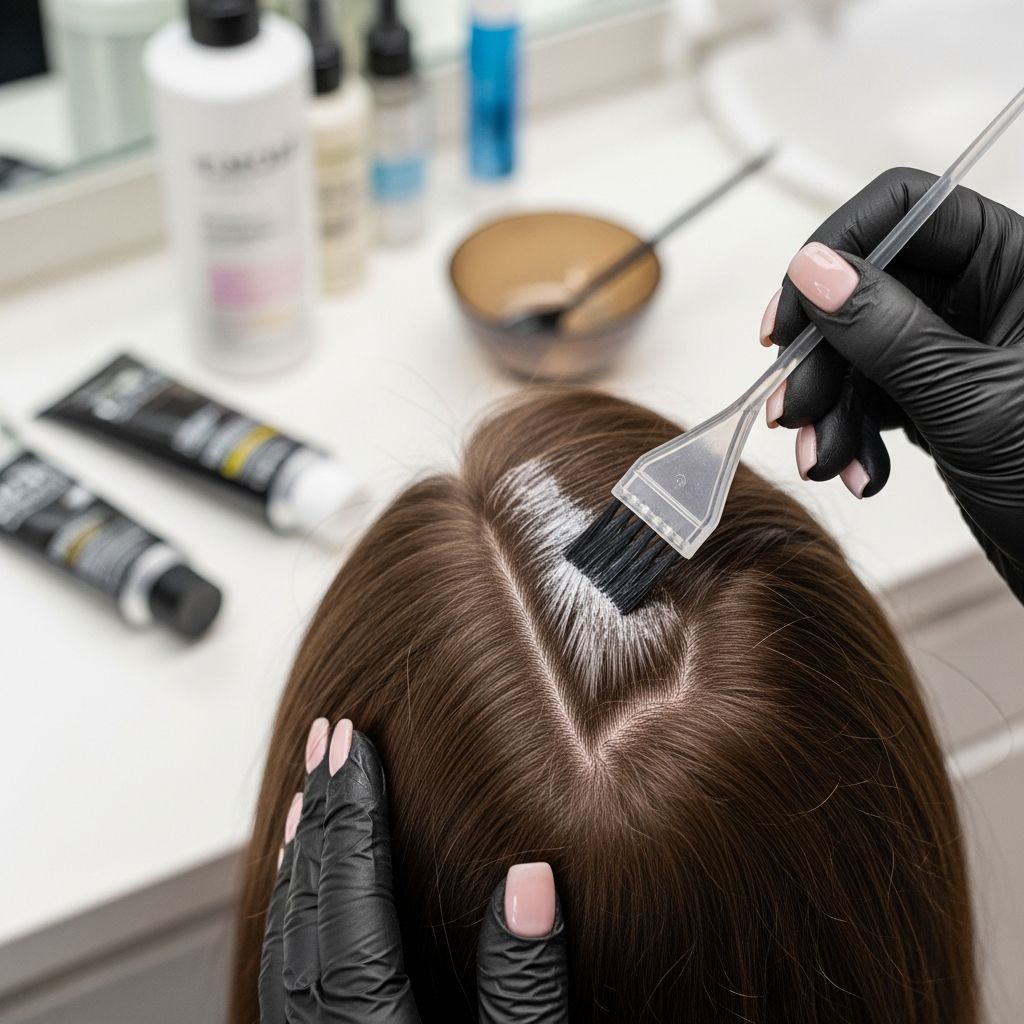
Refreshing your hair color at home can save time and money while keeping your look polished between full color appointments. The key is not just which box you buy, but how you approach timing, preparation, and technique so your hair looks intentional, not accidental.
This guide walks you through smart, realistic strategies for touching up home hair color, from roots and fading lengths to minor mishaps and long-term maintenance. Everything here is written in original language to help you avoid the usual pitfalls and care for your hair as you color it.
Understanding What a “Touch-Up” Really Is
Before opening any color kit, it helps to define what you are actually trying to fix. A touch-up should be a targeted refresh, not a total re-do of your entire head every single time.
- Root regrowth: Natural color showing at the scalp, usually in a stripe or band.
- Faded mid-lengths: Areas that have lost shine or depth but are not drastically off-color.
- Uneven tone: Sections that look warmer, cooler, or duller than the rest.
Touch-ups are meant to minimize obvious contrast and refresh tone without continually layering strong color on already-processed hair. Done thoughtfully, this helps keep your hair healthier and your color more believable over time.
When to Reach for the Color Bowl
Timing touch-ups correctly makes the job easier and the result more natural. Waiting too long can create wide bands of regrowth, but coloring too soon can over-darken your ends and cause damage.
- Root touch-ups: Typically every 4–8 weeks depending on how fast your hair grows and how strong the contrast is between your natural shade and your dyed color.
- Gloss or toning refresh: Every 4–6 weeks to revive shine and tone without adding heavy pigment, especially for blondes and highlighted hair.
- Full color overhaul: Only a few times a year if you are maintaining the same shade; frequent full-head applications can build up and look flat.
Instead of automatically repeating the entire process described on the box every time, adjust your plan: roots may need full color, while lengths may only need a brief refresh or a lighter formula like a semi-permanent gloss.
Prep Like a Pro: Setting Yourself Up for Success
Thoughtful preparation can turn a stressful coloring session into a relatively calm routine. A few extra minutes before you mix the color can save you from patchiness, stains, or unnecessary damage.
Gather the Right Tools
- Sectioning clips or small claw clips.
- A tail comb for clean partings.
- Gloves (use an extra pair for rinsing if possible).
- A timer or phone alarm.
- Old towel or cape and a button-up shirt you can remove without pulling over your head.
- Petroleum jelly or a thick face cream to protect skin around the hairline.
Pre-Color Hair Condition Checklist
Color performs very differently on parched hair versus healthy hair. Before touching up, look at the state of your strands.
- If ends feel rough, snaggy, or extremely dry, plan to keep strong color away from them and use a gentler refresher instead.
- If your scalp is irritated or flaky, wait until it calms down; dye on broken skin can sting and cause uneven absorption.
- If you have heavy styling product build-up, do a gentle cleanse at least 24 hours before coloring, then let your natural oils return to protect your scalp.
Choosing the Right Product for a Touch-Up
The best touch-up product is usually not the heaviest-duty permanent dye from root to tip. Different parts of your hair need different strengths of color and different formulas.
| Product Type | Ideal For | Pros | Considerations |
|---|---|---|---|
| Permanent root color | Gray coverage and strong regrowth contrast | Long-lasting coverage at the scalp | Best kept on roots only to avoid dark, flat ends |
| Demi-permanent color | Refreshing mid-lengths and ends | Gentler, adds shine and tone | Will gradually fade; not ideal for stubborn gray roots |
| Color gloss or toner | Correcting brassiness or dull tone | Quick, subtle refresh, boosts shine | Usually short processing time; watch carefully |
| Root spray or powder | Very temporary cover between coloring sessions | Instant, no-commitment fix | Washes out and can transfer to fabrics |
For most routine touch-ups, a permanent formula for the root area and a gentler, shorter-time refresh on the lengths is a balanced, hair-friendly approach.
Sectioning and Application Strategy
How the color is placed matters as much as which shade you choose. Strategic sectioning keeps your application neat and reduces the risk of missed spots or over-saturated areas.
Smart Sectioning Basics
- Start with dry, detangled hair.
- Create a central part from front hairline to nape.
- Divide each side horizontally from about the top of the ear to the other side, forming four main sections.
- Clip each section securely, leaving only the one you are working on loose.
Working in smaller, controlled sections helps you apply color directly to the regrowth rather than smearing it along the hair shaft where it can deepen and dull the existing color.
Root Application Technique
- Apply color along visible partings first (center and sides) to cover the most noticeable areas early.
- Use the tip of the bottle or a brush to draw short lines of color, then gently press in with gloved fingers instead of dragging down the strands.
- Avoid overlapping more than a few millimeters into previously colored hair to prevent dark bands.
After completing all sections, confirm that every part line you can see when you move your hair around has been covered. This simple check can prevent streaky or patchy roots once everything is rinsed.
Refreshing Your Lengths Without Overdoing It
Mid-lengths and ends rarely need the same strength or time as fresh roots. Constantly pulling permanent color through to the ends can make them darker than your roots and more fragile.
- Short exposure: If your lengths look slightly faded, apply a diluted mix or demi-permanent formula during the last 5–10 minutes of root processing time.
- Conditioner buffer: Apply a light layer of regular conditioner on very porous ends before pulling color through; this softens the effect and reduces grabby, uneven spots.
- Alternate sessions: Consider refreshing the lengths every second or third root touch-up instead of every time.
For highlighted or balayaged hair, focus more on toning glosses than on traditional all-over color. This lets your dimension and lighter pieces remain visible instead of disappearing under layers of pigment.
Processing Time: Why the Clock Matters
Leaving color on longer than directed does not usually make it “work better”; it often only makes it harsher. Under-processing can leave you with uneven coverage, while over-processing can dull shine and roughen the cuticle.
- Start the timer when you finish applying to the first section of roots, not when you begin mixing.
- Avoid guessing the time; use a real timer rather than mentally counting songs or shows.
- Resist the urge to extend processing “just in case.” If your color is not strong enough at the recommended time, address the formula choice next time instead of stretching the clock.
If you are adjusting formulas or using a product for the first time, do a strand test in an inconspicuous area beforehand. A small test lets you see both the color result and how your hair tolerates the process.
Rinsing, Shampooing, and Conditioning Correctly
The way you rinse and care for your hair immediately after coloring can influence both the final shade and how long it lasts. This is not the time for scalding hot water or harsh scrubbing.
Gentle Rinse Technique
- Begin by adding a small amount of lukewarm water and gently massaging the color at the roots to emulsify it.
- Rinse until the water runs mostly clear, focusing on the scalp and letting water carry the remainder through the lengths.
- Use water that is warm but not hot; cooler water helps the cuticle lie flatter, which can support shine.
Once the bulk of the color is rinsed out, use the conditioner provided in the kit or a nourishing conditioner for color-treated hair. This step helps restore slip and softness right away.
Common Touch-Up Mistakes and How to Fix Them
Even the most careful home colorer will eventually run into a surprise result. Small missteps are usually fixable with simple adjustments rather than starting from scratch.
Issue: Roots Too Dark or “Helmet” Effect
When roots grab too dark, the top of the head can look heavier and more artificial compared to the lengths.
- Next time, choose a slightly lighter or less opaque formula for the roots.
- Reduce processing time by a few minutes, within the safe range recommended by the product.
- In the short term, soften the line by using a clarifying treatment just on the overly dark root area, followed by a rich conditioner.
Issue: Banding (Stripes of Different Color)
Color bands occur when the same area of hair is repeatedly overlapped with full-strength dye, or when touch-ups are done at inconsistent intervals.
- On your next session, apply color only to the true new growth first.
- Use a lighter, less pigmented formula or a gloss on the darker band to gently soften it, rather than more strong color.
- Maintain a regular touch-up schedule so regrowth areas are narrow and easier to manage.
Issue: Brassiness and Unwanted Warmth
Warm, brassy tones often emerge after repeated lightening or when color fades unevenly. Touch-ups that ignore underlying warmth can make this effect more obvious.
- Incorporate a toning gloss or shampoo formulated to counter your specific unwanted tone (for example, violet for yellow, blue for orange).
- Use lower heat settings on styling tools, as high heat can expose warm undertones more quickly.
- Avoid very hot water when washing, which can accelerate fading and reveal brassiness.
Protecting Hair Health Between Touch-Ups
A smart touch-up routine does not end the day you color. What you do between sessions determines whether your hair feels soft and resilient or brittle and tired when it is time to color again.
- Limit wash frequency: Washing less often can slow fading and dryness. Dry shampoo can bridge the gap.
- Use color-safe products: Choose shampoos and conditioners free from harsh cleansers that strip pigment aggressively.
- Hydrate regularly: Weekly masks or deep conditioners can help maintain elasticity and shine.
- Turn down heat: Air-dry when possible and always use heat protectant when using blow-dryers or irons.
Think of your hair as fabric that has been dyed: the gentler you are with it in daily life, the longer the color will stay vibrant and the material will hold up.
When to Pause DIY and See a Professional
While many touch-ups are manageable at home, there are situations where an in-person color expert is the safer choice. Continuing to layer at-home color on top of a complicated situation can make later corrections more difficult and expensive.
- Major color changes (for example, going several levels lighter or darker).
- Patchy lightening, strong banding, or multi-colored mishaps.
- Hair that feels stretchy, gummy, or breaks easily when wet.
- Scalp sensitivity or allergic reactions to previous color applications.
Think of home touch-ups as maintenance on a car that is running well. If the engine light is blinking, it is best to visit a mechanic rather than hoping a quick fix will cover the real issue.
FAQ: Home Hair Color Touch-Ups
How often is it safe to touch up my hair at home?
Most people can safely touch up visible regrowth every 4–8 weeks, provided they focus color only where it is needed and avoid endlessly re-saturating the ends. If you find yourself itching to recolor more often, consider using temporary root sprays or powders between full touch-ups instead of applying permanent dye again so soon.
Can I use the same color on my roots and my ends?
Technically, you can, but it is rarely the most flattering or hair-friendly option. Roots are untreated and will usually grab color more predictably, while ends are more porous and can turn darker or flatter. Using a stronger formula or longer time on roots and a gentler, shorter refresh on the lengths typically yields a more natural, dimensional result.
Do I need to wash my hair right before coloring?
In most cases, slightly lived-in hair (not freshly washed the same day) is more comfortable and more predictable when coloring. Natural oils provide a buffer for your scalp, while very clean hair can be more easily irritated. However, avoid heavy styling product build-up, which can interfere with even application.
What if I am not sure which shade to pick?
When in doubt, err on the side of slightly lighter or softer rather than dramatically darker than your current overall color. Going a little lighter is usually easier to correct than lifting out heavy dark pigment later. Staying within one or two levels of your present shade also tends to look more cohesive and is safer for home maintenance.
Is it okay to do a full-head application every time?
Doing a full-head permanent color application at every touch-up can lead to dullness, bands, and dryness over time, especially on longer hair. Reserve full-head applications for major changes or a few times a year, and rely on targeted root work and glosses in between to keep the color fresh with less stress on your hair.
Bringing It All Together
Thoughtful home hair color touch-ups are less about strict rules and more about paying attention: to your regrowth pattern, your hair’s condition, and how your color behaves over time. With careful sectioning, appropriate product choices, realistic timing, and gentle aftercare, you can maintain vibrant, polished color at home while still protecting the long-term health of your hair.
Approach each touch-up as a small, controlled adjustment rather than a dramatic overhaul, and your hair is far more likely to look natural, shiny, and flattering—week after week, not just on the day you color.