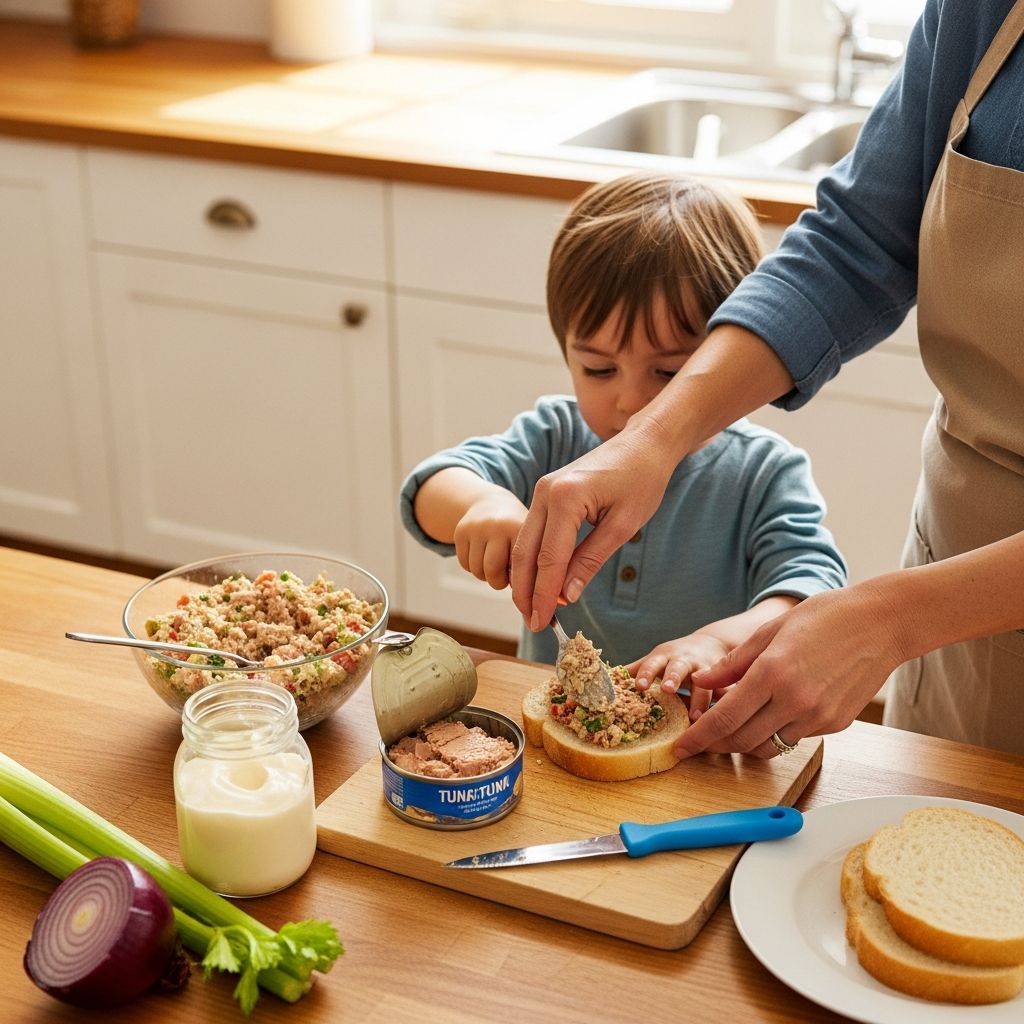
Helping children learn a handful of basic recipes before they leave home gives them confidence, independence, and a practical life skill. One of the easiest and most useful recipes to start with is a simple tuna salad sandwich—no oven required, minimal chopping, and endlessly customizable.
This guide walks you through how to teach kids and teens to make a tuna salad sandwich from start to finish, including safety tips, ingredient options, and kid-friendly variations. It is designed to be completely original, easy to follow, and adaptable to different ages and comfort levels in the kitchen.
Why Tuna Salad Is a Perfect Starter Recipe for Kids
Tuna salad works well as one of the first recipes kids learn because it uses pantry staples, involves no raw meat cooking, and comes together quickly. It lets young cooks practice important skills like measuring, mixing, and seasoning without the pressure of a complicated meal.
- It uses affordable, shelf-stable ingredients that are easy to keep on hand.
- The recipe can be made with simple tools: a can opener, a bowl, a spoon, and a butter knife.
- There are many ways to adjust texture and flavor so picky eaters and adventurous eaters both feel comfortable.
Essential Kitchen Safety to Teach First
Before a child opens a can or picks up a knife, take a moment to talk through basic safety. Safety habits formed on simple recipes will carry over when they move on to using stoves and ovens.
- Handwashing: Wash hands with soap and warm water for at least 20 seconds before handling any food.
- Clean workspace: Clear and wipe down the counter, and gather tools so nothing needs to be grabbed in a rush.
- Can safety: Emphasize that the edges of opened cans are sharp; show them how to handle and discard lids safely.
- Knife basics: If using a knife, start with a butter or kid-safe knife, emphasizing fingers tucked away from the blade.
- Food storage: Teach that tuna salad must be kept cold and never left out for long periods.
Simple Ingredients List for Kids
You can tailor the ingredient list to your family’s taste and your child’s comfort with different flavors. Think of the recipe in layers: base ingredients, creamy element, crunchy add-ins, and seasonings.
Core ingredients
- 1 small can of tuna packed in water, drained well
- 1–2 tablespoons mayonnaise or a lighter creamy alternative (such as plain yogurt)
- 2 slices of bread, a roll, or a wrap
- Optional: a leaf of lettuce or a handful of baby spinach
Optional mix-ins for flavor and crunch
- Finely chopped celery
- Minced pickles or pickle relish
- Grated carrot or finely chopped cucumber
- Minced onion or green onion (for older or more adventurous kids)
- A squeeze of lemon juice or a tiny spoonful of mustard
- Pinch of salt and pepper, to taste
Kid-Friendly Equipment Checklist
Keeping tools simple makes the process less intimidating and easier to clean up. Lay everything out ahead of time so kids can see the full plan.
- Manual or safety-style can opener
- Medium mixing bowl
- Fork or spoon for mixing
- Measuring spoons (for mayonnaise and seasonings)
- Butter knife or child-safe knife
- Cutting board for any vegetables
- Plate for assembling the sandwich
Step-by-Step: Teaching the Process
When teaching kids, think in small, clear steps. Let them read or repeat each step before doing it. Pause often to taste and adjust, so they learn to rely on their senses, not just the instructions.
1. Get set up
- Wash hands and clear a working space on the counter or table.
- Gather all ingredients and tools so there is no rushing mid-recipe.
- Explain that it is easier to cook (and clean up) when everything is ready before starting.
2. Drain the tuna safely
This is a good time to demonstrate how to use a can opener and handle a sharp lid. For younger children, an adult should manage this step while narrating what is happening.
- Open the can carefully, keeping fingers away from the cutting wheel.
- Press the lid down gently over the tuna to push out as much liquid as possible.
- Transfer the drained tuna to the mixing bowl and discard the lid safely.
3. Break up the tuna
Breaking the tuna into smaller flakes makes mixing easier and gives a better texture. This is an ideal job for small hands and builds confidence quickly.
- Use a fork to gently mash and separate the tuna in the bowl.
- Show kids how to press down and drag the fork to break up larger chunks.
- Pause to check for any stray bits of bone or tough pieces, removing them if needed.
4. Add the creamy element
Measuring mayonnaise or another creamy base helps children practice estimating and adjusting. Encourage them to start with less; it is easier to add more than to fix an overly heavy salad.
- Measure 1 tablespoon of mayonnaise and add it to the bowl.
- Stir thoroughly to see if the tuna is coated evenly.
- If the mixture looks too dry, add another small spoonful and mix again.
5. Stir in the mix-ins
This step lets children personalize their sandwich and experiment with flavors and textures. Offer a small “tasting bowl” so they can sample vegetable pieces on their own before mixing them in.
- Add any chopped celery, pickles, or vegetables one spoonful at a time.
- Stir after each addition, noticing how the texture changes.
- Encourage them to taste a tiny bite and describe what they like or want to change.
6. Season and taste
Learning to taste and adjust is one of the most important cooking skills. This step helps kids understand balance and teaches them to trust their sense of taste.
- Add a small pinch of salt and a small pinch of pepper, if desired.
- Optional: mix in a tiny squeeze of lemon or a small dab of mustard for extra brightness.
- Taste again and decide whether it needs more seasoning or mix-ins.
7. Build the sandwich
Assembling the sandwich is where kids see their efforts turn into a meal. It also gives practice with spreading and layering, which they will reuse in many other recipes.
- Lay two slices of bread on a plate.
- Optional: lightly toast the bread for extra texture.
- Spread the tuna salad evenly over one slice using a butter knife.
- Add lettuce or spinach if using, then top with the second slice of bread.
- Use the knife to cut the sandwich in half or into smaller triangles for easier eating.
Simple Variations Kids Can Try
Once the basic version is comfortable, introduce small changes to keep the recipe interesting. Present these as “flavor experiments” so kids feel like they are in charge of the creativity.
- Crunchy version: Extra celery, cucumber, or shredded carrot for added crunch.
- Pickle-lovers version: Chopped pickles or relish plus a little mustard.
- Lighter version: Use half mayonnaise and half plain yogurt.
- Cheesy melt: Top the sandwich with a slice of cheese and briefly toast or grill, with an adult in charge of the heat.
- Wrap style: Use a tortilla or flatbread instead of sliced bread for easy packing.
Nutrition Snapshot for Growing Kids
Talking about nutrition while cooking gives kids a sense of why certain foods matter, without turning meals into lectures. Use simple language and focus on how food helps their bodies and brains.
| Component | What it provides | Why it helps kids |
|---|---|---|
| Tuna | Protein, omega-3 fats | Supports muscles, brain health, and feeling full longer. |
| Bread (whole grain) | Carbohydrates, fiber | Gives energy for school and play, plus digestive support. |
| Vegetable add-ins | Vitamins, minerals, extra fiber | Supports immunity, growth, and overall health. |
| Mayonnaise or yogurt | Fats or protein, depending on choice | Helps with satiety and flavor; yogurt can add extra protein. |
Tips for Different Age Groups
Not every child will handle the same tasks at the same age. Adjust who does what depending on maturity, attention span, and comfort level in the kitchen.
- Young kids (5–8): Stir ingredients, mash tuna with a fork, add pre-measured mix-ins, and help assemble the sandwich.
- Tweens (9–12): Learn to use a can opener with supervision, measure ingredients independently, and try simple knife work with soft vegetables.
- Teens (13+): Handle the full process independently, experiment with new flavors, and double the recipe to feed siblings or friends.
Make-Ahead and Storage Guidelines
Understanding how long tuna salad stays fresh is part of learning responsible cooking. Talk about refrigeration and food safety as part of the routine, not as an afterthought.
- Store leftover tuna salad in a covered container in the refrigerator.
- Use within 3–4 days for best quality and safety.
- Keep tuna salad chilled in a lunchbox with an ice pack if it will sit out for more than a short time.
- Assemble sandwiches close to when they will be eaten if possible to avoid soggy bread.
Turning This Recipe Into a Life Skill
Learning to make a tuna salad sandwich is about more than lunch. It teaches kids planning, responsibility, and the satisfaction of feeding themselves (and others). Encourage them to write the recipe down in their own words and keep it in a personal recipe notebook or digital file.
- Have your child create a simple shopping list for the ingredients.
- Let them choose one variation each week to practice creativity.
- Invite them to make sandwiches for the family once they feel confident.
Frequently Asked Questions
Can kids make this recipe without any knife use?
Yes. If you skip fresh vegetables that require chopping and use softer mix-ins like relish, kids can prepare the entire recipe using only a can opener, bowl, spoon, and butter knife. An adult can still assist with opening the can if sharp edges are a concern.
What kind of tuna is best for children?
Most families prefer tuna packed in water, as it has a mild flavor and mixes easily with creamy ingredients. Choosing light tuna and rotating it with other protein sources is a commonly recommended approach for kids, but parents can consult nutrition guidance or a pediatrician if they have specific concerns.
How can I make the sandwich more appealing to picky eaters?
Start with very smooth tuna salad and only one mild add-in, like a small amount of finely chopped cucumber or pickle. Serve the vegetables on the side at first, and let kids add tiny pieces into their sandwich themselves as they become more comfortable with the flavors and textures.
Is there a way to make this recipe dairy-free?
Yes. Use a dairy-free mayonnaise or another plant-based creamy spread, and skip any yogurt, cheese, or other dairy ingredients. The rest of the recipe stays the same, and you can still add vegetables and seasonings to keep the flavor interesting.
Can this tuna salad be used for more than just sandwiches?
Absolutely. Kids can spoon tuna salad onto crackers, wrap it in lettuce leaves, stuff it into a pita, or serve it over a simple green salad. Teaching them several serving ideas shows how one basic recipe can become different meals throughout the week.