Few things ruin a good outfit faster than leather shoes that feel like torture devices. Maybe they stick to your skin, rub your heels raw, or create angry blisters on your toes. The good news: in most cases, the shoes are not ruined – they just need a little intervention, adjustment, and care.
This guide walks through why leather shoes become sticky and rubby, how to fix specific problem areas, gentle break-in strategies, and long-term habits to keep them comfortable for years. The goal is simple: keep the shoes you love and stop sacrificing your feet in the process.
Understanding Why Leather Shoes Hurt
Leather is a natural material that softens, stretches, and molds to your feet over time, but out of the box it can be stiff, tight, or unevenly finished on the inside. When that unfinished or poorly finished leather meets warm, slightly damp skin, friction follows.
Most discomfort comes from a combination of three factors: pressure (shoe too tight or badly shaped), friction (repeated rubbing in one spot), and moisture (sweat, humidity, or even lotions on your skin). Fixing your shoes is about reducing at least one of these factors – ideally all three.
Typical Problem Areas
- Back of the heel: stiff heel counters, rough seams, or hard edges dig into your skin.
- Toe box: narrow or low fronts squeeze toes, causing friction on the tops and sides.
- Edges and openings: the collar around your ankle or the tongue may rub when you walk.
- Ball of the foot: sliding forward in the shoe creates heat and blisters under the forefoot.
Quick Comfort Fixes You Can Try Today
If your shoes are already giving you trouble, start with low-risk changes that do not permanently alter the leather. These tweaks often make a surprising difference and help you decide whether deeper fixes are worth it.
Adjust Your Socks and Liners
Socks are your first line of defense against rubbing. The right pair can turn a miserable shoe into a wearable one long enough for a gentle break-in.
- Choose thicker socks in early wear: cushioned or padded styles reduce friction and act as a barrier while you break the shoes in.
- Avoid slick nylon-only socks: they can slide around, causing your foot to move and rub more.
- Use no-show socks with silicone grip: for low-cut shoes, choose liners that stay put and don’t roll under your heel.
- Consider moisture-wicking blends: keeping skin drier reduces stickiness and blister risk.
Experiment With Simple In-Shoe Adjustments
Sometimes the shoe is not too small; it is too roomy in the wrong spots, causing your foot to slip and rub. Small additions inside the shoe can stabilize your foot and soften contact points.
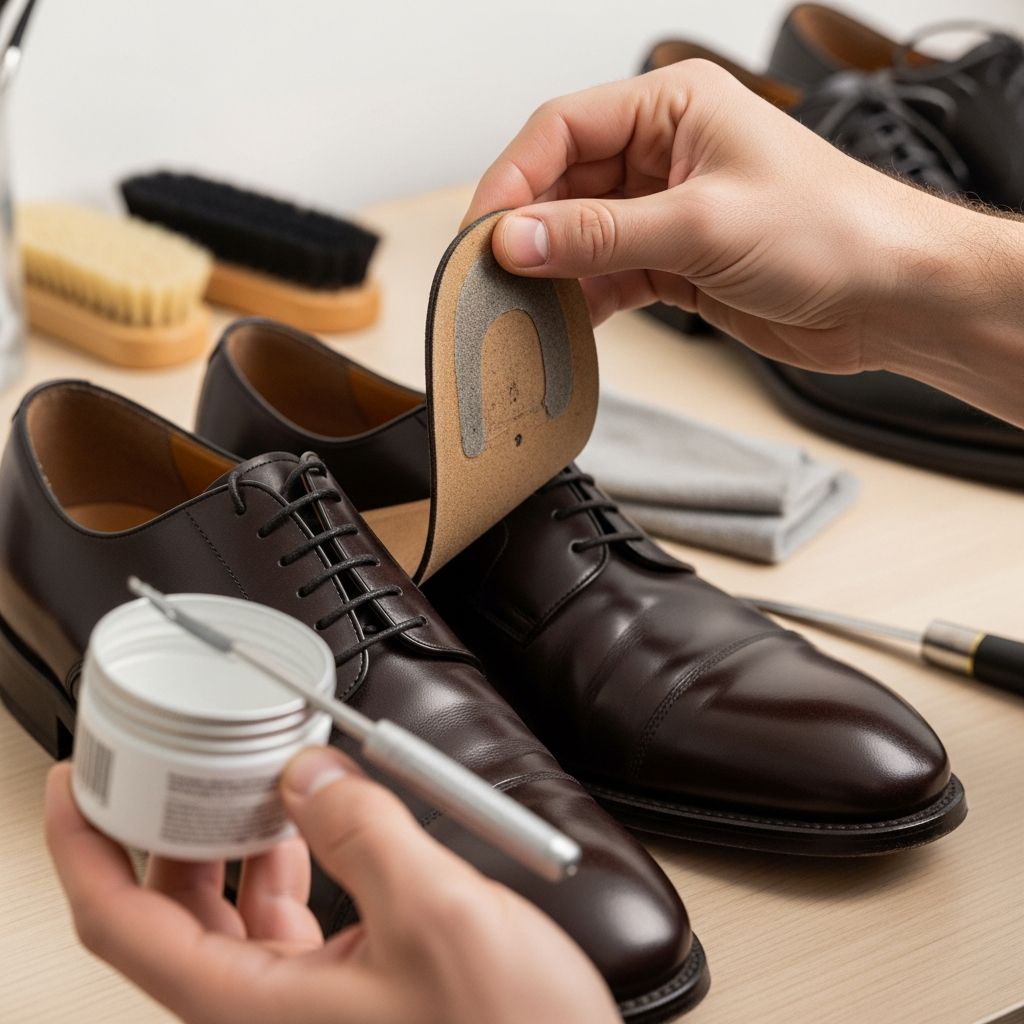
- Gel heel grips: slim pads that line the back of the shoe to soften a hard heel counter and reduce vertical slippage.
- Ball-of-foot cushions: pads that keep your foot from sliding forward in high heels or pumps.
- Full insoles: add light cushioning and can slightly raise your foot, moving sensitive areas away from the worst rubbing lines.
- Adhesive moleskin: place neatly on the inside of the shoe over aggressive seams or ridges.
Smoothing Sticky or Rough Leather Interiors
If the leather lining feels sticky, tacky, or weirdly rough, it will grab at your skin every time you move. This can happen when the interior finish is too raw, the coating has worn away, or the shoe absorbs moisture and stays slightly damp.
Step-by-Step: Taming Rough Spots Inside
Work slowly and test on a small area first, especially in more expensive shoes. You want to refine the surface, not damage it.
- Identify the exact friction zone. Put the shoes on with thin socks and walk around. Use a washable marker or small sticker on the outside to mark where you feel the rubbing.
- Turn shoes into good light. Take them off and inspect the interior with that mark as your guide. Look for raised seams, wrinkles, glue ridges, or finish inconsistencies.
- Gently smooth the surface. Use a super-fine nail buffer or very fine sandpaper (800–1000 grit or higher) to lightly buff only the problematic area. Keep pressure minimal and strokes short.
- Dust and wipe. Wipe away dust with a soft, slightly damp cloth. Let the area dry completely before wearing again.
- Seal and protect. If the interior looks dry or fuzzy afterward, apply a tiny amount of leather conditioner using a cotton swab and buff until the surface feels smooth, not greasy.
When to Add a Barrier Layer
Sometimes, no matter how carefully you smooth the leather, your skin and that shoe simply do not get along. In that case, building a thin barrier can save the relationship.
- Stick-on leather or fabric heel liners: ideal for shoes where the entire heel cup feels harsh.
- Self-adhesive suede strips: provide grip and softness along the sides or at the top edge of the collar.
- Moleskin patches: cut to shape and place in narrow spaces where larger pads don’t fit.
Smart Ways to Stretch Tight Leather Shoes
Many blister problems come down to shoes that are simply too snug in key areas. Leather can usually stretch slightly, but it needs to be done with care.
Targeted Stretching vs. Overall Stretching
Stretch only what needs to move. Widening the entire shoe when only the toe box is tight can lead to sloppy fit, more sliding, and – ironically – new blisters.
| Problem Area | Typical Cause | Best Stretching Method |
|---|---|---|
| Toe box feels crushing | Narrow front; low toe height | Two-way shoe stretcher with toe plugs; professional stretching for width and height |
| Sides of foot ache | Shoe too narrow overall | Overall width stretching; wear with thick socks in short sessions |
| Top of foot pressure | Low vamp or tight lacing | Skip certain eyelets when lacing; gentle upper stretching |
| Heel digs in | Stiff heel counter curve | Heel counter softening with conditioner and manual flexing |
DIY Stretching Techniques (Use With Care)
These approaches are best for small adjustments. If the shoe feels at least one full size too small, no safe amount of stretching will truly fix that.
- Thick sock method: Wear thick socks, put on the shoes at home, and walk for 10–15 minutes. Repeat over several days, never pushing through significant pain.
- Shoe stretcher tool: Insert a two-way or four-way stretcher and gradually expand it, leaving it in place overnight. Check progress slowly rather than cranking it wide on day one.
- Spot stretching: Use attachment plugs on a stretcher to push out specific pressure points, such as bunion areas or toe joints.
Avoid viral “quick fixes” that involve soaking leather, blasting it with high heat, or freezing water bags inside your shoes. Extreme temperature and moisture changes can permanently damage the leather or the adhesives inside.
Caring for the Leather to Reduce Rub
Well-conditioned leather is softer, more flexible, and less likely to create sharp edges that dig into your skin. Think of conditioner as both skincare and armor for your shoes.
Routine Conditioning Basics
- Clean first: wipe dust and dirt away with a soft, slightly damp cloth so you do not grind grit into the leather.
- Use a dedicated leather conditioner: a small amount goes a long way. Apply with a cloth in circular motions.
- Let it absorb fully: allow the shoes to sit for several hours before wearing so the surface is dry, not slick.
- Polish if needed: add cream or wax polish after conditioning to restore color and finish.
Soften High-Friction Zones
Some parts of the shoe naturally flex more, like the vamp over your toes or the area around your ankle. Keeping these areas supple can prevent harsh creases that pinch or rub.
- Apply a slightly heavier layer of conditioner around flex points and massage it in with your fingers.
- Bend the shoe gently in your hands after conditioning to encourage smoother, more natural flex lines.
- For ankle collars, pinch and roll the leather lightly between your fingers to soften hard edges before wearing.
Breaking In Leather Shoes Without Destroying Your Feet
Breaking in does not mean “suffer for weeks.” A thoughtful, gradual approach helps the leather adapt to your feet instead of forcing your skin to adapt to the shoe.
A Gentle Break-In Schedule
Use this as a guideline and adjust depending on how sensitive your feet are and how stiff the leather feels.
- Day 1–2: Wear indoors for 20–30 minutes at a time with thicker socks. Focus on just walking around the house.
- Day 3–4: Increase to 45–60 minutes. Pay close attention to hot spots; stop immediately if any area starts to burn.
- Day 5–7: Try short outings where you can bring backup shoes. Avoid long commutes or events where you are stuck standing.
- After week 1: Gradually extend wear time only if your feet finish each session without new blisters.
Protecting Skin While You Break Them In
Think proactively. If you know you always blister on your heels, do not wait for the shoe to prove it.
- Use blister prevention tape or hydrocolloid patches on known hot spots before wearing new shoes.
- Apply a friction-reducing balm to the back of your heels and sides of your toes.
- Rotate shoes: don’t wear the same stiff pair two days in a row during the early stages.
When the Problem Is Fit, Not Finish
No amount of conditioning, stretching, or clever padding can fix a shoe that is fundamentally the wrong shape or size for your foot. Recognizing that early can save you both money and pain.
Signs Your Shoes May Never Work
- Your toes are jammed even when standing still and not moving.
- The shoe cuts into your ankle bone or Achilles despite pads and conditioning.
- You feel numbness or tingling in your toes after a short time of wear.
- The sole bends in a place that does not match your natural foot flex.
In these cases, selling, returning, or donating the shoes and seeking a better-matched last (the form used to shape footwear) is kinder to your feet than forcing a bad fit to “work.”
Long-Term Habits to Keep Leather Shoes Comfortable
Once your shoes feel good, a few ongoing habits keep them that way – and help prevent the interior from becoming sticky or warped over time.
Daily and Weekly Care Tips
- Let shoes dry between wears: alternate pairs so leather can release moisture and return to its original shape.
- Use shoe trees: cedar or quality plastic trees help maintain structure and reduce deep creasing.
- Air them out: after a long day, remove insoles (if removable) and allow air to circulate before storing.
- Avoid direct heat: never dry wet leather near radiators or with hairdryers; slow, natural drying prevents stiffness and cracking.
Storage Matters
Where and how you store your shoes affects both comfort and longevity.
- Store in a cool, dry area away from direct sunlight, which can dry and warp leather.
- Use dust bags for long-term storage, but avoid sealing in moisture. Allow shoes to fully dry first.
- Keep silica gel packs nearby if your closet is particularly humid.
FAQs About Sticky, Rubbing Leather Shoes
Why do my leather shoes only hurt after a few hours?
Leather gradually softens and your feet swell a bit throughout the day. What felt “snug but fine” in the morning can become tight and rubby by afternoon. Moisture from sweat also increases friction, which is why blisters often appear late in the day rather than immediately.
Can I fix shoes that blistered me the first time I wore them?
Often, yes. Address the specific hot spots: smooth rough interior areas, add protective padding, and try a more gradual break-in schedule with thicker socks. However, if the shoe is painfully small or misshapen for your foot, no fix will make it truly comfortable.
Is it safe to use home remedies like water or heat to stretch leather?
Methods that soak shoes in water or apply intense heat are risky. They can dry out the leather, weaken adhesives, or cause permanent warping. Safer options include professional stretching, dedicated stretching sprays used sparingly, and mechanical stretchers.
How much should leather shoes stretch over time?
Most leather shoes relax slightly – often about a fraction of a size in width and softness rather than dramatic length changes. Shoes that feel a little snug can become comfortable; shoes that feel truly too small rarely stretch enough to fix the problem.
When should I see a professional cobbler?
Consult a cobbler if you have expensive shoes that need stretching, if interior seams are poorly finished, or if the heel counter feels aggressively hard. A good cobbler can perform precise spot stretching, add custom padding, and smooth or re-line problematic areas far more safely than most DIY attempts.
Final Thoughts
Sticky, rubbing leather shoes are not always a lost cause. With a mix of surface smoothing, thoughtful stretching, smart padding, and gradual break-in, many pairs can be transformed from blister factories into everyday favorites. Pay attention to how your feet feel, respect your pain signals, and remember that the best shoes are the ones you can wear all day without thinking about them.