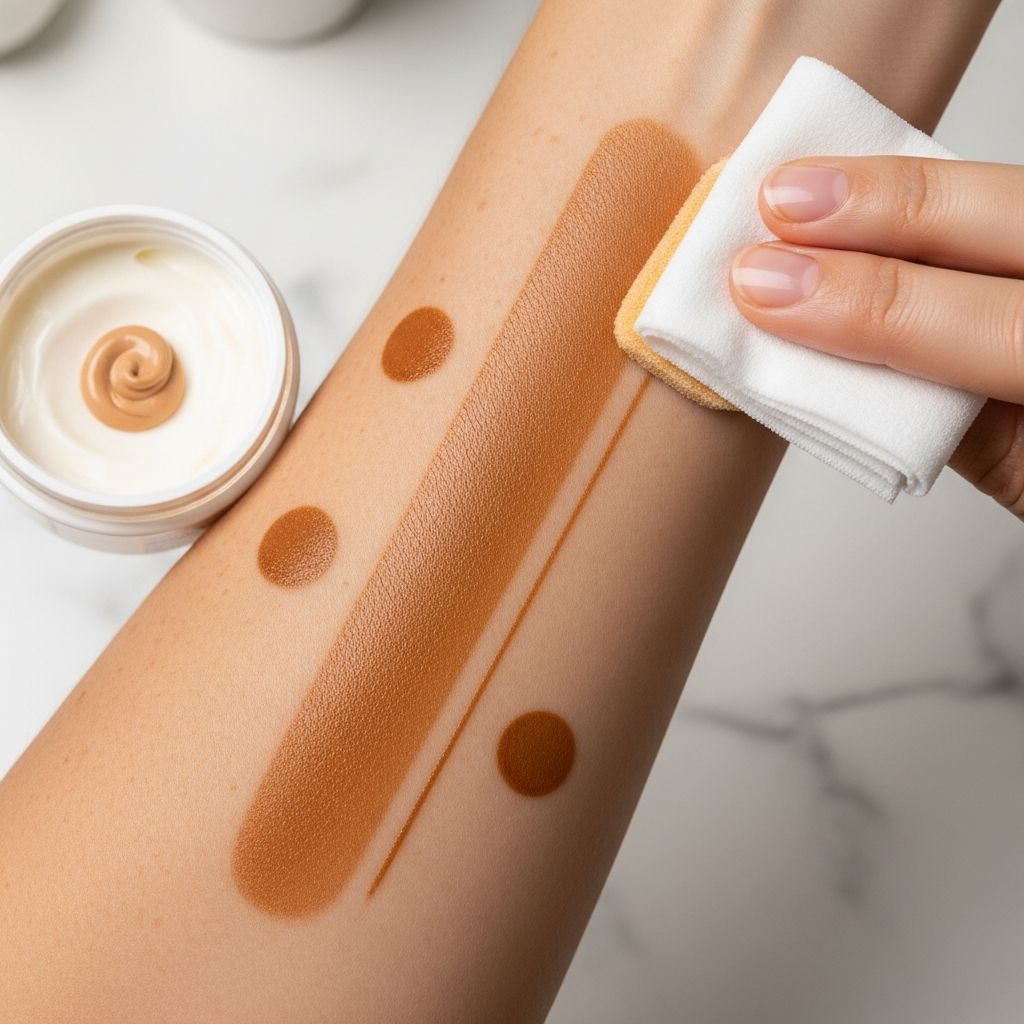
Self-tanner is a brilliant shortcut to a sun-kissed glow—until it clings to dry patches, turns your ankles orange, or leaves a dark line along your wrists. This guide walks through practical, skin-friendly ways to fade or remove unwanted self-tanner, plus how to avoid those mishaps next time.
Why Self-Tanner Leaves Stains and Streaks
Most self-tanners rely on an ingredient called dihydroxyacetone (DHA), which reacts with proteins in the top layers of your skin to create a temporary brownish color. Because that color forms only in the outermost cells, anything that disrupts or concentrates those cells—like dryness, rough texture, or excess product—can cause uneven results.
Streaks typically show up where the product was spread unevenly, while dark patches or stains often occur on areas with thicker or drier skin such as knees, elbows, knuckles, and ankles. The goal of removal is not to scrub your skin raw, but to gently loosen or dissolve those tinted cells so fresher, more even skin can show through.
Golden Rules for Safe Self-Tanner Removal
Before getting into specific methods, keep these universal rules in mind. They help you correct mistakes without causing irritation or making the problem worse.
- Be patient, not aggressive. Self-tanner fades naturally in a few days as your skin sheds; removal is about speeding that up gently, not stripping your skin.
- Treat different areas differently. The skin on your face, hands, and body have different needs, so tailor your approach to each zone.
- Patch test anything new. Even DIY methods can irritate sensitive skin; test first on a small, hidden area.
- Hydrate generously afterward. Most removal methods involve exfoliation, which calls for replenishing moisture immediately after.
- Fix, don’t overcorrect. Focus on the darkest or most uneven spots instead of trying to strip all color at once.
Step-by-Step: How to Fade a Bad Full-Body Tan
If your entire tan looks too dark, dull, or patchy, start with a gentle full-body routine. Think of it as a reset that lightens everything evenly before you target stubborn spots.
1. Soften the Color in a Warm Bath or Shower
Warm (not scalding) water helps loosen dead skin cells and soften the product sitting on the surface. This makes later exfoliation more effective with less effort.
- Soak in a warm bath for 10–20 minutes if possible.
- If showering, let the water run over your skin for several minutes before using any tools or products.
- Avoid harsh soaps at this stage; the goal is softening, not stripping.
2. Exfoliate Strategically, Not Harshly
Exfoliation is the backbone of self-tanner removal because it helps shed the tinted outer skin cells. However, over-scrubbing can leave you red, sore, and still blotchy.
- Use a soft washcloth, exfoliating mitt, or gentle body scrub in small circular motions.
- Pay extra attention to rough areas (knees, elbows, ankles), but do not dig or scratch.
- Limit intensive exfoliation sessions to once per day to protect your skin barrier.
3. Follow with Nourishing Moisturizer or Body Oil
After exfoliating, your skin is more vulnerable. Hydration helps calm any irritation and prevents new dry patches that could cling to leftover tanner.
- Apply a fragrance-free lotion, cream, or lightweight oil to slightly damp skin.
- Focus on areas that tend to stain: wrists, ankles, elbows, and knees.
- Repeat this moisturize-and-rest cycle daily until the tan fades to your liking.
Targeted Fixes for Common Problem Areas
Some parts of the body almost seem determined to sabotage your tan. Here are tailored strategies for the zones that most often end up stained or streaky.
Hands and Wrists
Hands and wrists darken quickly because self-tanner collects around knuckles, in creases, and along the junction where you stop blending at the wrist.
- Use a mild facial exfoliant or a soft washcloth and cleanser to gently buff over fingers, knuckles, and palms.
- For a harsh line at the wrist, blend the edge with a damp cotton pad and a small amount of creamy cleanser or micellar water.
- Finish with a rich hand cream so future applications go on more evenly.
Elbows and Knees
These areas often look darker and more orange because of their thicker, drier skin and deeper folds.
- Soak a washcloth in warm water, wring it out, and press it onto the area for a few minutes to soften the top layer.
- Use a gentle scrub or an exfoliating mitt in circular motions, focusing only on the darkest parts.
- Apply a heavier moisturizer afterward and recheck in a few hours before repeating.
Feet and Ankles
Feet collect excess product along the toes and at the back of the heels, while ankles often show telltale bands of color.
- Soak feet in warm, soapy water for 10–15 minutes to soften thickened skin.
- Gently buff stained areas with a soft foot file or cloth, avoiding over-scrubbing sensitive tops of the feet.
- Use a small amount of gentle cleanser on a cotton pad to blur any harsh ankle lines.
Face and Neck
Because facial skin is thinner and often more sensitive, heavy-duty body methods can be too harsh here. The key is subtlety.
- Switch to a mild face scrub or a low-strength chemical exfoliant (such as a gentle AHA toner) used sparingly.
- Focus on patchy areas such as the hairline, jawline, and sides of the nose instead of scrubbing your entire face aggressively.
- Layer on a soothing moisturizer or hydrating serum after any exfoliation to calm the skin.
Gentle DIY Approaches to Lighten Self-Tanner
If you prefer simple, at-home methods using products you already own, there are several techniques that can help lighten unwanted self-tanner without requiring special removers. Always remember to patch test, as even common ingredients can bother reactive skin.
Oil-Assisted Exfoliation
Oils help soften the top layer of skin, making it easier for gentle exfoliation tools or cloths to lift away tinted cells. This method works well when your tan feels rough or clingy on dry patches.
- Apply a generous layer of body oil, baby oil, or lightweight plant oil to dry skin.
- Let it sit for 10–20 minutes, then step into a warm shower or bath.
- Use a soft cloth or mitt to lightly buff the oiled areas, then cleanse with a mild body wash.
Cream Cleanser and Washcloth Buff
This approach is excellent for smaller stains on the hands, feet, and around joints. The creamy texture provides slip so you can buff without scratching.
- Apply a non-foaming cream or lotion cleanser to the stained area.
- Massage with a damp, soft washcloth using small circles for 1–2 minutes.
- Rinse thoroughly and moisturize; repeat the next day if needed.
Gradual Fading with Daily Gentle Exfoliants
If your tan is not disastrous but simply darker than you’d like, steady fading can be more comfortable than trying to erase it in a single session.
- Use a mild exfoliating body wash or a very soft scrub a few times per week.
- Apply moisturizer daily to keep skin smooth and minimize new patches of uneven fade.
- Layer lighter makeup or a body tint over any remaining unevenness while it continues to fade naturally.
When to Consider Dedicated Self-Tan Remover Products
There are purpose-made self-tan remover products on the market that are designed to break down residual tanner and help color lift more evenly. They can be useful if at-home methods are too slow or if a professional-level tan went very wrong.
These products often contain a blend of mild exfoliating ingredients and conditioning agents. If you decide to try one, follow the manufacturer’s instructions closely, avoid mixing them with other strong exfoliants at the same time, and always moisturize after use.
Common Types of Tan Remover Products
| Type | How It Works | Best For | Key Caution |
|---|---|---|---|
| Foaming or mousse removers | Spread easily over large areas and sit on the skin to soften tinted cells before rinsing. | Full-body tan removal or major color corrections. | Do not leave on longer than directed, especially on sensitive areas. |
| Gel or lotion removers | Often combine mild acids or enzymes with hydrating ingredients for controlled exfoliation. | Uneven patches on arms, legs, and torso. | Avoid layering with other acid products to minimize irritation. |
| Exfoliating mitts and gloves | Mechanically loosen dead skin and built-up color through physical friction. | Old, stubborn tans on the body (not face). | Use light pressure and limit use if skin becomes red or sore. |
How to Prevent Self-Tanner Stains Next Time
Prevention is far easier and more comfortable than removal. A few small changes in your routine can dramatically reduce streaks, stains, and awkward tan lines.
Prep Your Skin Properly
Even the best self-tanner will cling to rough, dry, or flaky skin. Smoothing and hydrating your skin beforehand is the single biggest step toward an even result.
- Exfoliate your entire body a day before tanning to remove loose, dead cells.
- Moisturize elbows, knees, ankles, feet, hands, and any obviously dry areas, then let it fully absorb.
- Avoid applying thick creams everywhere immediately before tanning, as they may dilute the product and cause patchiness.
Apply with Intention
Uneven pressure and rushed application are major culprits behind streaks. A deliberate, systematic method helps your tan look more professional.
- Work in sections (lower legs, upper legs, torso, arms, then hands and feet) so you don’t miss spots.
- Use long, overlapping strokes with a tanning mitt instead of quick, random swipes.
- Use the leftover product on your mitt for hands, wrists, and feet rather than adding fresh product there.
Protect Trouble Spots
Certain parts of the body require extra care to avoid future stains. With a little preemptive strategy, they can blend seamlessly into the rest of your tan.
- Apply a thin layer of lotion to knuckles, cuticles, elbows, knees, and the backs of ankles right before tanning.
- Wipe nails and cuticles clean with a damp cotton pad as soon as you finish applying.
- Lightly buff wrists and ankles with a dry mitt or cloth immediately after tanning to soften any lines.
Frequently Asked Questions About Self-Tanner Removal
How long does self-tanner usually last?
Most self-tanners last anywhere from 3 to 7 days on the skin, depending on how often you shower, how much you sweat, and how dry or oily your skin is. As your skin’s top layers naturally shed, the color gradually fades—even without special removal methods.
Can I remove self-tanner in one day?
Some color can be lifted in a single day, especially if you use a combination of soaking, gentle exfoliation, and possibly a dedicated tan remover. However, heavily saturated or very dark applications often require several days of repeated, gentle care to look completely even.
Is it safe to use strong scrubs daily until the tan is gone?
Daily use of very abrasive scrubs or rough tools can damage your skin’s protective barrier, leading to redness, tightness, flaking, and sensitivity. It is usually better to exfoliate moderately and consistently, allowing your skin to recover between sessions while also moisturizing generously.
What if my skin burns or stings when trying to remove self-tanner?
If you experience burning, intense stinging, or visible irritation, stop all active removal methods immediately and switch to gentle, fragrance-free moisturizers and cool compresses. If the discomfort is severe or does not improve, consider seeking advice from a medical or skincare professional.
Can I just cover a bad tan with more self-tanner?
Layering fresh self-tanner directly over a streaky or patchy base usually makes the unevenness more noticeable, not less. It is better to partially fade or smooth out the existing tan first, then apply a lighter layer to even everything out once the base looks more uniform.
Final Thoughts: Aim for Progress, Not Perfection
A flawed self-tan is frustrating, but it is also temporary and fixable. With patience, gentle exfoliation, selective spot treatments, and good moisturizing habits, even the most stubborn stains and streaks will soften and fade.
Treat removal as part of your overall tanning routine—not just an emergency measure. When you give equal attention to prep, application, and fade-out, your next glow will look smoother, last longer, and be far easier to manage from start to finish.