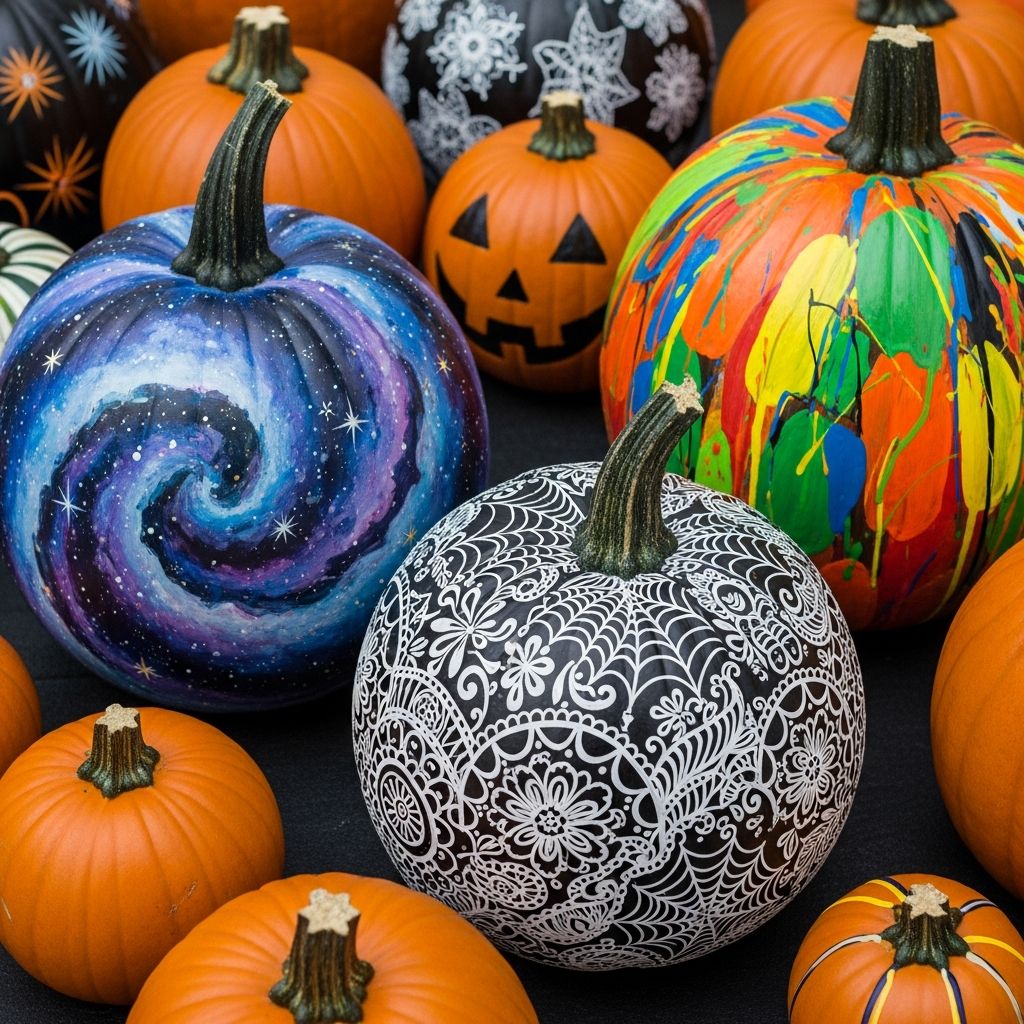
Transforming Pumpkins Through Paint: A Complete Creative Guide
Painting pumpkins offers a safer, cleaner alternative to traditional carving while allowing unlimited creative expression for Halloween celebrations. Unlike carved pumpkins that deteriorate quickly, painted designs maintain their appearance throughout the entire season, making them an ideal choice for families seeking long-lasting decorative options. The beauty of pumpkin painting lies in its accessibility—anyone from young children to experienced artists can participate, regardless of their artistic background or experience level.
Preparing Your Pumpkins for Optimal Paint Coverage
The foundation for successful pumpkin painting begins with proper preparation. Before applying any paint, thoroughly cleanse your pumpkins with water to remove dirt, bacteria, and residual farm materials that could interfere with paint adhesion. Moisture is particularly critical to address; completely dry your pumpkins, as any dampness will prevent paint from bonding properly and cause peeling or flaking after application.
Select pumpkins that are firm and free from soft spots or blemishes, as damaged areas make painting difficult and compromise the final appearance. For the best results, many artists recommend applying a white base coat first, which creates an ideal foundation for brighter colors and helps subsequent paint layers appear more vibrant and true to their intended hues. This preliminary white layer also ensures even coverage and prevents the natural orange pumpkin color from showing through your design.
Essential Supplies and Materials for Painting Success
Gathering quality materials significantly impacts your painting outcome. Acrylic craft paint provides excellent coverage and dries quickly, making it the preferred choice for most pumpkin painting projects. The variety of colors available allows for endless creative possibilities without requiring expensive supplies.
Beyond paint, assemble these fundamental tools:
- Various brush sizes, including large round brushes for base layers and fine-tipped brushes for detailed work
- Painter’s tape for creating clean geometric patterns and crisp lines
- Stencils for achieving intricate, uniform designs
- Pencils for lightly sketching designs before committing with paint
- Spray paint cans for smooth, even coverage when using stencil techniques
- A hair dryer for accelerating paint drying between layers
The Art of Design Planning and Sketching
Before picking up your brush, invest time in planning your design. Beginners should start with simple geometric patterns, dots, stripes, swirls, or classic jack-o-lantern faces to build confidence. These foundational designs teach basic techniques without overwhelming complexity.
Once you’ve selected your design concept, use a pencil to lightly sketch the outline directly onto the pumpkin surface. While pencil marks may not be highly visible, they create fine indents that serve as a roadmap for your painting. This approach allows you to make adjustments before permanently applying paint, reducing costly mistakes and ensuring proportional accuracy throughout your design.
Mastering Color Gradients and Transitions
Creating sophisticated color effects elevates your pumpkin painting from simple to stunning. Gradient techniques involve blending two or more colors smoothly across the pumpkin surface. A white-to-blush fade creates soft, romantic aesthetics, while deep orange-to-black transitions evoke dramatic Halloween atmosphere. These effects work particularly well on pumpkins painted with acrylic, where colors can blend while still wet.
To achieve smooth gradients, apply your first color in thin, even coats, allowing each layer to dry completely. Once dry, apply your second color to the designated area and, while still wet, gently blend it into the first color using gentle brush strokes. The key to successful blending is patience and working with wet paint before it dries, allowing colors to merge naturally rather than appearing as harsh lines.
Geometric Pattern Techniques for Modern Appeal
Geometric designs offer contemporary alternatives to traditional holiday imagery. Painter’s tape serves as your best tool for executing crisp, professional-looking patterns. Applications include:
- Horizontal and vertical stripes in alternating colors
- Chevron patterns that create dynamic visual movement
- Triangular color blocking for bold, abstract compositions
- Concentric circles and color-blocked sections for modern sophistication
When using painter’s tape, press it firmly around curves to prevent paint seepage underneath. Remove the tape carefully while paint is slightly tacky rather than completely dry to avoid peeling previously applied layers.
Spray Paint Stencil Method for Intricate Designs
For crisp, clean designs with professional appearance, spray paint combined with stencils delivers superior results. This technique works beautifully for creating intricate patterns that would be difficult to achieve with brushes alone. The key to success involves using light, even coats to prevent drips and ensuring stencils are sealed securely around curves while protecting surrounding pumpkin areas from overspray.
When using spray paint, work in a well-ventilated area and apply multiple thin coats rather than one heavy application. Each light coat dries quickly and allows you to assess coverage before applying additional layers. For best results with stencils, hold them flush against the pumpkin surface and maintain consistent distance from the pumpkin while spraying.
Character Face Designs: Bringing Monsters to Life
Monster-themed pumpkins appeal to both children and adults, offering opportunities for whimsical or frightening expressions. The Frankenstein design features a green base covering approximately 90% of the pumpkin, with black zig-zag patterns creating iconic hair. Two black circles serve as eyes, while a small smile and stitches drawn with a fine brush complete the classic monster appearance.
Vampire pumpkins transform with light purple or pale coloring reminiscent of undead skin. Black hair—including a distinctive widow’s peak and rounded ear shapes—frames the face, while white dots in the eyes create an eerie gleam. Pink cheek marks added beneath the eyes, along with small white triangle teeth, establish the supernatural character.
Witch pumpkins typically feature green face paint on one side with grey hair including triangular bangs and spiky borders. A black circular hat base crowns the design, while pink dots beside a painted smile add personality. A felt cone hat—created by rolling black felt into a cone shape and hot-gluing it securely—completes the classic witch aesthetic.
Nature-Inspired Artistic Elements
Bringing outdoor imagery to your pumpkins creates elegant seasonal designs. Nature-inspired motifs include painted leaves, acorns, vines, and woodland silhouettes. These organic patterns work wonderfully on pumpkins painted in autumn colors—deep oranges, burnt sienna, mustard yellow, and forest green.
Leaf designs can be simplified into basic shapes or rendered with detailed veining for realistic appearance. Acorn designs pair beautifully with leaf elements, while vine patterns create flowing, interconnected designs across the pumpkin surface. Woodland silhouettes—featuring deer, birds, or trees—add sophisticated, gallery-quality appeal when executed in contrasting colors.
Layering Techniques for Dimension and Depth
Professional-looking pumpkins incorporate shading and highlighting to create three-dimensional effects. Begin with lighter shades and gradually introduce darker tones for depth, allowing you to darken sections further if desired rather than committing immediately to heavy coloring. This conservative approach prevents mistakes while building realistic dimension gradually.
Blending highlights into mid-tones creates the illusion of light reflecting off curved surfaces, while subtle shading on section bottoms suggests shadows and contours. Using slightly darker versions of your base color for shading maintains color harmony while enhancing dimensional effects. Allow each layer to dry completely before adding subsequent shading to maintain clean edges and prevent muddy color mixing.
Advanced Skull and Spooky Designs
For experienced artists seeking challenging projects, skull designs offer excellent opportunities for demonstrating technique mastery. Begin by outlining eye sockets and nose cavities, then sketch drip marks below the nose that will guide paint placement and preserve natural pumpkin orange for authentic spooky appearance. Using pale pink and white tones creates ghostly, unsettling effects while maintaining appropriate Halloween atmosphere.
Additional spooky variations include skeleton faces, ghost designs, and other supernatural characters. These complex designs benefit from detailed preliminary sketching and careful paint application using fine brushes for precise details.
Paint Application Best Practices
Regardless of technique chosen, apply paint in thin, even coats rather than attempting to cover areas in single heavy applications. This approach prevents paint buildup that interferes with smooth color application and ensures consistent final appearance. Allow each coat to dry completely—using a hair dryer between layers accelerates the process—before applying subsequent colors.
Maintain consistent brush pressure and movement to achieve uniform coverage. For detailed work, hold the brush at an angle and use small, controlled strokes rather than broad sweeping motions. When using the brush handle end for dotting eyes or other small details, dip lightly into paint to ensure adequate coverage without excessive product application.
Timeline and Season Considerations
Unlike carved pumpkins that begin deteriorating immediately, painted designs maintain quality throughout the entire Halloween season and beyond, making painting an excellent long-term decorating solution. Plan to paint pumpkins one to two weeks before Halloween, allowing adequate drying time and opportunity to add additional details if desired. Painted pumpkins stored in cool locations away from direct sunlight maintain their appearance longest.
Frequently Asked Questions About Pumpkin Painting
What type of paint works best for pumpkins?
Acrylic craft paint is ideal for pumpkin painting because it provides excellent coverage, dries quickly, and comes in extensive color varieties. Spray paint works well for stencil designs and achieving smooth, even coverage.
Can I paint pumpkins that will be carved later?
Yes, you can paint pumpkins before carving. However, many people prefer to paint instead of carving because painted designs last throughout the entire season, whereas carved pumpkins deteriorate within days.
How long does pumpkin paint take to dry?
Acrylic paint typically dries to the touch within 15-30 minutes, though fully cured paint may take longer. Using a hair dryer accelerates drying between layers.
Are painted pumpkins safe for children to handle?
Yes, painted pumpkins are safe once paint is completely dry. Acrylic paint is non-toxic, making painted pumpkin projects excellent for families with young children who may not be ready for carving tools.
What should I do if I make a mistake while painting?
If mistakes occur, allow the paint to dry completely, then paint over the error with your base color or design color to correct the area.
Can outdoor pumpkins be painted?
Yes, pumpkins can be painted for outdoor display. However, seal the design with clear acrylic coating to protect paint from weather damage and extend design longevity.
What surfaces work best for pumpkin painting?
Real pumpkins are traditional and offer authentic appearance, but canvas pumpkins, painted rocks, and wooden pumpkin cutouts provide alternatives for those seeking different applications or reusable designs.
References
- How To Paint Pumpkins: A Step By Step Guide For Beginners — Fynes Designs. 2024. https://www.fynesdesigns.com/how-to-paint-pumpkins-a-step-by-step-guide-for-beginners/
- Easy Painted Pumpkins: How to Paint Simple Monster Faces — Aubree Originals. 2024. https://www.aubreeoriginals.com/painted-monster-pumpkins/
- Beginner Pumpkin Painting Tutorial | Step by Step Easy — YouTube. 2024. https://www.youtube.com/watch?v=hsUISAV_GrA
- Fun & Easy No-Carve Pumpkin Painting Ideas Perfect For Halloween — YouTube. 2024. https://www.youtube.com/watch?v=fHPPa-34k_4