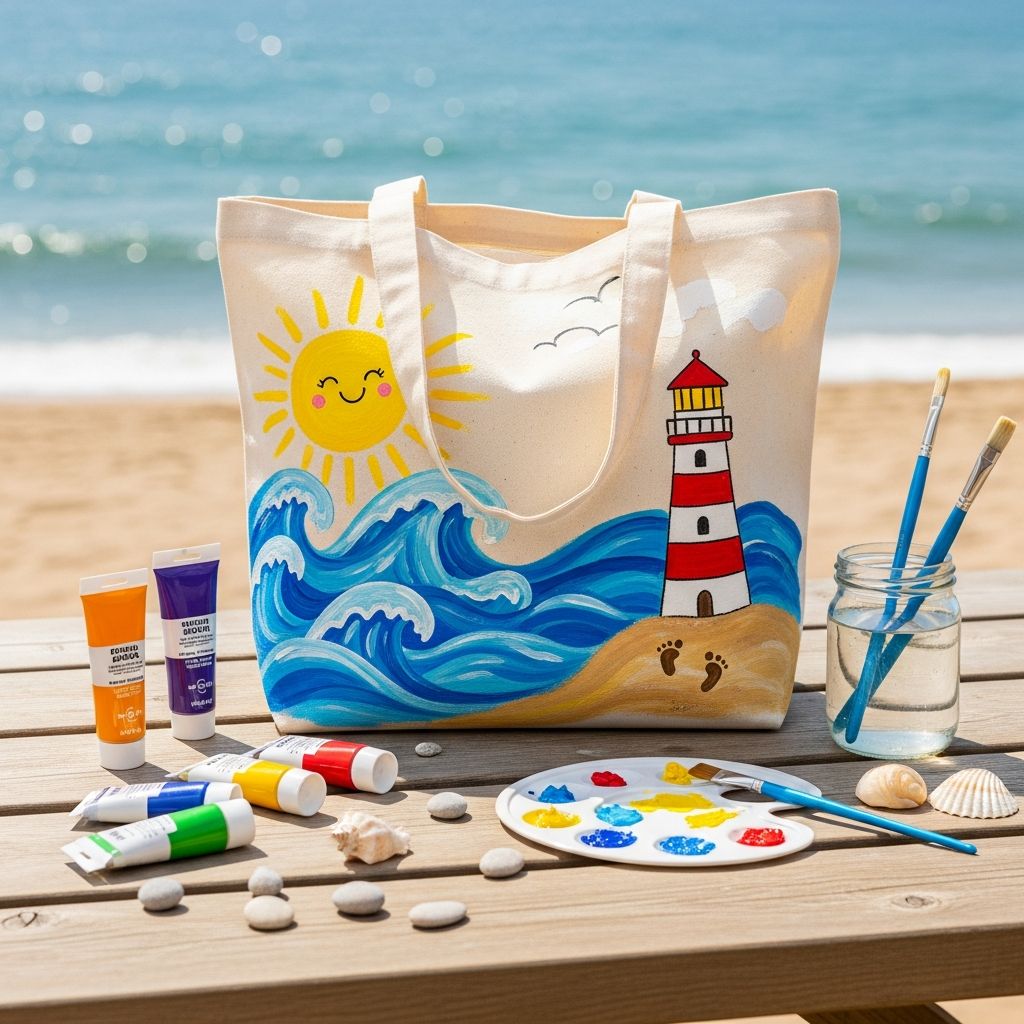
Designing and painting your own beach tote is an easy way to turn a plain bag into a colorful accessory that feels personal, useful, and fun. This guide walks you through every step, from choosing materials to sealing your design, with kid-ready ideas that make the project enjoyable for the whole family.
Why Make a Custom Beach Tote?
A hand-painted beach tote does more than hold sunscreen and towels. It becomes a memory in fabric form and a creative outlet for kids and adults alike.
- Practical and reusable: A canvas tote is sturdy enough for sand toys, snacks, and books while reducing reliance on disposable bags.
- Creative expression: Painting lets each person showcase their style, from bold geometric patterns to playful sea creatures.
- Perfect group activity: The project works well for birthday parties, family reunions, or summer camp craft time.
- Budget-friendly gift idea: A personalized tote makes a thoughtful, low-cost present for teachers, grandparents, or friends.
Supplies You Will Need
Gather your materials before you start so the painting session feels relaxed and organized. Most of these supplies are easy to find at craft stores or online.
- Plain tote bag: Choose a cotton or canvas bag in a light color so designs show clearly.
- Fabric paint or acrylic paint + fabric medium: Look for paint that is labeled safe for fabric and washable after curing.
- Paintbrushes: A mix of small detail brushes and medium flat brushes works best.
- Sponges or foam daubers: Great for creating soft backgrounds, polka dots, and simple shapes.
- Palette or disposable plate: For holding and mixing paints.
- Cardboard insert: Slide a piece of cardboard or thick paper inside the bag to prevent paint from soaking through.
- Painter’s tape or masking tape: Helps create clean stripes, borders, and blocked sections.
- Pencil or washable fabric marker: For sketching light outlines.
- Apron or old T-shirt: Protect clothing from accidental splatters.
- Paper towels and water cup: For cleaning brushes and quick fixes.
Prepare Your Tote for Painting
Good preparation helps your design look neater and last longer. Take a few minutes to get the tote ready before handing over the paint to eager kids.
- Check the fabric: If the tote is new, shake off any dust or loose fibers. If it feels stiff or heavily treated, a quick wash and dry can help paint adhere better.
- Smooth the surface: Lightly iron the tote if it has deep creases, or gently stretch it flat with your hands.
- Insert cardboard: Place a piece of cardboard inside the bag to create a firm surface and prevent paint bleeding.
- Tape down the edges: Use masking tape to hold the tote flat on the table, especially if working with younger children.
- Plan your design: Lightly sketch the main elements with pencil or a disappearing fabric marker to guide your painting.
Choosing a Beachy Design Theme
A theme keeps the design cohesive and makes decision-making easier for kids. You can choose one idea for the whole family or let each person create something unique.
| Theme | Visual Elements | Skill Level |
|---|---|---|
| Ocean Waves | Curved lines, layered blues, white foam accents | Beginner |
| Tropical Fruit | Pineapples, watermelons, citrus slices, bright colors | Beginner to Intermediate |
| Sea Creatures | Fish, turtles, starfish, jellyfish silhouettes | Beginner to Intermediate |
| Sunset Coastline | Gradient sky, sun, simple horizon line, palm trees | Intermediate |
| Graphic Patterns | Stripes, triangles, dots, chevrons in coastal colors | Beginner |
Encourage kids to pick just two or three main elements so the design feels intentional rather than overcrowded. Ask guiding questions such as “Do you want your bag to feel calm like the ocean or loud like a beach party?” to help them decide.
Step-by-Step Painting Guide
This basic painting sequence works for almost any design and keeps the process manageable for crafters of all ages.
- Start with the background: Use a large brush or sponge to apply a light wash of color across the tote, if desired. Soft blues, sandy beiges, and pastels can create a gentle beach mood.
- Block in large shapes: Paint big areas such as suns, waves, or fruit slices first. Let kids fill these shapes with solid color, then come back later for details.
- Add medium details: Once the base layer is dry to the touch, layer on stripes, simple patterns, and secondary shapes like clouds, leaves, or bubbles.
- Use small brushes for accents: Add outlines, facial expressions, patterns on seashells, or seeds on fruit using thin brushes or paint pens.
- Check for touch-ups: Fill any gaps where fabric peeks through and clean up edges where needed.
- Let it dry fully: Follow the drying time recommended by your paint. Keep the tote flat and out of reach of curious fingers.
Kid-Friendly Design Ideas
Children often benefit from clear visual prompts and simple shapes. These themed suggestions are easy to adapt for different ages and skill levels.
1. Happy Seashell Parade
Create a row of cheerful shells along the bottom edge of the tote, like a border of beach treasures.
- Use light pencil sketches of shell silhouettes (scallops, spirals, starfish).
- Fill each shell with a different pastel or bright color.
- Add tiny dots, lines, or hearts inside each shell for extra character.
2. Under-the-Sea Silhouettes
For kids who like bold shapes, solid silhouettes create striking results without needing detailed drawing skills.
- Paint the background in a gradient of dark blue at the bottom to light blue at the top.
- Use black, navy, or white paint to add fish, turtles, and coral shapes.
- Let older kids add bubbles or tiny dots of metallic paint for a magical effect.
3. Sunny Citrus Splash
Fruity designs feel bright and summery, and they rely almost entirely on circles and triangles.
- Paint overlapping circles for oranges, lemons, and limes in yellow, orange, and green.
- Divide some circles into wedges with thin white lines to look like sliced fruit.
- Scatter little dots or tiny leaves around to fill empty areas.
4. Simple Stripes and Dots
For very young children, structured patterns can help them focus while still giving them a sense of ownership.
- Lay down strips of painter’s tape to create even stripes across the tote.
- Have kids dab paint in different colors between the tape strips.
- Remove the tape when the paint is nearly dry, then add polka dots on top with a round sponge.
Tips for Painting with Kids
Crafting with children is most successful when the process matters more than the final picture. A little planning goes a long way toward happy, low-stress creative time.
- Limit the palette: Offer three to five colors at a time to prevent everything from blending into brown.
- Set clear drying spots: Designate a protected area where finished totes can dry without being bumped.
- Use aprons or smocks: Encourage kids to suit up before they touch the paint. Older kids can help younger ones tie the strings.
- Embrace experimentation: Allow children to flip sponges, layer shapes, or change direction mid-project. The tote is a canvas for exploring.
- Offer, don’t fix: Ask if they want help with tricky lines rather than correcting their work without permission.
Drying, Curing, and Heat-Setting
To make your design wearable and washable, follow the instructions on your paint label for curing and heat-setting. This step is key if you want to use the tote beyond a single season.
- Air-dry completely: Most fabric paints need at least 24 hours of drying time before heat-setting or washing.
- Heat-set if required: Some paints recommend ironing the reverse side of the design on a medium setting or using a clothes dryer to lock in the color.
- Wait before washing: Many brands suggest waiting several days after heat-setting before the first wash to keep colors vivid.
Care and Cleaning Tips
Proper care helps your handcrafted tote stay bright and beach-ready from one summer to the next.
- Turn inside out: Wash the tote inside out to protect the painted surface from friction.
- Use gentle cycles: Choose cold water and mild detergent; avoid harsh bleach or strong stain removers on the design.
- Air-dry when possible: Hanging the bag to dry helps preserve both the fabric and paint.
- Spot clean small stains: Dab gently with a damp cloth and a little soap rather than scrubbing the painted area.
Fun Variations for Parties and Gifts
Once you master the basic project, it is easy to adapt the idea to different occasions or themes. A painted tote can be the centerpiece of a party activity or a thoughtful keepsake.
- Birthday craft station: Set up a painting table where each guest decorates a tote as a party favor. Pre-trace simple shapes for younger children.
- Family travel bags: Assign each family member a bag with their name and a symbol that matches their personality or favorite beach activity.
- Teacher or coach gifts: Add a quote, team name, or simple icon like a sun or wave along with signatures from the group.
- Seasonal updates: Paint one side with a beach theme and the other with a general pattern so the tote works year-round.
Frequently Asked Questions
What type of paint works best on canvas tote bags?
Paint that is specifically labeled for fabric generally works best because it remains flexible and resists cracking as the tote bends and folds. If you already own acrylic paint, you can often mix it with a fabric medium to improve adhesion and washability.
Do I have to wash the tote before painting?
Pre-washing is not always required, but it can remove manufacturing residues that interfere with paint bonding. If the fabric feels stiff, smells strongly of chemicals, or has visible dust, a quick wash and dry is a good idea.
How can I prevent the paint from bleeding through to the other side?
The simplest approach is to slide a piece of cardboard or thick paper between the front and back panels of the tote. This barrier catches any paint that seeps through the weave of the fabric.
Can young children participate in this craft?
Yes, with supervision and a simplified setup. Offer them large shapes, chunky brushes or sponges, and a limited color palette. Adults can handle tasks such as heat-setting and detailed lettering.
How do I fix a mistake on my painted tote?
Small errors can often be disguised rather than erased. You can paint over the area with a darker color, turn a stray line into part of a pattern, or add an extra element like a wave, cloud, or shell to cover it.
How long will the design last?
With proper curing and gentle washing, painted designs can last through many seasons of beach trips and errands. Over time, you may notice soft fading, which often adds a relaxed, well-loved look to the tote.
Bringing Your Beach Tote to Life
Painting a beach tote transforms a simple bag into a custom accessory that reflects your family’s personality and creativity. The process encourages kids to plan, experiment with color, and enjoy the satisfaction of carrying something they made themselves.
Once your tote is dry and ready, fill it with your favorite summer essentials, from flip-flops and goggles to sketchbooks and snacks. Every time you grab it on the way out the door, it will serve as a small reminder of slow, sunny hours spent creating together.