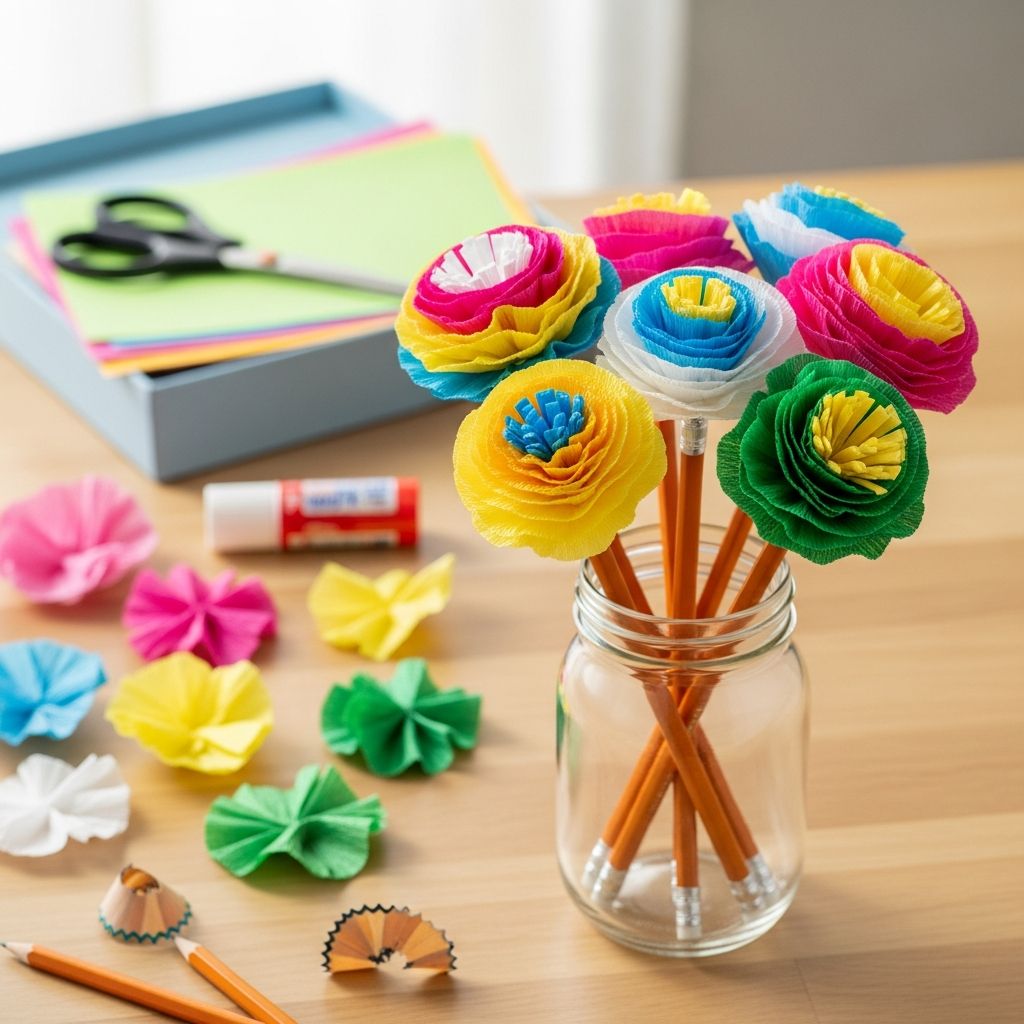
A pencil is one of the most ordinary objects on a desk, but with a bit of tissue paper and imagination you can transform it into a bright, blooming flower that makes writing and homework feel more fun. Tissue paper flower pencil toppers are simple enough for kids, stylish enough for grown-up desks, and customizable for almost any occasion.
This guide walks you through every step of making your own pencil flowers, from gathering materials to styling your finished bouquet. You will also find ideas for classroom use, party favors, and creative variations so that no two flowers ever look the same.
Why Make Tissue Paper Flower Pencil Toppers?
Crafting pencil toppers is more than a quick afternoon project; it is a way to personalize school or office supplies while encouraging creativity and fine motor skills. Because the materials are lightweight and inexpensive, this craft works well for groups, classrooms, and rainy-day projects at home.
- They instantly brighten study spaces, homework stations, or office desks.
- They make thoughtful, low-cost gifts for teachers, classmates, or coworkers.
- They are easy to customize with favorite colors, patterns, and flower styles.
- They are gentle on budgets because they use simple, easy-to-find supplies.
Supplies You Will Need
You can create a whole bouquet of pencil flowers with just a small set of craft supplies. Most items are reusable or come in packs large enough for many projects, making this a great choice for group crafts.
- Plain wooden or mechanical pencils (unsharpened is easiest for kids).
- Tissue paper sheets in assorted colors (cut into rectangles or squares).
- Thin craft wire or floral wire (flexible but sturdy).
- Floral tape or washi tape to cover the wire and secure it to the pencil.
- Scissors suitable for paper.
- Ruler and pencil for measuring tissue paper pieces (optional but helpful for uniform flowers).
Basic Size Guide for Tissue Paper Pieces
The size of your tissue paper pieces determines how big or small your flower will appear on the pencil. Use this simple guide as a starting point, then adjust to match your preferences.
| Flower Style | Approx. Tissue Size (per layer) | Number of Layers | Best For |
|---|---|---|---|
| Small blossom | 7 cm × 10 cm | 4–6 sheets | Young children, compact pencil tops |
| Medium bloom | 10 cm × 15 cm | 6–8 sheets | Everyday school pencils, gifts |
| Large statement flower | 12 cm × 18 cm | 8–10 sheets | Display jars, teacher bouquets |
| Two-tone flower | Outer: medium size, inner: half-size | 6–10 sheets total | Special occasions, center-color highlights |
Step-by-Step Instructions
The basic method for making tissue paper flower pencil toppers follows a simple pattern: fold, secure, shape, fluff, and attach. Once you understand the rhythm of these steps, you can quickly create multiple flowers in one sitting.
Step 1: Stack and Fold the Tissue Paper
Begin by stacking several pieces of tissue paper neatly on top of one another, lining up the edges so that all layers are even. The number of sheets you use will affect volume; more layers create a fuller, more dramatic flower.
- Place 4–8 tissue rectangles or squares in a stack.
- Starting from one short side, fold the stack back and forth into a narrow accordion, keeping the folds as even as you can.
- Press the folded stack firmly so that the layers stay together.
Step 2: Secure the Center with Wire
The center of the folded tissue stack becomes the core of your flower. A piece of wire wrapped firmly at this point holds everything together and later acts as the connection between the blossom and the pencil.
- Find the middle of your folded stack by gently bending it in half.
- Cut a length of wire long enough to wrap around the center and spiral down the pencil.
- Wrap the wire around the center and twist it tightly until the tissue is firmly held in place.
Step 3: Shape the Petals
By trimming the ends of your folded stack, you decide what kind of petals your flower will have. Rounded edges create a soft, traditional petal look, while pointed angles lead to a spikier, carnation-style bloom.
- For rounded petals: cut a gentle curve across both ends of the folded stack.
- For pointed petals: cut a shallow triangle, forming a V shape at each end.
- For fringe petals: make short, closely spaced snips along the edges without cutting all the way through.
Step 4: Separate and Fluff the Layers
This is the step where your flower really comes to life. Handle the tissue paper gently; it tears easily, but slight rips can usually be hidden within the layers of petals.
- Hold the wired center in one hand.
- With your other hand, slowly pull the top layer of tissue upward toward the middle.
- Repeat with each layer, alternating sides, until all pieces are separated and arranged in a round, fluffy blossom.
Step 5: Attach the Flower to the Pencil
Once the flower head is formed, it is time to connect it to your pencil so it can stand upright like a stem. The wire provides structure, while tape secures everything in place and gives the look of a finished stem.
- Place the flower’s wired stem alongside the top of the pencil.
- Begin wrapping floral tape or decorative tape around the pencil, starting just below the petals.
- Stretch the tape slightly as you wrap so that it adheres firmly to itself and to the pencil.
- Continue spiraling the tape down the pencil until you reach the desired point, then press the end of the tape flat to secure it.
Design Ideas and Color Combinations
One of the most enjoyable aspects of this craft is experimenting with different color schemes and petal shapes. You can create soft pastel blossoms, bold rainbow flowers, or themed designs that match parties and classroom decor.
- Monochrome blooms: Use several layers of the same color to create an elegant, unified look that is easy to coordinate in a bouquet.
- Two-tone centers: Stack a smaller rectangle of yellow or white tissue on top of larger petals to mimic a natural flower center.
- Ombre effect: Arrange shades of the same color from light to dark in the stack so the flower subtly shifts in tone from center to edges.
- Rainbow mix: Alternate bright colors for a playful flower that looks especially cheerful in kids’ pencil cups.
Creative Ways to Use Pencil Flowers
Once you start making tissue paper flower toppers, it is easy to find uses for them far beyond a single pencil holder. They can decorate classrooms, bring color to events, and serve as small, personalized favors.
- Teacher bouquets: Fill a jar or mug with flower pencils as a practical, pretty gift.
- Homework motivators: Let children choose a special pencil flower for reading time or challenging assignments.
- Party favors: Match flower colors to birthday or seasonal themes and place a pencil at each table setting.
- Classroom projects: Have students design their own flower styles as part of a unit on plants, color, or design.
Tips for Crafting with Kids
This project is well suited to a range of ages, but a few small adjustments can make it smoother when working with younger children. Plan your steps in advance and set up stations if you are crafting with a group.
- Pre-cut tissue paper rectangles so children can focus on folding and fluffing.
- Use blunt-tip scissors and pre-cut wires for safety.
- Let adults or older kids handle the initial wire twisting, especially with very thin tissue that is easy to tear.
- Encourage experimentation with color, but limit choices per child to prevent overwhelm.
Common Problems and Easy Fixes
Even simple crafts can occasionally go wrong, but most issues with tissue paper flowers are easy to fix. A few quick adjustments can rescue a wilted-looking blossom or a loose attachment.
| Problem | Likely Cause | How to Fix It |
|---|---|---|
| Flower looks flat | Too few layers or minimal fluffing | Add more tissue layers next time and gently separate every sheet all the way to the base. |
| Tissue tears while fluffing | Pulling too quickly or using very thin tissue | Slow down, support each layer with one hand, and accept small tears as part of the texture. |
| Flower slides on the pencil | Loose wire or insufficient tape | Re-wrap the base with additional tape, stretching it firmly so it grips the pencil. |
| Stem looks bulky | Too many tape layers in one spot | Wrap tape at a shallow angle, overlapping slightly instead of stacking it straight on top of itself. |
Storage and Care
Tissue paper flowers are surprisingly durable when handled with care, but they are sensitive to moisture, heavy weight, and direct sunlight over long periods. A few simple habits will keep your pencil flowers looking bright and full.
- Store flower pencils upright in cups or jars to avoid crushing the petals.
- Keep them away from water glasses and sinks, as tissue paper stains and warps easily when wet.
- Dust gently with a soft brush or canned air if petals begin to look dull.
Frequently Asked Questions
Can I make these without wire?
Yes. If you do not have wire, you can tie the center of the folded tissue stack with strong thread or thin string, leaving long tails. Wrap the tails around the top of the pencil and then cover them with tape in the same way you would cover the wire.
What type of tissue paper works best?
Standard gift-wrap tissue paper works very well because it is light enough to fluff but strong enough to hold its shape. Very thick paper is hard to fold and shape, while extremely thin decorative tissue may tear more easily during fluffing.
Can I reuse old gift tissue?
Clean, unwrinkled sections of gift tissue can be repurposed for this craft, making it a budget-friendly and eco-conscious option. Avoid pieces with heavy creases, tape residue, or tears, as they will be harder to fold neatly.
How long do the flowers last?
With gentle handling and dry storage, tissue paper flower pencil toppers can last for months or even years. Over time, colors may fade slightly, especially if kept in bright sunlight, but the overall shape will remain as long as the petals are not crushed.
Are these suitable for classroom activities?
This project is an excellent classroom activity, particularly for elementary and middle grades. By preparing materials in advance and pairing younger students with older helpers, you can guide an entire group through the steps in a relatively short period.
Bring a Garden to Your Desk
With just a few sheets of tissue paper and some tape, you can turn a pile of ordinary pencils into a lively bouquet that makes every writing task more inviting. Once you have made one flower, it is easy to experiment with new colors, petal shapes, and arrangements until your pencil cup looks more like a tiny garden than a set of supplies.
Whether you are crafting with kids, preparing gifts for teachers, or simply refreshing your own workspace, tissue paper flower pencil toppers offer a cheerful way to combine creativity and practicality in a single, simple project.