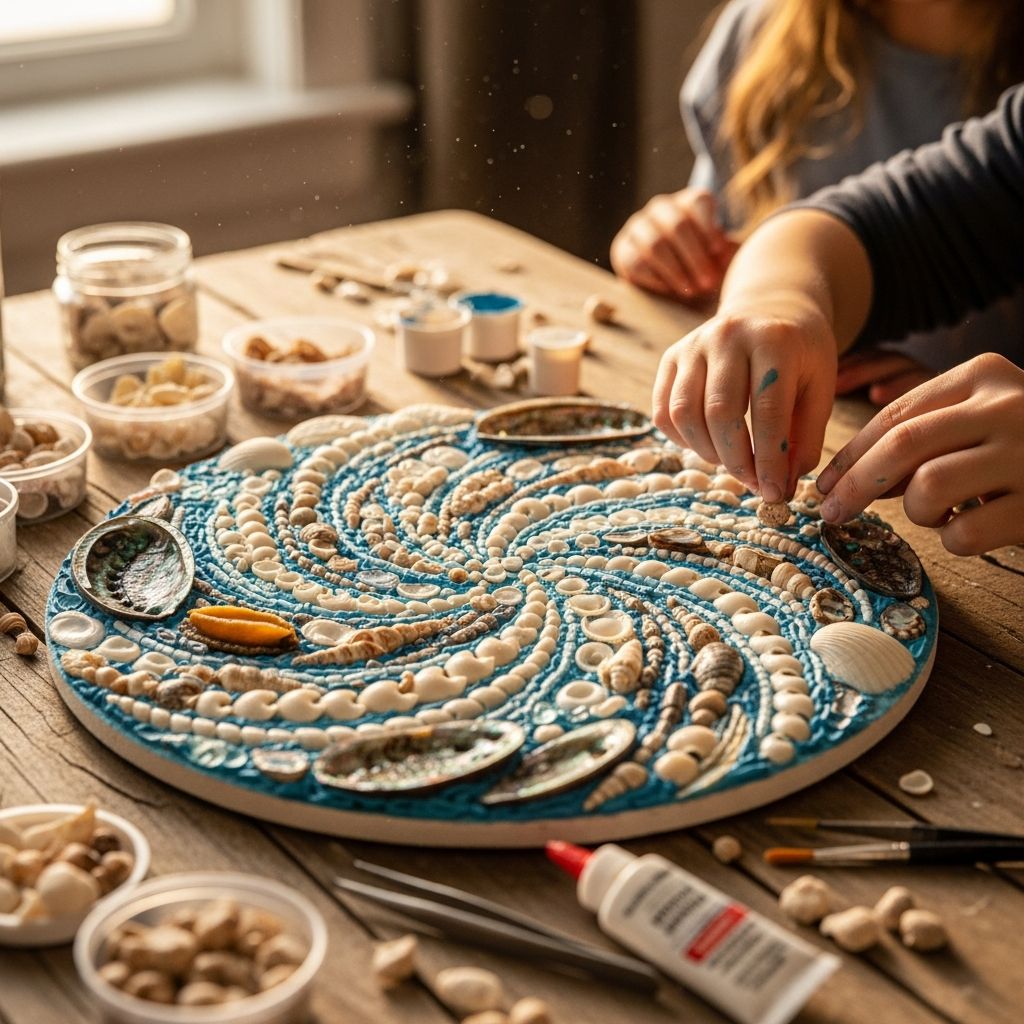
Sea shell mosaics are a playful way to turn beach treasures into lasting works of art. With a few basic supplies and some simple safety steps, families can create sturdy, decorative pieces that preserve summer memories all year long.
This guide walks you through everything from gathering shells and choosing a base to mixing plaster, designing your mosaic, and sealing it so it lasts for years.
Why Sea Shell Mosaics Are Perfect for Families
Sea shell mosaics are especially well-suited for family crafting because they:
- Use inexpensive, easy-to-find materials like shells, sea glass, and simple containers.
- Encourage kids to observe shapes, sizes, colors, and patterns, supporting creative development.
- Create durable artwork that can be displayed indoors or in sheltered outdoor spaces.
- Are highly adaptable to different ages, skill levels, and time frames.
Hands-on art projects such as mosaics help children develop fine motor skills, hand–eye coordination, and spatial awareness, especially when they place small pieces deliberately into a design. These activities also support problem-solving and planning, as kids decide where each shell or piece of sea glass should go.
Materials and Tools: What You Need to Get Started
You can adapt this project to what you already have at home, but the basic supplies for a classic sea shell mosaic with a plaster base include:
Core Materials
- Base container: Disposable aluminum pie pan, plastic food container, shallow mold, or sturdy paper bowl.
- Plaster of Paris: A quick-setting casting material available at most craft and hardware stores.
- Water: Clean, room-temperature tap water.
- Shells and sea treasures: Cleaned, dry shells, sea glass, small pebbles, or decorative beads.
- Mixing bucket: An old plastic bowl or bucket large enough for mixing plaster.
- Stir sticks: Wooden paint stirrers or disposable spoons.
- Sealer: Decoupage medium (like Mod Podge), acrylic clear coat, or other craft sealant suitable for porous surfaces.
Helpful Extras
- Measuring cup (for consistent plaster and water ratios).
- Disposable gloves for the adult mixing plaster.
- Protective table covering (old tablecloth, plastic sheet, or newspaper).
- Aprons or old shirts to protect clothing.
- Permanent marker for writing names or dates on the back after drying.
| Item | Suggested Alternative | Notes |
|---|---|---|
| Aluminum pie pan | Plastic plate or shallow food container | Choose something flexible enough to peel away once plaster cures. |
| Plaster of Paris | Premixed casting compound | Follow manufacturer instructions for mixing ratios and safety. |
| Sea shells | Buttons, beads, flat glass marbles | Great for days when you can’t collect shells at the beach. |
| Decoupage sealer | Acrylic spray sealant | Use in a well-ventilated area and follow the label directions. |
Safety First: Adult Prep and Supervision
Plaster of Paris is very useful, but it must be handled with care. Safety guidance from art education and occupational safety sources recommends that adults, not children, measure and mix dry plaster to reduce dust inhalation and skin contact. Keep these precautions in mind:
- Adults handle the powder: Children can help design and place shells, but mixing and pouring plaster should be done by an adult.
- Avoid dust: Open the container gently, mix slowly, and keep your face away from the bucket to minimize airborne dust.
- Protect skin and eyes: Consider gloves for sensitive skin and avoid touching your face or eyes while working.
- Use good ventilation: Work in a well-ventilated space, especially if you use spray sealers later.
- Dispose properly: Never pour leftover plaster down the sink; let it harden in a disposable container and discard it in the trash to avoid clogging pipes.
Step-by-Step: Creating a Sea Shell Mosaic in Plaster
The process below assumes a simple ratio of two parts plaster powder to one part water, which is common for many brands. Always check the instructions on your specific product and adjust accordingly.
1. Prepare Your Workspace and Shells
- Cover the table with a protective layer.
- Lay out shells and sea glass so kids can see all options at once.
- Rinse shells with fresh water and allow them to dry thoroughly to prevent trapped moisture or residue.
- Invite children to sort shells by size, color, or type. This sorting step supports early math concepts and planning skills.
2. Pre-Plan Your Design
Before you pour the plaster, encourage kids to experiment with arrangements inside an empty pan:
- Create patterns (spirals, stripes, radiating rays from the center).
- Form simple shapes like hearts, stars, or letters.
- Try a mini “beach scene” with a horizon line made from shells and sea glass.
You can photograph the layout so children remember their chosen pattern when it is time to press shells into the wet plaster.
3. Mix the Plaster (Adult Task)
- Measure water into the mixing bucket.
- Slowly sprinkle in plaster powder, maintaining approximately a 2:1 powder-to-water ratio, unless your product indicates otherwise.
- Stir gently but thoroughly, scraping the sides and bottom, until the mixture is smooth and lump-free.
- Let the mixture sit briefly (usually a minute or two) if recommended by the manufacturer to allow air bubbles to rise.
The working time for plaster is relatively short, often in the range of 10–15 minutes before it thickens noticeably, so have pans and shells ready first.
4. Pour and Level the Base
- Pour the wet plaster into the waiting pie pans or molds until each is filled to a depth of about 1–2 cm.
- Tap the container gently on the table to help air bubbles escape and to level the surface.
- Place the container on a flat, stable surface where it can remain undisturbed while you work.
5. Press in the Shells
This is the most enjoyable part for kids. They should be ready to work promptly after the pour.
- Wait a minute or two until the surface begins to thicken slightly but is still soft enough to press.
- Show children how to press shells gently into the surface so they are partly embedded but still visible.
- Encourage them to start with larger focal shells and then fill in gaps with smaller pieces.
- Remind them to keep edges away from the very rim if you plan to peel off the pan later.
Because shells vary in thickness, the finished surface will be textured rather than flat. This tactile quality is part of the charm and invites sensory exploration once the piece is fully cured.
6. Allow Time to Harden and Cure
- Follow the product’s recommended drying time; many plasters harden within an hour but may require 24 hours or more to fully cure.
- Keep mosaics in a dry area away from heavy traffic, pets, and curious hands.
- Once fully set, gently flex the aluminum or plastic mold to release the plaster disk if desired.
7. Seal and Finish
To protect the surface and intensify colors:
- Brush on a thin coat of decoupage sealer or acrylic clear coat.
- Allow to dry completely, then add a second coat if needed.
- Label the back with the child’s name and date using a permanent marker.
Sealing helps reduce dust and moisture absorption, extending the life of your mosaic and keeping shells bright.
Creative Variations and Display Ideas
Once you understand the basic method, you can adapt sea shell mosaics for different occasions, ages, and spaces.
Project Variations
- Mini keepsakes: Use small yogurt cups to make tiny round mosaics that become paperweights or desk decorations.
- Initials and monograms: Draw a large letter in the plaster with a toothpick and fill it with shells or sea glass of a single color.
- Story mosaics: Invite children to depict a simple scene (a fish, the sun over waves, or a lighthouse) and let them explain the “story” behind their design.
- Mixed-media mosaics: Incorporate beads, buttons, or flat gems alongside shells for extra sparkle.
Display Ideas
- Prop mosaics on small easels on a mantle or bookshelf.
- Attach adhesive felt pads to the back and use them as decorative trivets for cool serving dishes.
- Glue a sturdy picture hanger or loop of ribbon on the back (using strong craft glue) to hang lightweight pieces on the wall.
- Create a seasonal display by grouping several mosaics together, each labeled with the year or the beach where shells were collected.
Tips for Crafting with Different Age Groups
With slight adjustments, this project can engage toddlers, school-age children, teens, and adults alike.
Toddlers and Preschoolers
- Pre-embed larger shells in the plaster and invite them to add just a few pieces.
- Focus on exploring textures and colors rather than complex designs.
- Keep sessions short to match their attention spans.
Elementary-Age Kids
- Let them plan patterns or simple images in advance.
- Invite them to help with non-hazardous tasks: rinsing shells, sorting, and arranging layouts.
- Encourage reflection by asking, “What do you like most about your design?”
Preteens, Teens, and Adults
- Experiment with more intricate patterns, gradients, or mandala-style designs.
- Try larger bases and incorporate grout between shells for a more traditional mosaic look.
- Use color theory ideas—such as complementary colors or monochrome schemes—to guide shell and glass selection.
Frequently Asked Questions (FAQs)
Can kids safely help mix plaster of Paris?
It is safest for adults to handle plaster powder and mixing, as dry plaster dust can irritate lungs and eyes. Children can participate by planning designs and pressing shells into the wet plaster once it is poured.
How long should I let the mosaic dry before removing it from the pan?
Many plasters harden within an hour, but waiting at least 24 hours before removing the piece from its mold allows it to gain strength and reduces the chance of cracks. Always follow the drying time listed on your product.
Will my sea shell mosaic be waterproof?
Standard plaster of Paris is not fully waterproof. A clear sealer offers some protection, but it is best to display mosaics indoors or in covered areas away from standing water and heavy rain.
Can we use store-bought shells instead of ones from the beach?
Yes. Purchased shells and sea glass work very well and are often already cleaned. Just rinse and dry them before use to remove dust, then proceed with the project.
What should I do with leftover plaster?
Let any extra plaster harden in a disposable container and throw it away in the trash. Do not rinse it down the sink or pour it into drains, as it can cure inside pipes and cause blockages.
How can I make this project more eco-conscious?
Collect only empty shells and natural items that are not housing living creatures, follow local guidelines on shell collecting, and reuse containers as molds whenever possible.
References
- Learning in the Visual Arts and the World of Work — National Endowment for the Arts. 2011-02-01. https://www.arts.gov/sites/default/files/ArtsLearningFinalReport.pdf
- Art and Early Childhood: Personal Narratives and Social Practices — Australian Government, Department of Education (ACEReSearch). 2010-06-01. https://research.acer.edu.au/cgi/viewcontent.cgi?article=1089&context=early_childhood_misc
- OSHA Fact Sheet: Working Safely with Plaster of Paris — Occupational Safety and Health Administration (OSHA). 2013-05-01. https://www.osha.gov/sites/default/files/publications/OSHA3685.pdf
- Mosaics: Techniques and Traditions — The Metropolitan Museum of Art (educational resource). 2001-01-01. https://www.metmuseum.org/art/metpublications/mosaics_techniques_and_traditions