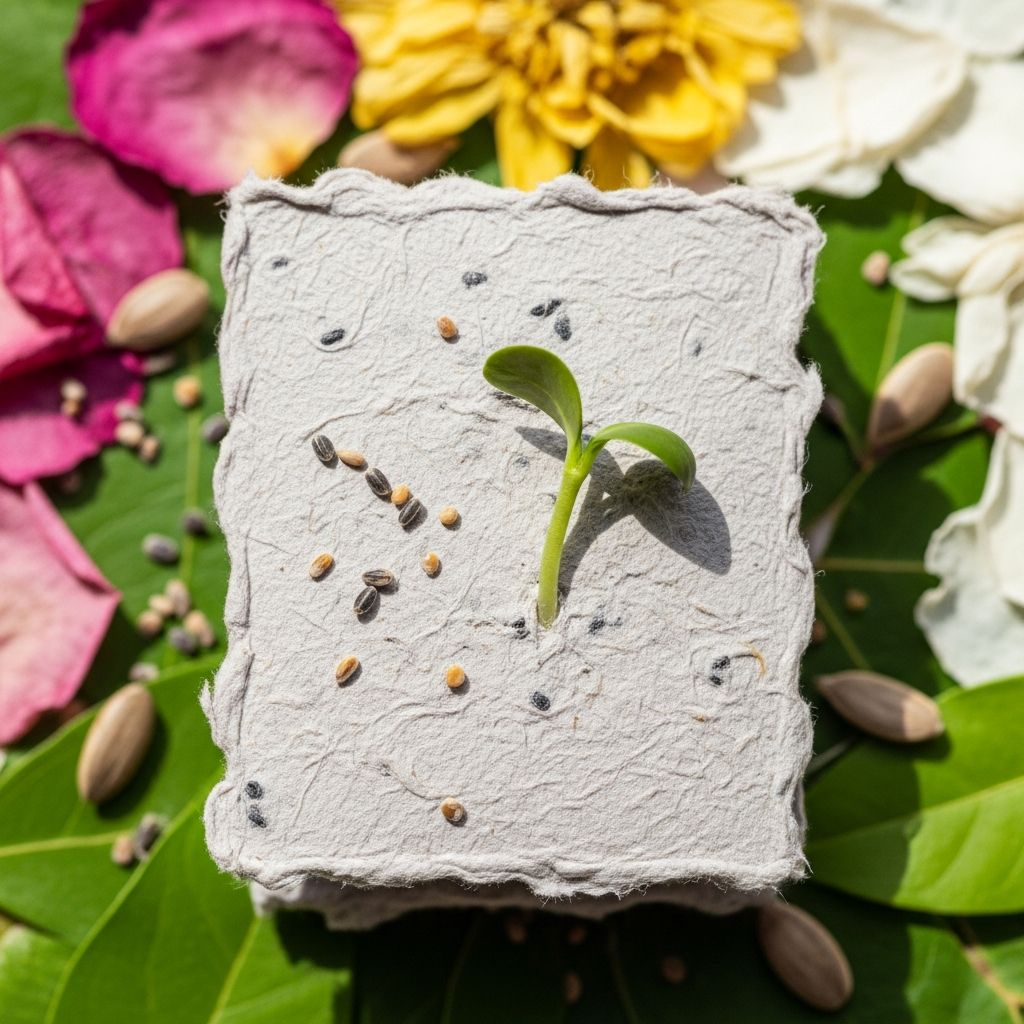
Plantable paper is a handmade paper embedded with seeds that you can plant in soil to grow flowers, herbs or vegetables. Instead of sending paper to the trash, this simple project lets you recycle it into something beautiful, useful and alive.
This guide walks you through how plantable paper works, what you need to make it at home, and creative ways to use it for kids 1 crafts, holiday projects and eco-friendly celebrations. The instructions are designed for beginners, families and classrooms who want a low-cost, earth-conscious activity.
Why Plantable Paper Matters
Paper is one of the easiest materials to recycle and reuse, yet a surprising amount still ends up in the trash. Turning scrap paper into plantable sheets keeps material in use longer and gives it a second life in the garden instead of the landfill.
Plantable paper also helps kids and adults see a full life cycle: paper comes from plants, becomes a surface for art and writing, then returns to the soil to grow new plants. It is a simple way to talk about waste, resources and responsibility without a lecture.
How Plantable Paper Works
Plantable paper is made from a slurry of soaked, blended paper mixed with seeds and then spread into thin sheets to dry. Once dry, the paper can be cut, written on and gifted like normal paper, but it carries a hidden bonus: the embedded seeds.
When the paper is planted, moisture softens the fibers and exposes the seeds to water, air and warmth. The paper slowly breaks down while the seeds germinate, allowing roots to push through and shoots to grow above the surface.
Best Seeds to Use (and Which to Skip)
Choosing the right seeds makes the difference between a fun experiment and a frustrating one. Not every seed handles soaking and drying the same way, so it helps to be selective.
- Great choices: small flower seeds (like wildflowers, calendula, alyssum), herb seeds (basil, parsley, dill, chives) and some leafy greens (lettuce, spinach).
- Avoid: very large seeds (beans, peas), seeds with tough shells (many tree nuts) and anything invasive or not suited to your local climate.
- Consider pollinators: using a mix of bee- and butterfly-friendly flowers can support local wildlife while looking beautiful.
Seed Selection Tips
Look for regionally appropriate, non-invasive seeds on the packet or from a local nursery. For kid crafts, choose quick-germinating varieties so children can see sprouts sooner and stay engaged.
If you are making gifts, you can tailor the seed mix to the occasion: kitchen herbs for foodies, bright flowers for birthdays, or calming lavender blends for wellness-themed events.
Simple Equipment and Materials
You do not need special tools or expensive kits to make plantable paper. Most supplies are already in a typical home or classroom.
| Item | Purpose | Budget-Friendly Alternatives |
|---|---|---|
| Scrap paper (white or light-colored) | Base material for the pulp | Old homework, junk mail (without plastic), paper bags |
| Blender or food processor | Turns soaked paper into pulp | Hand-mashing in a bowl (more rustic texture) |
| Water | Softens paper and forms slurry | Room-temperature tap water |
| Seeds | Grow into plants after planting | Leftover seed packets, seed swaps, bulk wildflower mix |
| Screen or mesh | Helps drain water and shape sheets | Old window screen, mesh produce bag, fine colander |
| Absorbent cloths or paper towels | Draw out moisture from the pulp | Old dish towels, cotton T-shirts |
| Rolling pin or bottle | Presses out water and flattens sheets | Clean glass jar, smooth metal water bottle |
Step-by-Step: How to Make Plantable Paper
The process can be broken down into four simple stages: soaking, blending, forming and drying. This is a perfect project to spread over a morning or an afternoon.
1. Tear and Soak the Paper
- Rip scrap paper into small pieces, roughly the size of postage stamps or smaller. Smaller pieces blend more evenly.
- Place the torn paper in a bowl and cover it completely with water.
- Let it soak for at least 30 minutes. For thicker paper, several hours or overnight creates a smoother pulp.
2. Blend Into Pulp
- Transfer the soaked paper and some of the water to a blender, filling it about halfway.
- Pulse until the mixture looks like a thick, uniform slurry with no large paper chunks. Add water if needed to help it move.
- Pour the pulp back into a large bowl so you have room to stir in seeds.
3. Add the Seeds
- Check that the pulp is cool and not hot from blending, as high heat can damage seeds.
- Sprinkle in your chosen seeds and gently fold them through the pulp with your hands or a spoon.
- Aim for an even distribution of seeds without clumps. Too many seeds in one spot makes it hard for all of them to grow.
4. Shape and Press the Paper
- Lay your screen or mesh on top of a towel to catch dripping water.
- Scoop a portion of the seeded pulp onto the screen and spread it into a thin, even layer with your fingers or a spatula. Thinner sheets dry faster and are easier to cut later.
- Place another cloth or towel on top of the pulp.
- Use a rolling pin, bottle or jar to gently but firmly press down, pushing out excess water. Lift and reposition if needed until most of the moisture is absorbed.
5. Dry Thoroughly
- Carefully peel away the top cloth, leaving the pulp on the screen.
- Move the screen to a dry, well-ventilated spot out of direct, hot sunlight. Too much heat can bake the seeds.
- Allow the sheet to dry completely, which may take anywhere from several hours to a full day, depending on thickness and humidity.
- Once dry, gently lift the paper from the screen. Trim any uneven edges if you like.
Decorating and Personalizing Your Paper
Decoration transforms simple plantable sheets into cherished keepsakes. Light colors and thin layers work best because they keep the seeds close to the surface and visible.
- Color: Add bits of colored scrap paper to the pulp, or blend in a small amount of food coloring or natural dye like beet or turmeric water.
- Texture: Sprinkle in dried flower petals, tiny leaves or threads of tissue paper for a confetti effect.
- Drawing and writing: Once fully dry, use waterproof pens or markers to add messages, borders and simple illustrations.
Creative Ways to Use Plantable Paper
Plantable paper can replace many single-use paper items, especially where a personal touch matters. The novelty of “paper that grows” makes even small notes feel special.
- Greeting cards: Cut the sheets into card sizes and write a message directly on them. Recipients can plant the entire card after reading.
- Gift tags: Punch a small hole in a corner, thread a string through, and tie to presents or party favors.
- Bookmarks: Long, narrow strips make lovely bookmarks that can be planted when they are worn out.
- Classroom rewards: Teachers can hand out plantable “tickets” that double as a science or nature project.
- Event favors: Weddings, baby showers and birthdays can use plantable hearts, circles or custom shapes as favors guests will remember.
Kid-Friendly Project Ideas
Children love crafts with a visible result, and plantable paper offers two: the finished artwork and the later surprise of seedlings emerging from the soil. The steps can be simplified so even young kids can participate.
- Alphabet garden: Cut plantable paper into letters of each child’s initials. When planted, kids get a mini garden that spells their name.
- Seasonal ornaments: Use cookie cutters as stencils to make leaf, star or flower shapes for different holidays.
- Science journals: Have students document each stage from paper scraps to plants with drawings or photos, turning the craft into a mini science unit.
How to Plant and Care for Seed Paper
Once your creations are gifted or ready to plant, clear instructions help new gardeners succeed. Plantable paper behaves like a thin mulch, so it needs contact with soil and consistent moisture.
- Prepare a pot or patch of garden soil that drains well. Loosen the top layer so roots can spread easily.
- Lay the plantable paper flat on the soil surface. For very thick pieces, you can break them up slightly.
- Cover with a light dusting of soil, just enough to hide the paper while still letting light and air reach the seeds.
- Water gently until the soil is evenly moist but not flooded.
- Keep the area consistently damp during the germination period, usually 1–4 weeks depending on the seeds.
- Once seedlings appear, thin them if they are crowded so the strongest plants can grow well.
Common Troubleshooting Tips
Not every batch or planting will be perfect, and that is part of the learning. When sprouts do not appear, a few simple adjustments usually help.
- No germination: The seeds may have been old, damaged by heat, or covered with too much soil. Next time, use fresher seeds and a lighter soil layer.
- Mold on drying sheets: This can happen if the paper is too thick or drying in a very humid spot. Make thinner sheets and increase air flow.
- Uneven growth: If only some sections sprout, seeds may have clumped during mixing. Stir more thoroughly and spread the pulp more evenly.
Safety and Sustainability Notes
Plantable paper is generally safe, but a few simple guidelines keep the project healthy for both people and the environment. Clear labeling also helps recipients know how to handle and grow their paper.
- Avoid glossy and heavily inked papers: These may contain coatings or inks that do not break down cleanly.
- Use non-toxic colorants: If adding color, choose food-based or child-safe dyes.
- Label seed types: Note what seeds are included and whether they are suitable for containers or outdoor beds.
Sample Plantable Paper Project Plan
For groups, a simple schedule keeps everyone engaged and ensures enough drying time. The timeline below works well for a family day or classroom activity.
| Time Block | Activity | Notes |
|---|---|---|
| Day 1 – 20 minutes | Tear and soak paper | Kids can help shred paper and discuss recycling. |
| Day 1 – 30–45 minutes | Blend pulp, add seeds, form sheets | Great time to talk about plant needs and seed types. |
| Overnight | Sheets dry | Keep in a safe, flat spot away from curious pets. |
| Day 2 – 20–30 minutes | Cut, decorate and label | Add messages, shapes and planting instructions. |
| Anytime later | Plant and observe growth | Invite kids to measure sprout height and sketch changes. |
Frequently Asked Questions About Plantable Paper
Does plantable paper really grow?
Yes, plantable paper can grow into real plants when made with viable seeds and planted in suitable conditions. Success depends on seed freshness, soil quality, light and consistent moisture during the germination period.
How long can I store plantable paper before planting?
Most seeds embedded in paper will stay viable for several months to a year if stored in a cool, dry place away from direct sunlight. Over longer periods, germination rates usually decline, so it is best to plant within the same growing season when possible.
Can I print on plantable paper?
Home inkjet printers can sometimes handle thicker handmade sheets, but there is a risk of jamming. For safety, many people prefer to handwrite messages or attach a separate printed note with planting instructions rather than running the plantable paper through a printer.
Is plantable paper safe for pets and wildlife?
Plantable paper made from plain recycled paper and non-toxic inks is generally safe, but the seeds and plants themselves may not be suitable for all animals. Avoid embedding seeds that are poisonous to pets or wildlife, and supervise pets around freshly planted areas.
Can I use recycled newspaper?
Small amounts of newspaper can be mixed into the pulp, but heavy newsprint can make darker sheets and may contain more ink than you want in the soil. If you do use it, balance it with lighter papers so the final product is still easy to write on and plant.
Making Plantable Paper Part of Your Traditions
When plantable paper becomes a recurring craft, it can anchor meaningful traditions: Earth Day projects, end-of-school-year thank-you cards, or a yearly family “planting party” to welcome spring. Each sheet is a reminder that creativity and care for the planet can go hand in hand.
With a bowl of water, some scrap paper and a handful of seeds, you have everything needed to turn waste into wildflowers and simple afternoons into memories that keep blooming long after the craft table is cleared.