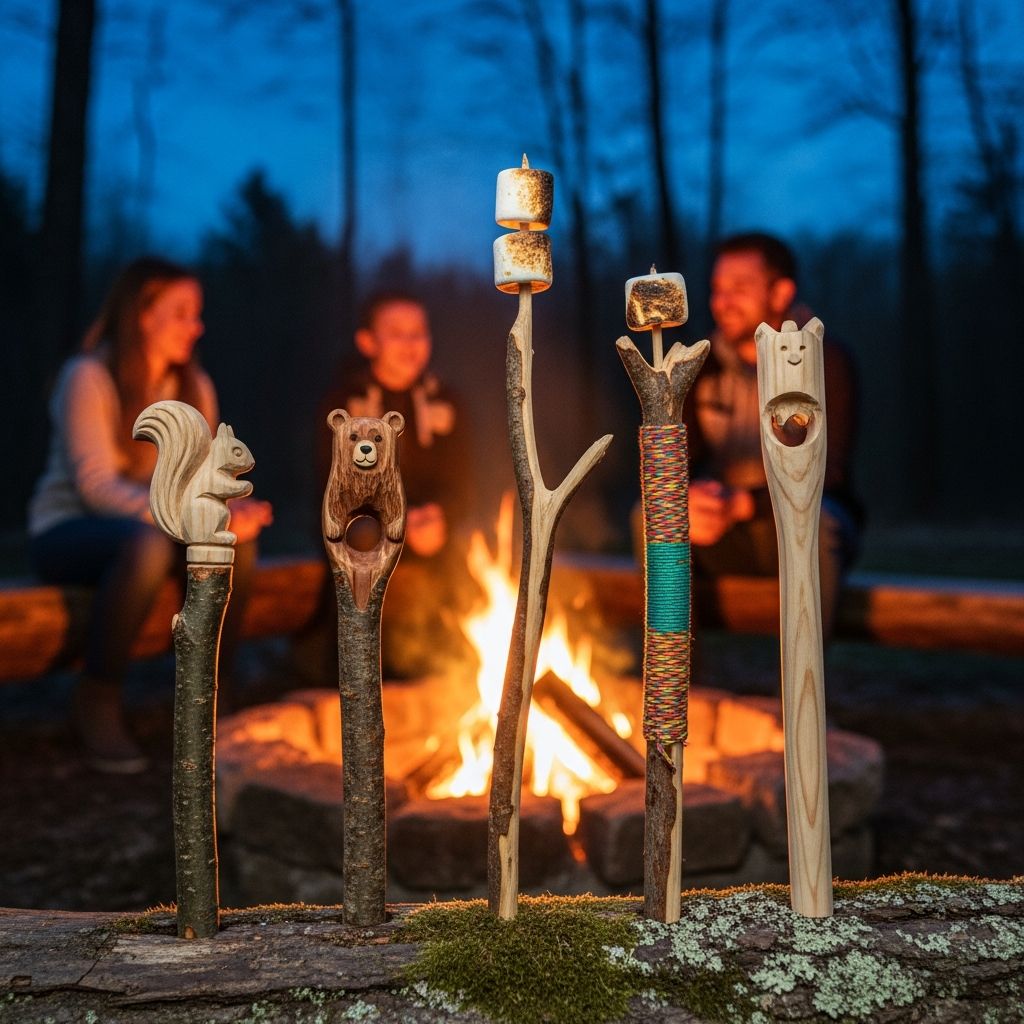
Few things feel as cozy and nostalgic as roasting marshmallows around a crackling fire. Personalized campfire roasting sticks add a special touch to this tradition by making each person’s skewer unique, easy to recognize, and more comfortable to hold.
This guide walks through how to build and decorate your own roasting sticks at home, from choosing safe materials to adding names, colors, and patterns that reflect your family’s style. It is written as original, step-by-step instruction and inspiration, not as a replica of any single source.
Why Make Your Own Roasting Sticks?
Store-bought skewers work, but custom roasting sticks offer benefits that go beyond simple function. They blend safety, comfort, and creativity into one small but meaningful project.
- Personal ownership: Each family member can design a handle that reflects their personality, reducing arguments over whose stick is whose.
- Improved comfort: Wooden handles are easier to grip and stay cooler than bare metal, making them safer for kids and more pleasant for adults.
- Reusability: A durable, personalized stick can last for seasons of camping trips and backyard fires, reducing disposable waste.
- Built-in activity: Decorating the handles is a fun pre-trip craft that builds anticipation for the campfire itself.
Planning Your Design Before You Start
Before picking up tools or paints, decide on a general look and purpose. This helps you choose the right materials and avoid redoing work later. Consider who will use the sticks, how often, and what kind of fire you usually build (small firepit versus large campsite fire).
Ask yourself a few questions as you plan:
- Will children be using these sticks, and do they need extra-long handles for safety?
- Do you prefer bright colors that stand out in a gear bin, or natural wood finishes that match rustic décor?
- Do you want to include names, initials, or simple icons (like stars or mountains) to identify each stick?
- Will the sticks live indoors or in a shed, and do they need extra sealing to withstand damp conditions?
Materials and Tools You Will Need
Most supplies are easy to find at hardware, craft, or big-box stores. The exact items can vary, but the overall goal is the same: a long, food-safe metal skewer anchored securely in a comfortable wooden handle.
Core Materials
- Stainless steel skewers or food-safe metal roasting forks (length 24–36 inches is ideal)
- Wooden dowels or pre-cut wood handles (about 1 inch in diameter and 5–7 inches long)
- Strong, high-heat-resistant adhesive (such as two-part epoxy labeled for metal and wood)
- Sandpaper (medium and fine grit)
Decoration Supplies
- Acrylic craft paints or outdoor wood paint
- Painter’s tape or masking tape for clean stripes and patterns
- Paint markers or permanent markers for names and fine details
- Clear, non-toxic sealant for wood (brush-on or spray, rated for outdoor use)
- Stencils, stickers, or letter templates (optional, for precise lettering)
Tools for Assembly
- Hand drill or drill press
- Drill bits sized to match the thickness of your metal skewers
- Clamp or vise to hold the dowel steady while drilling
- Rag or paper towels for wiping away extra glue or dust
- Drop cloth, cardboard, or scrap paper to protect surfaces while painting
Recommended Dimensions at a Glance
The table below outlines comfortable, family-friendly proportions for your roasting sticks. These are guidelines, not strict rules, so adapt them to your own needs.
| User | Suggested Metal Length | Handle Length | Overall Reach |
|---|---|---|---|
| Young children (with supervision) | 20–24 inches | 5–6 inches | 25–30 inches |
| Teens and adults | 24–30 inches | 6–7 inches | 30–37 inches |
| Extra-safe distance (large fires) | 30–36 inches | 6–7 inches | 36–43 inches |
Step-by-Step: Building the Handle and Attaching the Skewer
Construction comes before decoration. Focus first on creating a solid, secure connection between wood and metal so the decorative layers sit on a strong foundation.
1. Prepare the Wooden Handles
If you purchased long dowels, cut them into handle-sized sections. Aim for pieces that feel natural in the hand—long enough to grip with all fingers but not so long that they become heavy or awkward.
- Measure and mark handle lengths using a pencil before cutting.
- Cut using a hand saw or small power saw, depending on what you have and are comfortable using.
- Sand both ends and the entire surface until smooth, starting with medium-grit sandpaper and finishing with fine grit.
Rounded edges will feel better in the hand and are less likely to splinter over time, so spend an extra minute softening sharp corners.
2. Drill a Hole for the Skewer
The drilled hole must fit the metal rod snugly without splitting the wood. Take your time with this step, and always secure the dowel before drilling.
- Clamp the dowel horizontally to a workbench or sturdy table so it cannot roll.
- Select a drill bit that matches (or is just slightly larger than) the diameter of your skewer.
- Mark the drilling depth on the bit with a piece of tape—typically 2–3 inches is sufficient.
- Drill straight into the center of one end of the dowel, stopping when you reach the tape.
- Back the drill out slowly to prevent tearing or chipping inside the hole.
Test-fit the skewer dry (without glue) to ensure it slides in firmly. It should not wobble or fall out easily.
3. Attach the Metal Skewer
Once the fit feels right, move on to gluing. Adhesive gives your stick long-term durability and helps prevent the metal from twisting under the weight of food.
- Clean the end of the skewer with a dry cloth to remove oils or dust.
- Mix epoxy or prepare your chosen adhesive according to the instructions.
- Apply a thin coat inside the drilled hole and a small amount onto the end of the skewer.
- Insert the skewer into the handle in one smooth motion, twisting slightly to spread the adhesive evenly.
- Wipe away any excess glue that squeezes out, then set the stick aside to cure undisturbed.
Allow the adhesive to cure fully before painting or using the stick; this may take several hours or overnight, depending on the product.
Creative Ways to Decorate Your Handles
Once your handles and skewers are securely attached, it is time to personalize. This is where kids can really participate—just remember to supervise young children around paints and sealants.
Color Themes and Patterns
- Bold stripes: Wrap painter’s tape around the handle to create bands. Paint the exposed areas, let them dry, then remove the tape for crisp lines.
- Ombre fade: Blend two or three shades of the same color, starting darker at the base and getting lighter toward the top.
- Nature-inspired: Use greens, browns, and creams to mimic leaves, bark, or mountains.
- Glow accents: Add a few touches of glow-in-the-dark paint to help identify sticks after sunset.
Names, Initials, and Icons
Labeling sticks eliminates confusion and creates a deeper sense of ownership. You can keep it simple or go all out, depending on time and supplies.
- Write names or initials with fine-tipped paint markers after base colors have dried.
- Use alphabet stencils and a small brush for crisp, uniform lettering.
- Add small icons that match each person’s interests: stars, hearts, camping tents, animals, or favorite sports.
- Color-code for quick recognition—one person might have blue-and-gold, another green-and-white, and so on.
Adding a Protective Finish
A clear topcoat protects the artwork from scratches, dirt, and occasional splashes, extending the life of your project. Always apply sealant according to the manufacturer’s directions and only to the handle (not to the metal where food will touch).
- Let all paint layers dry completely before applying clear coat.
- Work in a well-ventilated area or outdoors on a calm day.
- Apply thin, even coats rather than one heavy layer to avoid drips.
- Allow sufficient drying time between coats, then cure fully before packing the sticks.
Safety Tips for Using Personalized Roasting Sticks
Homemade roasting sticks can be very safe when built thoughtfully, but it is important to practice good fire and food safety. Review these points with children and guests before roasting.
- Always keep the wooden handle well away from direct flames; hold marshmallows and hot dogs over the coals or to the side of the fire.
- Do not roast directly on painted or coated metal. Food should sit only on the uncoated metal tip.
- Inspect each stick before use to make sure the skewer is still firmly secured inside the handle.
- Teach children to walk slowly and point the metal end down when moving near others.
- Let the metal cool fully before packing the sticks away or touching the tip with bare hands.
Cleaning and Storing Your Roasting Sticks
Proper cleaning keeps your sticks sanitary and protects both the metal and the decorative finish. Avoid soaking the handles or using harsh chemicals that can damage paint or wood.
- After each use, wipe down the metal portion with a damp cloth, removing any burned sugar or food residue.
- For stubborn bits, carefully scrub the metal with a non-abrasive pad, keeping water away from the wood as much as possible.
- Dry thoroughly, then store in a cool, dry place where the handles will not be crushed or scratched.
- Consider hanging the sticks on hooks in a garage or mudroom so they stay ventilated and easy to grab on your way out.
Fun Ideas for Using Your New Roasting Sticks
Personalized roasting sticks are not just for classic marshmallows. They work for a variety of fire-friendly foods and occasions, making them a surprisingly versatile piece of gear.
- Host a backyard s’mores bar with different chocolate, cookie, and marshmallow flavors.
- Roast hot dogs or veggie skewers for a simple campfire dinner.
- Celebrate birthdays or holidays with themed handle colors and toppings.
- Pack them for family camping trips, scouting outings, or cabin weekends.
- Create a set as a thoughtful handmade gift for camping-loving friends or new homeowners with a firepit.
Frequently Asked Questions
Can kids help make the roasting sticks?
Yes, children can absolutely take part in the project, especially during the decorating phase. Adults should handle cutting, drilling, and gluing, while kids can choose colors, paint patterns, and add their names or drawings under close supervision.
What kind of metal should be used for the skewers?
Look for stainless steel or another food-safe metal that is sturdy and rust-resistant. Avoid coated or mystery metals that could chip, warp, or release unwanted substances when exposed to heat.
Do the handles need a sealant?
A clear sealant is not strictly required but is highly recommended for painted or heavily decorated handles. It helps protect colors from moisture, dirt, and general wear so your designs stay bright and intact.
How long should the roasting sticks be for safety?
Most families are comfortable with a total length of about 30–36 inches, which allows users to sit or stand a safe distance from the fire. Younger children may need help holding the sticks or may benefit from slightly shorter handles combined with extra supervision.
Can these sticks be used over a gas firepit?
Yes, as long as you follow the same safety precautions and keep the wooden handles away from direct flames. Always check your firepit’s manufacturer guidelines to ensure roasting food over the flame is allowed.
How many sticks should a family make?
At minimum, plan one stick per regular user plus one or two extras for guests. If your family entertains often, keeping a small collection on hand ensures no one has to wait too long for their turn to roast.
Bringing It All Together
Personalized campfire roasting sticks turn an everyday camping tool into a meaningful keepsake and a fun family craft. With simple materials, thoughtful design, and a bit of creativity, you can build a set of sticks that add comfort, safety, and personality to every marshmallow you toast.
Whether you are planning your first campout or upgrading a well-loved backyard firepit, invest an afternoon in this project. The memories made around the fire—with colorful, custom handles in hand—will last far longer than any single bag of marshmallows.