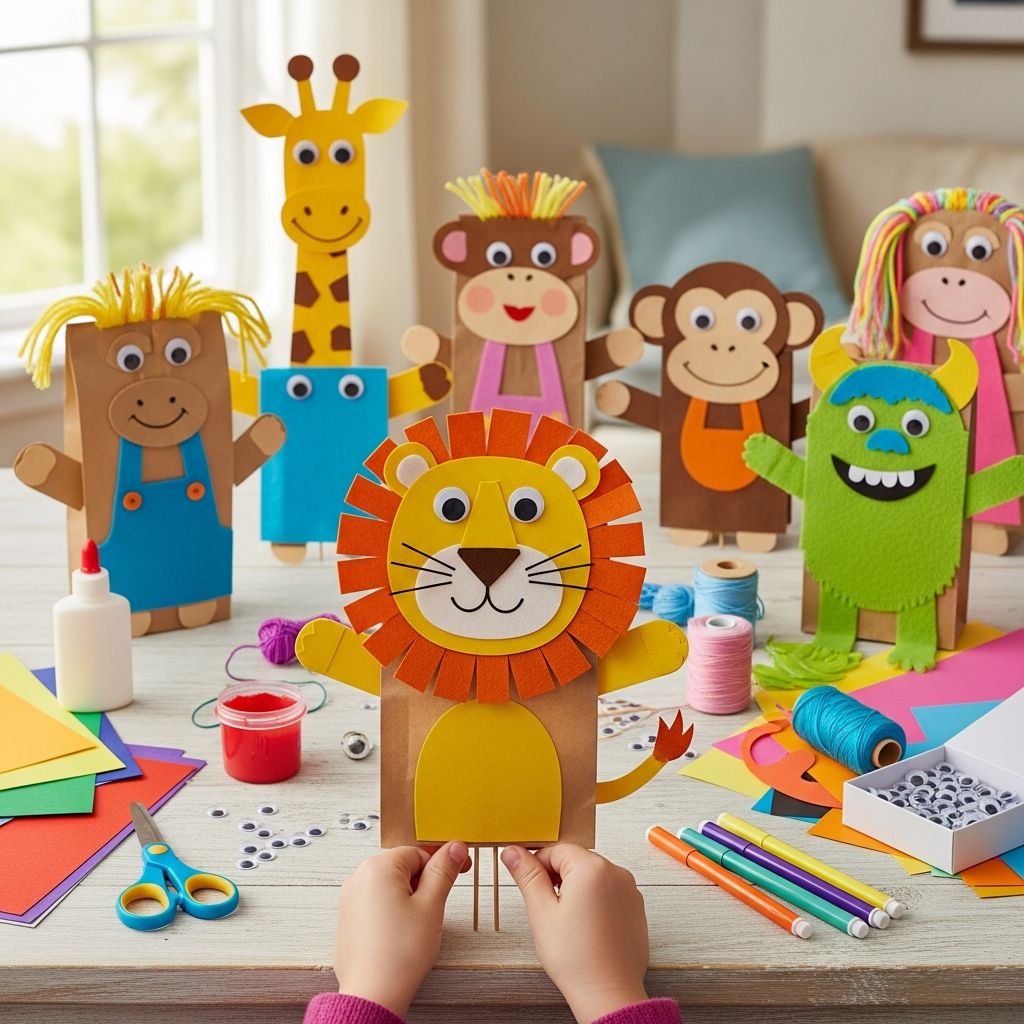
Paper bag puppets are a simple, low-mess craft that can entertain kids for hours, from the moment they pick up the glue stick to the time they stage their own living-room puppet show. With only a few basic supplies, you can turn plain lunch bags into animals, storybook characters, or completely made-up creatures that exist only in your child’s imagination.
This guide walks through the entire process: gathering supplies, building a basic puppet, adding personality, and then using the finished puppets for creative play and learning. Everything is written to be easy to follow, even if you rarely craft.
Why Paper Bag Puppets Are Such a Great Craft
Before diving into the steps, it helps to know why this simple project is worth your time. Paper bag puppets are more than just a quick art activity; they encourage storytelling, pretend play, and creativity in a way that screens never can.
- Inexpensive: Most of the materials are everyday items you likely already have at home.
- Beginner-friendly: The basic structure is easy enough for preschoolers with a bit of adult help.
- Open-ended: Kids can make animals, people, robots, or imaginary monsters—there is no single “right” outcome.
- Perfect for groups: Great for playdates, classrooms, parties, and rainy afternoons.
Essential Supplies and Helpful Extras
Start with a handful of core materials, then add fun extras if you have them. There is no need to buy specialized kits; everyday supplies work beautifully.
Core Materials
- Paper lunch bags (plain brown or white work best)
- Child-safe scissors
- Glue stick or white school glue
- Construction paper or colored cardstock
- Markers or crayons
Optional Embellishments
- Googly eyes (for instant personality)
- Yarn or string (for hair, manes, tails, or whiskers)
- Pipe cleaners (for bendable ears, antennas, or glasses)
- Pom-poms and felt scraps (for noses, cheeks, and textured details)
- Stickers, sequins, or glitter glue (for kids who love sparkle)
| Age Group | Recommended Tools | Adult Support |
|---|---|---|
| Toddlers (2–3) | Pre-cut shapes, glue sticks, crayons | High (cutting and small parts handled by adult) |
| Preschool (4–5) | Blunt scissors, markers, large googly eyes | Moderate (help with cutting and planning) |
| Early Elementary (6–8) | Regular scissors, glue, full range of decorations | Light (mainly for supervision and ideas) |
| Older Kids (9+) | Detail scissors, fine-tip markers, more complex materials | Minimal (can design and construct independently) |
Understanding the Paper Bag “Puppet Body”
The trick to a successful paper bag puppet is understanding which side is the face and how the bag fits on a hand. Once kids grasp this, they can design all kinds of characters without confusion.
- Lay the paper bag flat with the smooth side facing down.
- The side with the bottom flap becomes the front of your puppet.
- The folded flap at the top acts as the moving “mouth” or “snout.”
When the bag goes on a hand, fingers slide into the flap while the thumb supports the lower part of the bag, making the top flap open and close like a talking mouth. It can be helpful to demonstrate this movement before decorating.
Basic Step-by-Step Puppet Construction
This section outlines a simple method that works for almost any character type. Once this base is understood, you can adapt it endlessly.
Step 1: Choose a Character Idea
Before cutting paper, encourage kids to decide what they want their puppet to be. The planning process builds imagination and helps children think through details like color, features, and accessories.
- Animal ideas: dog, cat, lion, frog, owl, fish, dragon.
- People ideas: self-portrait, superhero, chef, teacher, astronaut.
- Fantasy ideas: aliens, monsters, robots, mythical creatures.
Step 2: Cut Out Paper Shapes
Instead of drawing everything directly on the bag, cut simple shapes from construction paper and glue them on. This creates a bold, layered look that children can easily manage.
- Circles for eyes, cheeks, and spots.
- Triangles for ears, beaks, teeth, or hats.
- Ovals and rectangles for muzzles, noses, arms, and legs.
- Long strips for whiskers, hair, or stripes.
Adults can pre-cut a variety of shapes and place them in little bowls so younger children can simply choose and assemble, almost like building with collage pieces.
Step 3: Build the Face on the Flap
The folded flap at the top of the bag is the most important part because it becomes the moving mouth. Build your character’s main facial features around this section.
- Glue eyes just above the flap.
- Add a nose and upper lip directly on the flap.
- Draw or glue teeth, tongue, or lower lip on the part of the bag under the flap.
- Finish with eyebrows, freckles, or eyelashes using markers.
Step 4: Decorate the Body
The long, flat part of the bag below the face becomes the body. This is a great place for clothing, fur, scales, or feathers, depending on your theme.
- Add a basic shirt or fur pattern using a large rectangle of colored paper.
- Glue on arms and hands at the sides.
- Attach tails, wings, or capes to the back or sides of the bag.
- Draw buttons, pockets, or jewelry for extra detail.
Step 5: Let Everything Dry and Test the Puppet
Once all pieces are attached, allow a few minutes for the glue to set, especially if kids have used heavier items like pom-poms or felt. Then help them gently slide their hands inside the bag and test the puppet’s “talking” motion.
- Check that the flap opens and closes easily.
- Reinforce any loose pieces with extra glue or tape.
- Encourage kids to immediately give their puppet a name and a voice.
Theme Ideas for Different Occasions
Once you have mastered the basic method, paper bag puppets can be tailored to seasons, stories, and celebrations. This keeps the craft fresh and relevant all year long.
Seasonal Puppet Themes
- Spring: Rabbits, chicks, lambs, butterflies, and garden gnomes.
- Summer: Ocean animals, sun characters, ice cream, and beachgoers.
- Autumn: Scarecrows, woodland creatures, friendly monsters, and leaves.
- Winter: Snow people, penguins, polar bears, and cozy sweater characters.
Puppets for Story Time
Paper bag puppets can transform a regular bedtime story or circle time into something interactive. Kids pay attention longer when they “meet” the characters as puppets.
- Create one puppet for each main character in a favorite book.
- Ask children to retell the story by acting it out with their puppets.
- Invite them to invent new endings or side adventures.
Adapting the Craft for Different Ages and Abilities
One of the biggest strengths of this project is how easily it can be adjusted for different skill levels. A toddler’s puppet might be simple scribbles and stickers, while an older child’s puppet might have layered clothing and tiny accessories.
- For very young children, pre-cut shapes and focus on glueing rather than cutting.
- For school-age children, introduce symmetry, patterns, and more detailed drawing.
- For kids who struggle with fine motor skills, choose larger pieces and chunky markers.
Encourage each child to make a puppet that feels achievable for them. The goal is creativity and confidence, not perfection.
Creative Variations to Try
Once you are comfortable with the classic layout, try some of these variations to keep things interesting and stretch imaginations.
Mini Puppet Families
- Use several bags to create a whole family with related outfits and colors.
- Assign roles such as parent, grandparent, baby, or cousin.
- Build simple storylines where the characters solve a problem together.
Animal Mash-Ups and Fantasy Creatures
- Combine traits of two or three animals (for example, a cat with dragon wings).
- Encourage kids to invent and name a brand-new species.
- Have them explain where the creature “lives” and what it eats.
Interactive Puppets with Moving Parts
- Attach arms with paper fasteners so they can wave or clap.
- Add a flap for a pocket or a secret message on the body.
- Use yarn or string to create pullable tails or hair that moves.
Turning Craft Time into Play Time
Finishing the puppet is really just the beginning. The real magic happens when kids start using their creations to tell stories and interact with each other.
Simple Puppet Show Ideas
- Turn a large cardboard box into a “stage” by cutting out a window.
- Hang a scarf or towel across two chairs as a curtain.
- Invite kids to perform a short show for the rest of the family.
Keep performances relaxed and low-pressure. The point is play and self-expression, not a polished production.
Learning Benefits Hidden in the Fun
- Language skills: Acting out stories encourages vocabulary and sentence-building.
- Social skills: Group shows require turn-taking, listening, and cooperation.
- Confidence: Shy children often feel braver speaking “through” a puppet.
Practical Tips for Success
A few simple strategies can make the entire process smoother, especially when working with several children at once.
- Cover the table with newspaper or a washable tablecloth for easier cleanup.
- Place glue, scissors, and markers in shared containers so kids can reach them easily.
- Limit very small decorations for young children to avoid frustration and safety concerns.
- Keep a small trash container nearby for paper scraps.
Storing and Displaying Finished Puppets
Once your home is filled with paper bag characters, you will want a simple way to store them without crushing their faces or losing track of favorites.
- Stand puppets upright in an empty tissue box, basket, or shallow bin.
- Label the bottom of each bag with the creator’s name and the character’s name.
- Rotate a few “featured puppets” on a shelf as changing decor.
Puppets that are cared for can last through many pretend play sessions, and kids often enjoy revisiting characters they made weeks or months earlier.
Frequently Asked Questions
Do I need special paper bags, or will any kind work?
Plain lunch-size bags are ideal because they fit easily over a child’s hand and have a neat little flap that works perfectly as a mouth. Larger grocery bags tend to be too big and floppy for young kids, although they can be used to make oversized characters for fun.
How can I make this craft safer for toddlers?
For very young children, handle all cutting yourself and set out only large, easy-to-grab pieces. Avoid tiny beads or sequins, and use glue sticks instead of liquid glue when possible, since they are less messy and easier for small hands to control.
What if we do not have googly eyes or fancy supplies?
This project works perfectly well with nothing more than bags, crayons, and scrap paper. Drawn eyes, noses, and mouths still give plenty of personality, and some children actually prefer the clean, illustrated look over layered materials.
Can paper bag puppets be used in a classroom setting?
Yes, they are excellent for classrooms because materials are affordable and easy to distribute. Teachers can connect puppets to lessons on animals, emotions, storytelling, or even history by having students create characters that match the topic being studied.
How long do finished puppets last?
The lifetime of a paper bag puppet depends on how gently it is handled and how many small embellishments it carries. If you store puppets standing upright in a box and remind kids to slide them on and off carefully, they can hold up through many rounds of play before the paper finally wears out.
Final Thoughts
Paper bag puppets turn simple materials into hours of creativity, conversation, and laughter. Whether you gather a whole group of kids around the table or craft quietly with just one child, the process is as valuable as the finished puppet. With a few bags, some colorful paper, and imagination, your home or classroom can quickly become a tiny theater filled with handmade characters ready to tell their stories.