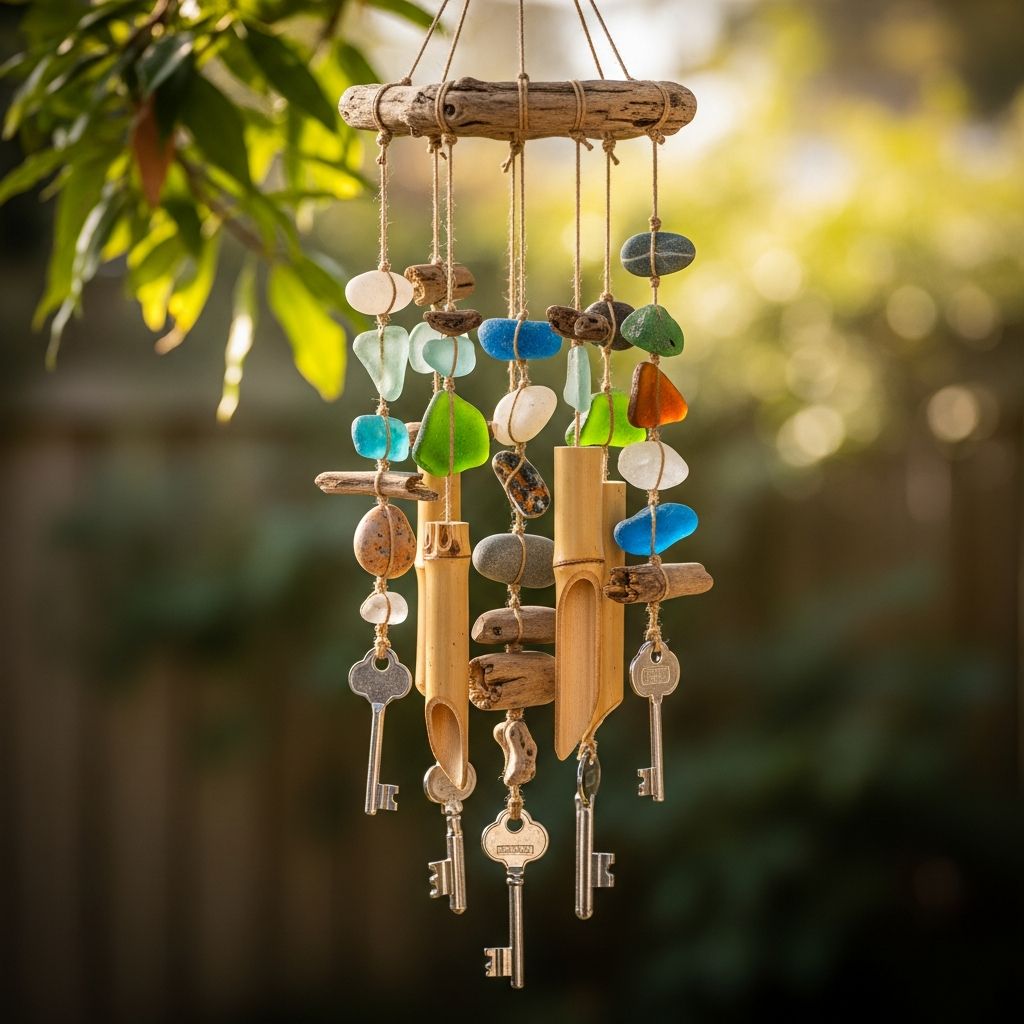
Homemade wind chimes are a simple way to turn everyday objects into a meaningful, musical gift. Whether you are crafting for Mother’s Day, a birthday, or just because, this project invites kids and adults to create something beautiful together while learning about sound, design, and upcycling.
Why Wind Chimes Make a Special Keepsake
Wind chimes are more than just outdoor decor. They combine art, science, and memory into one gentle sound every time the wind blows.
- Personalized gift: Colors, shapes, and materials can all be chosen with the recipient in mind.
- Lasting reminder: Every chime is a small reminder of the person who made it.
- STEM connection: Kids see how different materials and lengths create different sounds, echoing basic principles of vibration and pitch.
- Eco-friendly: Reusing small objects (washers, keys, beads, lids) models sustainable crafting.
Planning Your Wind Chime Project
Before opening the craft supplies, take a few minutes to plan. This keeps kids engaged and helps the final chime look and sound intentional.
Decide on the Style
Choose one main direction to keep the project focused:
- Colorful kids’ art: Painted beads, bright yarn, and bold shapes.
- Nature-inspired: Sticks, shells, pinecones, small stones, and driftwood.
- Upcycled metal: Washers, keys, small metal lids, or hardware for a stronger chime sound.
- Quiet decorative chime: Wood and fabric pieces that move gently but make subtle sounds.
Choose a Safe Workspace
Set up in a space where spills, paint, and small bits of string are easy to manage.
- Cover the table with newspaper or an old cloth.
- Keep sharp tools (scissors, hole punch, drill) in an adult-only area.
- Use small containers or muffin tins to separate beads, washers, and other tiny pieces.
Basic Parts of a Wind Chime
Most wind chimes share the same core components, whether they are made from copper pipes or kids’ craft supplies.
| Part | Purpose | Kid-Friendly Material Ideas |
|---|---|---|
| Top hanger | Supports the entire chime and connects to a hook or branch. | Sturdy stick, small wooden ring, craft hoop, plastic lid. |
| Strings | Hold each chime piece and allow movement in the wind. | Yarn, embroidery floss, twine, fishing line, thin ribbon. |
| Chime pieces | Objects that strike each other to create sound. | Metal washers, keys, shells, beads, wood shapes, small tins. |
| Clapper | Central piece that taps against the chimes. | Wood circle, large bead, or painted cardboard shape. |
| Wind catcher | Flat piece that catches the breeze and moves the clapper. | Cardstock, plastic lid, foam shape, lightweight wood. |
Materials: Simple Options from Around the House
You do not need specialized supplies. Start by checking your recycling bin and junk drawer.
Common Household Materials
- Clean metal lids (juice, condiments, small tins)
- Old keys or hardware (washers, nuts, bolts)
- Plastic or metal bottle caps
- Cardboard scraps or cereal boxes
- Fabric strips or old ribbon
- Twigs, sticks, or a piece of driftwood for the top bar
Basic Craft Supplies
- Yarn, string, or thin twine
- School glue or tacky glue
- Acrylic paint and paintbrushes
- Markers or paint pens
- Beads (plastic, wooden, or homemade paper beads)
- Hole punch; for thicker materials, an adult can use a small drill.
Step-by-Step: Kid-Friendly Wind Chime Instructions
This approach balances creativity with structure, letting children participate in almost every step while adults handle any drilling or cutting that requires extra care.
1. Design the Layout
Before tying anything, sketch or talk through the design.
- Ask kids how many hanging strands they want (3–8 works well for most home projects).
- Decide on a color palette (for example, blues and greens for a garden theme, or rainbow colors).
- Plan where the longest and shortest strands will hang for a balanced look.
2. Prepare the Top Hanger
Choose a top support that is light but sturdy enough for the weight of the hanging pieces.
- Cut a straight stick or choose a small wooden ring or plastic lid.
- If using a lid or ring, mark several points around the edge where strings will attach.
- An adult can carefully punch or drill holes at these marks.
- Attach a main loop of string at the top for hanging on a hook or branch.
3. Paint and Decorate Components
Kids usually enjoy this step the most. Allow pieces to dry thoroughly before assembling.
- Paint lids, wooden shapes, or cardboard pieces with acrylic paint.
- Add patterns with paint pens or markers once the base coat is dry.
- Let children write short messages like “Love You,” initials, or simple doodles.
- Optional: seal painted surfaces with a clear, water-resistant sealer to help them last longer outdoors.
4. Punch Holes in Chime Pieces
Each object that will hang on a string needs a place for the string to pass through.
- For thin materials like cardstock or thin plastic, use a standard hole punch.
- For lids, keys, or thicker plastics, an adult can use a small drill bit as demonstrated in many DIY chime tutorials.
- Place holes near the edge, leaving enough material so they do not tear easily.
5. String the Chime Strands
Now it all starts to come together. This step encourages pattern-making and fine motor skills.
- Cut several pieces of string longer than you think you need; excess can be trimmed later.
- Tie a knot or bead at the bottom of each strand so pieces cannot slip off.
- Let kids alternate beads and chime pieces along each string in any pattern they like.
- Leave a few inches of plain string at the top of each strand for attaching to the hanger.
6. Attach Strands to the Hanger
Even spacing and varied lengths will make the wind chime more visually appealing and help it sound better.
- Tie each finished strand through a hole or around the stick at the top.
- Vary the lengths slightly so the pieces can bump into each other in the breeze.
- Hold the chime up and gently blow on it to see if the parts move freely.
- Adjust knots or trim extra string as needed.
7. Add a Central Clapper and Wind Catcher (Optional)
Including a clapper can create a more consistent sound, similar to traditional metal or bamboo chimes.
- Cut a slightly larger shape for the clapper and hang it from the center of the top hanger using a single string.
- Attach a flat wind catcher at the bottom of this string so that the breeze can move it.
- Position the clapper so it can touch the surrounding chime pieces when it swings.
Helping Kids Understand the Science of Sound
This craft offers a natural way to talk with children about how sound is created.
- Explain that when two objects strike each other, they vibrate, and those vibrations travel as sound waves.
- Let kids compare metal pieces versus wooden pieces: metals usually ring longer and with a clearer pitch.
- Use two pieces of similar material in different sizes so children can hear how length affects the pitch of the sound.
These observations align with basic physical principles: longer tubes or objects generally produce lower pitches, while shorter ones produce higher pitches due to differences in vibration frequency.
Safety Tips for Crafting with Children
Most household wind chime projects are safe with simple precautions.
- Supervise any use of scissors, especially when cutting string or cardboard.
- Only adults should handle drills or sharp metal edges.
- Use non-toxic, child-safe paints and glues, as recommended by pediatric safety guidelines.
- Keep very small pieces (tiny beads, nuts) away from children who still put objects in their mouths, following general choking hazard guidance for small parts published by health authorities.
- Hang finished chimes out of direct reach of very young children if they contain small detachable parts.
Creative Variations to Try
Once you have made one wind chime, it is easy to experiment with other designs.
Nature Walk Chime
- Collect sticks, interesting small stones, seed pods, and shells on a walk.
- Use a sturdy branch as the top support.
- Wrap or tie twine around each object instead of drilling whenever possible.
- Leave pieces unpainted for a more natural look, or add a few touches of color.
Rainbow Bead Chime
- Sort beads into color groups.
- Create one strand for each color of the rainbow and attach them in order.
- Add a simple white or wood-colored top so the colors stand out.
Upcycled Kitchen Chime
- Use old measuring spoons, metal cookie cutters, or small whisks.
- Attach them to a wooden spoon or a small cutting board for a kitchen-themed gift.
- This variation may be better as an adult or teen project because of sharper metal edges.
Where and How to Hang Your Wind Chimes
Placement affects both how a wind chime looks and how well it performs.
- Choose a spot where breezes can reach it, such as near a window, porch, or balcony.
- Avoid placing it too close to walls or railings where it may knock loudly or tangle.
- Use a sturdy hook or nail appropriate for the weight of the chime.
- If you live in an area with strong winds, hang it where it is somewhat sheltered to prevent damage.
Making It a Meaningful Gift
To turn a simple craft into a keepsake, invite kids to add a few personal touches.
- Include a small, handwritten tag explaining that the chime was made just for the recipient.
- Let children write one word or short phrase on each hanging piece (such as “joy,” “love,” or their name).
- Take a photo of the child holding the chime before wrapping it and tuck the photo into the card.
- Encourage kids to help choose the hanging spot when the gift is opened.
Frequently Asked Questions (FAQs)
Q: What materials make the loudest wind chimes?
A: Metals like aluminum, steel, and copper tend to create clearer, louder tones than wood or plastic because they transmit vibrations efficiently and ring for longer.
Q: Can young children make wind chimes safely?
A: Yes, with supervision. Allow young children to focus on painting, threading beads, and choosing colors, while adults handle drilling, cutting, and hanging to follow general craft safety recommendations.
Q: How can I make the wind chime more weather-resistant?
A: Use outdoor-safe materials when possible, such as sealed wood, metal pieces, and UV-resistant string or fishing line. You can also apply a clear outdoor sealant to painted wood or cardboard to help protect it from moisture.
Q: Do the lengths of the chime pieces really matter?
A: Yes. Longer pieces generally produce lower notes and shorter pieces produce higher notes because the vibration frequency changes with length, a principle used in many chime design guides.
Q: Where should I hang a wind chime so it is not too loud?
A: Hang it where there is gentle, occasional breeze rather than constant strong wind—such as near a window, under a porch roof, or in a side yard—to keep the sound pleasant rather than overwhelming.
References
- Crafting Your Own Wind Chime: A DIY Guide — Perfect Pitch Chimes. 2023-04-10. https://perfectpitchchimes.com/blogs/news/crafting-your-own-wind-chime-a-diy-guide
- Make a Wind Chime — Instructables. 2018-06-01. https://www.instructables.com/Make-a-wind-chime/
- Easy DIY Copper Windchimes – Step-by-Step Tutorial — YouTube / DIY Creators. 2019-05-21. https://www.youtube.com/watch?v=d84GHFCCf4I
- Make Your Own Wind Chimes – The Great Outdoors — Your New House / YouTube. 2020-07-18. https://www.youtube.com/watch?v=Uz1BN-brqKU
- DIY Wind Chimes — Sand Dollar Lane. 2021-05-05. https://www.sanddollarlane.com/diy-wind-chimes/
- Chime Design & Build — Lee Hite. 2012-03-01. https://leehite.org/Chimes.htm
- Simple & Pretty Homemade Wind Chimes Kids Can Make — Hands On As We Grow. 2019-04-15. https://handsonaswegrow.com/outdoor-music-diy-wind-chimes/