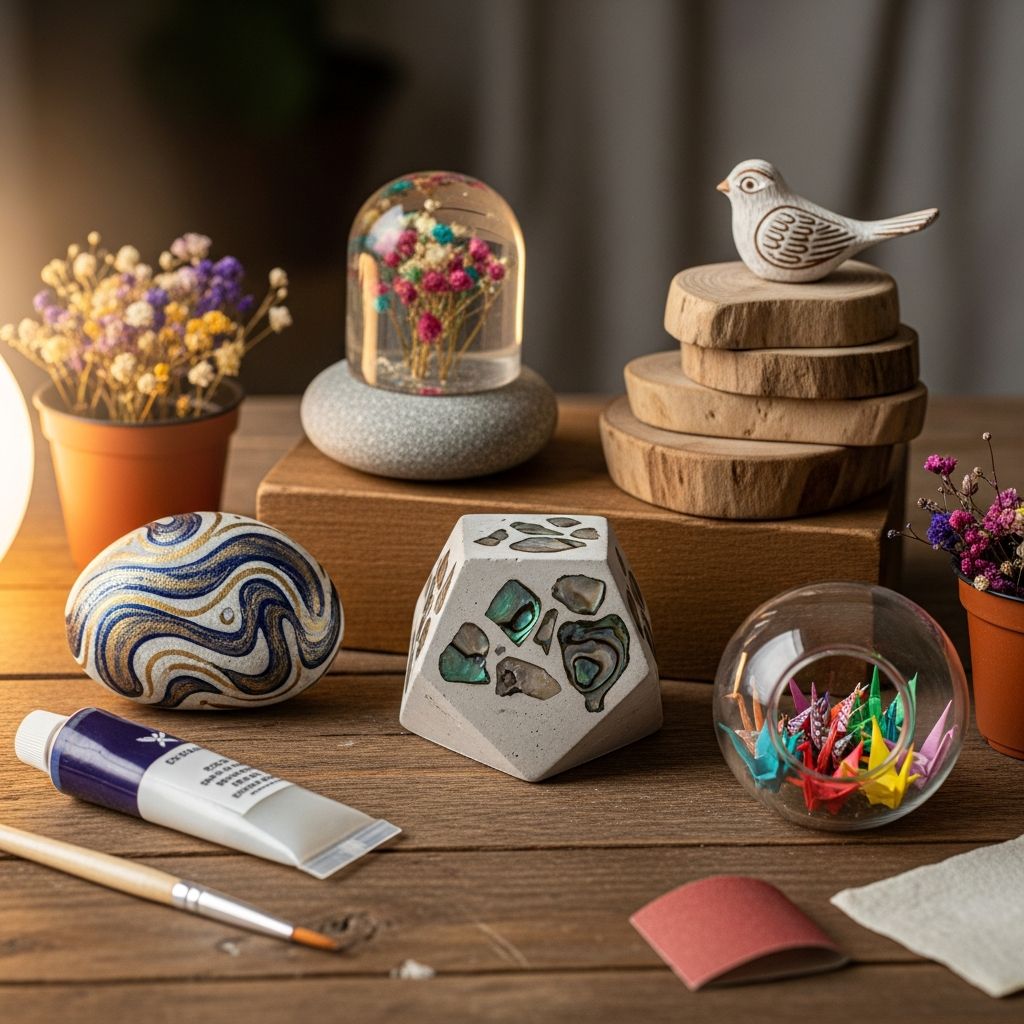
Handmade paperweights are a simple way to bring personality to a desk, keep papers organized, and create thoughtful gifts that feel far more special than their small size suggests. Unlike store-bought versions, custom paperweights can preserve memories, highlight favorite colors or patterns, and use materials you already have at home.
This guide walks through planning, tools, design options, and step-by-step methods so you can confidently craft paperweights that look polished and professional—even if you are new to DIY projects.
Why Paperweights Make Great DIY Projects
Paperweights are compact, forgiving projects that allow you to experiment with color, texture, and tiny keepsakes. They work well for both beginners and experienced makers because the basic concept is simple, yet the creative options are limitless.
They are also ideal for last-minute gifts: once you learn a basic method, you can customize each paperweight for teachers, coworkers, grandparents, or kids in a very short amount of time.
Planning Your Project: Purpose and Style
Before choosing materials, decide how your paperweight will be used and what style fits best. A heavy, minimal stone might suit a home office, while a playful, colorful design might be perfect for a child’s desk or craft room.
Clarifying these points first helps narrow down whether you should work with glass, stones, molds, or existing objects you can transform.
Questions to Guide Your Design
- Who is the paperweight for (you, a friend, a colleague, a teacher)?
- Will it sit in a professional office, a creative studio, or a kid’s room?
- Do you want something subtle and neutral or bold and colorful?
- Should it include sentimental items like photos or small mementos?
Common Types of DIY Paperweights
There are many ways to create a paperweight, but most fall into a few broad categories. Each type can be adapted with different designs and materials, so you can choose what matches your skills, tools, and time.
The overview below compares several popular approaches and highlights what makes each one appealing.
Overview of Popular Paperweight Styles
| Style | Main Material | Difficulty | Best For |
|---|---|---|---|
| Decorated glass dome | Clear glass dome + paper or photos | Beginner | Photo gifts and printed designs |
| Painted stone | Smooth river stone | Beginner | Kids, quick gifts, simple art |
| Embedded object | Resin in a mold | Intermediate | Preserving flowers or keepsakes |
| Upcycled object | Repurposed hardware or decor | Beginner–intermediate | Eco-friendly and budget-friendly crafts |
Essential Tools and Materials
You do not need a dedicated craft room to make a beautiful paperweight. A clear workspace, basic tools, and a few core materials are enough to get started. As your confidence grows, you can experiment with more specialized supplies.
Use the list below as a flexible reference; you do not need every item for every project, only those that match the method you choose.
Basic Supplies
- Scissors and craft knife for cutting paper, felt, or photos.
- Clear-drying craft glue or decoupage medium for collage-style designs.
- Acrylic paints and small brushes for painting stones or accents.
- Fine-grit sandpaper to smooth any rough edges on stones or bases.
- Felt or cork sheets to protect the surface under the paperweight.
Optional Supplies for Advanced Looks
- Clear casting resin and silicone molds for embedded designs.
- Glass domes or heavy glass knobs as ready-made tops.
- Metallic leaf, glitter, or mica powder for sparkly details.
- Ink pads, stamps, or stencils for repeatable patterns.
- Small keepsakes like dried flowers, tickets, keys, or beads.
Safety and Workspace Preparation
Even simple crafts benefit from a little planning around safety and cleanup. Preparing your environment ahead of time can prevent spills, damaged furniture, or accidental cuts.
If you are working with children, pre-cut small pieces and choose non-toxic materials that are easy to clean up with soap and water.
Safe Crafting Practices
- Cover your work surface with parchment paper, a silicone mat, or old newspapers.
- Wear gloves and eye protection when handling resin or strong adhesives.
- Work in a well-ventilated area, especially when using products that have fumes.
- Keep sharp tools and chemicals out of reach of young children and pets.
Method 1: Decorated Glass Dome Paperweight
Glass dome paperweights look elegant and polished but are surprisingly simple to make. The curved glass magnifies the design underneath, so you can turn a favorite photo, patterned paper, or hand-lettered quote into a piece of functional art.
This method is ideal for gifts because you can personalize each one to the recipient without buying expensive materials.
Steps for Glass Dome Paperweights
- Choose and size your image. Place the glass dome over your chosen paper or photo and lightly trace around it. Cut just inside the line so the paper will not extend beyond the edge.
- Seal and adhere the paper. Brush a thin, even layer of clear-drying glue or decoupage medium over the back of the glass dome. Press the image face-up against the glass so that the printed side shows through the dome. Smooth out any bubbles.
- Let it dry completely. Place the dome on a non-stick surface while the adhesive dries. Avoid moving it around, as that can shift the paper or create streaks.
- Add a protective backing. Once dry, apply a thin coat of glue to the exposed back of the paper and press the dome onto felt or cork. After it sets, trim around the edge so the felt matches the dome’s outline.
- Finish and polish. Wipe away any excess glue on the glass with a soft cloth. Your paperweight is ready to display or gift.
Design Ideas for Glass Dome Paperweights
- Use map fragments from a city that holds special memories.
- Print small quotes, initials, or meaningful dates in a favorite typeface.
- Layer subtle background patterns behind a bold central image or monogram.
Method 2: Painted Stone Paperweights
Painting stones is an accessible way to make paperweights using natural materials. Smooth stones provide enough heft to keep papers in place and have a pleasant, organic feel.
This method is especially well-suited to beginners and children, since it encourages experimentation with simple, bold shapes and bright colors.
Steps for Painted Stone Paperweights
- Select the stone. Look for a stone that fits comfortably in your hand and has a flat or gently curved top. Wash it with soap and water and let it dry completely.
- Prime the surface (optional). If the stone is very dark or porous, apply a thin coat of white acrylic paint as a base to help colors stand out.
- Sketch your design. Lightly draw shapes or letters with a pencil, or work freehand if you prefer a more spontaneous look.
- Paint in layers. Use small brushes and acrylic paints, allowing each color to dry before adding details or overlapping shades.
- Seal the paint. Once the design is fully dry, brush on a clear sealer to protect the artwork and give the surface a finished appearance.
- Add a soft base. Trace the stone onto felt, cut out the shape, and glue it to the underside to prevent scratches on your desk.
Design Ideas for Painted Stones
- Simple geometric shapes in contrasting colors for a modern look.
- Nature themes such as leaves, waves, stars, or simple florals.
- Short words like “Focus,” “Smile,” or “Create” to inspire you during work.
Method 3: Embedded Keepsake Paperweights
Embedded paperweights allow you to preserve tiny treasures inside a clear, solid form. While this approach usually requires resin and a mold, the result can be a long-lasting keepsake that feels more like a miniature sculpture than a basic desk accessory.
This is a good choice if you want to showcase dried flowers, small shells, beads, or other dimensional items that would not lie flat under glass.
Basic Process for Embedded Paperweights
- Prepare the mold. Use a clean silicone mold with a shape that suits a paperweight, such as a dome, square, or rounded rectangle.
- Arrange the items. Lay out your small objects to test how they will fit. Consider how they will look from different angles once encased.
- Mix and pour the first layer. Following the product instructions, mix a small batch of clear casting resin and pour a thin layer into the mold. Allow it to partially set until it is thick but still slightly tacky.
- Position your keepsakes. Place the objects gently onto the semi-set layer so they stay suspended instead of sinking or floating.
- Top off the mold. Mix and pour additional resin to cover the items completely. Check for bubbles and address them according to the manufacturer’s guidance.
- Cure and demold. Allow the resin to cure fully, then gently remove the paperweight from the mold. Sand any rough edges if necessary, and optionally attach felt or cork to the base.
Memory-Focused Ideas for Embedded Paperweights
- Use dried petals and leaves from a wedding bouquet or special occasion.
- Combine tiny seashells, sand, and a small charm from a beach vacation.
- Embed a miniature note or word written on acid-free paper.
Method 4: Upcycled Object Paperweights
If you prefer eco-friendly projects or want to avoid specialty supplies, consider turning existing household items into paperweights. Many everyday objects already have the right weight and shape and only need minimal decoration.
Upcycling also keeps costs low and encourages creative problem-solving as you reimagine what an object can become.
Ideas for Upcycled Paperweights
- Old drawer knobs or cabinet pulls mounted on small wooden blocks.
- Heavy curtain finials or decorative hardware painted in fresh colors.
- Miniature ceramic figurines glued to a flat stone or tile.
Personalization Tips for Gift-Giving
A paperweight becomes truly special when it reflects the recipient’s hobbies, colors, or memories. Thoughtful personalization shows that you took time to design something just for them.
You can add meaning through imagery, text, or the story behind the materials you choose.
Ways to Customize Your Paperweights
- Include initials, names, or a significant date as part of the design.
- Choose colors that match their office, favorite sports team, or favorite season.
- Incorporate tiny keepsakes that relate to a shared memory or inside joke.
- Add a handwritten note explaining the symbolism or source of the materials.
Finishing Touches and Presentation
Once your paperweight is complete, a few small details can elevate it from a casual craft to a polished, gift-ready piece. Clean edges, a neat base, and nice packaging make a strong impression.
Presentation matters especially when you are giving paperweights for holidays, graduations, or professional milestones.
Simple Ways to Elevate the Final Look
- Wipe the surface with a soft cloth to remove fingerprints or dust.
- Attach a felt or cork base that matches or complements the colors in the design.
- Place the paperweight in a small box lined with tissue, shredded paper, or fabric.
- Add a tag or small card describing the materials or offering care instructions.
Frequently Asked Questions About DIY Paperweights
How heavy should a paperweight be?
A practical paperweight only needs to be heavy enough to keep a small stack of papers from sliding or lifting when a breeze passes. In most cases, an object that feels solid in your hand and does not tip over easily is sufficient.
If you plan to display it on top of a large stack of papers, choose a slightly larger stone, glass piece, or resin casting with a broad base for better stability.
Can children help make paperweights?
Children can absolutely participate in making paperweights, especially when using painted stones, pre-cut images, and non-toxic glue or paint. Adults should handle any cutting, sanding, or work with strong adhesives and resin.
Assign age-appropriate tasks, such as choosing colors, placing stickers, or painting simple shapes, while supervising to keep the process safe and fun.
How do I keep bubbles out of clear designs?
Bubbles are most common when working with clear adhesives or resin. Pouring slowly, mixing gently according to product instructions, and avoiding excessive shaking can reduce the number of trapped air pockets.
For minor surface bubbles, you can often pop them with a toothpick or gently exhale warm air over the surface during the recommended working time specified by the product.
What if I don’t have special molds or domes?
Specialty molds and glass domes can create striking results, but they are not required. You can start with items you already own, like stones, ceramic shapes, or spare hardware, and transform them using paint, paper, and glue.
As you gain experience, you can decide whether investing in additional materials would expand the types of paperweights you want to create.
How should finished paperweights be cared for?
Most handmade paperweights only need occasional dusting with a soft, dry cloth. Avoid harsh cleaners, especially on painted surfaces, resin, or decoupage designs, as they can dull or damage the finish.
If your paperweight includes paper images, keep it out of prolonged direct sunlight to minimize fading over time.
Getting Started with Your First Design
The best way to begin is by choosing one simple method—such as painting a stone or decorating a glass dome—and completing a single paperweight from start to finish. This will show you how the materials behave and build your confidence.
Once you understand the basic steps, you can mix techniques, experiment with new motifs, and build a collection of unique paperweights that are as practical as they are personal.