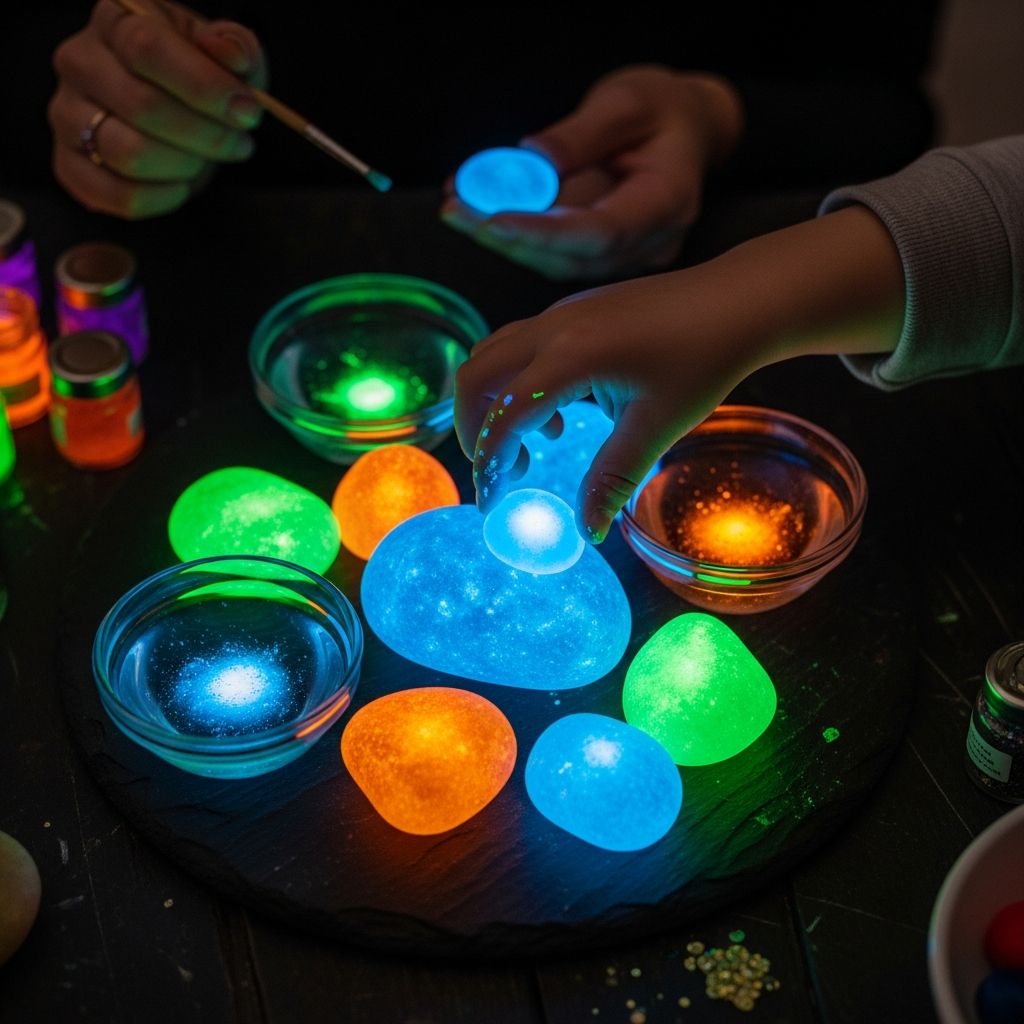
Turning plain stones into glowing treasures is an easy, low-mess project that combines art, science, and a little bit of magic. This guide walks you through every step, from choosing the right rocks and paints to understanding why they glow and how to display them safely.
Why Glow Rocks Make a Great Project
Glow rocks are a simple way to bring a sense of wonder into your home, garden, or classroom. They are inexpensive to make, endlessly customizable, and engaging for both kids and adults. The project is hands-on, visually rewarding, and offers a natural opening to talk about light, color, and basic science concepts.
- Perfect for family craft nights, birthday parties, and classroom activities.
- Can be adapted for many ages with different levels of complexity.
- Works indoors or outdoors and doubles as fun décor or a night-light accent.
Supplies You Will Need
Before getting started, gather all your materials so kids are not left waiting while you hunt down missing items. Choose washable and non-toxic products whenever possible, especially if younger children are involved.
Core Materials
- Clean, dry rocks or pebbles (smooth river stones work best)
- Glow-in-the-dark or fluorescent acrylic paint (various colors)
- Small paintbrushes or foam brushes
- Paper plates or palettes for paint
- Water container for rinsing brushes
- Paper towels or reusable rags
Optional Enhancements
- Black light (UV flashlight or lamp) to intensify the glow effect
- Clear acrylic sealer spray for outdoor durability
- Glitter or metallic paints for added sparkle
- Stencils or painter’s tape for geometric shapes and patterns
- Fine-tipped paint pens for details and lettering
- Disposable table covering and old T-shirts or aprons
Choosing and Preparing Your Rocks
The right starting surface will make your glow rocks brighter and longer-lasting. Smooth rocks are easier to paint, and a clean surface helps the paint stick better. If you plan to display your rocks outside, sturdier, denser stones are usually more durable.
Picking the Best Stones
- Look for stones with at least one smooth, flat surface for designs.
- Avoid rocks that crumble, flake, or feel chalky, as paint may peel off.
- Choose lighter-colored stones if possible; they help bright colors stand out.
Cleaning Steps
- Rinse rocks under warm water to remove dirt and sand.
- Use a small brush (like an old toothbrush) for stubborn debris.
- Allow rocks to dry completely—lay them out on a towel for at least an hour.
- If rocks feel dusty after drying, wipe them with a slightly damp cloth and let them dry again.
Understanding the Glow: Simple Science for Kids
Glow rocks typically shine because the paint contains special pigments that absorb energy from light and then release it slowly. This process is often called luminescence, and it can look especially impressive in the dark or under a black light.
Glow-in-the-dark paint is usually phosphorescent, which means it stores energy from a bright light source and then releases it gradually over time, creating a soft, prolonged glow. Fluorescent paints, by contrast, glow intensely only while a UV light is shining on them, making them ideal for dramatic party effects.
Step-by-Step: Painting Your Glow Rocks
The painting process can be done in an afternoon, but the rocks will need time to dry and “charge” under a light source before they look their best. Encourage kids to experiment with patterns, symbols, and color combinations.
Basic Painting Process
- Protect your workspace. Cover your table with a disposable cloth, butcher paper, or an old plastic tablecloth.
- Prime the surface (optional but helpful). Brush on a thin layer of white acrylic paint as a base coat and let it dry. This often makes glow paints appear brighter.
- Apply the first glow layer. Use a brush to cover the top and sides of the rock with glow-in-the-dark paint.
- Let it dry fully. Place painted rocks on wax paper or baking parchment and allow them to dry according to the paint’s instructions.
- Add additional coats. For a stronger glow, apply 2–4 thin coats rather than one thick one, allowing each layer to dry.
- Paint details and designs. After the base glow layer dries, add patterns, dots, stripes, stars, or faces using contrasting colors.
- Seal for durability (optional). If the rocks will live outside, spray a clear sealer in a well-ventilated area and let dry completely.
Design Ideas to Try
- Constellation rocks with tiny glow dots connected by fine lines.
- Galaxy swirls using layers of blue, purple, and green glow paint.
- Monster faces or emoji-style expressions.
- Alphabet rocks to spell names or short words.
- Garden markers labeled with the names of herbs and flowers.
Safety Tips for Adults and Kids
Glow rock projects are generally safe when using craft-grade paints and basic precautions. Adult supervision is essential when working with sprays, strong lights, or very young children. Make safety part of the routine so it becomes second nature.
- Always check that paints are labeled non-toxic and suitable for children.
- Keep paint and small stones away from toddlers who may put items in their mouths.
- Use spray sealers only outdoors or in a well-ventilated area, and wear a mask if recommended by the manufacturer.
- Wash hands after painting and clean brushes promptly.
- If using a UV lamp, remind kids not to stare directly into the light source.
Fun Ways to Use and Display Glow Rocks
Once your glow rocks are finished, there are many creative ways to use them. They can become a seasonal decoration, a teaching tool, or a reusable party prop. You can even rotate themes throughout the year, repainting or adding new rocks as needed.
- Line a pathway or garden bed with glowing stones for nighttime ambiance.
- Fill a clear glass jar with glow rocks as a gentle night-light accent.
- Hide glow rocks in the backyard for a twilight treasure hunt.
- Use them as rewards or “tokens” for chores, reading time, or classroom participation.
- Arrange them in patterns on a tray for a sensory-friendly, low-light activity.
Display Ideas Table
| Display Idea | Best Location | Lighting Needed |
|---|---|---|
| Pathway border | Garden edges, front walk, patio steps | Charges during daytime sunlight; glows at dusk |
| Night-light jar | Bedroom shelf or bedside table | Placed near a lamp during the day to recharge |
| Party centerpiece | Dining table or snack station | Works best with a nearby black light for strong glow |
| Classroom science corner | Designated STEM or reading nook | Overhead lights to charge rocks, optional UV flashlight |
Adapting the Project for Different Ages
Glow rocks can be tailored to suit toddlers, school-age children, teens, and even adults. As kids grow, the same basic activity can become more detailed and science-focused, making it a flexible project you can revisit over the years.
Toddlers and Preschoolers
- Let them dab paint onto large rocks with foam brushes or sponges.
- Focus on color exploration and basic patterns like dots and stripes.
- Handle any sealing or heavy cleanup tasks yourself.
Elementary-Age Kids
- Encourage them to sketch simple designs before painting.
- Introduce the idea of charging the rocks and observing how long they glow.
- Add simple science language: words like “energy,” “light,” and “phosphorescent.”
Teens and Adults
- Experiment with more detailed artwork, lettering, or themed sets.
- Try mixing glow colors and layering translucent paints.
- Use the project as part of a larger décor plan for patios, balconies, or events.
Simple Activity Extensions and Learning Ideas
This craft can easily blend into a mini science lesson or an art unit. Short, open-ended questions will help kids think about cause and effect, observation, and experimentation. Turn the project into an informal lab by changing one variable at a time and watching what happens.
- Compare how long rocks glow after charging under different light sources (sunlight vs. lamp vs. black light).
- Test whether more layers of paint produce a brighter or longer-lasting glow.
- Create a glow-rock “constellation map” and talk about stars and space.
- Discuss safety around electricity and different types of light.
Frequently Asked Questions About Glow Rocks
How long do glow rocks stay bright?
Most glow-in-the-dark paints shine brightest in the first few minutes after charging and then gradually fade over one to several hours. Actual glow time depends on the paint formula, the number of coats, and how strong the light source was during charging.
Do I need a black light?
A black light is not required, but it can dramatically increase the visible glow and make fluorescent paints look especially vibrant. Sunlight or a bright indoor lamp is typically enough to charge phosphorescent paints for normal glow-in-the-dark use.
Can I leave glow rocks outside year-round?
Yes, as long as you seal them properly and understand that weather and sun exposure will gradually wear down the paint. A clear outdoor-grade sealer helps protect both the color and the glow effect, but you may want to refresh or touch up the paint every so often.
Are glow-in-the-dark paints safe for kids?
Most craft-store glow paints are designed to be non-toxic, but you should always read product labels and follow safety instructions. Avoid contact with eyes and mouth, keep lids closed when not in use, and supervise younger children when painting.
Why don’t my rocks glow very much?
If the glow is weak, try applying additional thin coats of paint and make sure the rocks spend more time under a strong light source before turning off the lights. Also check that your paint has not expired or separated; mixing it well before use can sometimes improve performance.
Final Tips for Picture-Perfect Glow Rocks
A little patience and planning go a long way toward creating glow rocks that really stand out. Thin, even layers of paint produce smoother results than heavy coats, and allowing full drying time between layers helps prevent smudges and fingerprints.
- Test one rock first to see how your chosen paint performs before doing a big batch.
- Photograph your glow rocks in a dark room with a low-light camera setting for dramatic keepsake pictures.
- Store extra painted rocks in a box or jar so they stay clean and dust-free between uses.