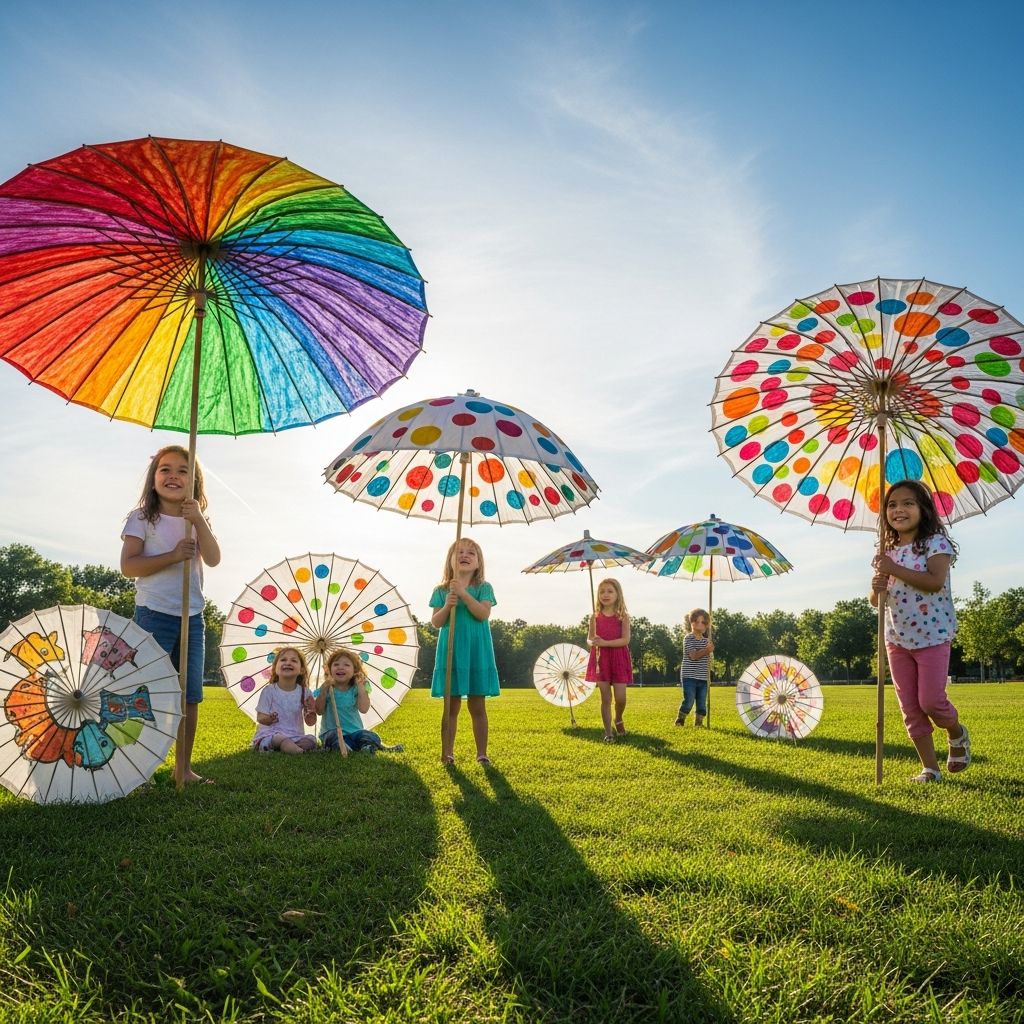
Giant paper parasols are a playful way to celebrate spring, mix art with pretend play, and spend creative time together. With a large sheet of sturdy paper, a dowel, and a few simple supplies, you can build a lightweight paper parasol that kids will love to design and carry outside on sunny days.
This guide walks you through everything: choosing materials, building the parasol shape, decorating it with kids of different ages, and using it safely indoors and out.
Why Giant Paper Parasols Make a Great Spring Craft
Oversized paper parasols have a special charm. They are big enough to feel magical to children, yet simple enough to build in an afternoon. Beyond the fun, this project supports key childhood skills like fine motor development and creativity.
- Big visual impact: One parasol can brighten a whole room or photo backdrop.
- Open-ended art: Kids can paint flowers, patterns, scenes, or abstract designs.
- Pretend play potential: Finished parasols become props for make-believe, storytelling, or dress-up.
- Adaptable for ages: Toddlers can scribble or sponge paint, while older kids can plan detailed designs.
- Seasonal connection: Decorating with flowers, raindrops, and sunshine helps kids notice and talk about spring.
Materials and Tools You Will Need
You can adjust this list to what you already have at home. Aim for sturdy paper and a handle that is light, smooth, and safe for kids to hold.
| Item | Suggested Options | Notes |
|---|---|---|
| Large stiff paper | Poster board, bristol board, or heavy drawing paper | Needs to be flexible but strong enough to hold its shape. |
| Handle | Wooden dowel, smooth stick, or sturdy cardboard tube | Lightweight and easy for kids to grip. |
| Foam or paper spheres | 2 small foam balls, crumpled paper balls, or cardboard discs | Secure the top and bottom of the parasol. |
| Adhesive | Stapler, strong white glue, or low-temp hot glue (for adults) | Choose based on age and supervision. |
| Drawing and painting tools | Washable paint, crayons, markers, colored pencils | Washable supplies are safer and easier to clean with kids. |
| Extra decorations | Tissue paper, stickers, glitter glue, washi tape, paper flowers | Optional, for more texture and detail. |
| Cutting tools | Scissors, craft knife (adults only), pencil, string | For measuring and cutting the large circle. |
Preparing the Parasol Base
The base is a large paper cone. Once you learn the basic method, you can adjust the size and angle to suit different ages or purposes.
1. Draw a Large Circle
If you do not have a huge circular object to trace, use a quick homemade compass.
- Tie one end of a piece of string to a pencil.
- Hold the other end at the center point of your poster board with your finger or a pushpin.
- Stretch the string and rotate the pencil around the center to draw a circle.
- The longer the string, the larger the parasol.
This method gives a reasonably even circle without needing special tools. Precision is less important than size and sturdiness for this project.
2. Cut the Circle and Add a Slit
Once the circle is drawn, cut around the line carefully. For younger children, adults should handle the cutting or use child-safe scissors only on smaller, supervised sections.
- Cut a straight line from the outer edge of the circle directly to the center.
- This slit will allow you to overlap the paper and form a cone.
3. Test the Cone Shape
Before decorating, fold the circle into a cone to see how it looks:
- Gently slide one cut edge over the other to overlap them.
- Adjust the overlap until the shape feels “parasol-like” — not too steep and not too flat.
- Note where the edges meet or lightly mark the overlap with a pencil for later.
Do not staple or glue yet. You will open the circle back up for painting and drawing.
Decorating Ideas for Different Ages
Art projects can support language, motor, and social development when activities are matched to children’s abilities and interests. Adjust the decorating stage so every age can join in.
For Toddlers and Preschoolers
- Tools: Jumbo crayons, washable markers, sponge brushes, and dot markers.
- Approach: Let them make free marks, dots, and color fields.
- Simple prompts: “Can you make rain dots?” or “Let’s paint big sunshine circles.”
- Stickers: Foam flower or cloud stickers are easy for small hands to place.
For Early Elementary Kids
- Invite them to sketch simple spring themes: flowers, butterflies, umbrellas, raindrops, or rainbows.
- Offer washable tempera or poster paints in a limited color palette to avoid muddy colors.
- Encourage patterns around the circle: repeating stripes, dots, or petals.
- Let them write cheerful words like “Spring,” “Sunshine,” or their name along the edge.
For Older Kids and Tweens
- Challenge them to design a full scene, like a garden, skyline, or underwater world.
- Try more detailed media: paint pens, fine-tip markers, or colored pencils for shading.
- Add collage elements: tissue-paper blossoms, cut-paper silhouettes, or washi-tape borders.
- Encourage planning: sketch lightly in pencil before committing with paint.
Decorating Tips
- Work on a protected, well-ventilated surface when using paints.
- Let each layer of paint or glue dry fully before adding more details to prevent tearing.
- Keep the center of the circle relatively clear so the eventual handle attachment is easier.
Forming and Securing the Parasol Cone
When your artwork is completely dry, it is time to turn the flat circle into a dimensional parasol.
1. Overlap the Edges
- Bring the cut edges back together and overlap them along the slit.
- Adjust until you like the shape of the cone. More overlap makes a taller, narrower parasol; less overlap makes a shallow one.
- Once you are satisfied, hold the overlap in place with binder clips or paper clips.
2. Fasten the Seam
There are several ways to secure the seam, depending on your tools and the age of the children helping.
- Stapler: Quick and strong for the outer edge; best handled by adults or older kids.
- White glue: Squeeze a thin line along the overlapping area, press, and tape or clip until dry.
- Low-temp hot glue: Adults can use a low-temperature glue gun for a fast, firm hold, keeping the tool out of children’s reach.
For extra strength, you can reinforce the inside of the seam with a strip of tape or an extra narrow piece of paper glued over the join.
Adding the Handle and Top Detail
The handle turns a simple cone into a functional parasol that kids can carry and pose with in photos.
1. Prepare the Handle
- Trim your dowel or tube so that it is comfortable for a child to hold (typically about the length from their hand to their shoulder).
- Sand any rough spots on wooden dowels to reduce splinters.
- Optionally, paint or wrap the handle with colorful tape before attaching it.
2. Use Foam or Paper Balls as Connectors
Two small spheres help lock the handle in place and protect the paper from tearing.
- Pierce one foam ball with the dowel, stopping before it comes out the other side.
- Slide the paper cone (parasol) over the ball so the ball is inside at the top center.
- Add the second ball on the outside top, lining it up with the concealed ball inside.
Once aligned, an adult can secure everything with glue where the handle meets the balls and where the top ball meets the paper. This creates a neat “finial” at the top and a supportive base inside.
3. Alternative Handle Options
If you do not have foam balls, try one of these alternatives:
- Crumpled paper taped tightly around the dowel end, then glued to the parasol.
- Two cardboard circles, one inside and one outside the parasol, glued together around the dowel.
- A large wooden bead or spool threaded onto the dowel and glued in place.
Safety and Supervision Tips
Art and craft activities are most beneficial for children when they are conducted with age-appropriate materials and adequate adult supervision. Keep these guidelines in mind while you work.
- Cutting tools: Adults should handle craft knives and help with cutting thick poster board; provide child-safe scissors only when appropriate.
- Glue guns: Use low-temperature glue guns and keep them in adult hands only; burns can occur even at lower temperatures.
- Non-toxic supplies: Choose art supplies labeled non-toxic and washable when working with young children.
- Ventilation: Paint and adhesives should be used in a well-ventilated area to minimize exposure to vapors.
- Small parts: Avoid tiny beads or decorations with children under three because of choking risks.
Ways to Use and Display Your Paper Parasols
Once your parasols are finished, there are many joyful ways to enjoy them beyond a single afternoon.
- Spring parade: Organize a mini parade in the yard or living room with each child showing off their design.
- Photo backdrop: Hang parasols at different heights for a vibrant background for spring photos or birthday parties.
- Ceiling decor: Suspend lighter parasols upside-down from ceiling hooks or curtain rods.
- Reading corner: Place a parasol near a cozy chair to make a “story umbrella” nook.
- Weather talk: Use them as a playful starting point for discussing sun, rain, and seasons.
Simple Variations to Try
After you build your first giant parasol, experiment with new versions using different themes, shapes, and textures.
- Raindrop parasol: Hang paper raindrops or ribbons from the edges with string or yarn.
- Garden parasol: Cover the surface with layered tissue-paper flowers and leaves for a 3D effect.
- Night sky parasol: Paint the parasol dark blue or black, then add stars and constellations with white or metallic pens.
- Collage parasol: Glue magazine cutouts, patterned paper, or fabric scraps to form colorful patches.
- Mini-and-giant set: Create a large parasol for a child and smaller matching ones from cardstock for dolls or stuffed animals.
Frequently Asked Questions (FAQs)
How durable are paper parasols for outdoor play?
These parasols are mainly for gentle play and decoration. Poster board can handle light outdoor use on dry days, but it is not waterproof; rain, strong wind, or rough play will shorten their lifespan. Treat them more like costumes or props than real weather gear.
What paper size works best for a giant parasol?
A standard poster board (often around 22 x 28 inches) works well for a child-sized parasol. Larger sheets create more dramatic parasols but may be harder for small children to carry comfortably.
Can I make this project with a group of kids?
Yes. Prepare the circles in advance, set up separate decorating and assembly stations, and recruit extra adults or older helpers. Group crafting can support social skills and cooperative learning when supervised.
How long does one parasol take to complete?
Active crafting time is usually 45–90 minutes, depending on how detailed the decorating is. Add extra time for paint and glue to dry before assembling and playing with the parasols.
What if I do not have foam balls?
You can securely attach the handle using tightly rolled paper, cardboard circles, or a small wooden bead. The goal is simply to reinforce the center so the paper does not rip when the parasol is lifted.
References
- Art Materials and Supplies: A Resource for Early Childhood Programs — National Association for the Education of Young Children (NAEYC). 2019-05-01. https://www.naeyc.org/resources/pubs/yc/may2019/art-materials-supplies
- Developmentally Appropriate Practice in Early Childhood Programs Serving Children from Birth Through Age 8 — NAEYC. 2020-04-01. https://www.naeyc.org/resources/position-statements/dap
- Preventing Burns — U.S. Consumer Product Safety Commission. 2022-03-15. https://www.cpsc.gov/Safety-Education/Safety-Education-Centers/Fire-and-Burn-Safety
- Art and Craft Safety Guide — U.S. Consumer Product Safety Commission. 2011-09-01. https://www.cpsc.gov/s3fs-public/5015.pdf