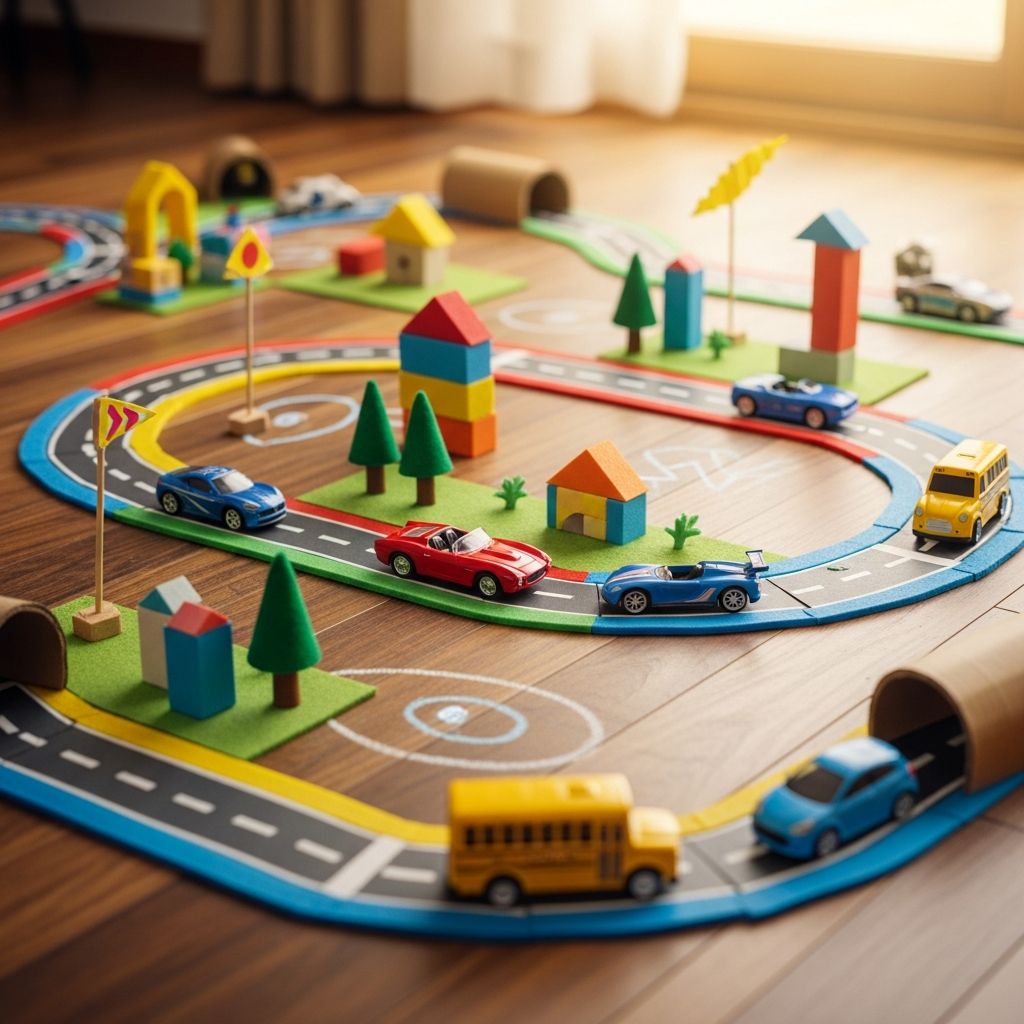
When toy cars are scattered across the house, a simple road system on the floor can turn random driving into rich, imaginative play. With a few basic materials and a little creativity, your living room can become a tiny city full of roads, bridges, parking lots, and pit stops designed just for kids.
Why Floor Roadways Are Worth the Effort
Building floor roadways does far more than entertain children for a few minutes. It encourages creativity, problem-solving, and storytelling while keeping kids active and engaged without screens. Even very young children can help design the layout, choose destinations, and decide how their toy drivers should follow the road rules.
Because most road materials are inexpensive or recycled, this type of setup is an ideal rainy-day project, a weekend boredom-buster, or a quick reset activity when your child needs a change of pace. You can scale it up for a whole room adventure or keep it small for tabletop play in compact spaces.
Planning Your Mini Road Network
Before you grab the tape and start sticking lines everywhere, take a moment to plan the play experience you want. Think about where your child naturally likes to play: near the couch, along a hallway, or beside a favorite toy shelf. Build your roads in those high-interest zones to invite them into the activity right away.
Also consider whether you want a temporary layout that comes up quickly or a semi-permanent road system that can stay for a few days. This will help you choose the right materials and how elaborate you want the design to be.
Questions to Guide Your Design
- How much floor space can you use without blocking walking paths or doors?
- Do you want a simple loop, a branching city map, or multiple small tracks?
- Will siblings be playing together and needing separate areas or shared destinations?
- Do you want to emphasize racing, everyday city driving, or obstacle-course challenges?
Choosing Kid- and Floor-Friendly Materials
The best materials for floor roads are gentle on surfaces, easy to remove, and safe for kids to handle. You don’t need specialty supplies; many households already have enough items to build a complete network of roads without spending money.
Common Options for Roads
- Low-tack painter’s tape: Great for hardwood or tile, easy to see, and less likely to leave residue.
- Washi or paper tape: Colorful, gentle on surfaces, and ideal for making lanes, crosswalks, and parking spots.
- Cardstock or construction paper: Cut into strips for movable road pieces that can be rearranged at any time.
- Cardboard strips: Wider and sturdier roads that can support small bridges, tunnels, and ramps.
- Foam sheets or play mats: Soft, durable surfaces that can be cut into road shapes and reused often.
Helpful Extras for Scenery
- Building blocks or wooden bricks to create tunnels, walls, and garages.
- Small boxes for car washes, gas stations, and drive-through restaurants.
- Markers or stickers to label destinations and add road signs.
- Miniature trees, figures, or animals to bring the scene to life.
Step-by-Step: A Simple Floor Road Setup
Start with a basic structure and then invite your child to customize it. This approach keeps the project from feeling overwhelming and lets kids gradually expand their world as they play.
1. Define a Start and End Point
Choose a clear starting area such as “Home Base” near a couch, toy shelf, or storage bin where all the cars can be parked at the beginning. Decide on one or two key destinations like a “Town Center” or “Race Finish Line” at another part of the room. Connecting these points gives your roadway a sense of purpose and direction.
2. Lay Down a Main Road
Using tape or long paper strips, create one main road that runs between your chosen points. Make the road wide enough for at least one or two toy cars to pass comfortably. A simple straight path with a gentle curve is often enough to spark interest, especially for younger children.
3. Add Loops and Side Streets
Once the main road is in place, add side loops that lead around furniture legs, under chairs, or past nearby shelves. These smaller streets can form neighborhoods, short-cut routes, or secret back roads. Try to keep intersections visually clear so kids can easily see where the cars can turn.
4. Mark Special Areas
- Draw short white or yellow dashes in the center to represent lane lines.
- Create rectangular spots along a wall or couch edge for parking spaces.
- Mark crosswalks with evenly spaced white stripes near pretend buildings.
- Add a simple traffic light station with colored circles on a small card.
Themed Road Worlds to Try
Once you have a basic network, you can transform the entire setup with a theme. Themes help children invent stories and can be tailored to their interests, from construction sites to fantasy races.
City Streets and Neighborhoods
For a city feel, cluster destinations close together and use shorter, intersecting streets. Make a small downtown area with a grocery store, post office, playground, and parking lot. Add tiny figurines or dolls to represent pedestrians heading to different places.
Kids can role-play everyday situations: driving to school, stopping at the shop, or picking up friends. This helps them practice social scripts and problem-solving in a low-pressure, playful way.
Construction Zone and Work Sites
If your child loves trucks, dedicate part of the road to a construction area. Use cardboard to mark off a “work zone” and pile up building blocks as pretend gravel or bricks. Cars and trucks can deliver materials, carry workers, and navigate around cones or barriers.
This type of play invites children to think about how different vehicles have different jobs. They might assign roles to each car, narrating how the dump truck, crane, and bulldozer work together.
Race Track and Rally Course
For kids who love speed, reshape your roads into an oval or figure-eight race track. Include a starting grid, lap counter, and pit stop area where cars can refuel or get new tires. If you have more than one child, give each racer a lane or color-coded parking spot.
You can also add challenges like chicanes, tight turns, and slow zones marked by tape patterns. This encourages kids to experiment with how fast they can push the cars without flying off the track.
Elevate the Fun with Bridges, Tunnels, and Levels
Adding vertical elements turns a flat layout into an exciting three-dimensional course. These features don’t need to be complicated; they can often be built from everyday items already in your home.
Easy Ways to Add Height
- Slide cardboard strips over small boxes to form ramps.
- Use sturdy books as foundations for overpasses.
- Place a road strip across two chairs to create a high bridge.
- Form tunnels by draping fabric or paper over blocks on either side of the road.
Be sure that any elevated feature is strong enough to withstand little hands and moving cars. Test each section yourself before inviting children to play, and show them how to use the structures gently but confidently.
Learning Benefits Hidden in Play
While kids see roads as pure fun, adults can appreciate the many skills quietly developing during play. A well-designed road network becomes a playful classroom where children explore early math, language, and social skills without realizing it.
| Skill Area | How the Roads Help |
|---|---|
| Spatial awareness | Kids judge distances, turns, and positions while driving around curves and through narrow passages. |
| Fine motor control | Placing cars in lanes, steering carefully, and adjusting tape or small props builds hand coordination. |
| Language and storytelling | Children narrate where their drivers are going and why, creating characters and mini-plots. |
| Problem-solving | When traffic jams happen or roads get blocked, kids experiment with routes and new layouts. |
| Social skills | When sharing roads, children negotiate turns, make rules, and practice cooperation. |
Keeping Play Safe and Floor-Friendly
Safety matters as much as fun, especially when tape, scissors, and small objects are involved. Always supervise younger children when you first introduce new materials, and store sharp tools out of reach after setup is complete.
Test any tape on an inconspicuous area of the floor before building an entire city. Gently peel back a short strip to ensure it doesn’t damage the finish. When it’s time to clean up, pull tape slowly and at a low angle to reduce the chance of residue.
Inviting Kids to Co-Create
The most memorable road setups are often those where children have a say in the design. Rather than presenting a fully finished layout, leave gaps for them to fill in and decisions for them to make about where roads should lead.
- Ask children to decide on three must-have destinations to add to the map.
- Offer a choice of themes: city, race track, countryside, or airport roads.
- Encourage them to draw their own road signs and building labels.
- Let them be in charge of naming streets and neighborhoods.
Adapting Road Play for Different Ages
Floor roads can grow with your child. The same basic materials can be rearranged and reimagined as interests and abilities change. Adjust the complexity of the layout and the types of challenges to match your child’s age and developmental stage.
Toddlers
For toddlers, focus on sturdy, simple paths with wide curves and minimal small pieces. Let them enjoy pushing cars back and forth on a single loop while narrating what is happening. The goal at this age is exploration, not detailed scenarios.
Preschoolers
Preschoolers often love storytelling and pretend play, so give them destinations and characters. Introduce basic rules like stopping at pretend stop signs and yielding at intersections. They can help place tape and props with supervision, building pride in their creations.
Early Elementary Kids
Older children may enjoy more complex designs, including traffic systems, race timing, and even simple maps drawn on paper to match their floor layout. Invite them to redesign the city with challenges like “no dead ends” or “make a route that visits every building once.” This adds a puzzle element that can keep them engaged for longer sessions.
Quick Variations for Fresh Play
Over time, kids may get used to the same layout. Instead of rebuilding everything from scratch, try small adjustments that keep the experience feeling new while reusing much of the work you already did.
- Rotate furniture slightly so roads pass new obstacles.
- Move just one major destination and rename it with a new purpose.
- Add a temporary rule like “one-way streets” or “no passing zones.”
- Introduce themed play sessions such as “delivery day” or “emergency response day.”
Making Clean-Up Part of the Game
Clean-up can feel daunting after big play sessions, but it can become part of the story rather than the end of fun. Turn car storage into a parking garage, depot, or car wash that kids drive their vehicles into before bed or mealtime.
If the roads will stay for several days, establish a routine for tidying only loose pieces while leaving the main layout in place. When it is time to remove everything, turn it into a “road repair crew” mission: children peel tape or collect paper strips as if they are construction workers resurfacing the streets.
Frequently Asked Questions
How long should a road setup stay on the floor?
The ideal length of time depends on your household and floor type. Some families keep a layout active for a weekend, while others maintain a small corner city for weeks. If the roads begin to peel, gather dust, or cause tripping, it is time to refresh or redesign.
What if I have limited space?
Even in small homes, a compact road setup can fit along a hallway, under a coffee table, or on a large piece of cardboard that slides under a bed when not in use. Portable boards let children enjoy the same kind of play without permanently occupying floor space.
Can this activity work on carpet?
Yes, but you may need to adjust materials. Some tapes don’t adhere well to carpet fibers, so consider using cardstock or foam strips that lie flat on top instead of sticking directly to the floor. Lightweight pieces can be stabilized with a few small blobs of removable putty at the corners.
How do I keep younger siblings from dismantling everything?
For families with a mix of ages, create separate zones. Use sturdier materials like cardboard roads for shared spaces and save delicate features, such as tiny signs, for a higher or more protected surface. Involve toddlers in simple roles like “traffic control” so they feel included rather than tempted to tear things apart.
Do I need special toy cars?
No special brand is required; any small vehicles that roll smoothly will work. Friction-powered cars, wooden vehicles, or metal die-cast cars each bring a slightly different feel to play, but they all benefit from clear paths and engaging destinations. Focus more on the play environment than on collecting specific types of vehicles.
Bringing It All Together
Designing floor roads for toy cars is a flexible, low-cost way to invite rich, imaginative play into your home. With tape, paper, and a few props, you can create a world where children explore stories, practice skills, and feel proud of the mini-city they helped build. Whether your roads last an afternoon or become a beloved recurring project, they offer a memorable, hands-on alternative to passive entertainment.