Felt ornaments are an inviting way to decorate for the holidays: they are soft, colorful, lightweight, and easy to sew by hand. With a few basic supplies and a bit of time, you can turn sheets of felt into keepsake decorations that tell your family’s story year after year.
This guide walks you through choosing materials, planning designs, stitching, assembling, and finishing ornaments, plus ideas for crafting with kids and turning simple shapes into heirloom-quality pieces.
Why Felt Ornaments Make the Perfect Holiday Craft
Before you pull out the scissors and thread, it helps to understand why felt is such a popular material for handmade decorations.
- Beginner-friendly: Felt doesn’t fray, so edges stay neat without special finishing.
- Soft and safe: Lightweight and soft ornaments are gentle on children and unlikely to break if dropped.
- Inexpensive: Craft felt sheets are affordable and available in many colors.
- Flexible designs: You can cut freehand shapes, use cookie cutters, or trace printed templates.
- Portable project: Hand-stitching ornaments is a great couch or travel craft.
Because felt is simple to cut and sew, it’s suitable for children and adults working together, making it ideal for family holiday traditions.
Gathering Supplies: What You Really Need
You do not need a sewing machine or fancy tools to start. Most felt ornaments can be made with basic craft supplies.
Core Materials
- Felt sheets or wool blend felt in various colors
- Embroidery floss or strong sewing thread in coordinating shades
- Embroidery needles with eyes large enough for floss
- Sharp scissors for fabric (and another pair for paper templates)
- Stuffing (polyester fiberfill or scrap yarn) for padded ornaments
- Ribbon, twine, or floss for hanging loops
Helpful Extras
- Pins or sewing clips to keep layers from shifting
- Chalk, fabric pencil, or erasable pen for tracing templates
- Small buttons, beads, or sequins for details
- Fabric glue if you prefer less stitching for embellishments
Many crafters like wool or wool-blend felt for durability and appearance, but acrylic felt works well for casual projects and kid crafts. Wool-blend felt is often recommended in sewing communities because it keeps its shape and resists pilling better than basic synthetic felt over time.
Planning Your Ornament Designs
Thoughtful planning gives you cleaner results and makes hand sewing more relaxing.
Choosing Shapes and Themes
Start with simple silhouettes that are easy to cut and sew:
- Classic holiday icons: trees, stockings, stars, hearts, bells
- Winter themes: mittens, snowflakes, mugs, houses
- Whimsical ideas: animals, sweets, tiny gifts, letters with initials
If you’re unsure how to draw, trace around cookie cutters, printed clip art, or cardboard stencils. Many sewing tutorials recommend creating sturdy template pieces from card or cardstock so they can be reused from year to year.
Flat vs. Stuffed Ornaments
| Style | Pros | Best For |
|---|---|---|
| Flat | Uses less felt and thread; fastest to sew; lies nicely on branches or gift packages. | Gift tags, garlands, classroom crafts. |
| Lightly stuffed | More dimensional and plush; looks “finished” and substantial on the tree. | Heirloom pieces, keepsakes, special gifts. |
Simple Design Planning Tips
- Sketch ornament ideas on paper with colored pencils before cutting felt.
- Limit colors at first (for example, one main color and two accent colors) to keep designs cohesive.
- Plan details like faces, patterns, or letter initials while the shape is still on paper.
- Consider whether details will be stitched, glued, or added with beads.
Creating and Using Templates
Accurate templates save time and keep a set of ornaments consistent in size.
How to Make Basic Templates
- Draw or print the desired shape at the size you like.
- Glue or trace the design onto thin cardboard for durability.
- Cut out the shape smoothly, refining any uneven edges.
Place the finished template on felt and trace around it with a fabric marker or gel pen that shows up clearly on the chosen color. Cut just inside the traced line to avoid pen marks on the edges.
Front vs. Back Pieces
- Cut two identical pieces for most ornaments: a front and a back.
- Plan all decorative stitching on the front piece while it is still separate and easy to handle.
- Only after decorating should you layer the back piece and sew around the edges.
Basic Hand Stitches for Felt Ornaments
You only need a few fundamental stitches to create neat, charming ornaments. Many sewing and embroidery tutorials teach these stitches for beginner felt projects.
Running Stitch
- Short “dashed” line made by weaving the needle in and out of the felt.
- Good for simple outlines, attaching small appliqués, or adding understated details.
- Try to keep the length of each stitch and each gap consistent for a clean look.
Backstitch
- Creates a continuous, solid line even though the needle jumps backward with each stitch.
- Excellent for writing names, adding dates, or drawing continuous shapes like hearts or spirals.
- Helps create readable lettering on small ornaments.
Blanket Stitch
- Decorative edge stitch that wraps the thread around the outer edge of two layers of felt.
- Commonly used to sew the front and back of an ornament together.
- Provides both structure and a pretty border, especially when worked in a contrasting color.
French Knots and Simple Embellishments
- French knots can stand in for berries, eyes, or tiny snowflakes.
- Straight stitches arranged in radiating patterns create stars, flowers, or stitched snowbursts.
- Seed beads or sequins add sparkle when tacked on with small stitches.
Practicing these stitches on a scrap of felt first can make your main project go more smoothly, especially for children or beginners.
Step-by-Step: Assembling a Stuffed Felt Ornament
Use this general process for almost any simple shape, from stars to small animals.
- Cut your shapes. Trace and cut two identical pieces of felt for the main body of the ornament.
- Decorate the front. Add any faces, patterns, or appliqué shapes to the front piece. Work all decorative embroidery now.
- Layer front and back. Place the decorated front piece on top of the plain back piece, lining up edges carefully.
- Pin or clip. Secure the layers with a few pins to prevent shifting while you stitch.
- Add a hanging loop. Fold a short piece of ribbon or floss into a loop and insert the raw ends between the felt layers at the top.
- Sew the edge. Begin blanket stitch or whip stitch around the perimeter, catching both felt layers and the ribbon ends.
- Leave a gap. Stop with a gap of about one inch (or enough to fit stuffing).
- Stuff lightly. Add small amounts of fiberfill at a time, using a pencil or capped pen to gently push it into corners if needed.
- Close the gap. Continue the same edge stitch until you meet your starting point, pulling the thread snug and knotting it securely.
The finished ornament should feel lightly padded rather than overstuffed, so it hangs flat enough to face forward on the tree.
Design Ideas to Try
Once you know the basics, you can apply the same techniques to a huge range of designs. Here are a few easy-to-adapt ideas.
Simple Shapes with Embroidered Patterns
- Cut trees, stars, or hearts in solid colors.
- Use contrasting floss to add zigzags, dotted garlands, or small cross shapes.
- Decorate just one side or both, depending on how your ornaments will hang.
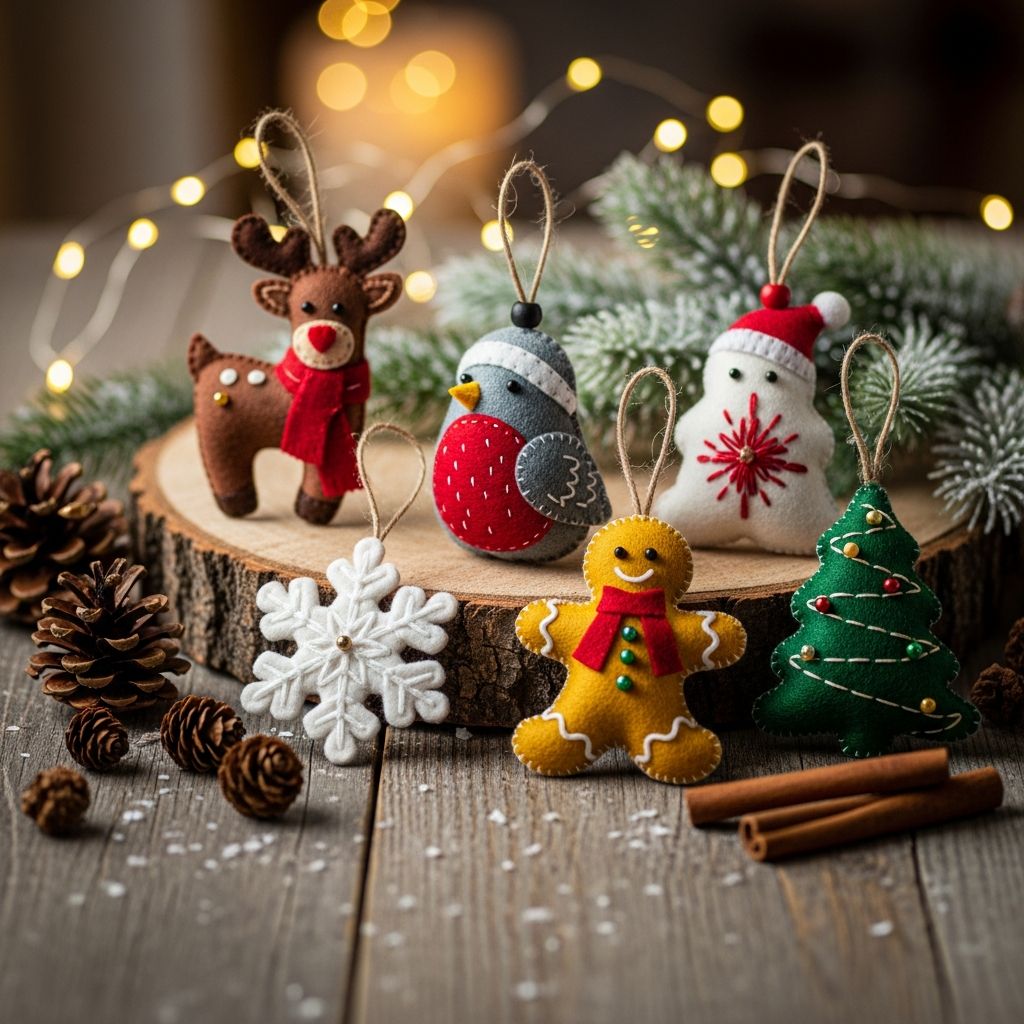
“Cookie”-Style Ornaments
You can turn brown felt into pretend gingerbread cookies or sugar cookies:
- Cut a base “cookie” shape from tan or brown felt.
- Cut a slightly smaller “icing” layer from white or pastel felt to sit on top.
- Attach the “icing” with running stitch or small dots of fabric glue.
- Add beads or French knots as “sprinkles.”
- Layer two cookie bases and sew together, leaving the decorative icing outward on each side if desired.
Personalized Initial Ornaments
- Cut a simple shape like a circle, oval, or tag.
- Cut a contrasting felt letter and appliqué it in the center.
- Backstitch around the letter for security and a framed look.
- Embroider the year or a short word like “JOY” or “PEACE” under the initial.
Miniature Scenes
Once you are comfortable with layering shapes, you can create tiny scenes:
- A small house with a snowy roof and stitched smoke.
- A mug of hot cocoa with appliquéd marshmallows.
- A winter landscape with layered hills and stitched falling snow.
Tips for Crafting with Kids
Holiday crafting with children can be meaningful and fun if the project is tailored to their skills.
- Prepare shapes ahead: Pre-cut simple shapes for younger children, letting them focus on decorating.
- Use blunt needles or plastic needles with yarn for small children, and supervise closely.
- Limit the time: Encourage short sessions so the project feels achievable.
- Embrace imperfection: Crooked stitches and lopsided smiles become part of the charm of family ornaments.
- Add names and years: Embroider or write (with fabric-safe markers) a child’s name and the year on the back of the ornament.
Many educational resources highlight that hand-sewing projects help children build fine motor skills, patience, and coordination, while also offering a sense of accomplishment when they finish a tangible item.
Turning Simple Crafts into Heirlooms
With just a few extra steps, your basic felt ornaments can become keepsakes passed down through the years.
- Choose quality felt: Wool or wool-blend felt resists stretching and pilling over time.
- Secure knots and tails: Bury loose thread ends between felt layers before trimming.
- Add labels: Include initials, dates, or short messages on the back to preserve memories.
- Store carefully: Keep ornaments in a dry place, ideally in boxes or fabric bags to prevent dust and tangling.
Handmade decorations often carry emotional value that goes beyond their materials, which is one reason families return to ornament-making traditions year after year.
Frequently Asked Questions (FAQs)
What type of felt is best for Christmas ornaments?
For long-lasting ornaments, wool or wool-blend felt is often recommended because it keeps its shape and texture better than basic acrylic felt. Acrylic felt is still useful for quick or kid-friendly projects due to its low cost and wide color range.
Do I need a sewing machine to make felt ornaments?
No, felt ornaments are typically sewn by hand using basic stitches like running stitch or blanket stitch. Hand sewing gives you greater control around curves and small shapes, and many tutorials are designed specifically for hand-stitching.
How thick should the stuffing be?
Only a small amount of stuffing is needed to give ornaments a soft, dimensional look. Overstuffing can distort the shape and make it harder for the ornament to hang flat, so add filling gradually and adjust before closing the final stitches.
Can felt ornaments be washed?
Felt ornaments are not usually meant for regular washing. Light surface cleaning with a soft brush or slightly damp cloth is preferable. Avoid submerging them in water, as felt can lose its shape and some threads or embellishments may bleed or loosen.
How can I make ornaments that are safe for very young children?
Skip small beads and buttons that could pose a choking hazard, and instead use embroidery or fabric paint for details. Attach hanging loops and layers with strong stitching, and supervise children closely if they assist with any part of the project.
References
- DIY Felt Embroidered Christmas Ornaments | Easy Hand Embroidery Tutorial — Practical Embroidery (YouTube). 2025-10-30. https://www.youtube.com/watch?v=clNgLYMtI8I
- DIY Felt Cookie Ornaments (with Patterns + Video) — Dans le Lakehouse. 2023-11-01. https://danslelakehouse.com/2023/11/diy-felt-cookie-ornaments.html
- Sew Handmade Felt Christmas Decorations — Sew Over It (YouTube). 2020-11-26. https://www.youtube.com/watch?v=s0S7OLAb__E
- Easy Embroidered Felt Christmas Ornaments — Thistle Key Lane. 2022-11-20. https://thistlekeylane.com/easy-embroidered-felt-christmas-ornaments/
- Guide to Making Heirloom Felt Ornaments: Best Inspiration & Tips — Mix Measure Make. 2021-12-10. https://www.mixmeasuremake.com/guide-to-making-heirloom-felt-ornaments-best-inspiration-tips/