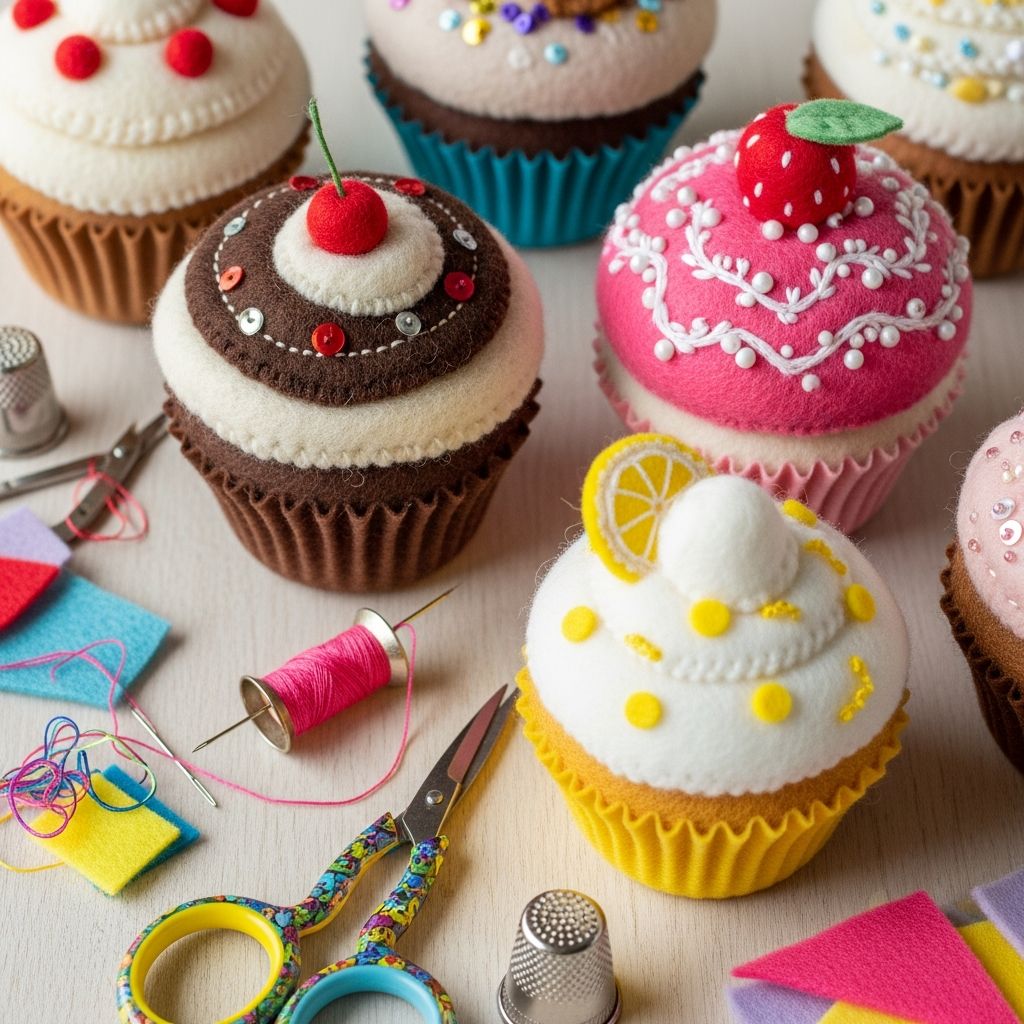
Felt cupcakes are a fun, safe, and reusable alternative to real sweets, ideal for pretend play, party decor, gifts, and even photo props. This guide walks you through every step of creating your own soft, colorful cupcakes—from planning and cutting to stitching and decorating.
Why Make Felt Cupcakes?
Felt cupcakes combine creativity and practicality in a single project. They are simple enough for beginners yet customizable enough to keep experienced crafters inspired.
- Perfect for children’s play kitchens, tea parties, and pretend bakeries.
- Great as handmade gifts, party favors, classroom props, or home decor.
- Reusable, long-lasting, and easy to personalize with colors and toppings.
Essential Materials and Tools
Before you start stitching, gather your supplies. Small projects like cupcakes are perfect for using up scrap felt and leftover embellishments.
Recommended supplies
- Wool or wool-blend felt sheets in at least three colors (wrapper, cake, frosting).
- Coordinating embroidery floss or strong sewing thread.
- Hand sewing needles appropriate for embroidery floss.
- Polyester fiberfill or fabric scraps for stuffing.
- Sharp fabric scissors for clean edges.
- Chalk or disappearing fabric marker for tracing shapes.
- Pins or small clips to hold pieces together while sewing.
Optional embellishments
- Seed beads or tiny buttons for sprinkles (for older children or decor only).
- Ribbon, lace, or rickrack for fancy cupcake liners.
- Small pom-poms to mimic cherries or berries.
- Fabric paint for icing drizzle effects.
- Felt scraps in bright colors for appliqué toppings.
Planning Your Cupcake Design
Before cutting any felt, decide how your finished cupcakes should look. A simple design will be faster to sew, while more details allow richer customization.
Key design decisions
- Shape: Classic cupcake with a straight wrapper and rounded top, or a taller, bakery-style version.
- Size: Mini cupcakes for doll play, or larger cupcakes for decor and gifts.
- Style: Flat “appliqué” style for banners and cards, or fully 3D cupcakes for play food.
Suggested size ranges
| Type | Height (finished) | Best Use |
|---|---|---|
| Mini felt cupcake | 4–5 cm | Dollhouses, keychains, ornaments |
| Standard felt cupcake | 6–8 cm | Play kitchens, party favors, desk decor |
| Oversized felt cupcake | 9–12 cm | Centerpieces, photo props, display pieces |
Creating Your Own Simple Template
Although printable patterns are convenient, drafting your own template gives you full control over the size and style of your cupcakes. The basic cupcake consists of a wrapper band, a cake circle, and one or more frosting layers.
Basic template pieces
- Wrapper band: A rectangle that forms the sides of the cupcake liner.
- Base circle: A circle that closes the bottom of the cupcake.
- Cake top: A slightly domed circle representing cake above the wrapper.
- Frosting shape: A scalloped or wavy piece that sits on top of the cake.
How to draft the wrapper band
- Decide the finished height of the wrapper (for example, 4 cm).
- Cut a paper strip that is slightly longer than the circumference you want (for example, 14–16 cm long).
- Wrap the strip into a ring; adjust the overlap until it forms a pleasing cupcake base.
- Once satisfied, mark the overlap line, trim the excess, and use this adjusted strip as your wrapper template.
How to draft the base and cake circles
To create a secure base, the circle should match the inner circumference of the wrapper. The cake circle can be slightly larger to create a subtle dome as you stuff the cupcake.
- Trace the wrapper band ring onto paper to capture its interior circumference.
- Cut out this circle to use as your base template.
- For the cake circle, trace the same base circle and extend the edge outward by 2–3 mm.
Designing frosting pieces
Frosting pieces can be as simple or elaborate as you like. A single scalloped circle gives a neat, cartoon-style look, while layered shapes feel more realistic.
- Draw a circle slightly larger than your cake top and add scallops or wavy edges.
- For layered frosting, create two or three progressively smaller shapes to stack.
- Consider adding an extra, tiny circle for a cherry or dollop of whipped cream.
Cutting the Felt Pieces
Clean, even cutting makes your finished cupcakes look polished and professional. Work slowly and avoid jagged edges, especially around curves and scallops.
Cutting tips
- Trace your paper templates onto the felt using chalk or a fabric marker.
- Cut just outside the traced line so the mark stays on the scrap, not the piece.
- Use the tips of your scissors for curves and small scallops, turning the felt as you cut.
- Cut matching pairs for pieces that will be doubled, such as wrappers with decorative outer layers.
Stitch Types for Felt Cupcakes
Hand sewing gives felt cupcakes a charming, handmade look. A few basic stitches are enough to complete the entire project.
Useful basic stitches
- Running stitch: Simple and fast; ideal for basting or subtle seams.
- Whip stitch: Great for joining edges; forms a sturdy seam with decorative loops.
- Blanket stitch: Neat and classic around visible edges such as frosting.
- Backstitch: Strong line of stitching for attaching small decorations securely.
Step-by-Step Assembly: 3D Cupcake
This section explains how to assemble a simple, three-dimensional cupcake with a separate wrapper, cake body, and frosting top.
1. Prepare and decorate the frosting
- Place your frosting piece on a flat surface.
- Add sprinkles or details using small stitches, beads, or tiny felt shapes.
- Secure all embellishments before attaching the frosting to the cake.
2. Build the cupcake wrapper
- Fold the wrapper band into a ring, right sides facing out.
- Use a whip stitch to close the short ends together, forming a cylinder.
- Pin or clip the base circle to one open side of the cylinder.
- Whip stitch around the edge, catching both the base and wrapper band as you go.
3. Attach the cake top
- Place the slightly larger cake circle on the open top of the wrapper.
- Begin whip stitching around the edge, leaving a small gap for stuffing.
- Lightly fill with fiberfill, shaping the stuffing as you go to form a dome.
- Continue stitching until the top is fully closed.
4. Sew on the frosting
- Position the frosting piece on top of the cake, centering it over the dome.
- Use small running or whip stitches around the inner area of the frosting to secure it.
- If you want a puffy frosting, add a thin layer of stuffing underneath before finishing the seam.
5. Add the final topping
- Place a felt circle, bead, or pom-pom at the center as a cherry or berry.
- Secure it with several tight stitches passing through the top of the cupcake.
- Knot the thread firmly on the underside of the frosting, burying the tail inside the cupcake.
Flat Felt Cupcakes for Banners and Cards
Flat cupcakes are quicker to make and work well for garlands, greeting cards, magnets, and quiet books. Instead of stuffing, you layer and stitch shapes onto a single base.
Basic method for flat cupcakes
- Cut a single cupcake silhouette (wrapper plus cake in one shape) from felt.
- Cut a frosting piece that overlaps the top of the base shape.
- Stitch the frosting onto the base with a neat running or blanket stitch.
- Add small details such as sprinkles, hearts, or tiny fruit shapes.
- For extra stability, back the cupcake with a second felt shape or card stock.
Creative Flavor and Color Ideas
Choosing colors as if you were decorating real cupcakes makes the crafting process even more enjoyable. Think of each cupcake as a different flavor combination.
Fun “flavor” combinations
- Chocolate base with pastel pink frosting and white felt sprinkles.
- Lemon “cake” in soft yellow with white drizzle and tiny green leaves.
- Red velvet cupcake with cream “cheese” frosting and red felt crumbs.
- Rainbow cupcake using layered stripes on the wrapper and multicolored sprinkles.
- Seasonal cupcakes: orange and black for Halloween, red and green for winter holidays.
Safety Tips for Children’s Play Food
If your cupcakes are meant for children, especially toddlers, focus on durability and safety. Avoid anything that could detach and become a choking hazard.
Child-friendly guidelines
- Skip beads and small buttons for children under three years old.
- Use embroidery floss instead of glue whenever possible for longer-lasting details.
- Double-knot threads and hide knots inside the cupcake to prevent unraveling.
- Choose high-quality wool or wool-blend felt, which resists pilling and holds stitches better.
Care, Cleaning, and Storage
Well-made felt cupcakes will last for years with basic care. Gentle handling and proper storage keep colors bright and shapes crisp.
Care recommendations
- Spot clean with a slightly damp cloth and mild soap; avoid soaking the felt.
- Air-dry thoroughly to prevent warping or mildew.
- Store cupcakes in a lidded box or basket to keep dust away.
- Keep them out of direct sunlight to reduce fading over time.
Project Variations and Advanced Ideas
Once you have mastered a basic cupcake, experiment with more playful designs and interactive elements. Small tweaks can turn a simple project into a centerpiece or learning tool.
Ideas to explore
- Create a set of cupcakes with removable frosting using small sewn-in hook-and-loop dots.
- Stitch numbers or letters on the wrappers for educational play.
- Design themed assortments, such as a “birthday dozen” with candles and confetti.
- Attach magnets to the backs of flat cupcakes for fridge decor.
- Use embroidered faces to turn cupcakes into whimsical characters.
Common Problems and Simple Fixes
Even experienced crafters encounter small issues while sewing. Here are some typical problems and practical solutions.
| Issue | Likely Cause | Quick Fix |
|---|---|---|
| Wrinkled wrapper | Base circle too small or uneven stitches | Re-cut a slightly larger base, or sew with smaller, consistent stitches. |
| Flat, saggy top | Not enough stuffing or cake circle too large | Add more stuffing and pull stitches gently to shape the dome. |
| Visible knots or tails | Knots tied on outer surface | Start and end threads inside the cupcake and bury the tails. |
| Uneven frosting edge | Inaccurate cutting of scallops | Trim carefully with small scissors and smooth the curves. |
How to Use Felt Cupcakes
Once finished, your cupcakes can brighten up countless settings. Their charm lies in how easily they adapt to different occasions and spaces.
- Arrange them on a toy cake stand for a child’s pretend bakery.
- Wrap them individually as handmade party favors or teacher gifts.
- Display them on a tiered stand as a centerpiece for dessert-themed celebrations.
- Use them as photo props for birthdays, baby showers, or social media content.
SEO-Friendly FAQs About Felt Cupcakes
How hard is it to sew felt cupcakes?
Felt cupcakes are a beginner-friendly project because the shapes are simple and the stitches are basic. With a bit of patience and careful cutting, even a first-time sewer can create attractive results.
What type of felt is best for felt food?
Wool or wool-blend felt is recommended because it holds its shape, resists pilling, and accepts stitches well. Craft felt made from acrylic is budget-friendly but may stretch or fuzz over time with heavy play.
Can felt cupcakes be washed?
Felt cupcakes should not be machine washed, as agitation can distort the shapes and loosen embellishments. Spot cleaning with a damp cloth and mild soap is usually sufficient for everyday play use.
Are felt cupcakes safe for toddlers?
Felt cupcakes can be safe for toddlers if they are stitched securely and free from small parts like beads and loose buttons. Always supervise young children during play and inspect toys regularly for loose threads or damage.
How long does one felt cupcake take to make?
The time required depends on your sewing speed and the level of detail you choose. A simple, undecorated cupcake might take around 30 minutes, while a heavily embellished one could require an hour or more.
Final Thoughts
Sewing felt cupcakes is a satisfying way to turn small scraps of fabric into cheerful, lasting creations. With a few basic tools and techniques, you can assemble a whole tray of unique, handmade treats that never go stale and always invite play and admiration.