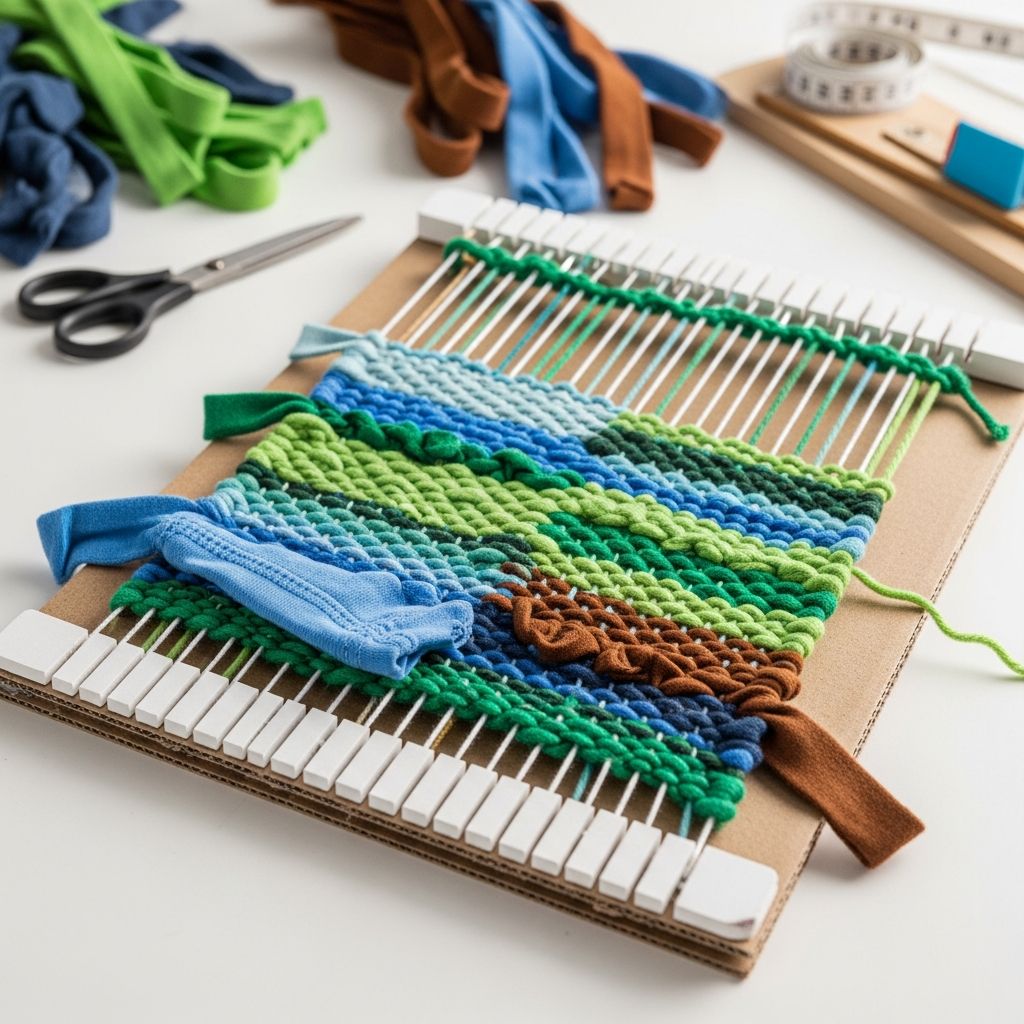
Old t-shirts pile up in drawers and closets, but they do not have to end up in the trash. With a simple weaving project, those worn, stained, or outgrown shirts can become bright, functional art that celebrates Earth Day all year long.
This guide walks through how to turn everyday t-shirts into woven pieces using easy techniques suitable for kids, families, classrooms, and beginners. No fancy loom is required—just creativity, a bit of patience, and a willingness to cut into fabric you no longer wear.
Why T-Shirt Weaving Is a Perfect Earth Day Project
Earth Day is about noticing how everyday choices impact the planet. T-shirt weaving turns the idea of “reduce, reuse, recycle” into something you can touch and display at home.
- Reduces textile waste: Instead of sending old shirts to the landfill, you give them a second life as decor or practical items.
- Teaches eco-awareness: Kids see firsthand that fabric is a resource, not trash, and that small creative choices can protect the environment.
- Builds fine-motor skills and focus: Weaving requires simple repetition that is calming and great for developing coordination and patience.
- Encourages storytelling: Each shirt carries a memory—sports teams, vacations, school events—that can be woven into a new shared artwork.
Gathering Materials: What You Need to Get Started
You can adapt this project to whatever you already have at home. Start by collecting a small pile of t-shirts, then decide what type of loom works best for your space and age group.
Recommended Materials List
- 3–6 clean old t-shirts in different colors
- Sharp fabric scissors (adult use or supervision)
- Sturdy cardboard, an old photo frame, or a simple wooden frame to act as a loom
- String, yarn, or thin t-shirt strips for the vertical threads (warp)
- Ruler or measuring tape
- Masking tape or painter’s tape
- Safety pins or clips (optional, for holding strips while you work)
- Large blunt tapestry needle or a homemade cardboard shuttle (optional, but helpful)
Choosing the Right Loom Base
The loom is simply the structure that holds your vertical threads tight. You can create one from common household items.
| Loom Type | Best For | Pros | Things to Note |
|---|---|---|---|
| Cardboard rectangle | One-time projects, young kids, classrooms | Easy to cut, inexpensive, fully recyclable afterward | Edges can bend; best for small wall hangings or coasters |
| Old photo frame (no glass) | Neat wall art, long-term use | Sturdy, already has a built-in display border | Requires string or nails to hold warp threads in place |
| Simple wooden frame or canvas stretcher | Larger projects like cushion fronts or placemats | Very strong tension, reusable for many weavings | Needs a bit more setup time with nails or screws |
Preparing T-Shirts: From Clothing to Weaving Strips
Before weaving begins, t-shirts must be cut into strips. This step is surprisingly quick once you understand the basic approach, and it is a good job for older kids or adults.
Step-by-Step Cutting Method
- Lay the t-shirt flat on a table and smooth out wrinkles.
- Cut off the bottom hem to remove the thick seam.
- Trim away sleeves and collar if you want to keep your strips even.
- Work with the main body of the shirt by cutting horizontal strips, about 2–3 cm wide, from side to side.
- Decide whether to keep each loop intact (for chunky weaving) or cut the loops open to form long ribbons.
- Gently stretch each strip so the edges roll inward, creating soft “yarn” that is easier to weave.
Thicker strips make bold, cushiony textures, while thinner strips allow for more detailed patterns. Mix both for variety in a single piece.
Color Planning Tips
- Choose a palette of 2–4 main colors to keep the design cohesive.
- Use patterned shirts for occasional accent rows to create visual interest.
- Place very bright or neon colors in small bands so they do not overpower the piece.
Building a Simple Loom with Cardboard
A cardboard loom is quick to make and perfect for a first attempt. It works especially well for small wall hangings, bookmarks, or mug rugs.
Creating the Cardboard Loom
- Cut a rectangle of thick cardboard slightly larger than the final size of your project.
- Along the top and bottom edges, mark small notches about 1–1.5 cm apart with a pencil.
- Use scissors to snip shallow cuts at each mark to hold the warp threads.
- Tape the ends of your warp string to the back of the cardboard, then wrap it up and down, slotting it into each notch.
- When you reach the last notch, tape the final end securely on the back.
The warp threads should be snug but not so tight that they bend the cardboard. Adjust tension before beginning to weave.
Basic Weaving Technique: Over and Under
Weaving itself is just a repeating pattern of moving fabric over and under the warp threads. Once kids understand this rhythm, they can work independently with minimal guidance.
First Rows: Getting Started
- Attach the end of a t-shirt strip to the first warp thread with a simple knot or a small piece of tape on the back of the loom.
- Weave the strip over the first warp thread, under the second, then over the third, and so on across the row.
- When you reach the last warp thread, gently push the strip upward so it sits snugly against the previous row (or the loom edge if it’s the first row).
- Turn around and weave the next row back across, reversing the pattern: if the first row started “over,” the next row should begin “under.”
- Continue alternating rows, changing colors whenever you wish by knotting or tucking new strips at the edges.
Dense weaving produces a firm, rug-like texture, while loosely spaced rows create a more open, flexible fabric.
Easy Variations for Kids
- Color blocks: Work several rows in one color before switching to another to form clear stripes.
- Rainbow stacking: Use the order of the rainbow to introduce color theory while building a cheerful hanging.
- Mosaic effect: Alternate short strips of different colors within the same row for a “patchwork” look.
Design Ideas: What You Can Make
T-shirt weaving is flexible. Once a rectangle of woven fabric is finished, it can be turned into many different items with just a bit of trimming and sewing.
- Mini wall hanging: Keep the weaving on the loom frame and add a cord at the top to hang from a hook.
- Nature-inspired banner: Incorporate greens, blues, and browns to echo forests, oceans, and soil for an Earth Day theme.
- Coasters or mug rugs: Make small, sturdy rectangles that protect tables and serve as daily reminders of eco-friendly choices.
- Cushion front: Sew a finished weaving onto a fabric backing and stuff it to create a throw pillow.
- Book cover or journal wrap: Wrap a finished panel around a notebook and attach with glue or stitching.
Finishing and Removing Your Weaving from the Loom
Finishing a piece neatly helps it last longer and gives it a polished look. The method changes slightly depending on your loom type, but the goals are similar: secure the warp threads and hide fabric ends.
Securing the Top and Bottom
- Turn the loom over and carefully cut pairs of warp threads along one edge.
- Tie each pair into a secure double knot as close to the woven edge as possible.
- Repeat across the entire top edge, then do the same for the bottom.
- Trim thread tails evenly or leave them long as a fringe.
If using a frame loom, you can also leave the warp attached and use it as part of the display, tying only a few secure knots and then tucking loose ends behind the frame.
Neatening the Sides
- Tuck the cut ends of t-shirt strips into nearby rows using a blunt needle or your fingers.
- Secure stubborn ends with a few small hand stitches in matching thread.
- For a very tidy look, sew a narrow fabric strip or ribbon along each side to act as a border.
Safety and Supervision Checklist
This project is family-friendly, but it does involve scissors and small pieces. A quick safety plan keeps things fun and stress-free.
- Use child-safe scissors for younger makers and keep fabric-cutting to an adult or older teen.
- Store sharp needles in a designated container and bring them out only for finishing steps.
- Keep strips and threads off the floor to avoid slipping hazards.
- Encourage regular breaks so hands do not get tired or cramped.
Extending the Project: Learning Activities for Home and Classroom
T-shirt weaving can anchor a whole afternoon of Earth Day learning. Add simple reflection questions, math connections, and creative writing activities to deepen the experience.
Discussion Starters
- How many shirts did this project use, and what might have happened to them otherwise?
- What other objects in your room could be reused or repaired instead of thrown away?
- How does it feel to wear or display something you made yourself?
Curriculum Connections
- Math: Count warp threads, calculate how many strips are needed to cover a certain width, or measure rows for even spacing.
- Art: Explore patterns such as stripes, checkerboards, and gradients using color placement.
- Language arts: Invite students to write a short story from the perspective of a t-shirt getting a new life as a piece of art.
Care, Cleaning, and Long-Term Use
Because t-shirt weaving uses knit cotton, most finished pieces are fairly durable and forgiving. How you care for them depends on how you plan to use them.
- Wall hangings: Lightly dust with a soft brush or vacuum on a low, gentle setting using an upholstery attachment.
- Coasters and placemats: Spot clean with mild soap and water. Allow them to air-dry completely before reuse.
- Pillows: If the weaving is removable, wash the pillow cover by hand or on a gentle cycle and reshape while damp.
Frequently Asked Questions
Do I need special weaving tools to start?
No special equipment is required. A simple cardboard loom, basic string, scissors, and old t-shirts are enough for a successful first project. Fancy tools can help with speed but are not necessary.
What kinds of t-shirts work best?
Soft, medium-weight cotton or cotton-blend shirts are ideal. Shirts that are too thin may roll into very narrow strips, while heavy, thick fabric can be difficult for small hands to weave.
Can young children participate?
Yes. Adults can handle cutting and loom setup, then invite young children to choose colors, push strips into place, and help with basic over–under weaving. Always supervise closely when scissors or needles are nearby.
How long does a project usually take?
A small coaster-size weaving might take under an hour, while a cushion front or large wall hanging can be a multi-day project. Breaking the work into short sessions keeps kids engaged and reduces hand fatigue.
What if my edges look uneven?
Uneven edges are very common on first projects and add handmade charm. Over time, practice will naturally improve consistency. You can also trim and sew a fabric border to neaten the outline if you prefer a straighter edge.
Bringing It All Together
T-shirt weaving turns something ordinary and often overlooked into a meaningful reminder of Earth Day values. By reusing what is already in your home, you reduce waste, spark creativity, and create lasting memories around a shared project.
Whether you hang a finished piece on the wall, turn it into a cozy cushion, or send it to school for an Earth Day display, each woven strip tells a small story of care—for your belongings, for your community, and for the planet.