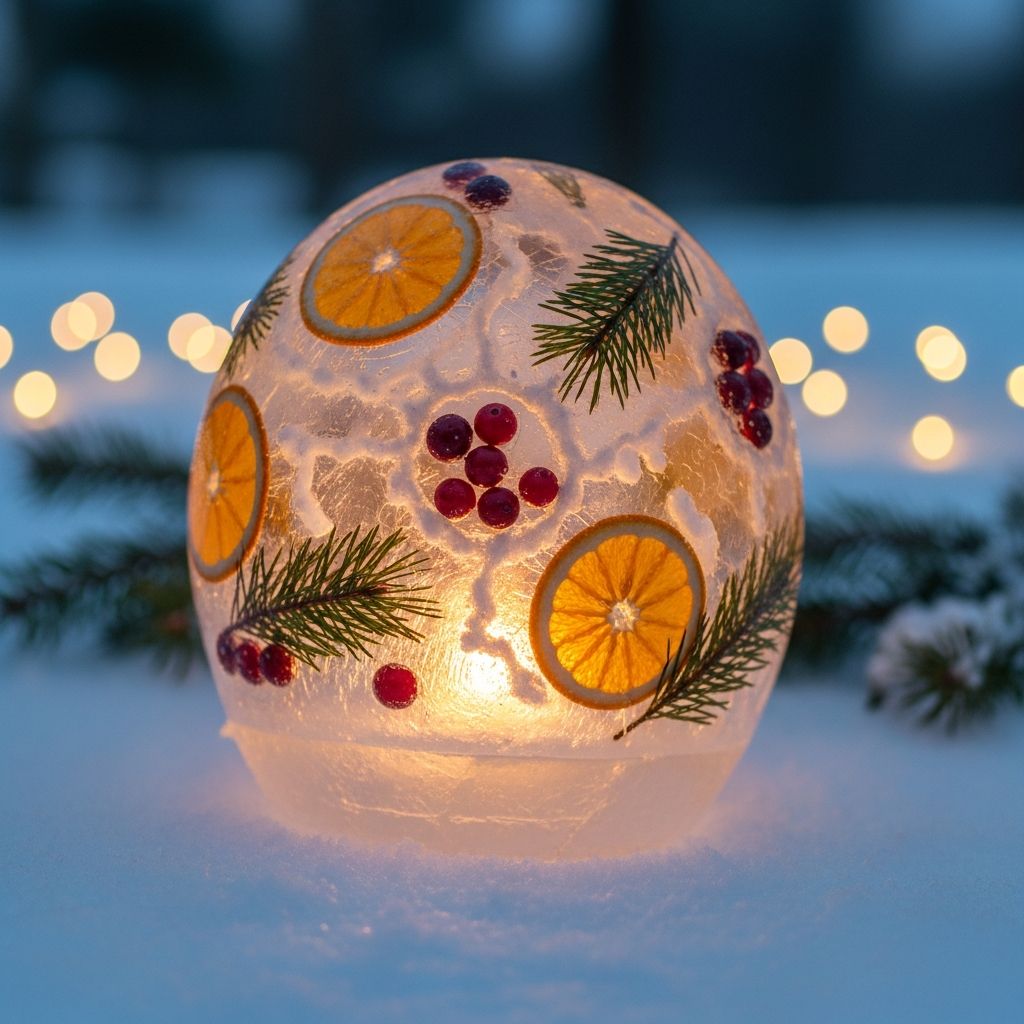
Ice lanterns are a simple, low-cost way to add shimmering magic to winter evenings, parties, and cozy nights at home. By combining recycled cartons, water, and a few decorative treasures, you can create glowing sculptures that look like they came from a frozen fairy-tale garden.
Why Ice Lanterns Are Worth Making
This project blends creativity, sustainability, and a sense of wonder. You reuse everyday containers, experiment with color and texture, and end up with a centerpiece that literally melts away instead of cluttering your storage.
- Perfect for winter holidays, outdoor paths, and evening gatherings.
- Kid-friendly with adult supervision and minimal tools required.
- Fully customizable with flowers, greenery, fruit slices, or glitter.
Project Overview
In this guide, you will learn how to turn clean beverage cartons into reusable molds for ice lanterns that cradle real or LED tea lights. You will also see how to use flower petals, leaves, and colorful odds and ends to create different looks, from delicate floral crowns to bold icy shards.
The basic process is straightforward: pour water in stages, tuck in decorations between layers, freeze, then release your frozen lantern and light it from within.
Materials and Tools
You do not need specialized equipment. Most of the supplies can be found in your recycling bin, pantry, or backyard.
Core Materials
- Clean paper beverage cartons (milk, juice, or broth), any size.
- Tea lights or LED tea lights (LED is safer around children and pets).
- Water (tap water works fine; filtered for extra clarity).
- Freezer space large enough for upright cartons.
Decorative Add-Ons
- Fresh or dried flower petals and small blossoms.
- Leaves, ferns, herbs (rosemary, thyme, or pine sprigs).
- Citrus slices (lemon, lime, orange) for a stained-glass effect.
- Food coloring for tinted ice layers.
- Biodegradable glitter or confetti (for sparkle without microplastic waste).
Basic Tools
- Scissors or a craft knife for opening cartons.
- Small plastic or metal cups to form candle cavities.
- Masking tape or painter’s tape.
- Tray or baking sheet to keep cartons stable in the freezer.
- Optional: funnel for easier pouring, oven mitts or thick towel to handle cold molds.
Safety and Preparation
A little preparation helps prevent spills, cracks, and frostbite fingers. Treat the cartons as molds that need support while freezing and remember that ice is heavy and slippery when released.
- Always supervise children when using scissors, knives, or real candles.
- Place cartons on a flat tray before adding water so you can move everything without tipping.
- Wear thin gloves or wrap a towel around frozen cartons when handling them.
Step-by-Step: Classic Cylindrical Ice Lantern
This is the simplest version and a good place to start. Once you understand the basic layering technique, you can easily adapt it to more elaborate variations.
Step 1: Prepare the Carton Mold
- Rinse the carton thoroughly and let it drain so no residual liquid remains.
- Use scissors or a craft knife to cut off the top flap, creating a straight open edge.
- Inspect the inside for seams; these are fine but avoid deep dents, which can cause thin or weak ice patches.
Step 2: Create the Candle Cavity
The candle cavity is formed by a smaller container nested inside the carton while the water freezes around it.
- Choose a small cup or container that is slightly wider than your tea light.
- Place it upright in the center of the empty carton.
- Use tape across the top edges of the carton to hold the inner cup centered and suspended.
Step 3: Add Water in Layers
Pouring water in stages helps your decorative elements stay where you want them instead of all floating to the top.
- Fill the space between the carton wall and the inner cup about one-third full with water.
- Add a few petals or leaves, gently pressing them against the sides with a spoon or chopstick.
- Place the mold in the freezer until the layer is mostly solid. This may take 1–2 hours depending on your freezer.
- Repeat for a second and third layer, adding more decorations each time if desired.
Step 4: Freeze Completely
Once all the layers are in place, let the entire mold freeze until completely solid. This can take overnight for larger cartons.
- Avoid topping the water right to the brim; ice expands and needs a bit of space.
- If you see the inner cup rising, adjust the tape or remove a little water to keep the cavity centered.
Step 5: Release the Ice Lantern
Removing the ice from the carton is satisfying and easier than it looks if you work patiently.
- Take the frozen mold out of the freezer and let it sit at room temperature for a few minutes.
- Peel or cut away the carton from top to bottom in strips.
- Twist and pull out the inner cup; if it is stuck, run a little warm water into the cavity to loosen it.
- Place your tea light in the cavity and admire your shimmering creation.
Design Ideas and Style Variations
Once you have made a basic lantern, experiment with different shapes, colors, and textures. Changing the decorative materials or the way you cut the carton can dramatically alter the mood of the finished piece.
Floral Crown Lantern
This version highlights a ring of flowers near the top of the lantern, mimicking a crown or wreath.
- Use smaller blossoms or clusters of petals concentrated in the upper third of the mold.
- Freeze a clear lower layer first, then add flowers to the second layer so they sit at eye level when the candle is lit.
Ice Shard Sculpture Lantern
For a more dramatic, crystalline look, you can shape the ice into angled facets that catch the light like jagged icebergs.
- After the basic lantern is unmolded, use a metal spoon or butter knife to chip away shallow facets while the lantern is slightly softened.
- Work from top to bottom, rotating the lantern, to create a series of overlapping planes.
- Return the lantern to the freezer briefly to re-harden before use.
Color-Washed Lantern
Food coloring can turn plain ice into tinted glass. Subtle shades tend to look more elegant than very dark colors.
- Add a drop or two of food coloring to each water layer and stir before pouring.
- Try gradients: pale at the bottom, darker near the top, or alternating bands of two different colors.
Ideas for Display and Use
Ice lanterns are surprisingly versatile. They shine on cold patios, garden paths, and even indoors for short periods (with a tray to catch drips).
- Line a walkway with lanterns for a winter party or holiday dinner.
- Group several at different heights on a porch step for a layered glow.
- Float smaller lanterns in a large metal basin or birdbath for a magical centerpiece.
Recommended Candle Options
Choosing the right light source affects both safety and the life span of your lantern. Real flames look classic but melt the surrounding ice faster.
| Type | Pros | Cons | Best For |
|---|---|---|---|
| Standard tea lights | Warm natural flame; inexpensive; widely available. | Short burn time; open flame requires supervision; faster melting. | Outdoor paths, brief events, adult-only gatherings. |
| LED tea lights | Safe around kids and pets; reusable; no smoke. | Requires batteries; light can be cooler in tone. | Family events, indoor use, long displays. |
| Rechargeable LED candles | Eco-friendlier over time; adjustable brightness and color (on some models). | Higher upfront cost; must remember to recharge. | Frequent use, decor enthusiasts, parties and celebrations. |
Eco-Friendly and Practical Tips
This project already leans eco-conscious because it reuses containers, but a few extra habits make it even kinder to the environment and easier to manage.
- Stick to plant-based decorations, citrus slices, and biodegradable glitter so any meltwater is harmless outdoors.
- Display lanterns on trays or shallow pans so runoff is contained and does not freeze into slippery patches in high-traffic areas.
- When finished, let the lanterns melt naturally and reuse the same cartons as molds for your next batch.
Troubleshooting Common Problems
Imperfections are part of handmade charm, but if you want more control over the final look, these quick fixes can help.
- Cracked sides: Often caused by freezing too fast or overfilling; leave a bit of headroom and avoid placing molds right next to the freezer vents.
- Cloudy ice: Try using filtered water and freezing in layers; boil and cool the water first for extra clarity if desired.
- Floating decorations: Work in partial layers, letting each one thicken before adding more flowers or leaves.
- Off-center cavity: Center the inner cup with tape and check periodically during the early stages of freezing.
Adapting the Project for Kids
Children especially enjoy choosing petals, sprinkling glitter, and seeing their designs come to life when lit. Adjust the steps to keep things fun and safe.
- Pre-cut cartons and handle all knife work yourself; let kids focus on decoration.
- Use LED tea lights only; explain that the ice can be very cold and slippery.
- Turn it into a mini science lesson about states of matter: water freezes, ice melts, and the lantern disappears when the temperature rises.
Seasonal and Event-Themed Variations
With a few changes in color and decoration, ice lanterns can match almost any occasion. Think of them as a temporary canvas for seasonal moods.
- Winter holidays: Evergreens, cranberries, star shapes, and cool blue tint.
- Romantic evenings: Rose petals, soft pink or red tint, and heart motifs drawn on the inner cup before freezing.
- Garden parties: Herbs, tiny wildflowers, and a barely tinted green or golden hue.
- New Year’s Eve: Metallic-style biodegradable glitter and layered colors for a fireworks feel.
Simple Care and Storage
Ice lanterns are temporary by nature, but you can stretch their life in cold weather. When temperatures are consistently below freezing, you can keep them outside between uses.
- Extinguish candles and let lanterns refreeze outdoors on a flat, shaded surface.
- If cracks appear, place the lantern in a shallow bowl, pour a little water around the base, and let it refreeze to “seal” it to the bowl.
- Do not try to store ice lanterns in bags or boxes; they will fuse together or fracture.
Frequently Asked Questions
How long do ice lanterns last?
The lifespan depends on temperature and candle type. In below-freezing weather with LED lights, they can last for several evenings, especially if you bring them back to a cold area between uses.
Can I use glass jars instead of cartons?
Glass jars can work, but they are riskier because water expansion during freezing can crack the glass. Flexible or semi-flexible molds such as cartons, silicone, or plastic containers are more forgiving and safer for beginners.
Is it safe to use real candles?
Real tea lights are fine outdoors in stable lanterns placed on nonflammable surfaces, as long as an adult supervises them. Never leave an open flame unattended or where it might tip, and keep flames well away from flammable decorations around the lantern.
What if I do not have many decorations?
Plain ice lanterns can be just as striking. You can create interest with texture—such as chipped facets—and color, using just a few drops of food coloring. Even without any extras, the gentle glow through thick ice looks sculptural and elegant.
Can I make mini lanterns for table settings?
Yes. Use small drink cartons, yogurt cups, or silicone muffin cups as molds, and choose tiny LED lights or battery micro-fairy lights instead of standard tea lights. Group three or more minis together for a stronger visual impact.
Final Inspiration
With a stack of rinsed cartons and a little imagination, you can create an entire gallery of glowing ice forms—each one different from the last. Let the seasons, your garden, and your recycling bin guide the colors and textures you choose, and enjoy watching your temporary sculptures turn light, water, and flowers into a fleeting work of art.