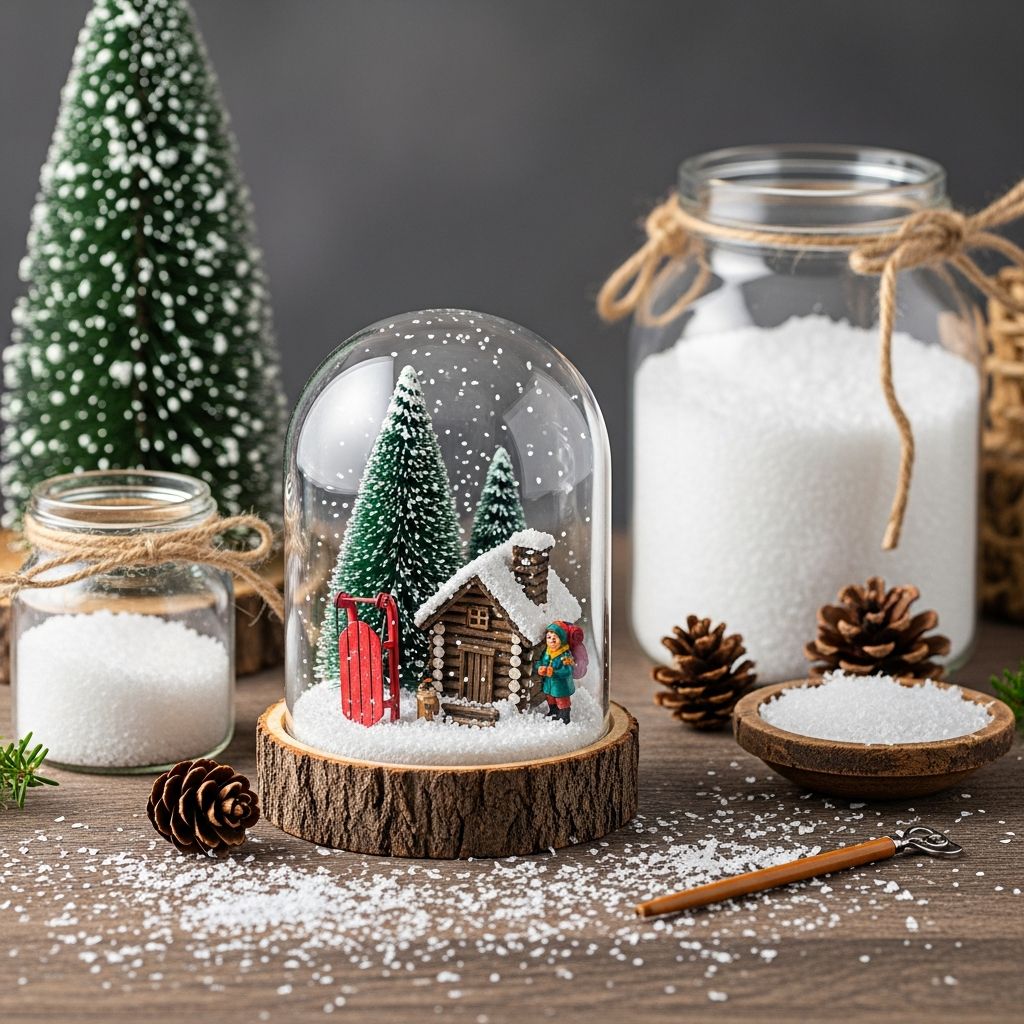
Waterless snow globes are a simple, charming way to bring winter magic indoors without using water or glycerin. Instead of liquid, you build a tiny winter scene inside a jar and surround it with faux snow or glitter. This makes the project safer for children, easier to store, and far less messy than traditional snow globes.
Below you will find a complete guide to planning, building, decorating, and displaying your own dry snow globes, plus tips for crafting with kids and answering common questions.
Why Choose a Waterless Snow Globe?
Before gathering supplies, it helps to understand what makes a waterless version appealing for families and classrooms.
- Kid-friendly and break-resistant: Without liquid, there is no risk of leaks if the jar tips over. Using plastic jars makes the project even safer for younger children.
- No special liquids required: Traditional snow globes use water mixed with glycerin or similar substances to slow the falling glitter. In a dry globe you can skip this step entirely, simplifying the craft.
- Less mold risk: Keeping moisture out reduces the chances of mold growth inside the jar over time, especially if you allow glue to dry completely before sealing.
- Reuse what you have: Empty jam jars, jelly jars, small food containers, and spice bottles can all be cleaned and turned into mini winter scenes, extending their life instead of sending them straight to recycling.
- Easy to store year after year: Because there is no liquid to freeze, expand, or discolor, dry globes are simple to pack away with your other seasonal decorations.
Basic Materials and Tools
You can create a globe with very few supplies, but having a small variety on hand helps everyone customize their scene. Always supervise children when using hot glue or glass jars.
Suggested Materials
- Clean glass or plastic jars with lids (mason, baby food, jam, or small plastic containers)
- Mini figurines such as trees, snowmen, buildings, animals, or tiny cars
- Artificial snow, white confetti, shredded foam, or coarse glitter
- Craft glue (white glue or tacky glue) and/or a hot glue gun with glue sticks
- Optional decorations: ribbon, twine, stickers, small pinecones, tiny presents, sequins, or beads
- Acrylic paint or spray paint for jar lids, if you want a colored base
Helpful Tools
- Small paintbrushes for applying glue and paint
- Craft tweezers for placing tiny pieces
- Scrap cardboard or extra jar lids to raise up figurines inside the globe
- Scissors for trimming ribbon and labels
Planning Your Mini Winter Scene
Designing the scene first makes assembly smoother and helps children think through what they want their finished globe to look like.
Pick a Theme
Choose one simple idea per jar. Some popular themes include:
- Winter forest: Tiny evergreens, a deer, and a dusting of snow.
- Snowy village: A small house, lamp post, and pathway made of beads.
- Holiday car: A toy car carrying a tree on its roof.
- Playful animals: Polar bears, penguins, or woodland creatures in snow.
- Child’s keepsake: A favorite small figure or ornament repurposed as the centerpiece.
Match Jar Size to Figurines
For the best effect, the figurines should be tall enough to be easily seen but short enough to leave some empty space above them.
| Jar Type | Best For | Notes |
|---|---|---|
| Baby food jar | Single tiny tree or animal | Great for classroom sets and party favors |
| Jam or jelly jar | One main figure plus small accent | Good balance of size and visibility |
| Pint mason jar | Small house or car with trees | Works well for centerpieces |
| Plastic ornament or dome | Lightweight globes for kids | Minimizes breakage risk |
Step-by-Step: Building a Waterless Snow Globe
You can adjust these steps for different jar shapes or materials, but the overall process stays the same.
1. Prepare and Paint the Lids
- Wash jars and lids with warm, soapy water and allow them to dry completely.
- If you want a decorative base, paint the outside of the lid with acrylic paint or spray paint and let it dry thoroughly before gluing anything on.
- Label any jars you plan to give as gifts on the underside of the lid with a permanent marker.
2. Test the Arrangement
- Set the lid on the table upside down (the part that usually faces inside the jar should now face up; this will become the floor of your scene).
- Place figurines, trees, and decorations on the lid without glue to test where everything fits.
- If a piece sits too low, place it on a hidden riser like an extra jar lid, a cork slice, or a bit of sturdy cardboard.
- Check that all pieces fit inside the jar by gently lowering the empty jar over the arrangement.
3. Glue the Scene in Place
- Remove the jar, then glue down the tallest piece first so it can guide the rest of the placement.
- Use craft glue if you want more time to adjust, or hot glue when you need a fast and strong bond.
- Hold each item in place for a few seconds while the glue sets.
- Allow the scene to dry according to the glue manufacturer’s instructions so moisture is not trapped in the finished globe.
4. Add Snow and Sparkle
- Pour a small amount of artificial snow, shredded foam, or chunky glitter into the actual jar.
- Start with less than you think you need; you can always add a pinch more.
- Aim for enough material to lightly cover the floor of the jar without burying the scene when it is turned upright.
5. Assemble the Globe
- Carefully lower the glued lid (with your completed scene) onto the jar opening.
- Screw the lid on firmly. For extra security, run a thin bead of hot glue or clear craft glue around the inside edge of the lid before tightening it.
- Turn the globe right-side up and gently tap the base so the snow settles around the figures.
6. Decorate the Outside
- Tie ribbon, baker’s twine, or yarn around the neck of the jar.
- Add a small tag with the maker’s name and year, especially if it is a keepsake from a particular holiday season.
- Stick on mini gems, stars, or snowflake stickers if you want extra sparkle.
Safety and Crafting with Children
Waterless snow globes are popular in classrooms, libraries, and community centers because they can be adapted for different ages and ability levels.
- For preschoolers: Use plastic jars, pre-glued scenes prepared by adults, and let children pour in the snow, add stickers, and choose ribbon colors.
- For elementary-age kids: Allow them to plan and glue the scene themselves with white glue, reserving hot glue for an adult helper.
- For teens: Encourage more detailed themes, hand-painted figures, or adding LED tea lights behind globes on a shelf for dramatic displays.
When working with children, simple guidelines like washing hands after handling craft materials and keeping small pieces away from very young kids can help prevent accidental ingestion or irritation.
Ideas for Displaying Your Snow Globes
Once your globes are complete, you can use them in many different ways around your home, classroom, or office.
- Mantel display: Arrange several jars of different heights along a mantel with evergreen branches or string lights woven between them.
- Table centerpiece: Place a large globe in the center of the table and surround it with smaller jars and candles (battery-powered for safety).
- Kid’s bookshelf: Let children display their own globes on a shelf, labeled with their names.
- Teacher or neighbor gifts: Add a tag that says “Shake up some holiday cheer” or a short note and deliver in a small gift bag.
- Photo memory globe: Laminate a small photo, glue it inside, and build a snowy frame around it to commemorate a special winter moment.
Tips for Long-Lasting Snow Globes
With a little care, dry snow globes can last for many seasons.
- Store finished globes in a cool, dry place away from direct sunlight to keep colors from fading.
- Make sure all glue is fully dry before sealing the jar; this limits trapped moisture and helps prevent condensation or musty odors.
- Choose sturdy materials inside the globe—plastic or resin figures handle changes in temperature better than delicate paper pieces.
- Wrap glass globes in paper or bubble wrap when packing them with other decorations.
Frequently Asked Questions (FAQs)
Q1: What can I use instead of artificial snow?
You can substitute small white beads, shredded paper, coarse salt (for display-only globes), or finely cut white fabric scraps. Avoid materials that dissolve, melt, or attract insects over time.
Q2: Do I need any special sealant inside the jar?
No additional sealant is required for most waterless globes. As long as the glue is thoroughly dry and the lid is tightened securely, the scene should remain stable. If the jar will be handled frequently by children, you can add a ring of hot glue around the lid to discourage opening.
Q3: Can I still shake a waterless snow globe?
Yes. When you gently shake the jar, snow or glitter will swirl around and then settle at the bottom again. Just make sure the jar is tightly closed and made of a material strong enough for repeated handling.
Q4: Is it okay to use real branches or natural materials inside?
Small dried pinecones or twigs can be used, but they should be completely dry and clean before adding them to reduce the risk of mold or pests. Over time, natural materials may change color or texture, so check them each year when you unpack your decorations.
Q5: How can I adapt this craft for a classroom with limited time?
Pre-assemble the jar lids with glued figurines in advance. During the activity, have students add snow, close the jars, decorate the outside with ribbon or stickers, and label their creations. This keeps the project within a short class period while still letting children personalize their globes.
References
- Household Use of Disinfectants and Cleaning Products — Centers for Disease Control and Prevention. 2020-05-17. https://www.cdc.gov/coronavirus/2019-ncov/prevent-getting-sick/cleaning-disinfection.html
- Art and Craft Safety Guide — U.S. Consumer Product Safety Commission. 2003-06-01. https://www.cpsc.gov/s3fs-public/5015.pdf
- Mold — U.S. Environmental Protection Agency. 2022-11-23. https://www.epa.gov/mold
- Reduce, Reuse, Recycle — U.S. Environmental Protection Agency. 2021-11-22. https://www.epa.gov/recycle/reducing-and-reusing-basics