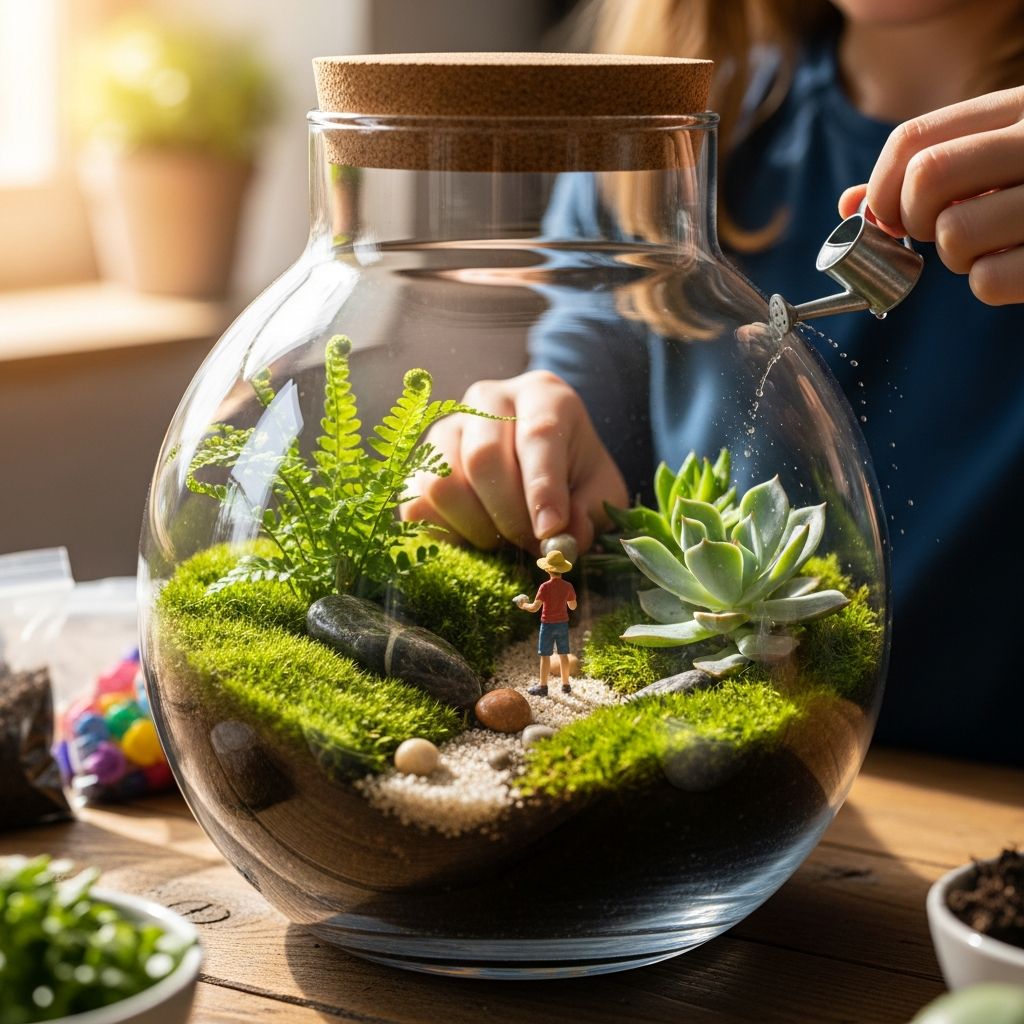
Terrariums are tiny living worlds inside glass containers, and they make a perfect hands-on project for children. They are simple to assemble, fun to decorate, and offer a gentle way to introduce kids to plant care and basic ecology. By combining craft time with science learning, families can create long-lasting mini gardens that brighten any windowsill.
Why Terrariums Are Ideal for Children
Before gathering supplies, it helps to know why terrariums work so well as a family craft and learning activity.
- Hands-on science: Kids see how soil, plants, water, and light work together to form a small ecosystem.
- Manageable size: A terrarium is small and contained, so children can care for it without feeling overwhelmed.
- Creative outlet: Kids can design their own landscapes with rocks, figures, or natural treasures.
- Ongoing project: Terrariums need occasional checking and light maintenance, teaching responsibility and observation.
- Indoor nature: Families in apartments or without yards can still enjoy gardening in miniature.
Open vs. Closed Terrariums: Choosing the Right Style
There are two main kinds of terrariums you can make with children. The best choice depends on the plants you use and how much maintenance you want to do.
| Type | Best For | Plant Types | Maintenance Level |
|---|---|---|---|
| Open terrarium | Dryer conditions, easy access for kids | Succulents, cacti, drought-tolerant plants | Needs occasional watering; more airflow |
| Closed terrarium | Humid, steamy mini rainforests | Tropical plants, ferns, mosses | Almost self-watering; needs careful moisture control |
For younger children, an open terrarium is often easier because it is less sensitive to overwatering and can be accessed without removing a lid. For older kids, sealed containers turn into a living experiment on the water cycle and humidity.
Kid-Friendly Materials and Safety Tips
You do not need expensive supplies to start. Many materials can be repurposed from around the house or garden.
Basic Materials
- Clear container: A clean glass jar, recycled food jar, small vase, or plastic container. Wide openings are easier for small hands.
- Small stones or gravel: For drainage at the bottom so extra water does not sit around plant roots.
- Optional activated charcoal: A thin layer can help reduce odors and keep water fresh in closed terrariums.
- Potting soil: Use a general potting mix for most plants, or a cactus/succulent mix for dry-loving plants.
- Plants: Small, slow-growing plants that like similar light and moisture conditions.
- Decorations: Clean pebbles, shells, small toys, or labeled plant tags.
Tools That Help Kids
- Plastic spoon or small trowel for soil and gravel.
- Long spoon, chopsticks, or tweezers for placing plants deeper in jars.
- Spray bottle or small squeeze bottle for gentle watering.
- Paper funnel (rolled paper) to keep soil off the glass sides.
Safety Reminders
- Supervise children using glass containers; plastic is a good alternative for very young kids.
- Avoid toxic or spiny plants when working with small children.
- Wash hands after handling soil, charcoal, or plants.
- Keep small stones and tiny decorations away from toddlers who may put them in their mouths.
Planning the Project With Kids
Involve children in planning. This builds ownership and turns the craft into a collaborative design project.
- Ask what kind of world they want to build: desert, forest, fairytale, or prehistoric landscape.
- Let them sketch a quick design of where plants and paths might go.
- Talk briefly about each material and what job it does in the terrarium (drainage, soil, support, decoration).
- Set some shared rules: handle glass carefully, be gentle with plants, take turns adding layers.
Step-by-Step: Building the Terrarium Layers
The layering process is similar for most terrariums. The exact depth of each layer will depend on the size of your container.
1. Prepare the Container
- Rinse and dry the container so kids can clearly see their mini garden.
- If reusing a jar with a label, soak it in warm soapy water to remove paper and adhesive.
- Place the container on a tray or newspaper to catch spills.
2. Create the Drainage Layer
A base layer of rocks or gravel lets water collect away from plant roots, helping to prevent root rot.
- Kids can spoon in a 1–3 cm layer of small stones or pebbles.
- Gently tilt the container so the stones spread evenly.
- Older children might create angled layers for a more dramatic look.
3. (Optional) Sprinkle Activated Charcoal
For closed terrariums, a thin scattering of activated charcoal on top of the stones can help keep the water fresher and reduce odors over time.
- Use a spoon to sprinkle a light, even layer.
- Explain that charcoal acts like a filter, similar to those in water filters or fish tanks.
4. Add the Soil Layer
Soil is where the plants’ roots will live, so give them enough depth to anchor and grow.
- Pour in soil until it reaches several centimeters above the charcoal or stones, depending on container size.
- Lightly press down to remove big air pockets, but avoid packing it too tightly.
- Children can use a spoon handle or their fingers to smooth sloping hills or flat areas.
5. Arrange the Plants
Choosing and placing plants is the most exciting step for most kids. Help them think about height, color, and texture.
- Start with the tallest plant at the back or center to create depth.
- Use a spoon or chopstick to make small holes where roots will go.
- Carefully remove plants from their pots, gently loosening extra soil from the roots.
- Set roots into the holes and press soil around them to hold them in place.
- Leave space between plants so they have room to grow and kids can see each plant clearly.
6. Add Moss and Ground Covers (Optional)
Moss or low-growing plants can create a lush, carpet-like base and help hold soil in place.
- Press small pieces of moss onto the soil surface, green side up.
- Let children arrange moss in patches, paths, or islands.
- Remind them that moss likes gentle misting and higher humidity.
7. Decorate the Mini Landscape
Once the plants are secure, kids can personalize the terrarium.
- Use pebbles to create winding pathways or riverbeds.
- Add tiny animal figures, toy cars, or fairytale characters.
- Place a simple homemade sign or label with the terrarium’s name and date.
- Encourage kids to keep decorations small so plants still have room.
8. Watering the First Time
Initial watering should be gentle to avoid washing out the layers.
- Mist the soil and plants lightly until the soil feels evenly moist but not muddy.
- For open terrariums, slightly more water may be needed because moisture can escape into the room air.
- For closed terrariums, use less water; you can always add more later if the soil looks dry.
Finding a Good Spot and Caring for the Terrarium
Proper placement and light care routines help the terrarium stay healthy and attractive.
Light and Temperature
- Place terrariums in bright, indirect light. Direct, hot sun through glass can overheat and scorch plants.
- Keep them away from heating vents or very cold windows.
- Explain to kids that plants need light for photosynthesis, but too much heat can stress them.
Watering Routine
- Open terrariums: Check soil every few days. Water when the top layer feels dry, but avoid soaking it.
- Closed terrariums: If there is constant heavy condensation on the glass, open the lid briefly to let excess moisture out.
- Teach kids to check leaves and soil before watering instead of watering on a fixed schedule.
- Use a spray bottle or spoon to control how much water is added.
Simple Maintenance Tasks for Kids
- Wipe the inside of the glass gently with a soft cloth or paper towel if it gets very foggy (for open containers).
- Remove yellow or dead leaves and talk about plant life cycles.
- Watch for mold or fungus; if it appears, improve airflow or remove affected pieces.
- Rotate the container occasionally so all sides receive light.
Using Terrariums as a Learning Tool
A terrarium can be more than a decoration. With a few questions and observations, it becomes a living science experiment and a starting point for discussion.
Science Concepts to Explore
- Water cycle: Children can watch water evaporate from soil and leaves, condense on the glass, and drip back down – a miniature version of rain.
- Plant needs: Light, water, air, and nutrients, and how a change in any one of these can affect growth.
- Microhabitats: How small spaces can host tiny ecosystems with soil microbes and sometimes insects.
- Observation skills: Recording what they see over days or weeks, such as new leaves, root growth, or changes in humidity.
Fun Extension Ideas
- Keep a simple terrarium journal with drawings and dates.
- Measure plant height every week and graph the changes.
- Compare two terrariums: one open and one closed; or one in bright light and one in a dimmer area.
- Use magnifying glasses to look closely at moss, soil grains, and leaf veins.
Frequently Asked Questions (FAQs)
What are the easiest plants for a kid-friendly terrarium?
Look for small, slow-growing, non-toxic plants. For open terrariums, many people use succulents and cacti with older children who can handle spines carefully. For closed terrariums, small ferns, tropical foliage plants, and mosses do well in higher humidity.
How often should kids water their terrarium?
Water only when the soil surface starts to dry out. Open terrariums may need water every week or two, depending on room conditions, while closed terrariums often need far less water because moisture is recycled inside the container. Help children use sight and touch, not a fixed schedule, to decide when to water.
Can we use soil from the yard instead of potting mix?
Garden soil can contain insects, weed seeds, or disease-causing organisms, and it often does not drain as well in containers. Many guides recommend using a clean potting mix that is designed for container plants instead. This gives kids a better chance of success and fewer unexpected visitors.
Do we really need activated charcoal?
Activated charcoal is optional. It is commonly suggested for closed terrariums because it can help keep water fresher and reduce odors. For simple open terrariums that children will check regularly, a good drainage layer and prompt removal of dead plant material are usually enough.
How long will a children’s terrarium last?
With suitable plants and basic care, a terrarium can last months or even years. Over time, plants may become crowded or outgrow the container. When that happens, you can treat it as a chance to divide plants, trim them back, or start a new terrarium together.
References
- Make your own terrarium — Royal Botanic Gardens, Kew. 2021-03-15. https://www.kew.org/read-and-watch/how-to-make-terrarium
- How to Make a Terrarium – A Beginner’s Guide — Terrarium Tribe. 2022-06-10. https://terrariumtribe.com/diy-terrarium-guide/
- How to Make a Terrarium: 7 Steps — Instructables. 2017-08-01. https://www.instructables.com/DIY-Terrarium/
- How to Make Mini Terrariums — Life in Mini. 2020-05-12. https://lifeinmini.com/how-to-make-mini-terrariums/
- How To Make a Terrarium: An In-Depth Tutorial — YouTube, SerpaDesign. 2019-04-05. https://www.youtube.com/watch?v=9B7aIULFjrc
- 10 Essential Terrarium Tips for Beginners — YouTube, SerpaDesign. 2020-02-02. https://www.youtube.com/watch?v=GIWy75QPxkI
- A Beginner’s Guide to Terrariums — OME Design. 2021-09-18. https://ome.design/blogs/guides/a-beginners-guide-to-terrariums