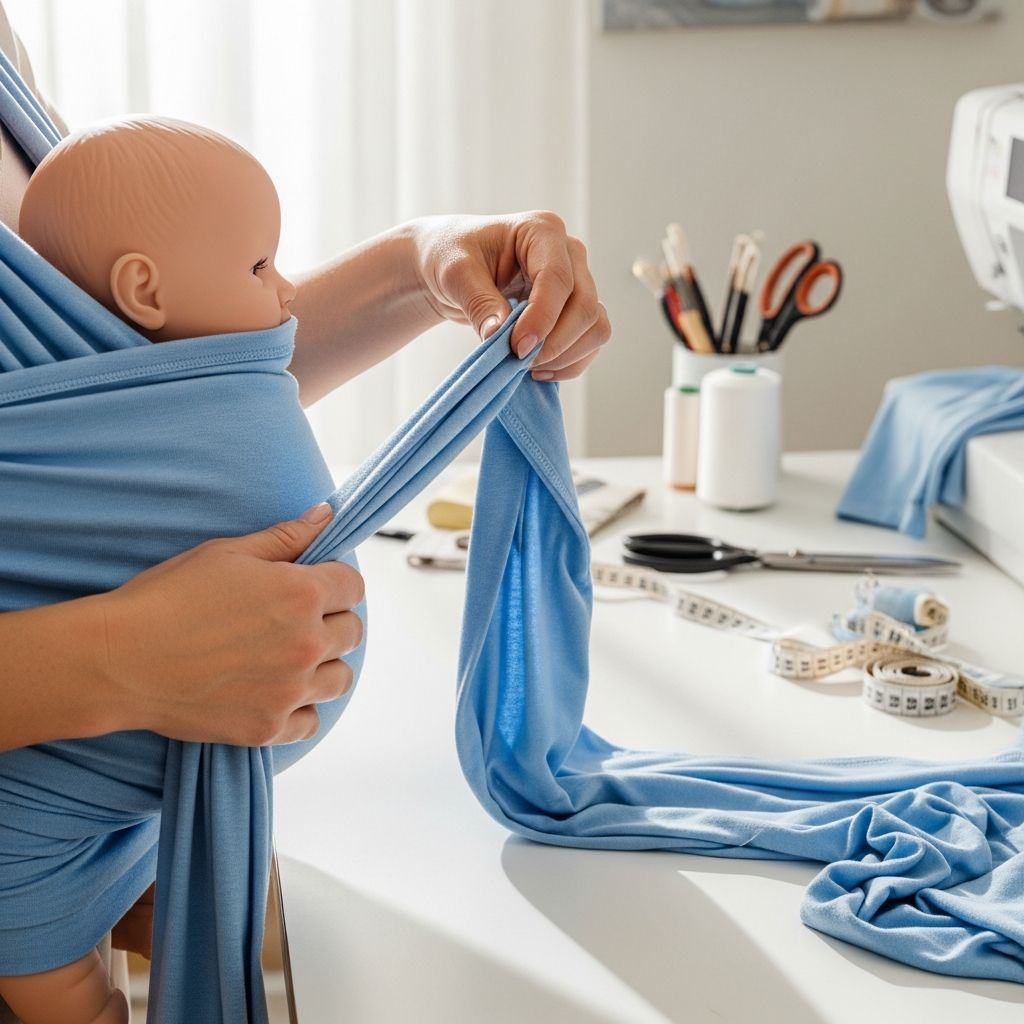
Babywearing helps caregivers keep their little ones close while still having both hands free. A stretchy wrap—similar in style to popular branded wraps—is one of the simplest and most comfortable ways to get started, and you can easily make one at home with basic supplies.
This guide walks through how to choose fabric, cut a wrap, tie it safely, and troubleshoot common problems. It is designed for beginners and does not require advanced sewing skills.
Why Choose a Stretchy Wrap?
A stretchy wrap is a long, soft piece of fabric that you tie around your body to hold your baby snugly against your chest. It distributes the baby’s weight across your shoulders, back, and hips, which can feel gentler than a narrow-strap carrier.
- Provides a snug, womb-like feel that many newborns find calming.
- Adjusts easily to different body shapes and sizes.
- Rolls up small for travel and storage.
- Can be worn at home for naps or out and about for errands and walks.
Key Safety Principles Before You Start
Before making or using a wrap, understand core babywearing safety concepts. One commonly used guideline is summarized with the acronym T.I.C.K.S.
- Tight: The wrap should be snug enough that baby does not slump or sag.
- In View at All Times: You can see your baby’s face without moving fabric or your body.
- Close Enough to Kiss: You can easily kiss the top of baby’s head by tipping your chin down.
- Keep Chin Off Chest: Baby’s head should not be forced down onto the chest; there must be space for easy breathing.
- Supported Back: Baby’s back is supported in a natural curve, with no collapsing or curling.
Always keep your baby’s airway clear, avoid covering the face with fabric, and do not use a wrap while driving, sleeping deeply, or during any activity where you cannot pay attention to your baby.
Choosing the Right Fabric
The fabric you choose determines how comfortable, secure, and easy to use your wrap will be. Look for a knit material with gentle stretch, soft texture, and good recovery (it should spring back instead of staying baggy).
Recommended Fabric Types
- Light to medium weight cotton/spandex jersey.
- Bamboo/spandex jersey for a cooler, drapier feel.
- Modal or rayon blends with a small amount of spandex for stretch.
Fabric that stretches more across the width than the length (two-way stretch) is often easier for beginners than very bouncy four-way stretch. Avoid slippery, heavy, or overly thick fabrics that could be hot or difficult to tighten.
Fabric Features to Avoid
- Very sheer knits that become see-through when stretched.
- Stiff or scratchy materials that could irritate sensitive skin.
- Fabrics with glitter, sequins, or rough embellishments where baby will rest.
- Old T-shirts sewn together; weak spots and uneven stretch can reduce safety.
How Much Fabric Do You Need?
The ideal wrap length depends on your clothing size and preference for tying around your front or back. The table below offers general starting points; adjust upward if you prefer extra length for decorative knots.
| Wearer Clothing Size (US) | Suggested Wrap Length | Notes |
|---|---|---|
| XS–S | 4.2–4.5 m (13.8–14.8 ft) | Usually enough length to tie in front. |
| M–L | 4.6–5 m (15–16.4 ft) | Common length for most adults. |
| XL–2XL | 5–5.4 m (16.4–17.7 ft) | Extra length allows tying at front or side. |
Typical wrap width is around 55–70 cm (22–28 inches). Wider fabric can be folded if it feels bulky, while very narrow fabric may not give enough coverage to support baby’s back and shoulders.
Simple No-Sew Method: Cut and Go
If you choose a knit fabric that does not fray, you can make a wrap with just scissors. This is the fastest and most accessible method for most people.
Materials
- 4.5–5 m (15–16.5 ft) of suitable knit fabric.
- Sharp fabric scissors or rotary cutter and cutting mat.
- Measuring tape or a long ruler.
- Chalk or washable marker (optional) for marking lines.
Steps
- Lay the fabric out flat on a clean floor or large table, smoothing out wrinkles.
- Measure the desired width (for example, 60 cm / 24 inches) along one short edge and mark it.
- Use the measuring tape as a guide and mark a straight line along the length of the fabric.
- Cut along your marked line to create one long strip. If your fabric is very wide, you may have enough for two wraps.
- Round the corners of the ends slightly if you prefer a softer look that is easier to knot.
Once cut, gently stretch the fabric along the length so the edges curl in slightly. This makes the wrap more comfortable and easier to handle when tying.
Optional Sewing Upgrades
While sewing is not required, a few quick stitches can make your wrap look more polished and easier to use. These upgrades are entirely optional.
Ideas for Simple Improvements
- Center marker: Sew a small contrasting rectangle or label at the middle of the wrap to help you find the center quickly.
- Tapered ends: Cut the last 25–30 cm (10–12 inches) of each end into a gentle point and hem them so knots are smaller and more secure.
- Decorative stitching: Use a stretch stitch or zigzag along the edges for a finished look.
If you sew, use a ballpoint or stretch needle and a stitch type designed for knits so the seams remain flexible and do not break under tension.
Putting the Wrap On (Pre-Tied Front Carry)
One of the most popular ways to use a stretchy wrap is a pre-tied front carry. You put the wrap on first, then place baby inside the fabric layers. The following description assumes a long, centered wrap.
Step-by-Step Overview
- Find the center of the wrap and place that point at your midsection, roughly at or slightly above your navel.
- Bring both ends around your back, cross them in an “X,” and bring each end over the opposite shoulder to the front.
- Check that the fabric lies flat on your back and does not twist; this improves comfort.
- At the front, tuck both ends down behind the horizontal section at your midsection, pulling them through from top to bottom.
- Cross the ends in front of you to form another “X” over your chest.
- Wrap the remaining length around your waist or back, depending on how much is left, and tie a secure double knot at the front, side, or back.
The finished setup creates three layers at the front: two diagonal panels forming an X, and one horizontal band. These layers work together to hold and support your baby when you place them in the wrap.
Positioning Baby in the Wrap
Always start with a calm, alert baby when possible. Hungry, overtired, or uncomfortable babies may resist the wrap until their needs are met.
Placing Baby Inside
- Hold baby against your chest in an upright, tummy-to-tummy position, with baby resting high on your body.
- Locate the diagonal panel that is closest to your body. Gently guide one of baby’s legs through this panel so the fabric crosses under the thigh.
- Spread the fabric from the back of one knee, across baby’s bottom and back, up to the shoulders, creating a deep “seat.”
- Repeat with the second diagonal panel, bringing baby’s other leg through and spreading that layer in the same way.
- Lift the horizontal band up and over baby’s lower back and torso, making sure it reaches at least to the middle of the shoulder blades.
Check that baby’s knees are higher than their bottom in a comfortable “M” shape, with hips flexed and thighs supported. The back should be gently rounded, not forced ramrod straight.
Essential Safety Checks Once Baby Is In
After positioning baby, take a moment to run through a quick mental checklist. This habit helps maintain a safe carrying environment every time you use the wrap.
- Can you clearly see baby’s nose and mouth?
- Is baby high on your chest, close enough to kiss the top of the head?
- Is the fabric tight enough that baby does not slump away from your body?
- Are the knees higher than the bottom, with thighs supported to the knees?
- Is baby’s chin off the chest, with space for at least two adult fingers between chin and chest?
If anything looks or feels off, adjust immediately. Do not hesitate to remove baby, retighten the wrap, and start again until you are confident in the fit.
When and How Long to Use a Stretchy Wrap
Stretchy wraps are best suited for the early months. They shine for newborns and young infants who enjoy being held snugly and close. As babies grow and become heavier, caregivers may prefer a woven wrap or structured carrier.
- Use primarily for front, chest-to-chest carries with younger babies.
- Follow weight guidelines from comparable commercial stretchy wraps (often around 3.5–15 kg / 8–35 lb), and consider your own comfort and strength.
- Avoid back carries with a stretchy wrap, as the elastic nature of the fabric can make back positions less secure for inexperienced users.
Daily Use Tips for Comfort
Small adjustments can make a significant difference in how the wrap feels during longer wears. Focus on even weight distribution and snug, not loose, wrapping.
- Spread the fabric wide across your shoulders rather than letting it bunch up like a rope.
- Pre-tighten the wrap slightly more than you think you need; the fabric will relax a bit once baby is inside.
- Wear supportive footwear and stand with good posture to prevent back strain.
- If you feel pressure in one spot, pause and smooth the fabric or adjust the knot position.
Care, Washing, and Storage
Because babies can be messy, choose a fabric that is simple to wash and dry. Before washing, check any sewn-on labels or decorative stitching to ensure they can withstand your chosen cycle.
- Machine wash in cool or warm water with a gentle detergent.
- Avoid bleach and harsh fabric softeners that can weaken fibers.
- Line dry when possible, or tumble dry on low to moderate heat.
- Store folded in a drawer or rolled in a basket; keep sharp objects away to prevent snags.
Common Problems and Simple Fixes
Most issues with wraps come down to tension (too tight or too loose) or incorrect positioning. Here are some common experiences and how to solve them.
| Problem | Likely Cause | Suggested Fix |
|---|---|---|
| Baby feels too low on the chest. | Wrap started too loose or positioned too low before placing baby. | Rewrap starting with the center panel higher on your torso and pull ends tighter before tying. |
| Baby’s face turns inward and is hard to see. | Fabric covering the face or baby’s head not supported well. | Uncover the face, adjust fabric so it supports the back of the head without blocking the airway. |
| Shoulders feel sore quickly. | Fabric bunched at shoulders or weight not evenly distributed. | Spread fabric wide across the shoulders and back; check that the knot is not pulling from one side. |
| Baby pushes away or arches back. | Too tight across the back or baby is uncomfortable (gas, hunger, temperature). | Take baby out, meet basic needs, then rewrap with enough room for natural spine curve. |
Frequently Asked Questions
Is a homemade wrap as safe as a store-bought one?
A carefully made wrap from strong, appropriate fabric can provide secure support similar to many commercial stretchy wraps. The critical factors are fabric quality, correct width and length, and careful, informed use. Always stay within weight limits recommended for similar products and follow established babywearing safety guidelines.
Can I use this wrap from birth?
Many caregivers use stretchy wraps from the newborn stage. Make sure your baby meets minimum weight recommendations used by well-known stretchy wrap brands, and be especially diligent about keeping baby’s airway clear and chin off the chest. If you have a premature or medically fragile baby, consult a healthcare professional before babywearing.
Do I need special training to use a wrap?
You do not need formal training, but watching a variety of demonstrations and practicing with a doll or rolled towel can help build confidence. If available, seek advice from local babywearing groups or certified educators who can check your fit and offer tips in person or virtually.
How long can I wear my baby at a time?
There is no universal time limit; comfort and safety are the main guides. Take regular breaks to stretch, check baby’s temperature, and ensure that circulation is not restricted. If you or your baby feel uncomfortable or restless, it is a good moment for a break.
Is it safe to breastfeed in a stretchy wrap?
Some caregivers nurse in a wrap after gaining experience, but it requires extra attention to positioning and breathing. Always bring baby back to an upright, fully visible, and supported position once feeding is over, and never leave baby asleep in a reclining nursing position inside the wrap.
Final Thoughts
Making your own stretchy baby wrap can be a satisfying, budget-friendly project that gives you a custom-fit carrier tailored to your style. With quality fabric, basic cutting skills, and a bit of practice in tying and safety checks, you can create a cozy, secure way to keep your baby close while moving through daily life.
Approach the learning process with patience, experiment with small adjustments, and reach out to experienced babywearers if you need support. Over time, using your homemade wrap can become as natural as picking up your baby in your arms.