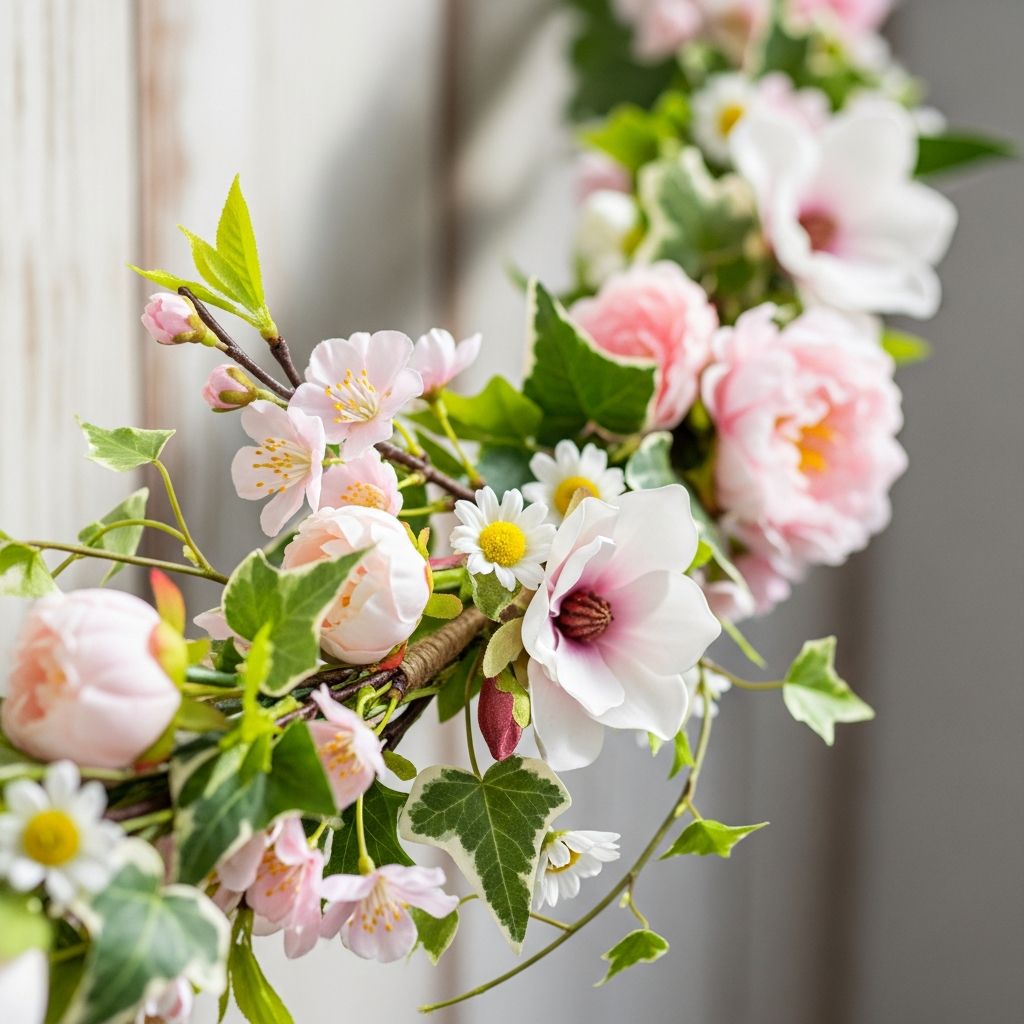
Spring is the perfect excuse to brighten your home with handmade decorations, and a blossom garland is one of the easiest ways to bring color and cheer into any room. This guide walks through a flexible, beginner-friendly project that works with paper, felt, or faux flowers so you can customize it to your style and skill level.
Why Make a Spring Blossom Garland?
A spring blossom garland is lightweight, reusable, and completely customizable, making it a great weekend project or activity with kids. You can adapt the colors to match your decor, keep it minimal and modern, or go all in with a rainbow of blooms for a festive, whimsical look.
- Ideal for mantels, windows, doorways, shelves, and party backdrops.
- Works with inexpensive materials you may already have at home.
- Easy to store and reuse for future seasons or celebrations.
Planning Your Design Before You Start
Before cutting a single petal, it helps to decide what kind of garland you want. Planning your design will guide your color choices, materials, and the number of flowers you need to make.
- Style: Decide if you prefer a loose, organic garland or a more structured row of flowers.
- Palette: Choose 3–5 colors (for example, soft pastels or bright, saturated tones) so the garland looks cohesive.
- Length: Measure the space you want to decorate, then add 20–30 cm of extra length on each side for draping.
Choosing Your Materials
This project is highly adaptable. You can mix and match materials depending on what you have available and the finish you want. The table below compares three popular options.
| Material Type | Best For | Pros | Considerations |
|---|---|---|---|
| Colored paper or cardstock | Crisp, graphic flowers and kids’ crafts | Inexpensive, easy to cut, endless color options | Less durable near moisture or strong sunlight |
| Felt sheets | Soft, cozy, textured blossoms | Does not fray, holds shape, long-lasting | Can be thicker to sew or glue, limited fine detail |
| Faux silk flowers | Realistic, dimensional garlands | Very full look with minimal crafting time | Typically more expensive, needs wire cutters |
Core Supplies You Will Need
Gather your materials before you begin so you can assemble the garland in one sitting. You do not need everything listed below; choose the items that fit your chosen material type.
- Base string or cord: cotton twine, baker’s twine, yarn, or thin ribbon.
- Paper or felt in spring colors (pinks, yellows, greens, whites, light blues).
- Optional faux flower stems or greenery if you want more volume.
- Craft glue or hot glue gun and glue sticks.
- Scissors; wire cutters if using faux stems.
- Hole punch or embroidery needle for threading pieces.
- Pencil, circular objects for tracing (like jar lids), or simple templates you draw yourself.
Designing Simple Flower Shapes
Complex templates are not necessary for a charming garland. Instead, rely on a few basic petal shapes and layer them to build variety. Aim for two or three different flower designs so the garland looks playful but not chaotic.
- Five-petal bloom: Draw or trace a circle, then mark five evenly spaced notches around the edge and cut out soft, rounded petals.
- Daisy style: Start with a small circle center and attach long, narrow petals all around, overlapping them slightly.
- Layered rosette: Cut several small circles or wavy circles, stack them, and snip small cuts toward the center to mimic ruffled petals.
Cutting and Preparing the Petals
Once you like your drawn shapes, create sturdy templates from scrap cardboard or heavier paper. This lets you trace consistent petals without redrawing every time. Consistency is especially helpful if you want a clean, modern look.
- Trace each template multiple times on colored paper or felt before cutting.
- Group petals and centers by type in small piles to make assembly smoother.
- Vary the sizes: a mix of small, medium, and large blossoms adds depth to your garland.
Forming Dimensional Blossoms
To keep the garland from looking flat, shape the petals slightly. Small adjustments can make a big difference in how finished your flowers appear.
- Gently curl paper petals around the handle of a paintbrush or pencil.
- Pinch the base of each petal with a tiny dot of glue to lift it away from the center.
- For felt, fold or twist petals slightly and secure with a stitch or dab of glue.
Adding Centers and Decorative Details
The center of each flower anchors the design and can tie your color palette together. There are several simple options that do not require special tools.
- Small punched circles in a contrasting color glued in the middle.
- Rolled strips of paper or felt to mimic stamens.
- Buttons, beads, or small pom-poms for extra texture and charm.
Incorporating Leaves and Greenery
Leaves help visually connect each blossom and make the garland feel more complete. They can be as stylized or realistic as you like.
- Cut simple leaf shapes in several greens, slightly folding each one lengthwise to create a central vein.
- Cluster two or three leaves behind certain flowers, especially at the ends of the garland.
- If using faux greenery, trim small sprigs and attach them near blossoms to create soft clusters.
Attaching Flowers to the Garland Base
There are several ways to connect the blossoms to your base string or ribbon. Choose the method that best suits the materials you selected and whether you want to rearrange pieces later.
- Glued in place: Lay the base string flat and glue each flower directly onto it, overlapping slightly for a continuous look.
- Threaded: Punch two small holes near the center of each blossom and thread them onto the string like beads.
- Tied clusters: For faux flowers, twist a bit of floral wire around each stem and then secure the wire to the garland base.
Spacing and Arranging Your Blossoms
The spacing of your flowers influences the overall mood of the garland. A dense arrangement feels lush and festive, while more open spacing looks airy and minimalist.
- For a full look, place blossoms 2–3 cm apart and fill the gaps with leaves or smaller flowers.
- For a lighter look, set flowers 8–12 cm apart, using mostly greenery in between.
- Lay everything out on a table before committing with glue so you can tweak the order and color distribution.
Finishing Touches and Secure Hanging
Once all the flowers are attached, gently shake the garland to check for any pieces that feel loose, then reinforce them with additional glue or wire. Neat finishing makes the garland easier to hang and reuse.
- Trim any visible glue strings or rough edges.
- Tie a small loop at each end of the garland for hooks, nails, or removable adhesive strips.
- If hanging across a wide space, add a tiny knot or drop of glue under the heaviest flowers so they stay facing forward.
Creative Ways to Display Your Garland
Once the garland is complete, try using it in more than one spot around your home. Its light weight makes it easy to move and experiment with different arrangements.
- Drape it along a mantel or shelf for an instant seasonal update.
- Hang it across the top of a window or doorway to frame the view.
- Wrap it loosely around a banister or bed frame for a whimsical accent.
- Use several short garlands as a layered backdrop for a spring party table.
Kid-Friendly Adaptations
If you are crafting with children, simplify the shapes and use safer materials. This turns the project into a fun and creative activity that still results in a display-worthy decoration.
- Pre-cut basic flower and leaf shapes and let kids decorate them with crayons, markers, or stickers.
- Use glue sticks instead of hot glue, and choose yarn or ribbon instead of thin string for easier handling.
- Turn the finished garland into a photo backdrop for family pictures or a birthday celebration.
Care, Storage, and Reuse
A little maintenance helps your garland last for multiple seasons. Gentle handling and smart storage are key to keeping petals from bending or fading.
- Store the garland in a shallow box or large envelope, layering tissue paper between sections.
- Keep it away from strong direct sunlight or damp areas to prevent fading and warping.
- Refresh it next year by adding a few new flowers or switching out the color of the base ribbon.
Frequently Asked Questions
How long does it take to make a spring blossom garland?
The time depends on the length of the garland and how detailed your flowers are. A simple, medium-length design with basic paper blossoms can often be completed in about two to three hours, while more elaborate felt or faux flower versions may take an afternoon.
Can I mix real flowers with paper or felt?
Yes, but real flowers will wilt quickly unless they are kept in water picks or used for a short-term event. A practical approach is to create a reusable base garland from paper or felt and tuck in a few fresh blooms just for a special occasion, then remove them afterward.
What if I do not have a glue gun?
Craft glue or strong tacky glue works well for paper projects; just allow more drying time before hanging. For felt, hand stitches with embroidery thread are a sturdy alternative, especially for pieces that will be handled frequently.
How do I stop the garland from flipping or twisting?
Make sure the base string is not too thin for the weight of your flowers, and consider using a flat ribbon for stability. If certain blossoms tend to twist, add a tiny dot of glue behind them directly onto the ribbon or wall hooks to keep them facing forward.
Can the garland be adjusted for other seasons?
Absolutely. Use the same basic steps but switch up the colors and shapes: deeper tones and leaves for autumn, evergreens and stars for winter, or bright tropical flowers for summer. The versatility of the method makes it easy to adapt for holidays, birthdays, and everyday decor.
With a handful of affordable supplies and a bit of creativity, a spring blossom garland can transform any room into a fresher, lighter space. Experiment with materials, colors, and arrangements until you find a style that feels like your version of spring.