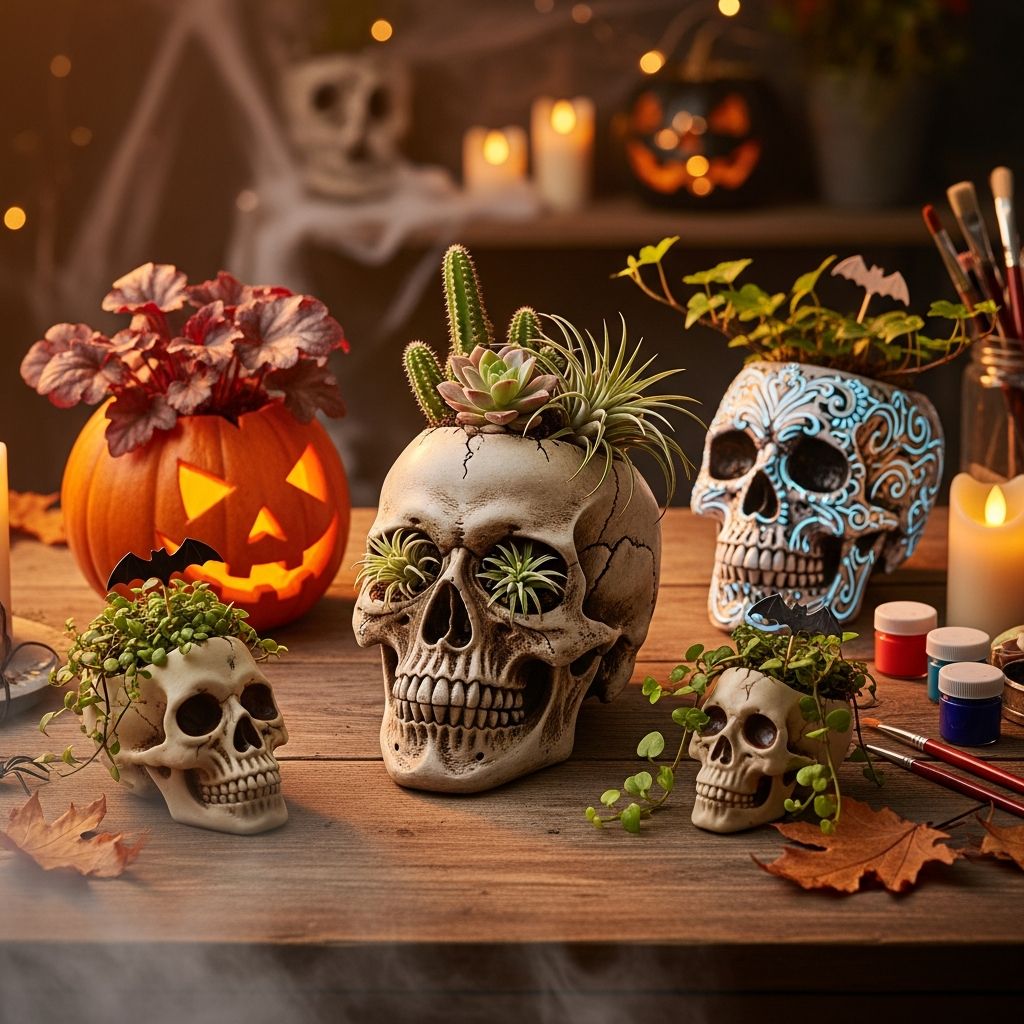
Skull planters are an easy way to mix creepy and cute for Halloween. With a few basic supplies and some plants, you can turn simple skull decorations into eerie centerpieces, porch decor, or last-minute party accents. This guide walks you through the entire process, from choosing the right skulls and plants to painting, potting, and styling your finished creations.
Why Skull Planters Make Perfect Halloween Decor
Skull planters are popular Halloween pieces because they combine seasonal decor with living (or faux) greenery, giving a spooky display more texture and personality. They work well indoors or outdoors, fit in small spaces like mantels or shelves, and can be customized to match gothic, playful, or elegant themes.
- Versatile placement: Ideal for tabletops, window sills, porches, or office desks.
- Reusable base: The same skull container can be replanted each season.
- Customizable style: Change colors, finishes, and plants to fit your Halloween aesthetic.
- Kid-friendly crafting: With supervision for cutting and spray painting, children can help with painting details and arranging plants.
Choosing the Right Skull Base
The starting point of your project is the skull itself. You can use inexpensive plastic decor from discount or craft stores, ceramic containers, or glass skull bottles. Each material needs slightly different preparation.
| Skull Type | Pros | Cons | Best For |
|---|---|---|---|
| Plastic skull | Cheap, easy to cut, very lightweight | May need extra priming for paint adhesion | Hanging planters, kids’ projects |
| Ceramic skull | Already watertight, often pre-shaped like a pot | Heavier, usually more expensive | Table centerpieces, mantel displays |
| Glass skull jar/bottle | Striking look, smooth surface for painting | Breakable, no built-in opening for plants | Decorative planters with faux plants |
| Concrete skull (cast or store-bought) | Very durable, great outdoor option | Heavy, may require drill for drainage holes | Porch steps, garden paths, outdoor altars |
Size Considerations
When selecting your skull, think about where you plan to display it and what kind of plant you want to use.
- Mini skulls: Best suited for air plants, tiny succulents, or preserved moss.
- Medium skulls: Work well with 3–4 inch nursery pots tucked inside.
- Large skulls: Can hold multiple plants or trailing vines for a dramatic “hair” effect.
Materials and Tools You Will Need
Adapt this list based on what kind of skull base you choose and whether your planter will be real or faux.
- Skull decor piece (plastic, ceramic, glass, or concrete)
- Sharp craft knife or small saw (for cutting openings in plastic)
- Drill with masonry bit (optional, for drainage holes in ceramic or concrete)
- Acrylic craft paint or spray paint in your desired colors
- Primer suitable for plastic or multipurpose surfaces
- Matte or satin clear sealer
- Small paintbrushes for details and dry brushing
- Fine-grit sandpaper for smoothing rough edges
- Disposable gloves and a dust mask for safety
- Potting mix appropriate to your chosen plant
- Plants or cuttings (succulents, trailing ivy, or faux greenery)
- Spanish moss, preserved moss, or coconut fiber for surface cover
- Optional embellishments: plastic spiders, bones, crystals, miniature gravestones, or LED candles
Step-by-Step: Transforming a Plastic Skull into a Planter
This walkthrough assumes a hollow plastic skull, which is one of the most accessible options. Adjust as needed for ceramic or glass.
1. Mark and Cut the Planting Opening
First, decide where your plant will emerge. Many makers prefer the top of the skull for a “hair” effect, but a side opening can create a more unusual, asymmetrical display.
- Use a marker to sketch an oval or circle on the top of the skull, leaving enough material around the edges for strength.
- With a craft knife or small saw, carefully cut along the line. Work slowly to avoid cracking weaker plastic.
- File or sand the edges until they are smooth to the touch. This makes planting easier and safer.
2. Prepare for Paint
Clean surfaces help paint adhere better, especially on glossy plastic. According to guidance on working with plastics, light sanding and degreasing can significantly improve adhesion for water-based and solvent-based paints.
- Wipe the skull with a damp cloth and let it dry.
- Lightly scuff shiny areas with fine-grit sandpaper.
- If you plan a hanging planter, drill or cut small holes near the top where cord or chain will attach.
3. Prime and Paint the Skull
Good priming and sealing will help your planter withstand light moisture and handling.
- Apply a thin, even coat of primer made for plastic or multipurpose surfaces. Let it dry fully.
- Spray or brush on your base color: bone white, matte black, metallic silver, or any hue that fits your theme.
- Allow each coat to dry before adding another. Several light coats are better than one heavy coat to avoid drips.
For a more realistic or aged skull, try these effects:
- Antiquing wash: Mix watered-down brown or black acrylic paint, brush it over the skull, and quickly wipe most off, leaving color in crevices.
- Dry brushing highlights: Load a brush with a small amount of lighter paint, wipe most of it off on a paper towel, then lightly brush raised areas for a bone-like texture.
- Metallic accents: Add subtle shimmer on teeth, cracks, or eye sockets using metallic acrylics.
4. Seal the Finish
After the paint has cured, seal your work.
- Use a matte or satin clear spray sealer for a more natural look, or glossy sealer for a wet, dramatic effect.
- Apply two or more thin coats, allowing full drying time in between.
Keeping painted surfaces sealed can reduce moisture penetration and slow fading if the planter sits near a bright window.
5. Add Drainage (If Needed)
Live plants benefit from drainage holes so water does not sit at the bottom and damage roots. Research on houseplant care emphasizes that excess moisture is a common cause of root rot, especially in poorly draining containers.
- If your skull is thick plastic, drill 1–3 small holes in the bottom.
- For ceramic or concrete, use a masonry drill bit and go slowly to avoid cracking.
- If you cannot add holes, place a layer of small stones, broken terracotta, or coarse gravel in the bottom to create a drainage layer, then keep watering very light.
6. Potting Your Plants
Next, prepare the planting area and choose the right growing medium.
- Place a small plastic nursery pot inside the skull if you want the option to swap plants easily.
- Choose a potting mix that suits your plant species—for example, a sandy, fast-draining mix for succulents.
- Fill around the root ball with soil, pressing gently to remove air pockets.
Cover the soil surface with moss or decorative stones to keep things tidy and hide inner pots if used.
Plant Ideas for Skull Planters
Your choice of plant will determine the overall mood of the planter. Some combinations feel cute and whimsical, while others lean darker and more gothic.
Low-Maintenance Favorites
- Succulents: Short rosettes and spiky varieties look like strange growths or eerie hair.
- Air plants: Ideal for small skulls; they need no soil and can be removed for occasional soaking.
- Snake plant pups: Upright, sword-like leaves match the dramatic vibe of a skull.
- Trailing ivy (e.g., devil’s ivy / pothos): Cascading stems resemble wild hair or creeping vines.
Studies and extension guides emphasize that succulents and many common houseplants prefer bright, indirect light and well-draining soil, making them suitable for decorative containers with limited space.
Faux Plants and Dried Elements
If you want zero maintenance or will store your skull planters between holidays, faux or dried materials are ideal.
- Silk or plastic trailing vines
- Preserved moss in different shades of green
- Dried seed pods, branches, or black-tinted flowers
- Feathers or tulle for theatrical “hair”
Styling Variations to Try
Once you understand the basics, you can adapt the look for many Halloween themes, from subtle to theatrical.
Gothic Library Skull
- Paint the skull in matte black or deep charcoal.
- Add subtle metallic gold or copper details to the teeth and eye sockets.
- Plant with a dark-leafed houseplant or deep green ivy.
- Display on top of stacked books with brass candlesticks nearby.
Colorful Party Centerpiece
- Use bright, nontraditional colors: neon green, purple, or candy pink.
- Plant with cheerful succulents or seasonal blossoms in oranges and yellows.
- Scatter confetti, faux spiders, and mini pumpkins around the base.
Outdoor Graveyard Display
- Choose heavier ceramic or concrete skulls for stability.
- Use hardy plants or cold-tolerant pansies depending on your climate.
- Nestle the skulls among fallen leaves or mulch and add low-voltage path lights or LED candles for nighttime glow.
Care Tips for Live Plants in Decorative Planters
Skull planters are eye-catching, but they are still containers like any other. To keep your plants thriving, follow general indoor plant guidelines.
- Light: Place them in light appropriate for the chosen species. Many common houseplants do best in bright, indirect light rather than direct sun.
- Water: Check soil moisture with your finger; water when the top inch feels dry instead of on a fixed schedule.
- Drainage: Avoid letting water stand in saucers or the bottom of non-draining skulls; tip out excess after watering if necessary.
- Cleaning: Wipe dust off leaves and the painted skull occasionally so colors and details stay visible.
Research on container gardening supports that consistent but not excessive watering and attention to light levels are key to long-term plant health in decorative pots.
Safety and Kid-Friendly Adaptations
Halloween projects often turn into family activities, so it is wise to plan around safety and the ages of participants.
- Have adults handle any cutting with sharp tools or drilling.
- Use child-safe paints and glues labeled non-toxic when kids are doing the decorating.
- Choose non-breakable skulls for young children, like plastic foam or sturdy plastic.
- If using potentially toxic plants, place planters out of reach of small children and pets.
Frequently Asked Questions (FAQs)
Do I have to use real plants in my skull planter?
No. Faux plants, preserved moss, and dried flowers work very well and are completely maintenance-free, making them ideal if your planter will go into storage between holidays or sit in a low-light spot.
What if my skull does not have drainage holes?
You can either drill holes carefully, add a drainage layer of small stones at the bottom, or keep your plant in a smaller plastic pot that you slip inside the skull and remove for watering so excess water can drain elsewhere.
Which plants are easiest for beginners to use?
Succulents, pothos (devil’s ivy), and small snake plants are forgiving choices as long as you provide bright, indirect light and avoid overwatering. Many extension services highlight these as beginner-friendly houseplants.
Can skull planters go outside?
Yes, but outdoor exposure can fade paint faster and may stress tender houseplants. For porch displays, choose sturdier containers like ceramic or concrete and opt for plants suited to your local climate or use faux greenery instead.
How can I store my skull planters after Halloween?
For live plants, either rehome them into neutral pots or keep the planter on display as everyday decor. For faux versions, empty loose moss or accessories that might attract pests, wrap the skull in paper or bubble wrap, and store in a cool, dry place.
References
- Painting Plastics — Sherwin-Williams. 2020-05-12. https://www.sherwin-williams.com/homeowners/color/painting-101/how-to-paint-plastic
- Consumer Product Safety Improvement Act: Lead in Paint and Surface Coatings — U.S. Consumer Product Safety Commission. 2022-03-15. https://www.cpsc.gov/Business–Manufacturing/Business-Education/Lead/Lead-in-Paint
- Sun and Fading — Library of Congress Preservation Directorate. 2010-08-01. https://www.loc.gov/preservation/care/light.html
- Growing Indoor Plants with Success — Kansas State University Research and Extension. 2017-01-01. https://www.bookstore.ksre.ksu.edu/pubs/mf2771.pdf
- Selection and Care of Indoor Plants — University of Minnesota Extension. 2021-06-10. https://extension.umn.edu/houseplants/selection-and-care-indoor-plants