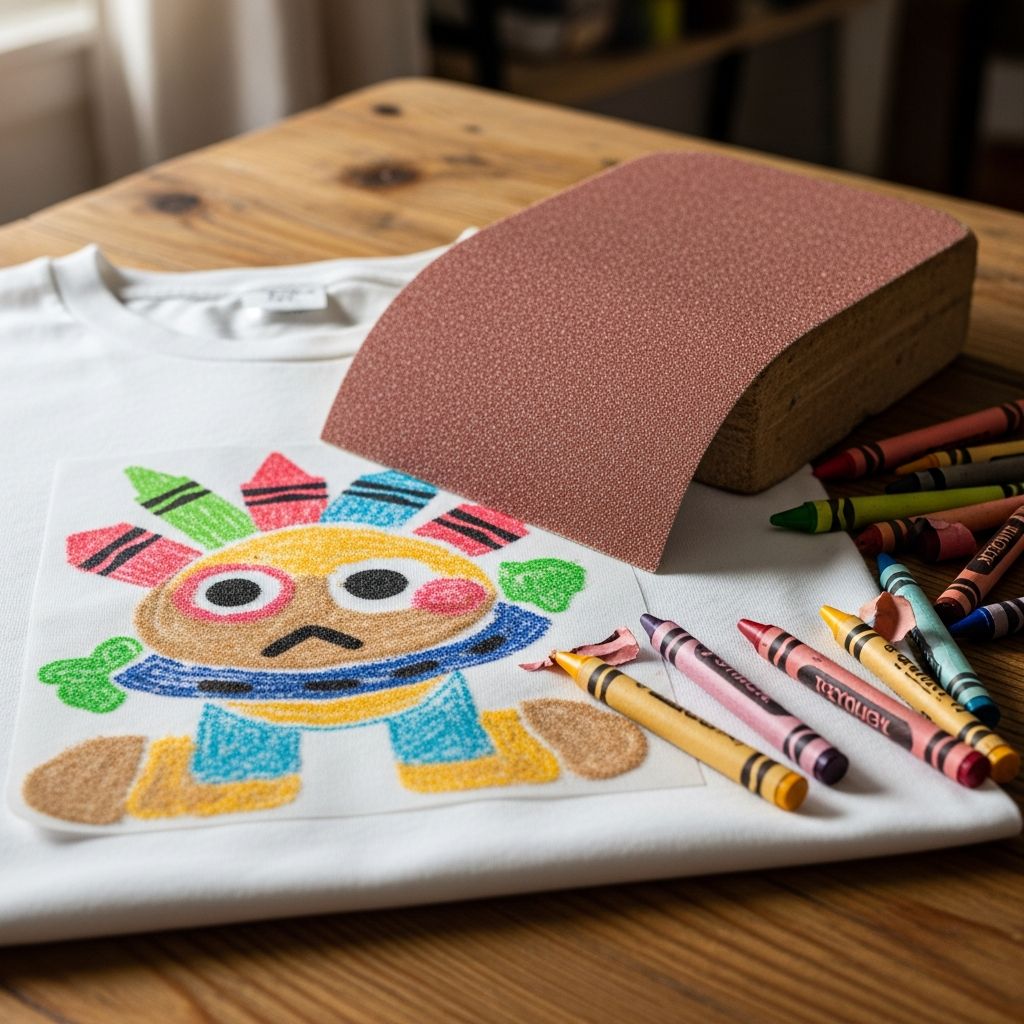
If you have crayons, sandpaper, and a plain T-shirt, you already have everything you need to design a bright, custom shirt without fancy equipment. This simple project turns drawings into wearable art in under an hour, making it perfect for kids, parties, and last-minute handmade gifts.
Why Try Sandpaper T-Shirt Printing?
Sandpaper printing uses the wax in crayons to create a colorful image that melts into fabric when heat is applied. The rough surface of the sandpaper grabs the crayon strongly, so plenty of pigment transfers to the shirt when you press it with an iron. Because the supplies are inexpensive and easy to find, the project works well for classrooms, camps, and rainy-day activities at home.
- Uses basic, low-cost supplies you may already own.
- Simple enough for children, with adult supervision for ironing.
- Great for preserving kids’ artwork in a fun, practical way.
Materials and Tools You Will Need
Gather everything before you begin so the transfer process goes smoothly. Having a designated work surface and a safe spot for the hot iron will make the craft less chaotic, especially with younger helpers.
- Plain T-shirt – 100% cotton or a cotton-rich blend works best; light colors show crayon designs more clearly.
- Sandpaper – Fine or medium-grit sheets (labeled around 100–220 grit) give smoother lines and hold wax well.
- Wax crayons – Standard school crayons in bright colors for the strongest transfer.
- Iron – A regular household iron with adjustable heat.
- Protective layer – Parchment paper or plain white paper to place between the iron and sandpaper.
- Cardboard insert – A piece that fits inside the shirt to prevent color from bleeding through to the back.
- Scissors and tape (optional) – For trimming and combining sandpaper sheets to make a larger drawing area.
Choosing the Right Shirt and Design
The base shirt and drawing style play a big role in how successful your final print will be. Solid, pale fabrics perform best because they allow the crayon colors to stand out instead of competing with busy patterns or dark backgrounds.
Best Fabric and Color Options
- Choose tightly woven cotton T-shirts for crisp lines and better wax absorption.
- Stick to white, cream, or pastel shirts so bright crayons remain vivid after transfer.
- Avoid heavy textures, thick seams, or ribbed fabric in the area where you plan to print.
Design Ideas that Work Well
Because the image softens slightly when heat-transferred, bold, simple pictures tend to look the best. Complicated shading or tiny writing may blur or disappear.
- Thick outlines, cartoon characters, or simple silhouettes.
- Block letters, big words, or short phrases drawn in bubble style.
- Patterns such as stars, hearts, rainbows, geometric shapes, or simple landscapes.
Step-by-Step: From Sketch to Shirt
This process falls into three basic stages: drawing the design, transferring it, and setting the colors. Adults should always manage the hot iron, but kids can enjoy the planning and coloring steps.
1. Prepare the Shirt
- Launder and dry the shirt first to remove any factory coatings that could block the wax.
- Place a piece of cardboard inside the shirt to keep the front and back layers from sticking together.
- Pre-iron the front of the shirt to remove wrinkles so the sandpaper lies flat.
2. Draw on the Sandpaper
- Position the sandpaper with the rough side facing up; this is the surface you will draw on.
- Lightly sketch the design in pencil if desired, then color heavily with crayons, pressing firmly.
- Fill in shapes completely, leaving few white gaps, because more wax equals stronger color on the fabric.
- If the design includes text, draw the letters backward so they read correctly after transfer, like writing in a mirror.
3. Align the Artwork on the Shirt
- Lay the shirt flat on a heat-safe surface such as an ironing board or sturdy table covered with a thick towel.
- Place the finished sandpaper drawing face down on the shirt exactly where you want the image to appear.
- Cover the back of the sandpaper with parchment paper or a plain sheet of white paper to protect the iron.
4. Transfer the Design with Heat
- Set the iron to a medium to medium-high dry setting, without steam, and let it preheat.
- Press the iron down firmly onto the paper-covered sandpaper, moving slowly to heat the entire design evenly.
- Maintain steady pressure for 30–60 seconds in each area rather than sliding quickly back and forth.
- Lift a corner of the sandpaper carefully to check whether the colors have transferred strongly; if not, replace and add a bit more heat.
- Once satisfied, fully remove the sandpaper and allow the shirt to cool before handling.
5. Set the Colors for Better Durability
Crayon designs are made of wax, so they benefit from a little extra heat to help them bond with the fibers. This step can slightly improve wash resistance, though the art will always be more delicate than commercial screen prints.
- Place a clean sheet of parchment over the design and press once more with the iron for a short burst of heat.
- Alternatively, tumble dry the shirt alone on low heat for about 15–20 minutes to help set the wax.
Safety Tips for Working with Kids
This project is very child-friendly as long as the heat step stays in adult hands. Explain each stage to kids in advance so they know when they can participate and when to step back.
- Assign children to the drawing and color-filling portions only; adults handle all ironing.
- Keep the hot iron cord out of busy pathways to prevent accidental tugs or tipping.
- Use a heat-safe surface and never leave the iron unattended, even for a moment.
- Let the shirt cool completely before allowing kids to touch or try it on.
Project Ideas and Variations
Once you master the basic transfer method, you can adapt it to multiple occasions and personal styles. Group events, holidays, and themed parties all become more memorable when guests help create their own wearable souvenirs.
- Birthday parties: Provide pre-cut sandpaper sheets and crayons for guests to design, then transfer each image with an iron station run by an adult.
- Family reunions: Invite kids to draw representations of family traditions or symbols, and turn them into matching shirts.
- Classroom or club projects: Use the technique to illustrate a theme such as space, animals, or sports.
- Seasonal shirts: Create designs for holidays like hearts for Valentine’s Day, pumpkins for autumn, or snowflakes for winter celebrations.
Care Instructions for Your New Artwork
Crayon-based prints are more delicate than ink-based ones, so gentle care extends their life. Expect some softening or fading of color over repeated washes, which can give the art a vintage look over time.
- Turn the shirt inside out before washing to protect the surface of the design.
- Use cold water and a mild detergent on a gentle cycle.
- Wash the shirt alone for the first wash to avoid any possible color transfer to other garments.
- Line-dry or tumble dry on low heat rather than high to reduce stress on the wax.
Troubleshooting Common Problems
If the first attempt does not look perfect, small adjustments in pressure, heat, or drawing style usually solve the issue. Use the table below as a quick reference guide for improving future shirts.
| Issue | Likely Cause | Suggested Solution |
|---|---|---|
| Colors look pale or washed out | Not enough crayon wax on the sandpaper or insufficient heat during transfer | Press harder when coloring and increase iron time slightly while keeping the heat at a safe level. |
| Image appears fuzzy or smudged | Design has very tiny details, or the sandpaper shifted while ironing | Simplify the artwork and hold the iron steady; avoid sliding it quickly across the surface. |
| Letters show up backwards | Text was drawn in normal orientation | Write all words in reverse on the sandpaper next time so they read correctly after transferring. |
| Wax shows on the back of the shirt | No cardboard barrier inside the shirt during transfer | Always place a firm insert between the front and back layers before adding heat. |
| Design cracks or flakes quickly | Very thick buildup of wax or frequent high-heat drying | Use moderate coloring pressure and launder on cool settings with low or no heat drying. |
Frequently Asked Questions
How long does the design last?
With gentle washing, a crayon and sandpaper print can remain bright for several wears, though it will naturally fade more quickly than professional printing methods. Treat these shirts as special-occasion or art shirts rather than everyday uniforms.
Can this technique be used on other fabrics?
Most smooth, cotton-rich fabrics accept crayon transfers fairly well, including tote bags, pillowcases, and aprons. Avoid very stretchy or slick synthetic materials, which may not bond with the wax as effectively.
Is it safe to iron over crayon wax?
It is safe when you use a protective barrier such as parchment or plain paper between the sandpaper and the iron surface. This layer keeps melted wax from touching the metal plate, making clean-up simple and preventing residue on future ironing projects.
Can I add more details after the first transfer?
You can repeat the process with smaller sandpaper drawings placed on different parts of the shirt, such as the sleeve or corner of the front. Just be sure to protect the areas that already have designs and avoid reheating them excessively.
Do I need special crayons?
Standard, inexpensive wax crayons are all you need for this project. Softer crayons tend to deposit more pigment on the sandpaper, but any basic school brand works well for most purposes.
Make Your Next T-Shirt a Mini Masterpiece
Sandpaper printed T-shirts offer a satisfying blend of creativity and instant gratification, turning a flat drawing into something you can wear and share. Whether you use the method for family crafts, group events, or personalized gifts, it invites everyone to play with color, experiment with design, and show off their artwork in a fun, unexpected way.