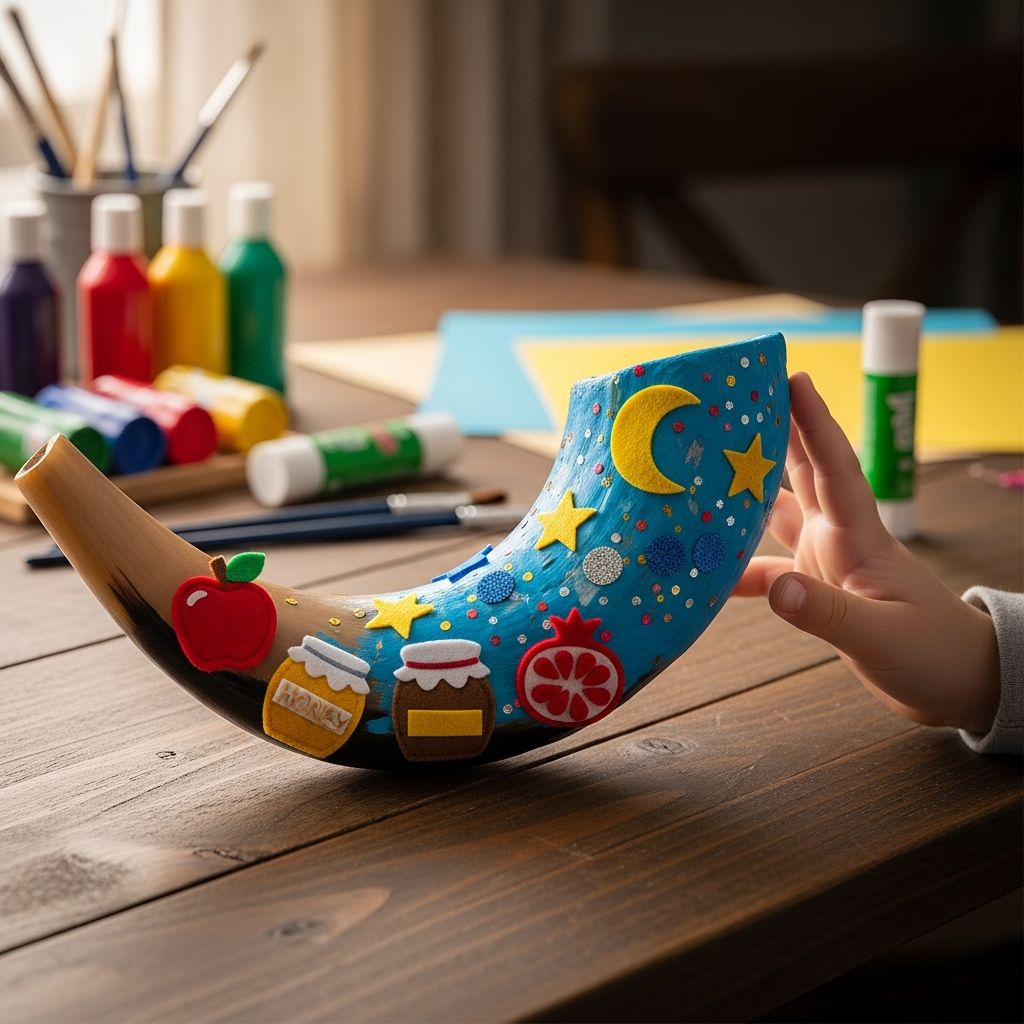
Creating a pretend shofar at home is a fun way to introduce children to the sounds, symbols, and spirit of the Jewish New Year while keeping the focus on creativity, learning, and play.
What Is a Shofar and Why It Matters
The shofar is a traditional horn, usually made from a ram’s horn, that is blown in synagogues during Rosh Hashanah, the Jewish New Year, and throughout the High Holiday season. Its raw, powerful sound is meant to grab attention, awaken the soul, and inspire reflection, change, and hope for the year ahead.
For children, a pretend shofar can act as a safe, accessible introduction to this important ritual object. It allows them to actively participate in the holiday atmosphere while learning that the real shofar is a sacred item, often handled with care and respect in a religious setting.
Benefits of a DIY Shofar Project With Kids
Turning the idea of a shofar into a hands-on craft offers more than just a cute holiday decoration. It encourages kids to ask questions, experiment with shapes and sounds, and connect homemade objects with deeper stories and values.
- Hands-on learning: Children understand better when they can touch, build, and explore objects related to ritual and tradition.
- Fine motor skill practice: Tearing paper, wrapping tape, painting, and decorating all strengthen small hand muscles and coordination.
- Holiday ownership: When kids make their own shofar, they feel more personally involved in the celebrations at home and in community spaces.
- Room for creativity: No two pretend shofars will look the same, which reinforces the idea that every family and every person can bring something unique to the New Year.
Materials: Simple Supplies, Big Impact
This craft is designed to use items that many families already have in the house or can easily find at a low cost. Feel free to substitute what you have on hand and adapt the project to your family’s needs.
| Item | Purpose | Possible Alternatives |
|---|---|---|
| Cardboard tubes (e.g., from toilet paper or paper towels) | Form the main body and curve of the shofar | Rolled cardstock, poster board, or thick construction paper |
| Party horn or simple noise-maker | Provides a fun sound when blown through the craft | Straight drinking straw or cardboard mouthpiece (for a quieter version) |
| Masking tape or paper tape | Shapes the curve and holds pieces together | Painters tape or other non-transparent tape |
| White glue or school glue | Adheres paper, details, and any papier-mâché layers | Glue stick for lighter projects |
| Scrap paper or tissue paper strips | Adds texture and strength, gives a “horn-like” surface | Newsprint, brown paper bags, or recycled wrapping paper |
| Acrylic, tempera, or washable paint | Colors the shofar in natural or imaginative tones | Markers, crayons, or decorative tape |
| Paintbrushes and water cup | For applying paint and glue mixtures | Foam brushes or cotton pads |
| Scissors (adult use or supervision) | Cuts cardboard, tape, and paper to the right size | Safety scissors for young crafters |
Step-by-Step: Building the Pretend Shofar
The steps below describe one approach to making a playful shofar-shaped instrument. You can simplify or embellish the process depending on the time, mess tolerance, and ages of the children involved.
1. Shape the Shofar Body
Start by selecting two or three cardboard tubes to build the length and gentle curve of your shofar. Younger children often find shorter horns easier to hold, while older kids may enjoy creating a longer, more dramatic shape. Adults or older children can use scissors to make a small cut on one end of a tube and slightly squeeze or fold the edge so that it can tuck into the next tube at a slight angle.
Insert one tube into another and secure the connection firmly with tape. Repeat with a third tube if you want extra length or a more pronounced curve, thinking about the organic, uneven curves of real animal horns as an inspiration rather than aiming for a perfectly straight line.
2. Add the Mouthpiece or Sound Element
To give your shofar a playful sound, gently remove the paper or decorative part of a party horn so that you are left with the plastic mouthpiece and small internal noise-maker. Slide this mouthpiece into one narrow end of your cardboard structure and secure it thoroughly with tape so that no air escapes around the sides when someone blows into it.
If you prefer a quieter version, you can skip the noise-maker and simply create a small opening at one end of the cardboard tube. In that case, the craft functions as a visual symbol: children can pretend to blow, practice the different traditional calls by saying them out loud, or use their own voices to mimic the shofar’s varied tones.
3. Smooth and Strengthen the Shape
Once the basic horn shape is assembled, wrap the entire surface with strips of masking tape. Overlap the edges slightly to hide the seams between tubes and to create a single, unified surface. This step keeps the tubes connected, strengthens weak spots, and gives you a good base for paint and decoration.
Families who enjoy an extra-messy craft can go further by coating the taped horn with papier-mâché. Combine equal parts white glue and water (or flour and water) in a small bowl, dip strips of paper in the mixture, and smooth them over the horn. After one or two layers are applied, set the craft aside to dry completely before moving on to painting.
4. Paint and Decorate the Horn
When the surface is dry and sturdy, it is time to choose colors. Many children like to imitate natural horn shades using brown, cream, and black paints, gently blending and layering them to achieve a marbled effect. Others may prefer bright, festive colors that reflect apples, honey, pomegranates, or other Rosh Hashanah themes.
Encourage kids to experiment with:
- Sponging a darker color over a lighter base to create texture.
- Adding gentle stripes or swirls along the length of the horn.
- Drawing small symbols such as stars, hearts, or Hebrew letters (with guidance) near the wide end.
- Using metallic accents like gold or bronze paint on ridges or raised areas.
Allow the shofar to dry thoroughly before using it in any holiday play or practice.
Ideas for Using Your Pretend Shofar
Once the craft is complete, your family can incorporate it into Rosh Hashanah traditions at home in a variety of playful and meaningful ways. The key is to emphasize respect for the real ritual object while giving children freedom to engage with the story and spirit of the holiday.
- Practice the traditional calls: Teach children the names of the calls (for example, tekiah, shevarim, teruah) and use your pretend horn as a cue to sing or clap the rhythms.
- Story time with props: Use the shofar during bedtime stories or holiday-themed picture books about the Jewish New Year, pausing to “sound” it at important moments.
- Home ceremony: Create a simple family ritual where each person shares one hope for the new year, then takes a turn blowing or pretending to blow the shofar.
- Classroom demonstration: Teachers in Jewish and interfaith settings can use the craft as a visual tool when real shofars are not available or appropriate for young hands.
Adapting the Craft for Different Ages
Not every family has the same time, tools, or developmental range, so adjusting the difficulty level makes the project more enjoyable for everyone involved. Consider the following variations as starting points, and mix and match according to your needs.
| Age Group | Recommended Approach | Adult Role |
|---|---|---|
| Toddlers (2–3) | Pre-built horn base; focus on simple decorating with stickers, crayons, or washable paint | Fully construct and tape the horn; supervise closely during decorating |
| Preschool (4–5) | Help assemble tubes; allow more independence with painting and adding basic textures | Handle all cutting; guide taping and encourage discussion about the holiday |
| Early Elementary (6–8) | Participate in shaping, taping, and papier-mâché; experiment with color blending | Oversee use of scissors and glue; introduce simple information about shofar traditions |
| Older Kids (9+) | Lead most steps; design complex patterns, ridges, or layered textures | Offer minimal supervision; encourage research into the history and symbolism of the shofar |
Safety and Respectful Use Tips
Even simple crafts benefit from some shared safety rules and values. Setting expectations early helps the project run smoothly and keeps the pretend shofar from becoming just another toy tossed onto the floor.
- Assign an adult to handle all cutting, especially when working with tough cardboard or sharp scissors.
- Use washable, non-toxic paints and glues, and protect work surfaces with paper or an old tablecloth.
- Remind children that while this is a playful craft, it represents a real ritual object that many people treat with great care.
- Establish where the shofar will be stored when not in use, such as a special shelf or holiday box.
Frequently Asked Questions About Pretend Shofars
Is it okay to make a toy shofar?
Yes. A pretend shofar made from art materials is a helpful teaching tool, especially for young children who are not ready to handle or purchase a real ram’s horn. Many families and educators use crafts like this to introduce important rituals in a gentle, age-appropriate way.
Can this craft replace a real shofar in religious services?
No. A homemade shofar-shaped craft is not a substitute for a real shofar in a religious context. It does not meet the traditional requirements for ritual use and should be understood as an educational and symbolic project meant for home, school, or informal activities.
How long will a cardboard shofar last?
With careful handling, a cardboard shofar can last through several holiday seasons. Storing it in a dry place, avoiding rough play, and occasionally touching up loose tape or chipped paint can extend its life and turn it into a treasured part of your family’s annual Rosh Hashanah traditions.
What if we don’t have a party horn?
If no party horn is available, you can leave out the sound element entirely or experiment with other methods, such as blowing gently through a straw taped inside the narrow end. The goal is not to reproduce the exact sound of a real shofar but to create a hands-on, meaningful connection to the idea of the horn and its role in the holiday.
Can we personalize the design with names or dates?
Absolutely. Writing children’s names, the Hebrew year, or a short holiday message along the horn can make the project feel more personal and memorable. Just keep in mind that, unlike a real shofar, this object is meant to be playful and expressive, so there is plenty of room for creativity.
Bringing the New Year to Life Through Creativity
Crafting a pretend shofar with children merges hands-on art with the deeper meaning of Rosh Hashanah, giving kids a tangible way to explore themes like renewal, reflection, and hope. The process of building, decorating, and then using the horn in family rituals can turn abstract ideas into concrete memories.
Whether your household already observes the Jewish New Year every year or is just beginning to explore Jewish traditions, this simple, customizable craft offers a warm invitation to learn, play, and welcome the new year together in a spirit of curiosity and joy.