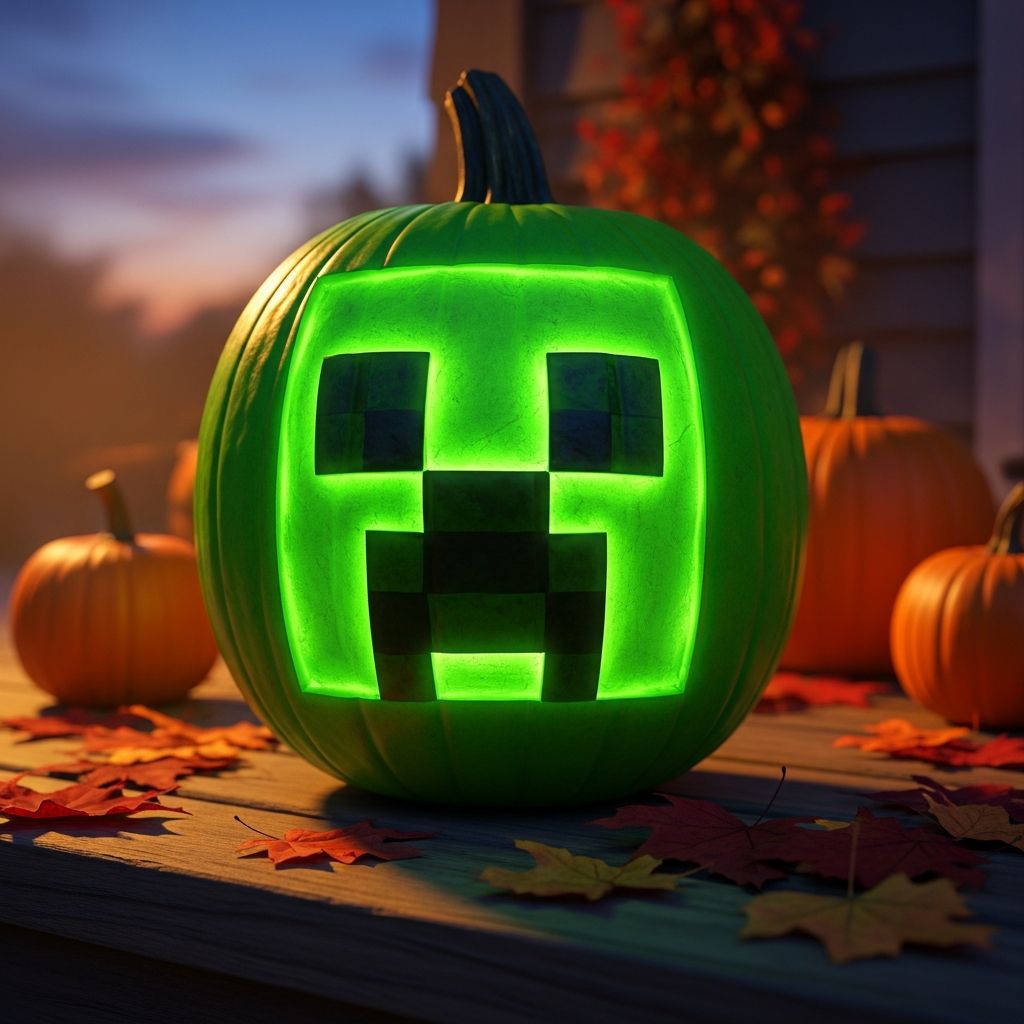
If your kids are obsessed with Minecraft, green Creeper jack-o’-lanterns are an easy way to bring their favorite game into real-life Halloween decorating. This guide walks you through everything from picking the right pumpkin to safely lighting and displaying your pixel-perfect lanterns.
Why Creeper Pumpkins Are a Halloween Win
Combining a beloved video game character with a classic Halloween icon practically guarantees excited kids and memorable front-porch photos. Unlike complicated costumes, Creeper pumpkins are simple to create and can be adjusted for any age or skill level.
- Recognizable: The Creeper face is bold, simple, and instantly familiar to Minecraft fans.
- Flexible: You can carve, paint, or use stickers depending on time and mess tolerance.
- Collaborative: Kids can help design the face, choose shades of green, and arrange the display.
Choosing the Right Pumpkin (or Faux Pumpkin)
Creeper faces look best on pumpkins that mimic the blocky feel of Minecraft. You do not need a perfect cube, but the flatter and more upright the pumpkin, the easier it is to map out straight lines.
What to Look For
- Shape: Tall, slightly squared pumpkins give you more vertical space for the Creeper face.
- Surface: Smooth areas make it easier to tape on templates and draw crisp lines.
- Stability: A pumpkin that stands firmly without wobbling is safer for carving and display.
If you want decorations that last beyond one season, consider hollow craft pumpkins made of foam. These carve similarly to real pumpkins but do not rot, and they store well for future Halloweens.
Supplies You Will Need
Before you start, gather everything in one place so kids are not wandering in and out of the workspace. A basic kit works fine; no special tools are required beyond standard pumpkin-carving gear and craft paint.
Basic Materials List
- Pumpkins (real or faux)
- Non-toxic green acrylic paint in at least two shades (light and dark)
- Black acrylic paint or black adhesive vinyl for the face
- Paintbrushes or foam brushes
- Pencil or washable marker
- Painters tape or masking tape
- Disposable table covering or craft mat
Carving and Lighting Tools
- Pumpkin carving kit with scoop and small serrated knives
- Battery-powered tea lights, puck lights, or LED string lights
- Optional: drill with wide bit for neat round openings
- Optional: clear spray sealer for painted real pumpkins
Planning the Creeper Face (Pixel-Style)
The key to a convincing Creeper pumpkin is getting the face proportions right. Think of the front of the pumpkin as a grid of squares rather than a curved surface.
Simple Grid Method
- Use painter’s tape to mark a rectangular “face area” on the pumpkin front.
- Lightly draw vertical and horizontal lines inside that rectangle to form a simple grid.
- Assign each grid square as “cut out,” “painted black,” or “left green” to match the Creeper’s iconic expression.
You can draw freehand or use graph paper first to test different layouts. Older kids may enjoy designing their own “custom mob” face using the same basic grid method.
Painting the Perfect Creeper Green
Unlike traditional orange jack-o’-lanterns, Creeper pumpkins need that unmistakable pixelated green look. Paint lets you transform any pumpkin color into a video-game-ready canvas.
Step-by-Step Painting Guide
- Prep the surface: Wipe the pumpkin with a damp cloth to remove dirt; let it dry thoroughly.
- Base coat: Apply a solid coat of mid-tone green paint and let it dry completely.
- Add pixels: With a small brush, dab blocks of darker and lighter green randomly over the surface to mimic Minecraft shading.
- Blend edges: Leave some hard edges for a pixel feel but soften a few transitions to avoid a harsh checkerboard.
- Seal (optional): When dry, spray a light coat of clear sealer if the pumpkin will sit outdoors.
For younger kids, you can skip multi-tone shading and stick to a single bright green. The blocky face alone still clearly reads as a Creeper.
Two Ways to Create the Creeper Face
You can either carve the Creeper face, paint it, or combine both techniques. Choose what works best for your children’s ages and your timeline.
Option 1: No-Carve Creeper Pumpkin
This version is ideal for classrooms, apartments, or families who prefer to avoid sharp tools.
- Trace the face using your grid lines and a pencil.
- Fill in the eyes and mouth with black acrylic paint for a bold, flat design.
- For ultra-crisp shapes, cut the face pieces out of black vinyl or contact paper and stick them inside the grid.
No-carve pumpkins last longer than cut ones and can be brought indoors without worrying about exposed candle flames.
Option 2: Carved Creeper Jack-O’-Lantern
For families who enjoy traditional carving, translate the same square face shapes into cutouts. The pixel design naturally fits the straight lines of a carving saw.
- Cut a lid (or a bottom opening) at a slight angle so it does not fall inside.
- Scoop out seeds and strings until the walls are about 1.5–2 cm thick.
- Transfer your Creeper face to the front using tape and a poking tool or by drawing directly on the skin.
- Carve out each square slowly with a small serrated knife, working from the center outward.
- Clean up edges with a smaller blade to keep the pixel look sharp.
Lighting Your Creeper Safely
Modern LED lights make it simple to get a bright, eerie glow without fire risk, melted pumpkins, or smoke. This is especially helpful when decorating for parties with lots of children.
Lighting Options
- LED tea lights: Affordable and easy to switch on and off inside carved pumpkins.
- Battery puck lights: Brighter than tea lights and often include remote controls or color settings.
- Mini string lights: Wrap a short string of green or white LEDs inside the pumpkin for a diffused glow.
To increase brightness, try placing a piece of aluminum foil on the inside bottom of the pumpkin so it reflects the light upwards through the Creeper face.
Display Ideas for a Minecraft-Themed Porch
Once your Creeper pumpkins are ready, the fun really begins. Think about your entryway as a tiny Minecraft biome and build outward from the pumpkins as the main characters.
Minecraft Porch Ideas
- Line a pathway with several small Creeper pumpkins, alternating carved and painted versions.
- Place one large Creeper jack-o’-lantern at the top step surrounded by square cardboard “blocks” painted like grass and stone.
- Add green and black balloons in clusters to echo the Creeper color palette.
- Use square cardboard signs for phrases like “Beware of Mobs” or “Enter the Nether” to complete the game-world vibe.
Simple Display Planning Table
| Display Element | Materials Needed | Time Estimate |
|---|---|---|
| Creeper pumpkin row | 3–5 pumpkins, green paint, black paint or vinyl, LEDs | 1–2 hours |
| Cardboard “grass” blocks | Boxes, green and brown paint, tape | 45–60 minutes |
| Mob warning signs | Cardboard, markers, string | 20–30 minutes |
| Photo spot backdrop | Tablecloth or poster board, printed Minecraft-style letters | 30–45 minutes |
Making It Kid-Friendly and Safe
Kids love helping with Halloween prep, but safety and clear boundaries keep the experience fun instead of stressful. Assign tasks based on age and comfort with tools.
Task Ideas by Age Group
- Preschoolers: Help wash the pumpkins, choose paint colors, and place stickers or vinyl pieces.
- Elementary kids: Draw grid lines, help paint large areas, and decide on display arrangements.
- Older kids and teens: Assist with carving under supervision, manage lighting setups, and design more complex pixel patterns.
Always keep sharp tools and hot glue (if you use it for decorations) in the hands of adults or responsible teens. Let younger children stay in charge of creative decisions rather than cutting tasks.
Cleanup and Storage Tips
Once October ends, you can either compost your real pumpkins or pack away the faux ones for next year. A little planning makes cleanup faster and preserves your work.
- Spread newspaper or a plastic tablecloth before you start to catch stray paint and pumpkin strings.
- Keep a labeled bin for reusable decor elements like faux pumpkins, cardboard blocks, and signs.
- Wrap foam pumpkins in tissue or bubble wrap to protect the paint and pixel details.
Real carved pumpkins break down quickly, so display them outside and dispose of them in yard waste or compost once they soften or mold.
Frequently Asked Questions
Do I have to be good at art to make a Creeper pumpkin?
No. The Creeper face is made of simple squares and rectangles, so it is very forgiving. Even if your lines are not perfectly straight, the green color and bold black shapes still clearly suggest the character.
Can I skip carving entirely?
Yes. A fully painted or vinyl-only Creeper pumpkin looks great and is safer around small children, pets, and windy balconies. It also lasts longer than a carved pumpkin.
What kind of paint works best?
Water-based acrylic craft paint adheres well to both real and foam pumpkins and dries quickly. Look for non-toxic formulas labeled safe for children’s crafts when kids will be doing the painting.
How long will a carved Creeper jack-o’-lantern last?
Most carved pumpkins look their best for three to five days, depending on temperature and humidity. To extend the life a bit, keep them out of direct sunlight during the day and avoid placing them near heat sources.
Can I use real candles instead of LEDs?
Real candles can be used outside in stable, supervised locations, but battery-powered lights are a safer choice. LEDs reduce fire risk, do not heat the pumpkin, and can offer fun extras like color changes or flicker effects.
Is this craft suitable for school or group events?
Yes. In group settings, choose the no-carve method and pre-paint pumpkins green ahead of time. Then let kids customize Creeper faces with markers, foam stickers, or adhesive shapes for a low-mess activity.
Final Touches for a Blocky Halloween
Once you have even a single glowing Creeper pumpkin on your porch, the whole atmosphere changes from ordinary Halloween to a playful Minecraft scene. Add a few cardboard blocks, some eerie lighting, and themed signs and you will have a house that young gamers remember for years.
Whether you carve, paint, or stick on the face, the project is all about celebrating your kids’ interests and spending time creating something together. The result is a decorating tradition you can update every year with new mobs, colors, and ideas.