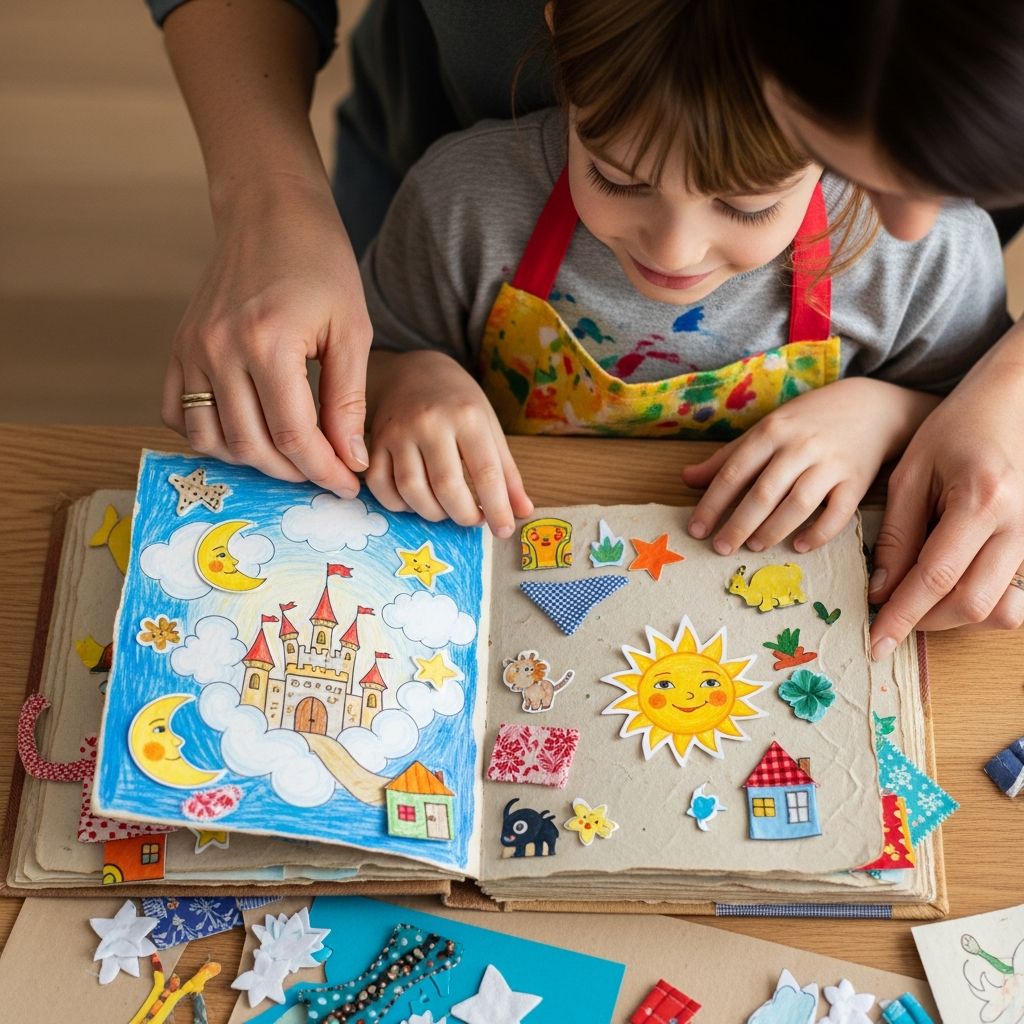
Homemade storybooks combine creativity, literacy, and quality family time in one simple craft. Instead of buying another book, you can help your child write, illustrate, and assemble a personal story they will proudly read again and again.
Why Create Your Own Storybook?
Designing a storybook together gives children a powerful sense of ownership over their ideas. They are not just reading a story; they are the author, illustrator, and designer of a real book with pages they turned into something special.
Parents and caregivers gain a low-cost, high-impact project that can be revisited over several days. A handmade storybook also becomes a keepsake that records how a child thought, drew, and wrote at a specific age.
- Encourages writing, drawing, and storytelling skills.
- Builds confidence as children see their work become a “real” book.
- Creates meaningful screen-free time for the whole family.
Gathering Simple, Kid-Friendly Supplies
You do not need special equipment to make a storybook at home. Most supplies can be found in your desk drawer, school supplies bin, or recycling box.
Basic Materials
- 8–12 sheets of printer or drawing paper for pages.
- 1–2 sheets of heavier cardstock or construction paper for the cover.
- Glue stick or white glue for attaching cutouts and photos.
- Child-safe scissors for trimming paper and shapes.
- Markers, crayons, or colored pencils for text and illustrations.
- String, yarn, ribbon, or staples for binding.
- Optional: stickers, washi tape, stamps, or printed photos for decorating.
Optional “Upgrade” Supplies
- Hole punch for easy binding with yarn or ribbon.
- Patterned scrapbook paper for endpapers or page borders.
- Envelopes or small pockets to tuck in notes or mini drawings.
- Self-adhesive labels or sticky notes for speech bubbles.
| Supply | Budget Option | Fun Upgrade |
|---|---|---|
| Pages | Regular printer paper | Drawing paper or light cardstock |
| Cover | Construction paper | Chipboard from cereal boxes covered in paper |
| Binding | Staples or simple string tie | Ribbon lacing or decorative yarn |
| Decoration | Crayons and markers | Stickers, stamps, and washi tape |
Planning the Story Together
Before touching the paper, spend a few minutes talking about the story your child wants to tell. Planning even a loose outline helps children focus and prevents pages from feeling random or disconnected.
Choose a Story Type
- Adventure: A character travels, discovers something new, or solves a problem in a new place.
- Everyday life: A story about school, a pet, a sibling, or a favorite routine.
- Fantasy: Dragons, talking animals, magical forests, or superheroes created by your child.
- Memory book: A real event like a vacation, holiday, or first day of school.
Use Simple Story Prompts
If your child is unsure where to start, use easy prompts to get ideas flowing. Ask who the main character is, what they want, what goes wrong, and how things end.
- “Once there was a kid who really wanted…”
- “One day, something surprising happened when…”
- “At first it was hard because…”
- “In the end, they realized that…”
Choosing a Book Format
The shape and binding style of the book can be as simple or as fancy as you like. For younger children, a small, sturdy booklet works best because it is easy to hold and decorate.
Three Easy Formats
- Stapled booklet: Stack the pages, fold them in half like a greeting card, and staple along the fold.
- Hole-punched spine: Punch 2–3 holes near the folded edge and tie with yarn or ribbon.
- Accordion book: Tape or glue page edges together in a long strip, then fold back and forth like a fan.
Talk with your child about how many pages they want and how detailed they plan to be. It is better to complete a short book than to start a very long one that never gets finished.
Step-by-Step: Assembling the Blank Book
Once you have a plan and supplies ready, assemble the blank book before adding words and pictures. This helps children see the project as a real object from the beginning.
1. Prepare the Pages
- Stack 4–6 sheets of paper neatly.
- Fold the stack in half to create a center crease.
- Press along the fold firmly to help the book stay flat.
2. Add a Cover
- Cut a piece of construction paper or cardstock slightly larger than the inner pages.
- Fold it in half to match the pages.
- Place it around the inner stack like a jacket.
3. Bind the Book
Pick the binding method that best matches the tools you have and the age of your child.
- Staples: Staple along the fold in two or three spots. Adults should handle the stapler.
- Yarn tie: Punch holes along the folded edge, thread yarn through the holes, and tie snug knots.
- Decorative tape: Wrap washi tape along the spine for color and extra strength.
Designing Each Page
Now comes the fun part: turning blank pages into a story. For many children, it helps to decide as a team where pictures and words will go on each page.
Page Layout Ideas
- Half page for text on top and half page for an illustration below.
- Full-page illustration with a single sentence as a caption.
- Comic-style panels with speech bubbles made from cutout labels.
- Photo on one side with handwritten notes or dialogue on the opposite page.
Keeping It Child-Led
Resist the urge to correct every spelling mistake or re-draw every character. This book should reflect your child’s stage of development, quirks and all. Offer gentle help with spelling when they ask, but focus more on expression and storytelling than on perfection.
Helping With Writing Without Taking Over
Different ages will need different levels of support. The goal is to make the child feel successful and heard, not to produce a flawless, adult-level manuscript.
Pre-Readers and Early Writers
- Invite your child to dictate the story while you write the words.
- Leave space for them to add their own invented spelling or labels.
- Use large, clear letters so they can start recognizing words.
Confident Writers
- Encourage them to write the main text on their own, then read it aloud together.
- Ask questions like “What happens next?” instead of telling them what to write.
- Offer light editing help at the end only if they request it.
Illustrations and Visual Storytelling
Pictures are often a child’s favorite part of the project. They do not need to be realistic or polished; expressive stick figures and colorful scribbles are perfect for a handmade storybook.
Simple Illustration Ideas
- Use crayons or markers to draw scenes, characters, and speech bubbles.
- Cut out shapes (houses, trees, stars) from colored paper and glue them in.
- Add printed photos of family members, pets, or places as “cameos” in the story.
- Use stickers as characters or props and build scenes around them.
Visual Consistency Tips
- Keep the main character’s basic look the same on each page (same colors, features).
- Repeat certain colors or symbols to create a cohesive feel across the book.
- Leave margins so pages do not look too crowded or overwhelming.
Adding Interactive and Keepsake Elements
Small interactive touches turn a simple craft into a treasured keepsake. These extras also keep children engaged as they flip through the book again and again.
Interactive Ideas
- Attach a paper flap with tape that reveals a surprise picture or secret message.
- Glue a small envelope inside the back cover to hold extra drawings or “bonus scenes.”
- Add a “design your own ending” page where the reader can complete the final picture or write alternate endings.
- Include a “hide and seek” element, such as a small symbol hidden on every page for readers to find.
Personal Touches
- Write the author’s name (your child’s) and age on the title page.
- Add a dedication page: “This book is for…” with space for your child’s message.
- Date the inside cover so you remember when the book was created.
Sharing and Storing the Finished Storybook
Once the story is complete, treat it like a real, published book. Reading it aloud and displaying it proudly shows children that their creative work matters.
Ways to Share the Story
- Host a “book launch night” where your child reads the story to family members.
- Record a video of your child reading the book and send it to grandparents or friends.
- Pack the book in your child’s backpack for show-and-tell at school.
Preserving the Book
- Store it on the family bookshelf alongside other favorite books.
- Slip it into a clear plastic sleeve or folder to protect it from spills.
- Consider taking photos or scanning the pages to create a digital backup.
FAQs About DIY Storybooks
How long does it take to make a children’s storybook?
Most families can assemble and decorate a simple storybook in one afternoon. However, breaking the project into shorter sessions—planning on one day, writing on another, and illustrating later—keeps younger children from getting overwhelmed.
What if my child is not interested in writing?
Try emphasizing drawing and storytelling out loud instead of long written sentences. You can write a few key phrases for them or use labels and speech bubbles so the writing feels small and manageable.
Can this project work for groups or classrooms?
Yes, this activity adapts well to classrooms, clubs, or playdates. Provide each child with a pre-assembled blank booklet, then guide everyone step-by-step through planning a character, setting, beginning, middle, and end.
What if my child wants to make a very long story?
Celebrate their enthusiasm but start with a shorter version first. Suggest creating “Book One” now, with the option to make sequels later so the project stays fun and achievable.
How can we use this as a learning tool?
Homemade storybooks reinforce reading, writing, sequencing, and verbal storytelling skills. You can also use them to explore emotions, practice new vocabulary, or retell historical events and science concepts in your child’s own words.
Making a DIY storybook is more than just a craft; it is a way to honor your child’s imagination and capture a moment in their growth. With simple supplies, a bit of planning, and a willingness to let kids lead, you can create a small book that holds big memories.