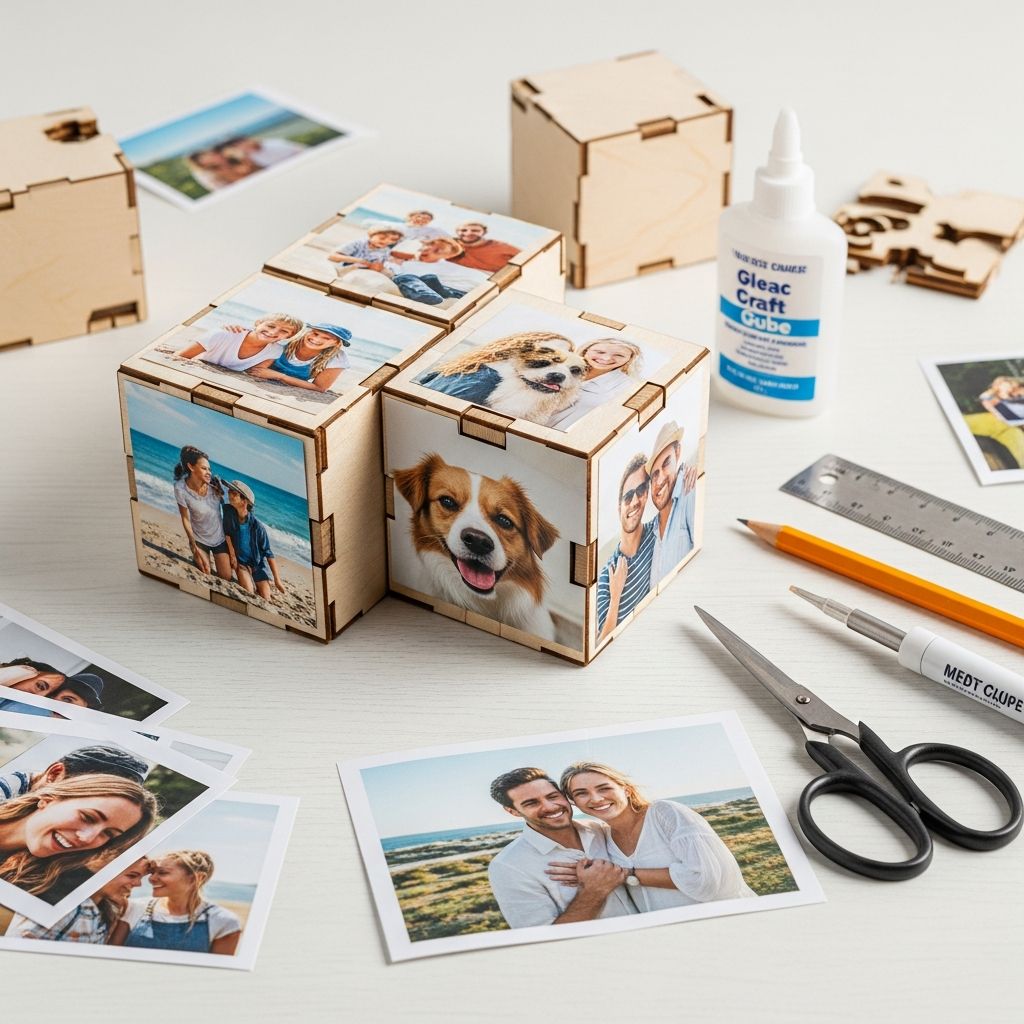
If you are looking for a meaningful, hands-on way to showcase your favorite photos, a handmade photo cube is a beautiful and surprisingly simple project that can become a cherished keepsake or heartfelt gift.
Why a Photo Cube Makes a Special Gift
A photo cube is a three-dimensional frame that displays multiple photos at once, allowing someone to turn the cube and revisit memories from every side. Unlike a traditional flat frame, it invites interaction and can sit neatly on a desk, shelf, or nightstand.
This project is ideal for beginners because it uses basic materials, simple shapes, and straightforward steps. You can adapt the style of your cube to fit any occasion, whether you want something playful for kids or elegant for a wedding or anniversary.
Planning Your Photo Cube Project
Before you gather supplies, take a few minutes to plan the size, theme, and purpose of your cube. Thoughtful planning will make the crafting process smoother and help you produce a polished result.
- Decide who it is for: yourself, a parent, a partner, a friend, or a child.
- Choose an occasion: birthday, holiday, graduation, new baby, travel keepsake, or everyday decor.
- Pick a style: colorful and playful, rustic and natural, or minimal and modern.
Choosing the Right Materials
You can build a photo cube from wood blocks, a ready-made paper mache cube, or sturdy cardboard. The material you choose will affect the weight, durability, and final look of your project.
Common Base Options
| Base Type | Best For | Pros | Considerations |
|---|---|---|---|
| Solid wood cube | Long-lasting gifts and home decor | Very sturdy, feels substantial, easy to paint or stain | Heavier; may need sanding before finishing |
| Paper mache or craft cube | Quick projects and kids’ crafts | Lightweight, budget-friendly, ready to decorate | Less durable than wood if handled often |
| Cardboard cube (DIY) | One-time events or practice projects | Uses supplies you already have; highly customizable | Requires careful construction for sharp edges and stability |
Basic Supply Checklist
- Cubes or a blank cube base (wood, cardboard, or paper mache)
- Printed photos (matte paper works well to avoid glare)
- Paper trimmer or scissors and a ruler
- Adhesive (glue stick, double-sided tape, or decoupage medium)
- Optional: acrylic paint, paintbrushes, decorative paper, stickers, or markers
- Optional sealer: clear acrylic spray or decoupage sealer for protection
Selecting and Preparing Your Photos
The heart of this project lies in your photo choices. Six sides mean six opportunities to highlight different memories or themes. You can mix people, places, and small details that tell a story when viewed together.
- Choose high-resolution images so that faces and details remain clear when cropped small.
- Consider using a consistent filter or color palette so the cube looks cohesive.
- Include at least one close-up image for visual impact and one wider shot to give context.
Measuring and Cropping
To keep edges neat and aligned, measure your cube carefully and then trim your photos slightly smaller than each side. This leaves a narrow border that makes the photos look intentionally framed.
- Measure one side of the cube and subtract 2–3 millimeters from each dimension for your final photo size.
- Use a paper trimmer when possible to keep lines straight and corners square.
- Lay photos out on the table in the order you want them to appear before gluing anything down.
Step-by-Step: Building a Simple Photo Cube
This section focuses on a straightforward cube where each face holds one photo. The method is the same whether your base is wood, paper mache, or sturdy cardboard.
Step 1: Prepare the Cube Surface
Start by making sure each side of your cube is smooth, clean, and ready to accept glue and photos. Any uneven areas can show through the paper or prevent photos from sticking properly.
- Lightly sand wooden surfaces if they feel rough or splintered.
- Wipe away dust or debris with a dry cloth.
- Apply a base coat of acrylic paint if you want colored edges instead of raw material.
- Allow paint to dry completely before moving on.
Step 2: Arrange Your Layout
It helps to assign each photo to a specific side before you use any glue. This reduces mistakes and lets you balance colors and faces around the cube.
- Place the cube in the center of your workspace with the top side facing up.
- Decide which image will be the “hero” photo and place it on the front or top.
- Alternate busy, detailed photos with simpler ones to avoid visual clutter.
Step 3: Attach the Photos
When you are satisfied with the layout, begin attaching photos one side at a time. Work slowly so you can smooth bubbles and ensure straight placement.
- Apply a thin, even layer of adhesive to the back of a photo or directly onto the cube side.
- Align one edge of the photo with the cube and slowly press it down from one side to the other.
- Use your fingers or a clean card to gently smooth out air bubbles.
- Repeat for all visible sides and let the adhesive dry according to the product instructions.
Step 4: Seal and Protect (Optional)
If the cube will be handled frequently, a protective layer will help the photos last longer and resist fingerprints or minor spills.
- Brush on a thin coat of decoupage sealer over each photo, using light strokes in one direction.
- Allow it to dry fully, then add a second coat if you want a more durable finish.
- For a matte look, choose a non-glossy sealer; for a vibrant, polished look, use a gloss or satin version.
Creative Design Ideas and Themes
Once you understand the basic construction, you can turn a simple cube into a themed, story-rich piece that reflects the personality of the recipient. Consider combining decorative elements, color schemes, and creative photo choices.
- Family moments cube: One side per family member, plus a group photo and a quote or date on the remaining side.
- Travel memories cube: Landmarks on some faces and tiny printed maps or ticket stubs on others.
- Baby milestone cube: Use monthly photos, birth details, and a handprint or footprint motif.
- Pet cube: Showcase your pet’s funniest expressions, favorite toys, and a name label.
Decorating Beyond the Photos
Photos may be the focal point, but small embellishments and thoughtful details can make your cube feel even more personal. Just remember to keep raised decorations minimal if you want the cube to stack neatly or fit on a tight shelf.
Simple Decoration Ideas
- Ink the edges of the cube with a coordinating color for a framed effect.
- Add small word stickers (like “love,” “laugh,” or “family”) in corners of each photo.
- Use thin washi tape to create borders or stripes around the edges.
- Write dates, locations, or short captions with a fine-tip permanent marker.
Color and Style Tips
Choosing colors that complement the photos rather than compete with them will keep the cube looking intentional and polished.
- Pull two or three colors from your photos and repeat them in paint, tape, or lettering.
- For black-and-white photos, try soft neutrals or metallic accents.
- For bright, playful photos, pair them with bold, contrasting edges.
Fun Variations on the Classic Photo Cube
Once you are comfortable with a standard cube, you can experiment with additional features that make the project even more engaging. Try one variation at a time so you can keep track of what works best for you.
- Message cube: Reserve one or two faces for handwritten notes, quotes, or song lyrics (avoiding copyrighted text from published works).
- Mixed-media cube: Combine fabric, patterned paper, and photos on different sides.
- Mini calendar cube: Attach tiny monthly calendar grids on alternating sides and use the others for photos.
- Kids’ drawing cube: Add children’s artwork on some sides and family photos on others.
Displaying and Gifting Your Photo Cube
Part of the charm of a handmade cube is how it is presented. Thoughtful display ideas can encourage the recipient to interact with the cube, turn it often, and keep it visible rather than tucked away.
- Place the cube on a small decorative tray alongside a candle or a small plant.
- Pair it with a handwritten card explaining the story behind each photo.
- Wrap it in tissue paper and present it in a square gift box that echoes the cube shape.
- Create a set of two or three cubes as a mini “gallery” for a mantle or office shelf.
Frequently Asked Questions About Photo Cubes
1. What size should my photo cube be?
Common sizes range from small 2-inch cubes to larger 4-inch cubes. Smaller cubes are perfect for desks and small spaces, while larger cubes provide more room for detail and are easier for young children to handle without smudging the photos.
2. Do I need special photo paper?
You do not need professional photo paper, but slightly heavier paper prevents warping and helps photos lie flat. Matte or semi-matte finishes usually work better than glossy ones because they reduce glare and show fewer fingerprints.
3. How can I keep the photos from peeling off over time?
Use a strong, acid-free adhesive designed for paper crafts, and make sure all surfaces are clean and dry. Adding a clear sealant or decoupage layer over the top will help protect edges from lifting and keep colors vibrant for longer.
4. Is this project suitable for children?
Yes, with a few adjustments. Adults or older teens can handle cutting and measuring, while younger children can help choose photos, paint the cube, and place stickers or simple decorations on each side.
5. Can I change the photos later?
If you use removable adhesive or corner photo mounts, you can swap photos periodically. For a more permanent keepsake, glue and seal the photos in place, accepting that the cube will remain as originally designed.
Final Tips for a Polished Finish
A little patience during each step will go a long way toward making your photo cube look professional. Work slowly, check your measurements twice, and allow plenty of drying time between layers.
- Test your adhesive and sealer on scrap photos first to see how the colors react.
- Keep your hands clean and dry to avoid smudges on the photo surfaces.
- Store your completed cube somewhere away from direct sunlight to reduce fading.
With these techniques and ideas, you can transform a simple cube into a meaningful piece of art that celebrates your favorite people and moments in a form that is both tactile and timeless.