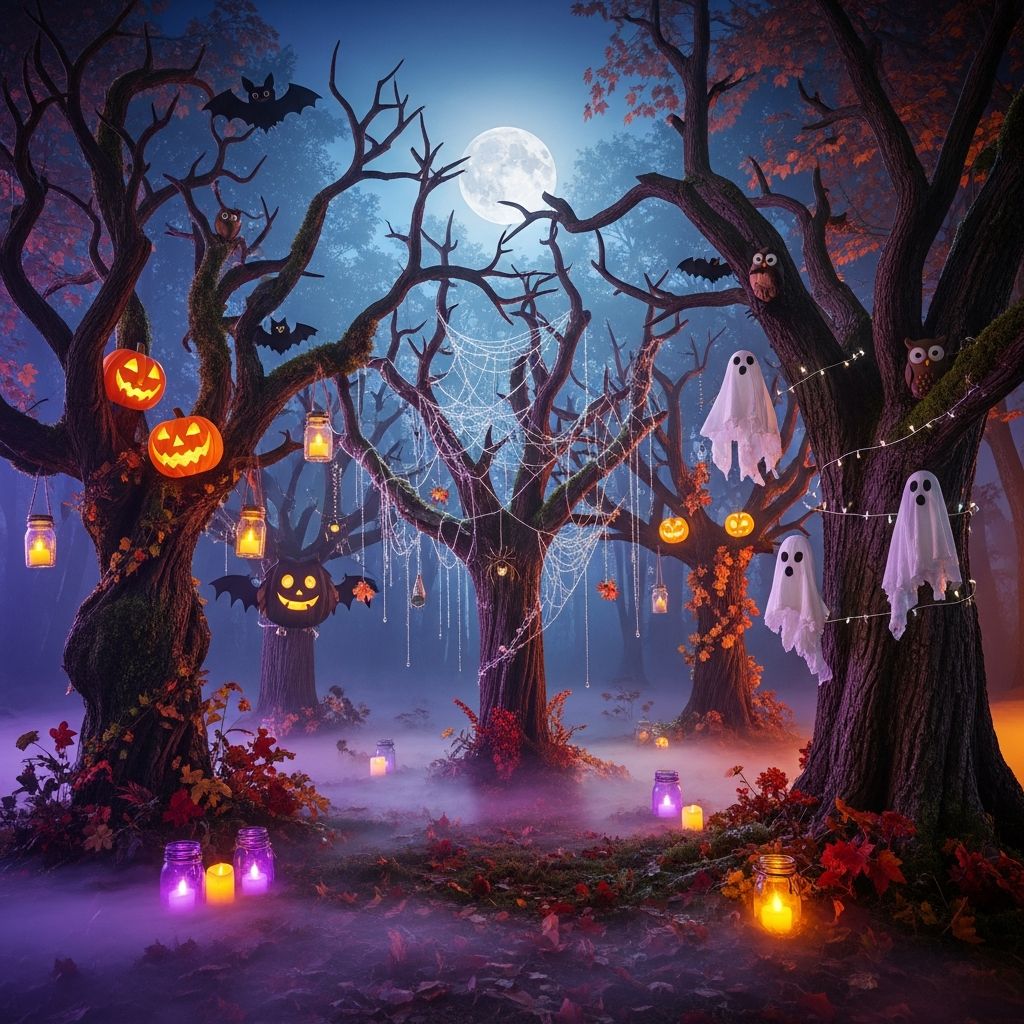
Halloween trees are a playful way to bring haunted forest vibes into your living room, porch, or party space. Instead of carving one more pumpkin, you can build a spooky tree that shows off your family’s creativity and becomes a tradition year after year.
Why Halloween Trees Are Worth the Effort
A Halloween tree combines the fun of crafting with the excitement of decorating, so everyone from toddlers to teens can join in. Unlike one-and-done decorations, a tree can be refreshed each year with new themes, colors, and handmade ornaments.
- Works indoors or outdoors, depending on your space and weather.
- Can be made almost entirely from recycled or low-cost materials.
- Offers a creative alternative to traditional yard inflatables or store-bought decor.
Planning Your Halloween Tree Vision
Before you start gathering branches or pulling out craft bins, decide what kind of mood you want your Halloween tree to create. A quick planning session will help you avoid buying unnecessary supplies and keep the project fun instead of stressful.
Choose a Style and Mood
Begin by picking a style that matches your household or party theme. You might gravitate to a creepy haunted forest, a cute candy-themed tree, or a moody gothic design with deep colors and metallic accents.
- Cute and friendly: Smiling ghosts, candy shapes, bright oranges and purples.
- Classic spooky: Bats, spiders, miniature jack-o’-lanterns, cobweb accents.
- Elegant gothic: Black, silver, and burgundy, with lace, ribbons, and ravens.
- Nature-inspired: Owls, leaves, faux moss, tiny woodland creatures.
Pick a Color Palette
Limiting your color palette to two or three main shades keeps the tree from looking cluttered. Start with a base color, add an accent, and then sprinkle in metallic or neutral touches for depth.
- Traditional: orange, black, and white.
- Mystical: purple, black, and silver.
- Candy shop: orange, lime green, and hot pink.
- Moody forest: deep green, charcoal, and bronze.
Materials and Tools You May Need
You can adapt this craft to almost any budget by using what you already have. Start by checking your recycling bin, holiday storage, and yard before heading to the store.
Possible Tree Bases
- Real tree branches placed in a heavy vase or bucket.
- A small artificial Christmas tree repurposed for Halloween.
- A cone of cardboard or foam covered with painted twigs.
- A bundle of painted sticks tied together like a mini tree.
Decorating Supplies
- Spray paint or craft paint (black, white, metallic, or neon).
- LED string lights or battery-operated fairy lights.
- Cardstock, felt, or foam sheets for DIY ornaments.
- Twine, ribbon, yarn, or fishing line for hanging decorations.
- Glue gun and glue sticks, craft glue, or glue dots.
- Googly eyes, buttons, beads, and sequins for details.
- Small plastic spiders, bats, skulls, or toy animals.
- Stones, sand, or rice to weigh down containers.
Safety Essentials
- Drop cloth or newspaper to protect surfaces while painting.
- Child-safe scissors and non-toxic paints for younger kids.
- Adult supervision when using hot glue, spray paint, or cutting tools.
- Stable, tip-resistant containers for tall branches or trees.
Setting Up the Tree Base
Once you have a plan and the basic materials, it is time to create a sturdy foundation. A stable base makes decorating easier and keeps your tree safe around kids and pets.
Step-by-Step Base Assembly
- Prepare the container: Choose a pot, bucket, or vase that is heavy enough to support the height of your tree. If it is lightweight, add stones or sand to the bottom.
- Arrange the branches: Start with one main branch or the artificial tree trunk, then add smaller branches at different angles to create a full, tree-like shape.
- Secure in place: Fill the container with more stones, sand, or tightly packed newspaper until the branches no longer wobble.
- Optional painting: If you want a solid color tree, paint the branches now and let them dry fully before adding decorations.
| Base Type | Best For | Pros | Considerations |
|---|---|---|---|
| Real branches | Rustic, natural themes | Free, unique shapes, eco-friendly | May shed bark; needs sturdy container |
| Artificial tree | Full, lush, indoor displays | Reusable, stands on its own | Takes more storage space |
| Cardboard cone + twigs | Tabletop displays | Lightweight, cheap | Less durable; avoid heavy ornaments |
| Stick bundle | Minimalist designs | Easy to assemble, sculptural look | Limited surface for hanging decor |
Lighting Your Halloween Tree Safely
Lighting sets the tone for your Halloween tree, whether you want a soft glow or a dramatic, flickering effect. Focus on low-heat, energy-efficient options that are safe for kids to handle.
- Use LED string lights or battery-powered fairy lights instead of old incandescent strands.
- Wrap lights loosely around the trunk and main branches before adding ornaments.
- Hide battery packs behind the tree, in the container, or under decorative fabric.
- Consider flameless candles or tea lights placed near, but not on, the tree for extra ambiance.
Creating DIY Ornaments and Spooky Details
Handcrafted ornaments make your Halloween tree feel personal and memorable. Most decorations can be made with basic shapes and simple materials, which is ideal for kids and beginners.
Simple Ornament Ideas for Kids
- Paper ghosts: Cut out ghost shapes from white cardstock, draw friendly or scary faces, punch a hole at the top, and hang with ribbon or yarn.
- Bats and cats: Use black construction paper or craft foam to cut bat wings or cat silhouettes. Add googly eyes for a playful touch.
- Mini monster faces: Glue scraps of felt, buttons, and yarn onto cardboard circles to make unique monster characters.
- Faux potion bottles: Fill clean, empty spice jars with colored water and glitter, seal tightly, and hang with wire or place at the tree base.
Textured and 3D Decorations
- Wrap a few branches with gauze or torn white fabric to suggest floating spirits.
- Use faux spiderwebs sparingly to avoid tangles but add instant creepiness.
- Attach small plastic spiders, snakes, or insects with hot glue or twist ties.
- Cluster ribbon bows or tulle puffs to fill any bare spots on the tree.
Theme Ideas to Inspire Your Design
Once you have the basics down, you can turn each Halloween tree into a mini story. Choose one main concept per tree, or mix a few for a more eclectic look.
Kid-Friendly Haunted Hideout
For younger children, keep things whimsical rather than terrifying. Focus on smiling characters, bright colors, and soft materials such as felt and pom-poms.
- Use orange, purple, and lime green ornaments.
- Add cartoon-style ghosts, pumpkins, and friendly monsters.
- Top the tree with a felt witch hat or oversized bow.
Gothic Manor Tree
For a more sophisticated display, lean into deep, desaturated tones and vintage-inspired decor. This style works well for entryways, dining rooms, and adult parties.
- Stick to black, burgundy, and silver, with lace or velvet ribbon.
- Hang cameo silhouettes, mini picture frames, and keys.
- Use crows, ravens, or owls as focal ornaments.
Forest of Forgotten Creatures
This nature-inspired theme turns your tree into a dark woodland scene. It suits branches gathered from your yard and works nicely for porch displays.
- Add faux moss and leaves around the base and on some branches.
- Perch small owls, foxes, and other animals among the twigs.
- Use warm white lights to create an eerie but inviting glow.
Balancing Design and Child Participation
With family projects, it is easy for adults to take over in the name of aesthetics. Building a Halloween tree is a chance to prioritize process over perfection and let kids feel proud of their contributions.
- Assign each child their own small branch or section of the tree to decorate freely.
- Provide a mix of “fancy” store-bought elements and homemade crafts.
- Keep a box or basket nearby where kids can toss unused ornaments without cluttering your workspace.
Safety and Practical Tips for Busy Households
A Halloween tree should be magical, not hazardous. A few simple safeguards can help prevent accidents while keeping setup and cleanup manageable.
- Place tall trees away from busy walkways and doors that swing inward.
- Avoid fragile glass ornaments in homes with small kids or curious pets.
- Use removable hooks or command strips if you anchor branches to a wall.
- Unplug lights when you are not home or when everyone goes to bed.
Display Ideas for Different Spaces
You do not need a huge house to enjoy a Halloween tree. Scale your design to match your space, and use height or grouping to make a strong visual impact.
Indoors
- Entry table: A medium-sized tree here welcomes guests and sets the tone for the rest of your decor.
- Mantel or bookshelf: Use small trees in staggered heights for a layered look.
- Dining table: A low, wide tree becomes a dramatic centerpiece for Halloween dinners.
Outdoors
- Place weather-resistant trees on the porch, securing containers with bricks or sandbags.
- Add reflective or glow-in-the-dark details for trick-or-treat visibility.
- Use solar or battery lights so you do not need outdoor outlets.
After Halloween: Storage and Reuse
With a little planning, many elements of your Halloween tree can be stored and reused. This not only saves money but also lets your display evolve from year to year.
- Pack ornaments by theme in small labeled boxes or zipper bags.
- Wrap light strands around cardboard pieces to prevent tangles.
- Consider composting natural branches after the season, then collecting new ones next year.
Frequently Asked Questions About Halloween Trees
How early can a Halloween tree be set up?
Many families start decorating in late September so they can enjoy their tree for the entire spooky season. If you like to switch themes, you can start with a general autumn look and then add scarier elements as October progresses.
Do you need a large budget to make a Halloween tree?
Not at all. You can create an impressive tree using fallen branches, recycled containers, and homemade paper or fabric ornaments. A single string of lights, some paint, and a bit of imagination go a long way.
Is it better to buy or make ornaments?
A mix of both usually works best. Handmade ornaments showcase your family’s creativity, while a few store-bought pieces can serve as focal points and help anchor your theme.
How can a Halloween tree be made toddler-friendly?
Keep fragile or small pieces near the top and use soft, lightweight materials within reach. Felt shapes, large pom-poms, and chunky ribbons are safer than tiny plastic pieces or glass ornaments.
Can a Halloween tree transform into a different holiday decoration?
Yes. If you use a neutral base, such as black or natural branches, you can swap out the ornaments for autumn leaves in November or winter decor in December. This extends the life of your craft and reduces storage needs.
Bringing Your Haunted Tree to Life
A Halloween tree is more than a decoration; it is an activity that invites your household to slow down and make something together. Whether you prefer eerie elegance or goofy ghosts, the process of planning, crafting, and decorating will become part of your seasonal memories.
Start small with a tabletop tree or go all out with a towering haunted centerpiece. Either way, you will end up with a custom display that reflects your style, delights your visitors, and makes Halloween feel just a bit more enchanted.