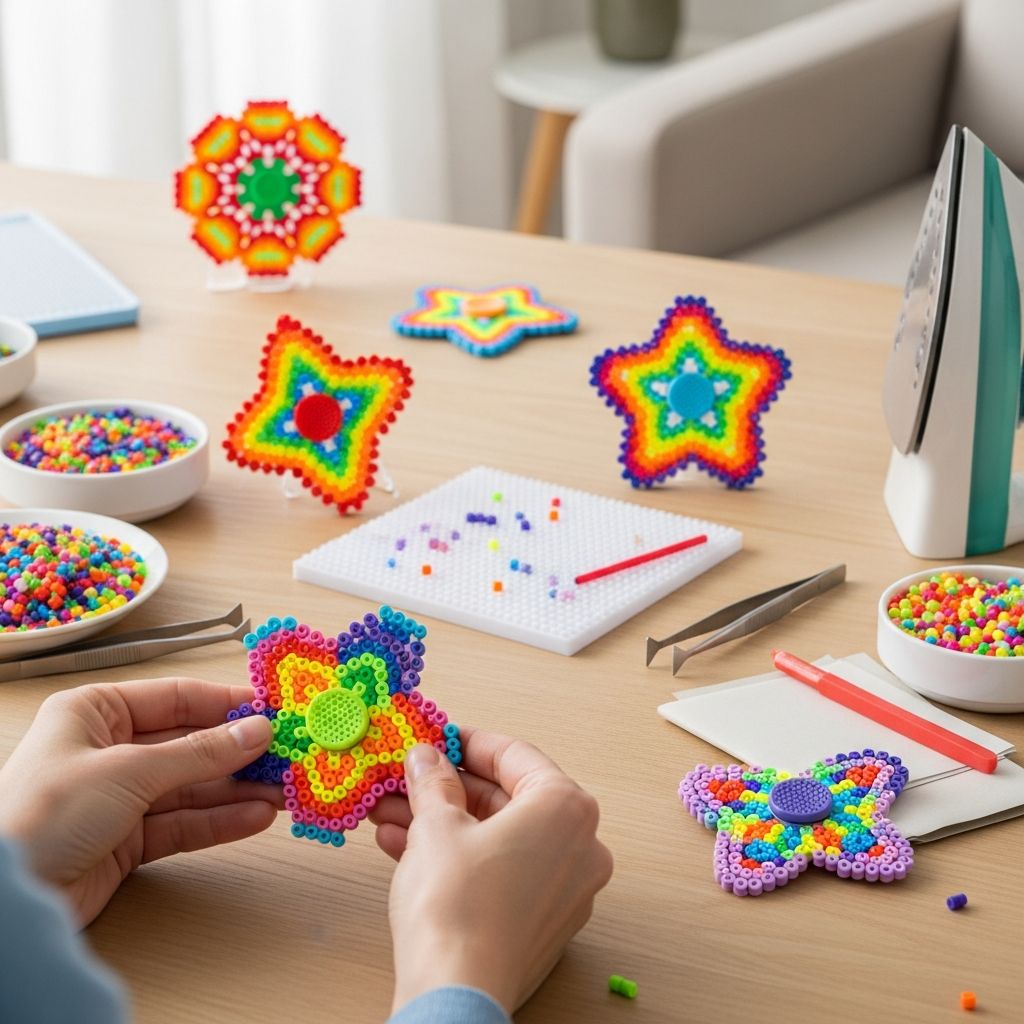
Fidget toys went from playground fad to everyday staple almost overnight, and for many families they are now part stress-reliever, part creative outlet. Instead of buying yet another plastic spinner, fuse beads (often known as perler beads) let you transform this popular toy into a colorful craft project kids can design themselves. This guide walks you through every step, from planning a design to spinning a finished toy that actually works.
Below you will find supply suggestions, step-by-step instructions, design ideas, safety tips, and answers to common questions, all organized for busy parents and curious kids. Use it as a weekend project plan, a rainy-day boredom buster, or a hands-on STEM activity that sneaks in learning while everyone is having fun.
Why Make Your Own Fidget Spinners?
Homemade fuse bead spinners are more than just toys; they give children a chance to experiment with patterns, practice fine-motor control, and feel proud of something they built from scratch. Because every spinner is designed and assembled at home, each one can reflect a child’s favorite colors, shapes, and themes.
- They are inexpensive: once you have beads and a pegboard, each spinner typically uses only a small handful of beads plus a bearing or simple substitute.
- They are customizable: kids can create geometric patterns, rainbow effects, initials, or character-inspired color schemes.
- They encourage creativity and problem-solving: children can adjust balance, weight, and symmetry to improve how the toy spins.
Basic Materials and Optional Upgrades
You do not need a specialized kit to start, but you do need a few key items. Some are essential for any version of a fuse bead spinner, while others simply make the experience smoother or the final toy more impressive.
Core Supplies You Will Need
- Fuse beads (also called perler beads or melty beads) in a variety of colors.
- Pegboard (round boards are easiest for balanced spinners, but you can experiment with other shapes).
- Heat-safe ironing surface.
- Ironing paper or baking parchment to place between beads and iron.
- Household iron with adjustable temperature settings.
Hardware for Spinning and Weight
- 1 skate bearing or similar small bearing per spinner (for smooth, long spins).
- Optional: small metal washers or coins to add weight to the outer edges.
- Strong craft glue or a hot glue gun (adult operation only) for attaching hardware.
Optional Tools and Extras
- Craft tweezers to place beads more precisely.
- Fine-tip permanent markers to label designs or add tiny details to the fused surface.
- Clear sealant spray for added durability (used outdoors and by an adult).
Planning a Stable Spinner Design
Before anyone starts placing beads, it helps to talk briefly about what makes a spinner work well. Good designs are symmetrical, balanced, and thick enough to stay sturdy after ironing. Even young children can understand the basics if you focus on simple shapes and matching patterns.
Key Design Principles
- Symmetry: If the design looks the same when rotated (for example, three or four arms that match), it is more likely to spin smoothly.
- Center opening: Leave space in the very middle for a bearing or for the pinched fingers that will hold the spinner.
- Consistent weight: Arms should be roughly the same length and contain a similar number of beads and weights.
Parents can trace a light outline on paper first and then slide it under a transparent pegboard so that kids can follow the guide. Older children may prefer to sketch their ideas in a notebook, test different arm shapes, and see how many variations they can invent.
Step-by-Step: Building the Fuse Bead Shape
Once the general design is ready, it is time to start placing beads. This is the most relaxing part of the project and a great opportunity to put on some music, chat, and let creativity flow. Younger crafters may need help keeping the center opening clear and mirroring patterns across the design.
- Prepare the workspace. Set the pegboard on a flat, heat-safe surface and make sure beads are sorted into easy-to-reach containers.
- Create the central ring. Mark where the bearing or finger hold will sit and avoid filling those pegs so that the final piece has a clean hole.
- Build out the arms. Starting from the central ring, extend arms evenly in two, three, or four directions using the same length and number of beads on each side.
- Fill in decorative patterns. Add stripes, dots, gradients, or shapes on each arm, making sure both sides of the spinner stay visually and physically balanced.
- Double-check for gaps. Inspect the design from all angles to confirm there are no missing beads that might weaken the structure.
Safely Fusing the Beads
Melting the beads together is the only step that involves heat, so this part must be supervised and, for many families, handled entirely by an adult. Children can watch from a safe distance and observe how heat turns a loose pattern into a solid shape.
Ironing Instructions
- Preheat the iron to a medium setting without steam.
- Place a sheet of ironing paper or parchment on top of the beads to protect both iron and project.
- Press the iron gently over the entire design using slow, circular motions for several seconds at a time.
- Lift the paper occasionally to check whether the beads are melting together and the holes are becoming slightly smaller.
- When all beads appear fused on the top, remove the design from the pegboard, cover the second side with paper, and lightly iron again for extra strength.
Allow the fused piece to cool completely before touching it with bare hands. Some families like to press the warm spinner between two heavy books so that it stays perfectly flat as it cools.
Adding Bearings, Weights, and Grips
With the colorful base finished, it is time to transform it from a decorative disk into a functioning toy. This section covers different ways to add spinning hardware, depending on what materials you have available at home.
Using a Skate Bearing
- Test the fit of the bearing by gently sliding it into the center opening. If it does not fit, very carefully sand or trim the inner edge of the hole, or consider making a fresh design with a slightly larger opening.
- Once the bearing fits snugly, remove it and add a thin line of glue around the inside edge of the hole (not inside the bearing).
- Press the bearing into place and hold it steady until the glue begins to set.
- Flip the spinner over and repeat with a thin line of glue around the seam on the other side for extra security.
DIY Finger Grips
If you want a more comfortable hold, you can add simple finger grips made from buttons, small circles of fused beads, or bottle caps glued on either side of the bearing. The goal is to create two flat pads that your thumb and finger can pinch while the outer ring spins freely.
- Cut or fuse two small circles roughly the same size as the bearing.
- Glue one to each side of the bearing, keeping glue away from the moving inner ring.
- Press and hold until the grips feel secure and even.
Balancing and Weighting the Spinner
At this stage the spinner should turn, but it may feel slow or wobbly. Small adjustments can dramatically improve performance, and older kids often enjoy treating this as a mini-engineering challenge.
Simple Balance Check
- Give the spinner a gentle flick and watch whether it rotates smoothly or visibly wobbles.
- If one arm seems heavier, compare bead counts or added pieces and remove or add beads in other arms to match it.
Adding Outer Weights
To increase spin time, you can attach small metal pieces near the ends of each arm. Keep them equal in size and distance from the center to maintain balance.
- Glue one washer or coin to the outer tip of each arm.
- Let the glue dry fully, then test the spin again and adjust if needed.
Customization Ideas Kids Love
Once everyone understands the basics, the fun really begins. Encourage children to think of each spinner as a tiny canvas that can reflect favorite hobbies, characters, or color schemes. No two toys need to look alike, even if the underlying structure is similar.
Creative Theme Suggestions
- Galaxy spinner: Use deep blues, purples, and scattered white beads to mimic stars.
- Sports team colors: Reproduce team jerseys or logos using stripes and borders.
- Monogrammed spinner: Place an initial in the center and keep arms in coordinating shades.
- Seasonal designs: Try autumn leaves, snowflake patterns, or bright summer citrus colors.
Encourage kids to sketch their favorite ideas in a notebook before moving to the pegboard. This gives them freedom to experiment without worrying about knocking beads out of place and helps them plan more complex patterns.
Sample Design Comparison
The table below shows how a few simple choices—number of arms, colors, and weights—change the final look and feel of a spinner. Use it as a starting point when planning your own versions at home.
| Design Style | Number of Arms | Color Approach | Suggested Weights | Best For |
|---|---|---|---|---|
| Classic tri-arm | 3 | Three repeating color blocks | Small washers on each tip | Longer spin times and easy balancing |
| Four-point star | 4 | Alternating light and dark colors | Coins near, not at, the very edges | Visually striking designs and gentle spins |
| Compact disk | 0 distinct arms | Concentric circles of color | Heavier ring of beads around the outside | Beginners who want a sturdy first project |
Safety, Clean-Up, and Storage Tips
Like all small-piece crafts, fuse bead spinners call for common-sense precautions. A short conversation about safety before starting keeps the project fun and stress-free for everyone.
- Limit the activity to children old enough not to place beads or small hardware in their mouths.
- Assign one adult to handle all ironing and any hot glue work.
- Protect tables with a mat or cloth, and sweep carefully afterward to pick up stray beads.
- Store finished spinners and loose materials in labeled containers with lids, out of reach of toddlers and pets.
Using Fidget Spinners Constructively
Fidget spinners can be more than simple toys when used thoughtfully. Many families find them helpful as quiet tools during homework, reading time, or stressful transitions, especially for children who focus better when their hands are busy.
- Introduce a simple rule that spinners may be used during independent work as long as they are not tossed or shared mid-task.
- Offer them as part of a calm-down corner along with coloring pages, headphones, or favorite books.
- Encourage children to notice when spinning helps them relax and when it becomes distracting, and to adjust accordingly.
Frequently Asked Questions
Do I need a bearing for the spinner to work?
No, a bearing is not absolutely required, though it usually produces the smoothest and longest spins. For a simpler version, some families create a small fused bead cylinder in the center and spin the outer ring around it, or they leave a large central hole that can be pinched between fingers without hardware.
Can very young children make these spinners?
Preschool-aged children can help sort beads by color and place them on the pegboard, but small parts and hot tools mean an adult must supervise closely. Many families let younger kids design the color pattern while an older sibling or adult handles the ironing and gluing steps.
How long does a typical project take?
A straightforward design can be completed in under an hour, including planning, placing beads, ironing, and attaching a bearing. More detailed patterns or experiments with different weights may stretch the project into an afternoon, which can be ideal for a rainy day or school break.
What if the spinner bends or warps?
If the fused piece cools in a slightly curved shape, you can gently reheat it by placing it between paper and pressing briefly with the iron, then immediately putting it under a heavy book until it cools flat. Severely warped pieces may work better as keychains or ornaments rather than spinners, so consider turning mistakes into new projects.
Are these safe to bring to school?
Every classroom and school has its own rules about toys and fidgets, so it is best to check with teachers before sending homemade spinners in backpacks. Even when allowed, it helps to talk with children about using them quietly and putting them away when asked so that they stay a helpful tool rather than a distraction.
Can the designs be reused or changed later?
Once beads are fused they cannot be separated back into individual pieces, but you can remove bearings and weights and attach them to new designs. Many kids enjoy building a small collection, swapping hardware among their favorite creations, and comparing which designs spin the best.
Turning Craft Time Into Lasting Memories
Fuse bead fidget spinners combine the simple joy of hands-on crafting with the excitement of building a real working toy. Children get to see how their design choices influence balance and motion, while adults gain an engaging activity that can fill an afternoon without relying on screens.
Once your family has mastered the basics, you can expand into themed sets, gifts for friends, or even a friendly home “spin-off” contest to see whose design stays in motion the longest. However you use them, these small, colorful creations often become big conversation starters and favorite pocket companions.