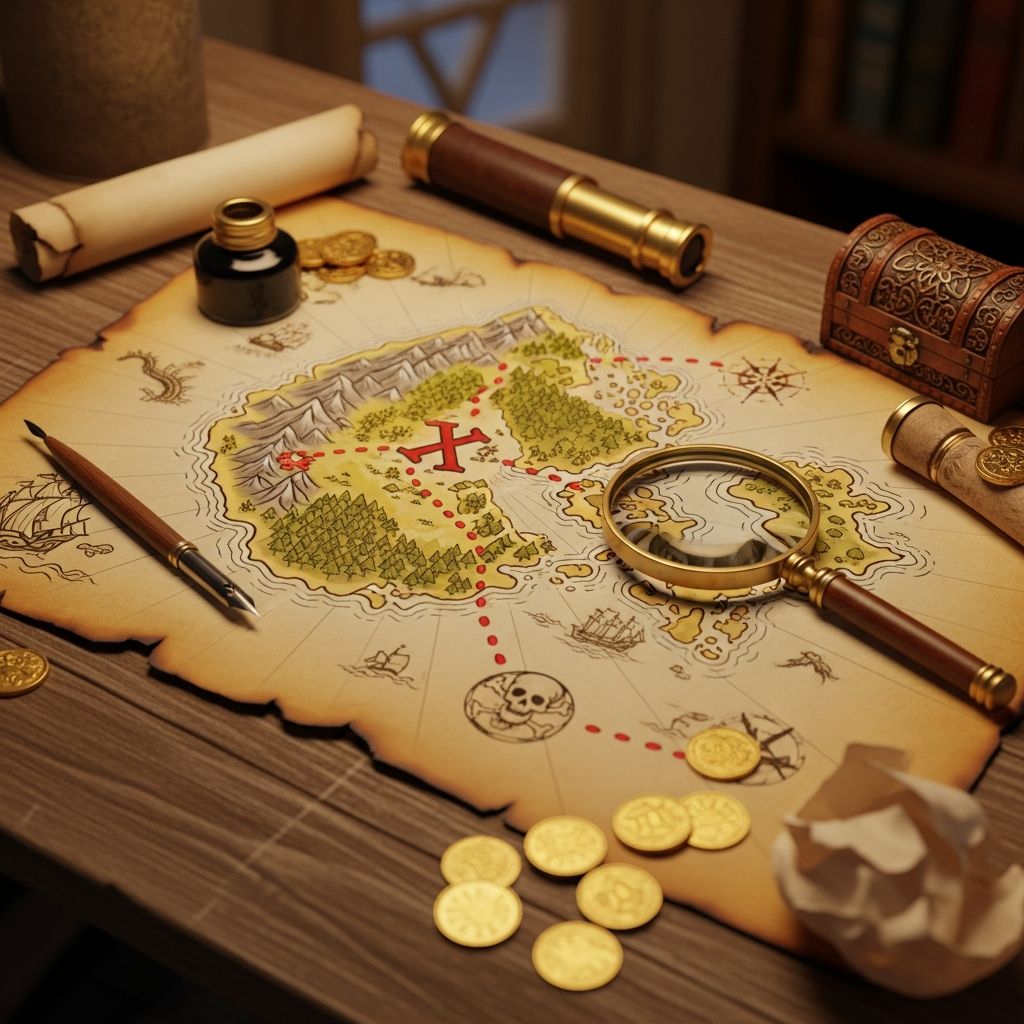
Pirate treasure maps transform ordinary afternoons into legendary adventures, and you do not need fancy supplies or artistic skill to make them. With a few household materials and a bit of imagination, anyone can design a map that sends kids (and enthusiastic adults) on a swashbuckling search for hidden loot.
Why Pirate Maps Are Perfect for Kids
Pirate maps are more than just a fun prop; they are a playful way to build real skills.
- Encourages problem-solving: Kids learn to interpret symbols, follow directions, and connect clues logically.
- Boosts creativity: Drawing islands, monsters, and secret coves lets children invent their own stories.
- Gets them moving: Treasure hunts tempt even reluctant kids away from screens and into active play.
- Flexible for any group: Maps can be as simple or as complex as you like, making them suitable for preschoolers through tweens and beyond.
Core Materials You Will Need
Most pirate maps can be made with items already in your home. Mix and match depending on what you have on hand.
- Plain white or brown paper (printer paper, kraft paper, or a paper grocery bag)
- Pencils, markers, crayons, or colored pencils
- Tea or coffee for aging the paper (optional but fun)
- A lighter or candle for singed edges (adults only, and strictly optional)
- Paintbrush or sponge for staining
- Ruler (for borders and straight paths)
- Stickers, stamps, or ink pads for decorative symbols (optional)
| Material | Budget Option | Upgrade Option | Notes |
|---|---|---|---|
| Paper | Printer paper | Watercolor or parchment-style paper | Heavier paper looks more “authentic” and holds up better outdoors. |
| Drawing tools | School markers or crayons | Fine-tip pens and brush markers | Fine tips are helpful for tiny details like compass roses and labels. |
| Aging effects | Tea bags or coffee grounds | Watercolor washes, distress ink pads | Always test on scrap paper first so the map does not tear. |
| Decoration | Hand-drawn doodles | Themed stamps or pirate stickers | Useful when working with young kids who prefer sticking to drawing. |
Step-by-Step: Aging Your Paper
An aged, crinkled sheet of paper instantly looks like it has traveled across the high seas. Try this simple process before drawing your map details.
- Crinkle and smooth: Gently crumple your paper into a loose ball, then unfold and flatten it. Repeat if you want deeper creases.
- Prepare a stain: Brew strong tea or coffee and let it cool. Pour into a shallow tray or bowl.
- Apply color: Dip a brush or sponge into the liquid and sweep it across the paper, leaving some areas lighter and some darker.
- Dry completely: Lay the sheet flat on a protected surface or baking tray. You can speed things up with a hair dryer set on low.
- (Optional) Distress the edges: Tear the borders gently with your hands or carefully singe the edges under strict adult supervision.
If you are working with very young children, skip any open flame and simply use tearing and tea stains for a rugged look.
Planning the Adventure First
Before drawing a single palm tree, decide what your treasure hunt will look like in the real world. A thoughtfully planned route makes the map feel surprisingly convincing.
- Walk the area you plan to use (house, yard, classroom, park) and note 5–10 distinctive spots.
- Assign each spot a clear symbol: a star for the couch, a wave for the bathtub, a tree icon for the backyard oak.
- Choose a final treasure location that is safe, accessible, and big enough to hide a small box or bag.
- Decide whether the map shows all locations at once or whether kids earn new mini-maps at each stop.
Designing the Layout of Your Map
Now that you know the real-world path, translate it into a simplified drawing. The map does not need to be geographically perfect; clarity and charm matter far more than accuracy.
- Outline the land: Draw an irregular island, a crooked coastline, or a rough floor plan of your house.
- Add a border: Lightly draw a frame around the page, leaving space for labels and decorative details.
- Place key landmarks: Add 5–8 noticeable features (large tree, sofa, playground slide) in roughly the correct positions.
- Draw the path: Use dashed or dotted lines to connect the starting point to each clue and finally to the treasure.
- Mark the treasure: Finish with a bold “X” or a tiny treasure chest icon at the final location.
Creating Symbols and a Simple Legend
Symbols help younger children read the map even if they cannot handle long written clues. A tiny legend in one corner keeps everything clear.
- Use a skull for dangers such as “do not enter” rooms or off-limits areas.
- Draw simple icons for everyday objects: a rectangle with cushions for a couch, a book outline for a bookshelf, a swing for the playground.
- Add a mini legend box listing a handful of key symbols (for example, wave = bathroom, star = toy chest, tree = backyard tree).
- Consider color-coding: blue for water, green for safe zones, red for important clues or warnings.
Adding Classic Pirate Details
This is the part that turns “rough diagram” into “real pirate treasure map.” Encourage kids to embellish freely.
- Compass rose: Draw a simple four-point compass with N, S, E, W to introduce basic direction concepts.
- Sea monsters and ships: Add a sea serpent in the bathtub, an octopus in the sink, or a sailing ship cruising along the hallway.
- Named locations: Rename familiar spots with dramatic titles like “Dragon’s Den” for the basement or “Mermaid Lagoon” for the kiddie pool.
- Decorative borders: Frame the map with ropes, anchors, shells, or repeating patterns.
Writing Clues That Match the Map
For older kids and mixed-age groups, pair the map with written or spoken clues. These can be silly, poetic, or disguised as puzzles.
- Use short rhyming couplets that hint at a location without naming it directly.
- Introduce simple directional language: “Take ten big steps north from the kitchen table.”
- Offer multiple-choice hints for younger players: “Is the treasure by the couch, the fridge, or the bed?”
- Hide mini scrolls at each stop that lead to the next place, keeping excitement high all the way to the treasure.
Adapting Pirate Maps by Age Group
The same basic activity can be tailored to fit toddlers, early readers, or older kids who crave more challenge.
| Age Range | Map Style | Clue Complexity | Adult Involvement |
|---|---|---|---|
| 3–5 years | Large icons and bright colors; few landmarks | Picture-based hints, verbal guidance | High: adults read clues and guide closely |
| 6–8 years | Simple compass rose, more landmarks | Short written clues, easy rhymes | Moderate: adults check safety and help read |
| 9–12 years | Detailed maps, multiple paths, secret symbols | Riddles, codes, coordinates, and logic puzzles | Low: adults set up, kids lead the adventure |
Using Pirate Maps at Home
Once your map is ready, there are countless ways to use it beyond a one-time treasure hunt. Incorporate it into everyday routines to keep things playful.
- Hide small toys, costume jewelry, or chocolate coins and run a quick hunt on rainy days.
- Turn cleanup into a game by mapping “treasure spots” where toys should be returned.
- Create a bedtime map that leads through pajamas, tooth brushing, and story time as “quests.”
Ideas for Parties and Classrooms
Pirate treasure maps scale beautifully for larger groups and themed events. Planning ahead keeps things organized while still feeling adventurous.
- Split kids into small crews, each with a slightly different map that ultimately converges on the same treasure chest.
- Use different ink colors or stickers to mark clues assigned to each group so they do not accidentally steal one another’s hints.
- In a classroom, tie each clue to a curriculum topic: math problems, spelling words, or geography facts.
- End with a communal “booty chest” filled with stickers, pencils, temporary tattoos, or small prizes rather than candy alone.
Treasure Ideas That Go Beyond Candy
The treasure at the end does not have to be sugary to feel rewarding. Try including a mix of physical items and special experiences.
- Homemade coupons: choose tonight’s movie, pick dessert, stay up 15 minutes later.
- Craft kits: beads and string for bracelets, mini notebooks, or themed stickers.
- Dress-up accessories: eye patches, bandanas, foam swords, or costume rings.
- Books or comics with adventure themes for older treasure hunters.
Safety Tips for Pirate Adventures
Excited kids can move fast when treasure is involved, so build safety into the design of your map and clues.
- Avoid locations near stairs, sharp corners, or breakable objects.
- Set a clear rule that running is not allowed indoors during the hunt.
- If using outdoor spaces, keep the area visible from where adults are stationed.
- Skip any fire-based aging techniques when kids are present; prepare the paper in advance if desired.
Making It Extra Special for Talk Like a Pirate Day
If you are celebrating a specific pirate-themed holiday or party, lean into the theatrical side of the experience.
- Announce each clue in your best pirate voice and encourage kids to respond in character.
- Let children design their own mini-maps after the main hunt, using the same materials and techniques.
- Set up a photo corner with pirate props and hang finished maps as a backdrop.
Simple HTML Structure for Online Sharing
If you are writing about your pirate map activity on a blog or family website, using clear HTML structure helps search engines and readers understand your content. Use one main <h1> for the article title, several <h2> and <h3> tags for sections, and organized lists for steps and supplies. Including descriptive alt text for any map photos also improves accessibility and discoverability.
FAQs About DIY Pirate Treasure Maps
How long does it take to make a pirate map?
For a basic map without elaborate aging, you can sketch landmarks and a path in about 20–30 minutes. If you include tea staining, drying time, and decorative details, plan for 45–60 minutes from blank paper to finished treasure map.
Do I need artistic talent to draw a convincing map?
Perfect drawing skills are not necessary; simple shapes and stick-figure icons are enough to guide kids. The charm comes from creativity, playful names, and the excitement of the hunt itself, not fine art quality.
Can pirate maps be reused?
Yes, you can reuse a sturdy map many times by changing the location of the treasure and adjusting your written or verbal clues. Laminating the map or slipping it into a plastic sleeve helps it survive multiple adventures, especially outdoors.
What if I do not have tea or coffee for aging?
You can still create an aged effect by crumpling the paper, rubbing it lightly with a brown or yellow crayon, or brushing it with diluted watercolor paint. Some kids even prefer the brighter look of unaged paper, so treat this step as optional, not required.
How can I include older kids or adults?
To keep older participants engaged, add secret codes, coordinate-style clues, or multi-step puzzles that require collaboration. You can also assign them roles as captains or mapmakers who help design challenges for younger crew members.
Bringing It All Together
With a sheet of paper, a bit of color, and some imaginative planning, any home, classroom, or backyard can turn into a pirate’s playground. The maps you create today can become keepsakes, storytelling prompts, and the starting point for many future adventures on the high seas of pretend play.