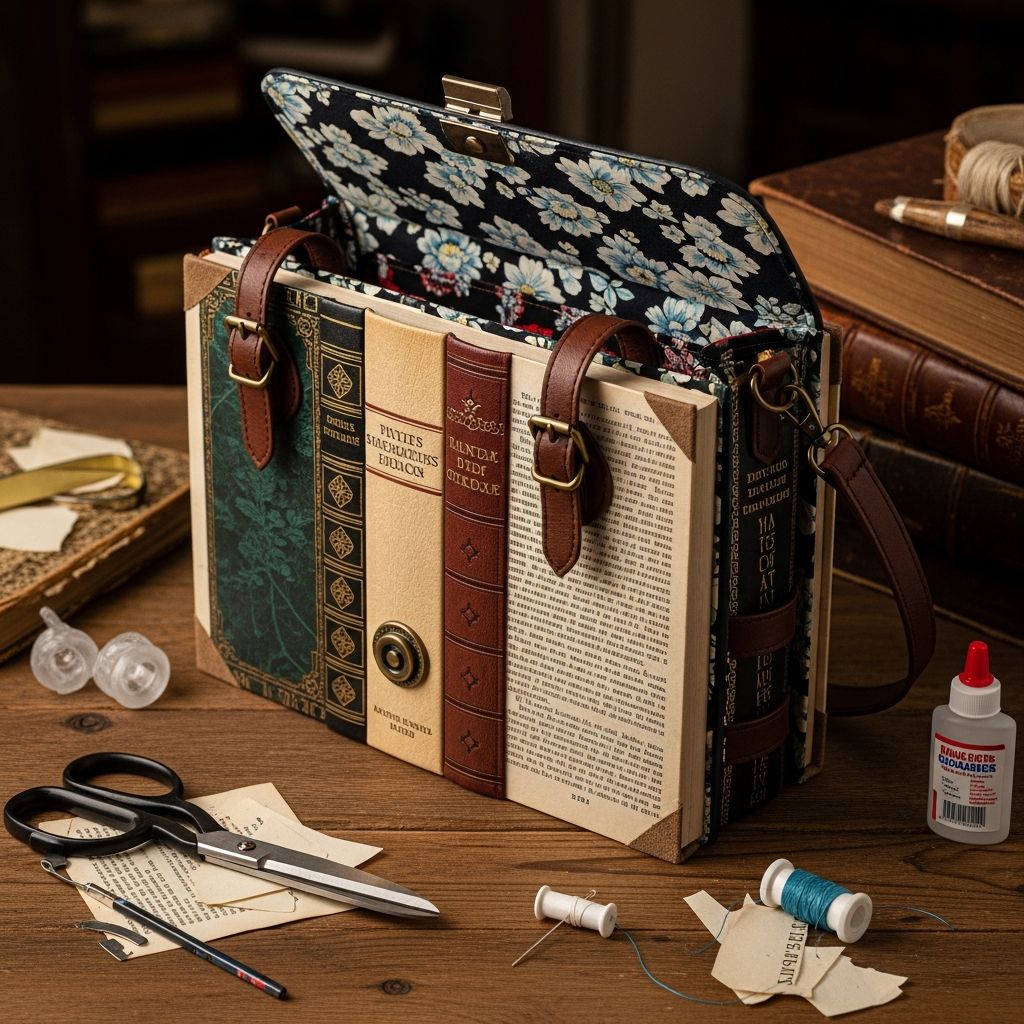
Old, damaged, or unwanted books do not have to end their lives in dusty boxes or recycling bins. With a bit of creativity, you can transform a worn hardcover into a stylish purse that is both functional and conversation-worthy. This guide walks through every step of turning a book into a handbag, from choosing the right cover to adding straps, closures, and lining.
Whether you are an experienced crafter or just starting out, this project is approachable, highly customizable, and surprisingly sturdy when done with care. You will also discover multiple design options, safety tips, and answers to common questions about durability, cleaning, and ethical choices.
Why Upcycle Books into Purses?
Repurposing books into purses blends love for literature with a passion for handmade fashion. Instead of discarding damaged titles, you can give them a new life as everyday accessories that reflect your personality and style.
- Reduce waste by reusing covers that might otherwise be thrown away.
- Create a unique accessory that cannot be found in any store.
- Turn sentimental books with torn pages into keepsakes you can actually use.
Choosing the Right Book for Your Project
The book you select will determine the size, shape, and overall look of your purse. Not every volume is a good candidate, so it helps to know what to look for before you start cutting or gluing.
Ideal Book Characteristics
- Hardcover binding: Softcovers are usually too flimsy for daily use; a rigid cover gives structure to the purse.
- Moderate size: A book roughly in the range of a standard novel or small textbook works well for most people’s carrying needs.
- Interesting cover design: Vintage typography, bold colors, or iconic titles make the finished purse stand out.
- Already damaged pages: Using books with torn or stained pages helps avoid destroying intact, valuable volumes.
Books to Avoid
- Rare, collectible, or historically significant books.
- Volumes with mold, strong mildew odor, or signs of insect damage.
- Books with very brittle covers that crack easily when you open them wide.
Essential Tools and Materials
Before beginning, gather all tools and supplies so you can work safely and efficiently. Many items may already be in your craft stash or home toolkit.
| Item | Purpose | Notes |
|---|---|---|
| Hardcover book | Forms the outer shell of the purse | Choose size and design that match your style |
| Fabric for lining | Creates the soft interior compartment | Cotton or canvas is easy to sew and glue |
| Fabric for side panels | Closes the gap between front and back covers | Medium-weight fabric helps the purse hold its shape |
| Heavy-duty glue | Attaches fabric to the book covers | Use a strong craft or fabric adhesive |
| Handles or strap | Allows you to carry the purse | Can be store-bought, handmade fabric, or chain |
| Closure (magnetic snap, button, or clasp) | Keeps the purse securely closed | Choose based on skill level and desired look |
| Cutting tools | Remove pages and trim fabric | Use a craft knife and sharp scissors |
Optional items include interfacing for extra stiffness, decorative trim for the edges, and clear sealer for protecting the book cover from wear and moisture.
Preparing the Book Cover
This phase transforms the book from a reading object into a structural shell for your new purse. Work slowly and carefully to avoid tearing the spine or damaging the cover artwork.
Step 1: Remove the Pages
- Open the book roughly in the center and gently press along the inner hinge to reveal the gap between the block of pages and the cover.
- Use a craft knife to cut along the endpapers near the spine, staying as close to the page block as possible.
- Work slowly from top to bottom on both the front and back sides until the entire block of pages lifts out, leaving only the empty hardcover.
Save the loose pages for future projects such as collages, bookmarks, or gift tags. This keeps waste to a minimum and can inspire even more upcycled crafts.
Step 2: Reinforce the Spine
- Open the empty cover and inspect the spine for cracks or soft spots.
- If needed, apply a strip of strong tape or a piece of lightweight cardboard glued along the inside spine.
- Allow any adhesive to dry completely before moving on so the spine does not shift during later steps.
Designing and Cutting the Side Panels
The side panels are crucial because they define how wide the purse opens and how much it can hold. They also keep items from falling out through the gaps between front and back covers.
Creating a Paper Template
- Open the book to the angle you want your purse to open, then stand it like a tent on a piece of scrap paper.
- Trace the triangular shape formed between the covers on one side, including the height of the book and the width of the opening.
- Add a narrow border around the shape to serve as a seam or gluing allowance.
- Cut out the paper shape and test-fit it inside the book. Adjust until it fits smoothly from one edge of the cover to the other.
Transferring the Template to Fabric
- Pin the paper template to your chosen side-panel fabric.
- Trace around it and cut two identical pieces, one for each side of the purse.
- If the fabric frays easily, finish the edges with a zigzag stitch or fabric sealant before attaching.
Building the Fabric Lining
The lining is both practical and decorative. It hides any reinforcements, protects your belongings from rough cardboard edges, and offers an opportunity to introduce color, pattern, or texture.
Measuring the Interior
- Lay the book cover fully open on your lining fabric.
- Trace a rectangle that matches the outer shape, then subtract a small margin so the lining sits neatly inside without buckling.
- Cut one large rectangle, or two pieces that will meet at the spine if that feels easier to manage.
Assembling the Lining Pocket
You can keep the interior simple or add structure and pockets for organization. A basic lining still benefits from a few thoughtful details.
- Fold and press the top edge of the fabric where it will meet the book’s opening to create a clean line.
- Stitch the corners of the lining to form a shallow box that matches the footprint of the book.
- Insert optional details such as a small card pocket or pen loop before attaching the lining to the cover.
Attaching Side Panels and Lining
Once side panels and lining are ready, they must work together as a single interior unit. This step requires patience, but it is what makes the purse strong and visually polished.
Joining Side Panels to the Lining
- Align one fabric side panel with the matching side edge of the lining piece, right sides together.
- Sew or glue along the edge, depending on your tools and comfort level, to connect the panel and lining.
- Repeat on the other side, ensuring the side panels are oriented the same way so the angles match the book opening.
When finished, you should have a single fabric “box” with two triangular sides and a flat bottom that fits snugly inside the open book cover.
Securing the Fabric Interior to the Book
- Apply a thin, even layer of strong adhesive to the inside of one cover.
- Press the corresponding lining section firmly into place, smoothing out wrinkles from the center outward.
- Repeat on the other cover and along the spine area, taking care not to let glue ooze into visible areas.
- Support the purse in an open position and allow it to dry completely according to the adhesive instructions.
Adding Handles, Straps, and Closures
At this stage, the purse has structure but still needs a reliable way to carry and close it. The hardware and strap style you choose can shift the look from casual book bag to elegant evening clutch.
Handle and Strap Options
- Short rigid handles: Ideal for a handbag look; attach with small metal rings, fabric loops, or reinforced holes near the top edge of the covers.
- Crossbody strap: Use a long fabric strap, chain, or repurposed belt attached to small D-rings on the sides.
- No strap: Skip handles entirely to create a handheld clutch that is tucked under the arm.
Choosing a Closure Style
- Magnetic snap: Simple to use and easy to install between layers of fabric on the inside of the cover.
- Loop and button: A fabric loop sewn into the lining that slips over a decorative button on the front.
- Clasp or latch: Metal hardware for a more polished or vintage appearance, ideal for experienced crafters.
Whichever option you choose, position the closure carefully so the covers meet neatly without straining the spine when shut.
Decorative Finishing Touches
Once the purse is structurally complete, you can personalize it with embellishments, protective coatings, and design flourishes that reflect your style.
- Add lace, ribbon, or decorative trim along the outer edges for a softer look.
- Use clear, matte sealer on the cover to help resist scuffs, dirt, and moisture.
- Attach small metal corners to reinforce delicate cover edges or to create a vintage-inspired finish.
- Consider stenciling or hand-painting subtle designs on plain covers to make them more striking.
Care, Durability, and Everyday Use
A well-made book purse can last for years if treated thoughtfully. Because the outer shell is made from paper board covered with cloth or paper, it is more delicate than a typical leather or synthetic bag.
- Avoid overloading the purse with very heavy objects such as large water bottles or heavy textbooks.
- Keep it away from rain and puddles; if it does get damp, let it air-dry completely before using again.
- Store it upright or lying flat rather than stacked beneath heavy items to prevent warping.
Ethical and Creative Considerations
Some people feel uneasy about cutting into books, so it helps to make mindful choices. Focus on titles that are already damaged, outdated, or widely available in multiple formats.
You can also incorporate the pages into complementary projects—such as matching bookmarks or tags—to ensure the entire book is used in creative ways rather than discarded.
SEO-Friendly Tips for Sharing Your Project Online
If you plan to post your finished book purse on a blog or social platform, a few simple SEO practices can help others discover your work. Thoughtful descriptions and tags make your tutorial or photos more visible and useful to fellow crafters.
- Use clear, descriptive titles such as “DIY Upcycled Book Purse” or “How to Turn an Old Hardcover into a Handbag.”
- Include phrases people might search for, like “recycled book crafts” or “literary fashion accessories,” in your introduction and headings.
- Add alt text to images describing the steps shown, materials used, and final result.
- Link to related craft projects, such as fabric tote tutorials or other upcycling ideas, to keep readers engaged.
Frequently Asked Questions
Is it okay to cut up a book for this project?
Using damaged, outdated, or duplicate books is a practical and respectful approach to upcycling. Many such volumes have little resale or rereading value but can shine as creative accessories when transformed instead of discarded.
Will the purse be strong enough for everyday use?
Strength depends on the original book quality and how carefully you reinforce the spine, attach the side panels, and choose your adhesive. When well constructed and used for light to moderate loads, a book purse can hold essentials like a phone, keys, a small wallet, and cosmetics without issue.
Do I have to sew, or can this be a no-sew project?
Sewing produces a very durable, clean-finished lining, but it is possible to design a mostly no-sew version. Strong fabric glue, pre-made straps, and simple folded pockets can substitute for stitching if you take your time and allow all adhesives to cure properly.
How do I clean a book purse?
Spot-clean the fabric lining with a slightly damp cloth and mild soap, avoiding excess water. For the exterior cover, gently wipe with a dry or barely damp cloth and avoid harsh cleaners that might damage inks or coatings.
Can I resize the project for children?
Yes, smaller hardcover storybooks make charming purses for children, as long as handles are securely attached and the closure is easy for small hands to manage. Be sure to keep the contents light and supervise younger kids when they carry or play with the bag.
Ready to Craft Your Own Storybook Accessory?
Transforming a worn hardcover into a purse is an approachable project that blends creativity, sustainability, and personal style. With thoughtful material choices, careful construction, and a bit of imagination, your next favorite handbag might already be waiting on your bookshelf.