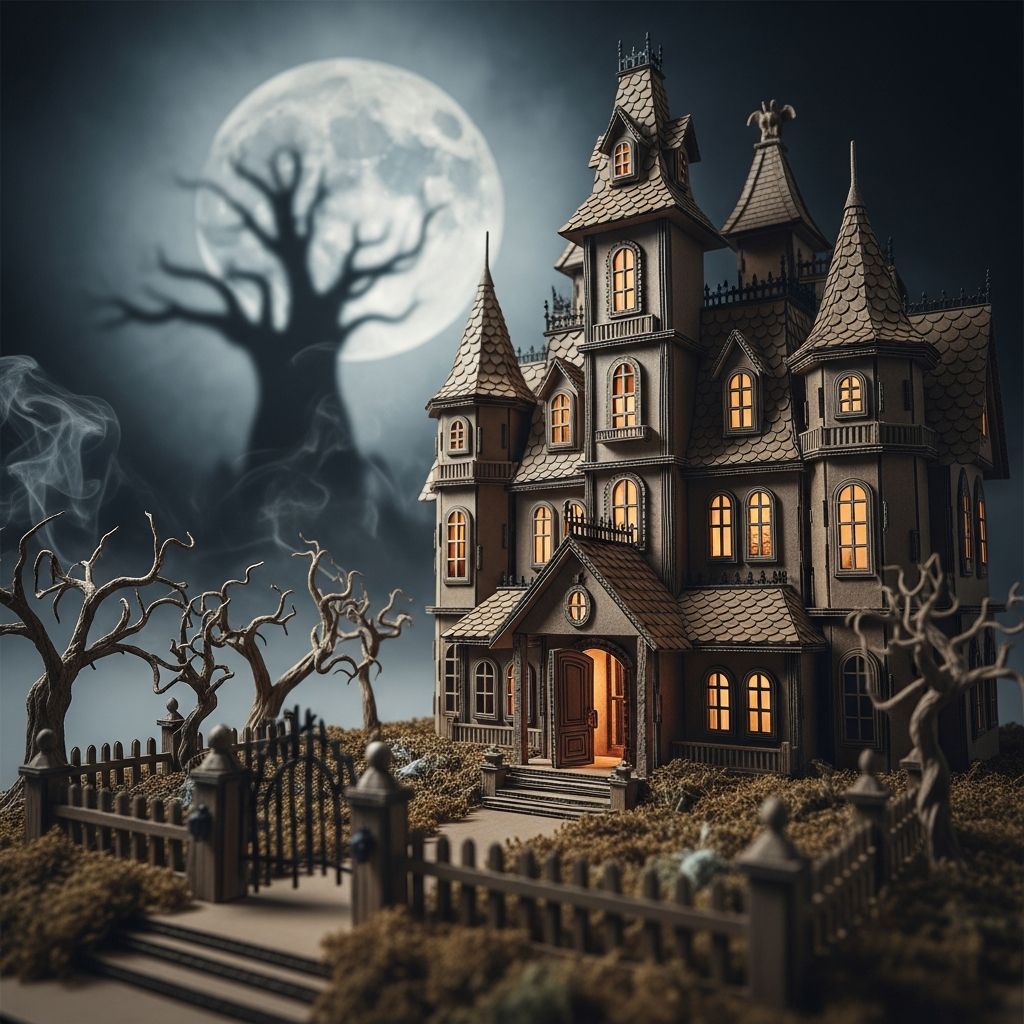
Turning everyday cardboard boxes into a haunted mansion is an affordable and imaginative way to decorate for Halloween and entertain kids at the same time. This guide walks you through designing, building, and decorating a cardboard haunted mansion that can be used as a play space, tabletop décor, or centerpiece for your spooky celebration.
Why Choose Cardboard for Your Haunted Mansion?
Cardboard is light, easy to cut, and usually free, which makes it ideal for experimenting with creative Halloween designs without worrying about expensive mistakes. Because it takes paint, tape, and glue well, you can customize every surface and shape to fit your style, from cute and whimsical to eerie and gothic. Using recycled cardboard also keeps boxes out of the trash and turns them into a hands-on craft that encourages imagination and problem-solving.
Planning Your Spooky Structure
Before scissors and paint come out, take a few minutes to imagine how your haunted mansion will look and how it will be used. Decide if this project will become a walk-in playhouse for kids, a smaller tabletop display, or a decorative prop for your front porch or party table. Having a basic plan helps you choose the right boxes, the right level of detail, and the right amount of time to set aside.
Decide the Size and Purpose
Think about where your haunted mansion will live once it is finished and who will interact with it most. A life-size cardboard house large enough for children to climb into will require sturdy, appliance-sized boxes, while a miniature mansion for a shelf can be built from a single shipping box. Matching the size to the purpose will keep the project manageable and ensure that the final result actually fits in your space.
- For a kids’ playhouse, aim for tall refrigerator or wardrobe boxes.
- For a tabletop centerpiece, select shoeboxes, cereal boxes, or small shipping cartons.
- For a window display, plan something slender and tall that can stand on the sill.
Sketch a Simple Haunted Mansion Blueprint
A quick sketch on scrap paper helps turn vague ideas into something you can build. Draw the front of the house first, including doors, windows, a roofline, and any towers or side wings you might want. Once you like the general look, add side views to indicate where walls and roof pieces will connect so you can tell how many panels you will need from your cardboard stash.
- Mark where windows and doors will go so you remember to cut them before assembly.
- Note any special features, such as a crooked tower, porch, or chimney, right on your sketch.
- Use arrows or numbers to show which walls will be taped or glued together.
Gathering Supplies and Tools
You can create a haunted mansion using only very basic craft supplies, but having the right tools ready before you start keeps the process smoother and safer. Choose kid-friendly options where possible, and keep sharp cutting tools reserved for adults or responsible teens.
Suggested Materials Checklist
Use this checklist to gather everything in one spot before building time. Adjust it according to your design and what you already have at home.
- Cardboard boxes in various sizes (appliance, shipping, or shoe boxes)
- Sturdy tape (painter’s tape, duct tape, or packing tape)
- White glue or hot glue (for adults to use)
- Craft paint or tempera paint (black, gray, white, purple, orange, green)
- Paintbrushes and sponges in different sizes
- Scrap paper, tissue paper, or vellum for windows
- Markers, crayons, or paint pens for details
- Battery-operated tea lights or fairy lights for safe illumination
- Scissors and a craft knife (adults only)
- Ruler, pencil, and eraser for planning cuts
Optional Spooky Extras
Once the core structure is finished, small additions can transform a simple cardboard box into a mansion with personality. Most of these extras can be made from leftover craft scraps, making them budget-friendly and easy to swap out year after year.
- Colored cellophane or candy wrappers for stained glass effects.
- Black construction paper for bats, cats, and fence silhouettes.
- Cotton balls or fiberfill for fog, clouds, or ghostly shapes.
- String, yarn, or thread to hang ghosts or spiders.
- Small plastic figures, faux pumpkins, or bottle-brush trees for the yard.
Design Ideas for Different Age Groups
The beauty of a cardboard haunted mansion is that it can be adapted to fit the age, skill level, and interests of the children involved. Simplify the design for younger kids, and explore more detailed construction and finishing techniques as kids get older or as adults take the creative lead.
| Age Group | Project Style | Recommended Features |
|---|---|---|
| Preschool (3–5) | Simple, sturdy playhouse | Large door, a few big windows, bold paint, stickers |
| Early Elementary (6–8) | Interactive house with details | Shutters, window frames, paper ghosts, basic lights |
| Older Kids (9–12) | More complex mansion | Towers, stairs, hinged doors, removable roof, scene around the house |
| Teens & Adults | Display-worthy miniature or large prop | Textured walls, layered roof tiles, detailed paint effects |
Step-by-Step: Building the Mansion Base
With your sketch and supplies ready, it is time to turn flat cardboard into the shell of your haunted mansion. Work in stages, starting with the main structure so the house can stand up on its own, and then move on to smaller details.
Step 1: Prepare and Shape the Boxes
Begin by flattening your boxes and trimming away any flaps that will not be needed, keeping them nearby for later use as roofs, chimneys, or fences. Measure and cut the main wall panels according to your sketch, trying to keep the bottom edges straight so the house will stand securely. If you plan to make a walk-in structure, test the height by standing a panel next to your child or by setting it where the finished house will sit.
- Use a ruler as a guide when drawing cutting lines to keep edges straight.
- Save long, narrow pieces of cardboard for trimming, stairs, or window frames.
- Mark each panel with a small letter or symbol so you remember how they will connect.
Step 2: Cut Doors and Windows
Doors and windows give your mansion character and allow kids to peek in and out or shine lights from within. Draw the shapes lightly in pencil first, then carefully cut them out, leaving one side attached if you want a door or shutter that swings. For very young children, create large, simple openings that do not have sharp corners and round any pointed edges.
- Cut a large, arched doorway on the front panel for a friendly look.
- Add small, irregular windows in towers to suggest mysterious attic rooms.
- Glue tissue paper or thin fabric inside the windows if you want a glowing effect when lights are placed inside.
Step 3: Assemble the Walls
Once openings are cut, stand the panels upright and start attaching them with tape on the inside and outside corners. Work slowly around the house shape, making sure each connection is secure before moving on to the next wall. If a seam feels weak, reinforce it with an extra layer of tape or a strip of cardboard glued across the joint like a brace.
- Build on a flat surface such as a table or clean floor for better alignment.
- Invite kids to hold panels while an adult tapes, giving them a sense of ownership.
- Check that the base does not wobble, adjusting panels if necessary before adding the roof.
Creating Roofs, Towers, and Porches
The roofline and extra structures are what transform a plain box into something that actually looks haunted. Experiment with uneven angles and a slightly crooked appearance, which are forgiving and add personality to the finished mansion.
Step 4: Build the Roof
Measure the top of your house and cut two rectangles that will meet in the middle to form a peaked roof, allowing a small overhang on each side for a classic house shape. Tape or glue the two roof pieces together along one long edge to form a hinge, then attach this hinge to the top of your walls so the pieces fold down on each side. If you want access to the interior for lights or play, consider attaching only one edge and letting the other side rest in place so it can be lifted like a lid.
- Cut small triangular pieces to fill gaps at the front and back of the roof peak.
- Glue narrow strips of cardboard as roof “shingles” to create texture and shadows.
- Allow some shingles to curl or bend to add to the haunted, weathered appearance.
Step 5: Add Towers, Chimneys, and Porches
To create a more elaborate silhouette, attach smaller boxes or folded cardboard tubes to the sides or corners of your main structure. A narrow rectangular box can become a tower, while a rolled or folded piece of cardboard makes a simple chimney at the roof peak. For a porch, use a flat rectangle as the floor and short strips as railings, then support the front edge with small square posts.
- Vary the height of towers to avoid a uniform, modern look.
- Cut tiny windows into towers and backlight them with small LED candles.
- Place a crooked chimney on one side and paint a hint of smoke drifting upward.
Painting and Decorating for Maximum Spookiness
With the structure complete, it is time to give your haunted mansion its personality through color, texture, and small decorative details. Painting is also a great job for kids, because perfection is not the goal; streaks, drips, and patchy coverage can actually make the building look older and more haunted.
Choose a Color Palette
Select two or three main colors for the walls and roof, then add a few accent shades for doors, windows, and trim. Dark grays and blacks create instant creepiness, while purples, greens, and oranges bring a more playful Halloween vibe. Using a limited palette keeps the house visually cohesive, even if several people are painting at once.
- Paint the entire house with a base coat first and let it dry before adding details.
- Use a dry brush technique to lightly rub lighter or darker paint over edges and corners.
- Highlight raised details like shingles, trim, and porch rails so they stand out.
Easy Spooky Details Kids Can Add
Small additions turn your painted box into a fully realized haunted scene. Encourage kids to brainstorm a list of spooky elements and then help them translate those ideas into simple drawings, cutouts, or glued-on pieces. The more personal touches you add, the more your haunted mansion will feel like a unique family creation rather than a store-bought decoration.
- Draw cracks, spider webs, and crooked boards directly onto the walls with dark markers.
- Cut out silhouettes of bats, cats, or witches from black paper and glue them near windows or along the roofline.
- Roll small paper cones or cylinders into ghost shapes, draw faces, and hang them from the eaves with string.
Lighting and Interactive Features
Lighting transforms your cardboard haunted mansion from a simple craft into a centerpiece that comes alive after dark. Safe, battery-powered lights are ideal, especially if children will be playing inside or near the structure. Combining glow and movement can keep kids engaged long after the paint has dried.
Safe Lighting Ideas
Place small, battery-operated tea lights or short strings of LED fairy lights inside the house so they shine through doors and windows. If you lined windows with tissue or translucent paper, the lights will create a warm, eerie glow without revealing the plain cardboard interior. For outdoor displays, secure the battery packs where they are easy to reach for turning on and off.
- Cut a small access flap in the back wall to reach lights without moving the whole house.
- Use colored lights in purple, green, or orange for added drama.
- Avoid candles or anything with open flame, since cardboard is highly flammable.
Interactive Elements for Play
Adding moving parts makes your haunted mansion more than just a decoration; it becomes a prop for storytelling and imaginative games. Hinged doors, flaps, and hidden surprises give kids reasons to keep returning to the house long after Halloween night.
- Attach doors and shutters with tape loops so they swing open and closed.
- Create a hidden compartment or secret door where kids can tuck small toys or treats.
- Hang paper ghosts or spiders inside windows so they sway when the house is gently moved.
Safety and Durability Tips
Because this project invites kids to build, paint, and play, it is important to think about safety and how to keep the structure stable. A few simple precautions can help your haunted mansion survive multiple play sessions and more than one Halloween season.
Safety Considerations
Always reserve sharp cutting tools and hot glue guns for adults or older teens who can use them responsibly. When younger children are involved, assign them tasks like painting, gluing pre-cut pieces, or placing stickers. Make sure any lights you place inside are cool to the touch and designed for crafts or holiday décor.
- Check corners and cut edges for sharp points and trim or tape them as needed.
- Supervise painting, especially with very young children, to keep paint away from mouths and eyes.
- If the house is large enough to climb into, remind kids not to climb on top of the roof.
Strengthening and Storing the Mansion
To make the structure more durable, add braces or extra strips of cardboard to the inside corners and across large wall panels. If you plan to keep the mansion beyond one season, try brushing the outside with a thin layer of glue mixed with water or clear craft sealant once the paint is fully dry. Store the house in a dry area and gently stuff it with lightweight materials like crumpled paper or fabric so the walls do not collapse in storage.
- Label removable sections like roofs or towers so you can reassemble them correctly next year.
- Keep any detachable decorations in a labeled box stored alongside the house.
- Consider photographing your finished design from several angles so you can recreate or improve it later.
Creative Themes and Variations
Once you build one haunted mansion, it becomes tempting to experiment with new themes every year. Instead of repeating the same design, try turning the basic structure into different spooky settings or pairing it with related crafts. Changing only the decorations while keeping the core house means less work but fresh excitement.
- Witch’s Cottage: Add a crooked chimney, a cardboard cauldron, and broom silhouettes by the door.
- Ghost Hotel: Stack multiple levels with lots of tiny windows and number them like hotel rooms.
- Monster Mansion: Attach paper monsters peeking out of windows and paint giant claw marks.
- Pumpkin Manor: Decorate the yard with paper pumpkins and string orange lights along the roofline.
Frequently Asked Questions
How long does a cardboard haunted mansion take to build?
The total time depends on the size and level of detail, but most families can finish a simple version in an afternoon of cutting and assembly plus another session for painting and decorating. Larger, more detailed mansions with multiple towers and extensive decorations may stretch over a weekend, which can be part of the fun if you plan it as an ongoing family project.
Can this project be done in a classroom or group setting?
This craft works well in classrooms, scout groups, and neighborhood gatherings as long as adults handle the cutting and structural assembly. Children can rotate through painting stations, design paper decorations, or work in teams on different parts of the house, such as the roof, yard, or windows.
What if I do not have large boxes?
If large boxes are hard to find, build a smaller mansion from several medium-sized boxes taped together or create a row of tiny houses that form a haunted village. Smaller projects are easier to store and still provide opportunities for creative decoration and imaginative play.
How do I keep the paint from soaking into the cardboard?
If you notice paint soaking in quickly, try brushing the cardboard with a thin layer of glue diluted with water and letting it dry before painting. You can also use thicker craft paint or apply a second coat once the first layer has dried to achieve stronger colors and more even coverage.
Is this project suitable for outdoor use?
Cardboard is vulnerable to moisture, so the mansion is best suited for covered porches or indoor displays unless the weather is very dry. A protective clear sealant can help, but it will not make the structure completely waterproof, so plan to bring it inside if rain is expected.
Turning a Simple Box into Halloween Magic
With a few basic supplies and a little imagination, a pile of cardboard boxes can become the centerpiece of your Halloween celebrations. Building a haunted mansion offers a chance to collaborate as a family, experiment with design ideas, and create a decoration that reflects your own sense of spooky style. Whether you choose a towering playhouse or a miniature display, the memories made during the building process will be just as delightful as the finished haunted home.