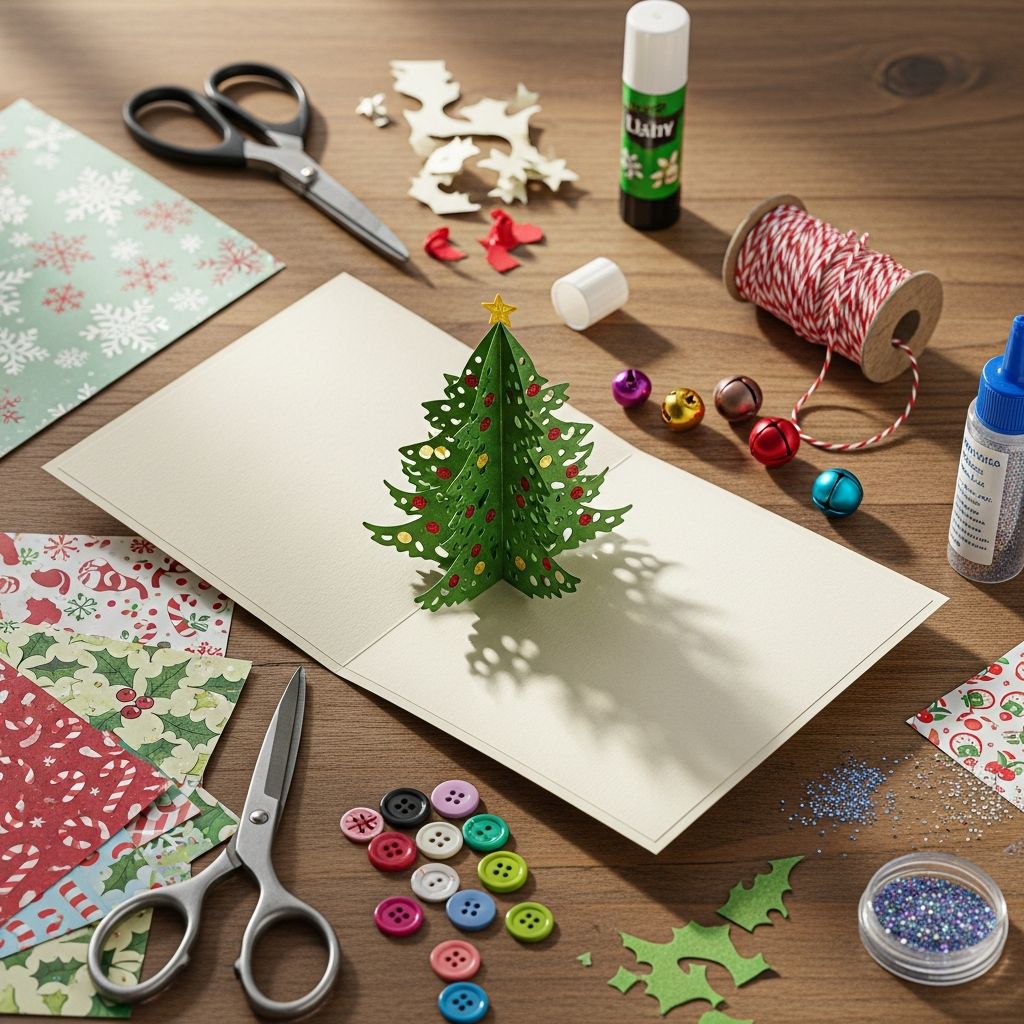
Handmade Christmas cards turn a simple holiday greeting into a keepsake, and a 3D paper tree on the front of your card makes that moment even more special. This guide walks you through a complete, original method for crafting dimensional Christmas tree cards with easy folds, simple supplies, and lots of room for creativity.
Why Make Your Own 3D Christmas Cards?
Store-bought cards are convenient, but a handmade 3D card shows time, care, and thoughtfulness that mass-printed designs rarely match. A raised paper tree adds texture, shadow, and a miniature scene your recipients will want to display all season long.
These cards are ideal for:
- Families looking for a low-cost, screen-free holiday activity.
- Teachers and group leaders planning a festive classroom or club project.
- Anyone who wants a beautiful card without advanced art skills or expensive tools.
Basic Materials and Tools
You can create an impressive 3D tree card using very simple craft materials. Most supplies can be found in a basic stationery kit or a local craft store.
Recommended Supplies
- Card base: Medium-weight cardstock in white, cream, red, or deep blue.
- Tree paper: Green paper (construction, printer paper, or craft paper).
- Adhesive: Glue stick for kids, or tacky glue/double-sided tape for adults.
- Cutting tools: Scissors; a craft knife and ruler are optional for cleaner edges.
- Decorations: Sequins, stickers, small paper stars, markers, colored pencils, or glitter glue.
- Extras (optional): Metallic pens for lettering, washi tape for borders, and small envelopes for mailing.
Suggested Card Sizes
Choose a size that fits standard envelopes so your cards are easy to mail and store.
| Folded Card Size | Unfolded Sheet Size | Best Use |
|---|---|---|
| 4 x 6 inches | 8 x 6 inches | Quick notes and minimalist trees. |
| 5 x 7 inches | 10 x 7 inches | Standard greeting card with room for decorations. |
| A6 (approx.) | A5 sheet folded | European envelopes and photo-style cards. |
Planning Your Tree Design
Before cutting into paper, decide what kind of 3D tree effect you want. You can stack simple folded triangles, layer curved segments, or create an accordion-style tree that fans outward.
Ask yourself:
- Do you want a subtle raised tree or a bold, sculptural effect?
- Will children be helping, or is this a more detailed adult project?
- Do you want to decorate the background with a night sky, snowfall, or presents?
Step-by-Step: Simple Layered 3D Tree Card
This version uses layered folded pieces to create a dimensional tree that lies mostly flat when the card is closed but stands out nicely when viewed from the front. The steps are easy enough for beginners yet look polished when finished.
Step 1: Prepare the Card Base
- Cut or fold your cardstock into the desired size, such as a 5 x 7 inch folded card.
- Press the center fold with the side of a ruler or a clean spoon to create a crisp edge.
- Decide whether your tree will go on the front of the card or inside; this guide places it on the front.
Step 2: Cut Tree Sections
The tree is built from several gradually smaller pieces that stack from bottom to top. You can use either rectangles that will be folded accordion-style, or squares that fold into simple triangle units.
- Cut 4–6 pieces of green paper, each slightly smaller than the previous one.
- For a medium card, your largest piece might be about the width of your palm, with the smallest piece about the width of your thumb.
- Round the corners of the larger pieces if you prefer a softer, layered look.
Step 3: Fold for Dimension
To give your tree its 3D quality, fold each piece so it lifts away from the card instead of lying flat. Choose one of these methods or mix them for variety:
- Accordion strip method: Fold a rectangular strip of green paper back and forth in equal sections, like a fan, then pinch the middle to create a flared tree layer.
- Simple triangle method: Fold a square into a triangle, then fold the corners inward so the piece becomes a layered triangular shape.
- Curved layer method: Cut each piece as a curved strip, then gently arch it when gluing so the center lifts off the page.
Step 4: Assemble the Tree
- Lightly draw a vertical guideline on the card front with a pencil to help center the tree.
- Start with the largest piece of green paper and glue only the back edge or the two ends, depending on your folding style, so the center can lift outward.
- Stack the next smaller piece above the first, again securing only where necessary to allow the paper to pop up.
- Continue until you reach the smallest piece at the top, leaving a small space for a star or tree topper.
Step 5: Add the Tree Trunk and Star
- Cut a small rectangle of brown paper for the trunk and glue it below the lowest tree layer.
- Punch or cut a star shape from yellow or gold paper and attach it above the top layer.
- For extra sparkle, trace around the star with metallic pen or glitter glue.
Decorating Your 3D Card
Once your basic tree is in place, the fun really begins. Decorations can be minimal and elegant or bright and whimsical, depending on your style and who will receive the card.
Ideas for the Tree Itself
- Glue on sequins or tiny punched circles as ornaments.
- Add tiny bows from narrow ribbon at the ends of some branches.
- Use a white gel pen to draw garlands or snow-dusted edges on each paper layer.
Ideas for the Background
- Draw falling snow with white or silver dots scattered around the tree.
- Create a snowy hill from torn white paper along the bottom of the card.
- Glue small gift box shapes at the base of the tree using colorful paper scraps.
Adding Lettering and Messages
Keep the front message short so the tree remains the focal point. Inside, you can write a longer, personal note.
- Use metallic pens for short phrases like “Joy”, “Peace”, or “Merry Christmas”.
- Write your main message on the inside right panel, keeping ink away from any glued areas.
Kid-Friendly Variations
Children love the surprise of a 3D card, and many steps can be simplified for small hands. Concentrate on large shapes, bold colors, and safe materials.
- Swap scissors for pre-cut shapes if you are working with very young kids.
- Invite kids to color plain white paper green instead of starting with colored paper.
- Use stickers instead of tiny sequins for ornaments, which are easier to handle.
- Encourage them to sign the card themselves, even if the handwriting is uneven—that personal touch is priceless.
Design Variations for Different Styles
Once you understand the basic structure, you can create many different looks just by changing the paper, colors, or layout of your design. Here are a few ideas to explore.
Minimalist Monochrome Tree
- Use white or cream paper for both the card base and tree layers.
- Add very subtle details in silver or gold pen.
- A great style when you want an elegant, modern holiday greeting.
Rustic Craft Paper Look
- Choose kraft cardstock for the base and deep green or plaid paper for the tree.
- Tie a tiny jute twine bow at the bottom of the tree.
- Decorate with warm colors like burgundy, forest green, and cream.
Bright Kids’ Party Theme
- Mix several shades of green and even nontraditional colors, like teal or pink.
- Add oversized paper ornaments in red, yellow, and blue.
- Use bold handwritten lettering for a playful, casual feel.
Tips for Mailing and Displaying
Even though your tree has dimension, it should still fold down flat enough to mail. A little planning ensures your card arrives in good condition and looks great on display.
- Let all glue dry completely before inserting the card into an envelope.
- Avoid heavy embellishments that could get crushed in the mail, such as thick buttons or large beads.
- Suggest to recipients that they display the card standing open on a mantle or shelf so the 3D tree is fully visible.
- If you use very raised elements, consider hand-delivering those cards or placing “Do Not Bend” on the envelope.
Common Mistakes and How to Avoid Them
Like any craft, 3D Christmas cards come with a few easy-to-prevent issues. Keeping these points in mind will help your project go smoothly.
- Problem: Tree layers slide out of alignment.
Solution: Lightly mark a vertical line first and glue one layer at a time, checking spacing before the glue sets. - Problem: Card will not stay closed.
Solution: Reduce the amount of paper in each layer or switch to flatter folding methods; avoid very thick embellishments on the inside. - Problem: Card warps from too much glue.
Solution: Use a thin layer of adhesive and smooth each piece from the center out to remove excess glue and air bubbles.
Quick Reference Table: Design Choices
Use this table as a planning checklist before you start cutting and gluing.
| Element | Beginner Option | Advanced Option |
|---|---|---|
| Tree Structure | Simple layered rectangles or triangles | Accordion folds, curved segments, or multi-tier fans |
| Decorations | Stickers, paper dots, basic drawing | Hand-drawn shading, intricate cutouts, metallic accents |
| Color Palette | Classic red, green, and white | Monochrome neutrals, jewel tones, or pastel themes |
| Message Style | Short word or phrase on the front | Hand-lettered script, layered banners, or stamped text |
| Recipient | Family and friends who enjoy playful designs | Clients, colleagues, or art-loving recipients |
FAQs About 3D Christmas Tree Cards
How long does it take to make one card?
For a simple design with four or five layers and modest decoration, expect about 20–30 minutes per card once you are comfortable with the process. Batch-cutting tree pieces can make multiple cards much faster.
Can I make these cards without special tools?
Yes. A basic pair of scissors, glue, and regular paper are enough to make an attractive 3D tree card. Extra tools like a cutting mat, craft knife, or scoring tool can make edges sharper, but they are completely optional.
What type of glue works best?
For kids, a washable glue stick is convenient and easy to control. For adults or more intricate layers, a tacky craft glue or double-sided tape will hold the pieces more firmly and reduce warping.
Can I use recycled materials?
Absolutely. Old gift wrap, paper shopping bags, and leftover scrapbook paper can all be transformed into tree layers and decorations. Reusing materials not only saves money but also gives your cards a unique, eco-friendly character.
How do I keep the card from getting too bulky?
Choose lighter-weight paper for the tree, avoid stacking too many layers in one spot, and reserve thicker embellishments for cards you plan to hand-deliver. Flat stickers and drawn details give plenty of personality without much added thickness.
Make This Project Your Holiday Tradition
Handmade 3D Christmas tree cards are more than just paper crafts—they are small, personal gifts that travel through the mail or across a room to remind someone they matter. With a few folds and a bit of imagination, you can turn simple materials into a keepsake your friends and family will remember long after the holidays are over.